Month

April 2014

Barbecue Ham Fried Rice

friedrice1.jpgBeing Vietnamese, I grew up eating rice. I ate a lot of rice. As an adult not much has changed. It is one of my favorite side dishes to a meal, but rice doesn’t only have to be a side dish. Sometimes it can be the main course.

Ingredients:

Day old rice – 2 cups measured before cooking.

2 ham steaks, cubed

1/2 cup of chopped onion

1/2 cup of thinly chopped or shredded carrot

1/2 cup of chopped baby corn

1 can of chopped water chestnuts

1 cup of frozen peas

2 eggs

2 tbsp of olive oil

Sauce

1/4 cup of raspberry jam

1/4 cup of bbq sauce

1/2 tsp of minced garlic

2 tbsp of seasoned soy sauce ( Green mountain or Maggi are my favorites,) They have a completely different taste than Kikkoman or La Choy.

Pepper to taste 1 tbsp of water

Combine all ingredients in a bowl. Stir well.

Directions:

Cook 2 cups of white rice. Refrigerate overnight. This is important. Fresh rice will make for mushy fried rice.

Cut the skin of the outside of the ham steaks & cube into 1/4 inch chunks. Chop and set aside all vegetables except the peas.

Scramble the eggs with a splash of water. Water makes for fluffier eggs. Spray a large frying pan or electric skillet with cooking spray. Turn the stove or skillet to medium- low heat. Add the egg. When the bottom of the egg firms, flip it quickly. Let cook briefly. You want them just firm and fluffy. Transfer to a bowl and set side.

Turn up the heat to medium – high heat. Add a tbsp of olive oil. Add the ham & stir, cooking until the edges brown slightly. Add all the vegetables. Stir until the peas have thawed and onions have tendered. Pour the sauce mixture over the vegetables. Stir until evenly coated. Pour vegetables into a bowl and set aside.

Add another tbsp of oil & add to the pan or skillet. Add the rice. The rice will be hard and need to be broken apart as you stir. Spread out in a flat layer & and fry until the edges brown slightly. Pour the vegetable and sauce mixture over the top and stir until the rice, vegetables and sauce are evenly distributed. Remove from the heat & toss in the egg. Serve hot.

010

009

011

012

015

016

017

018

020

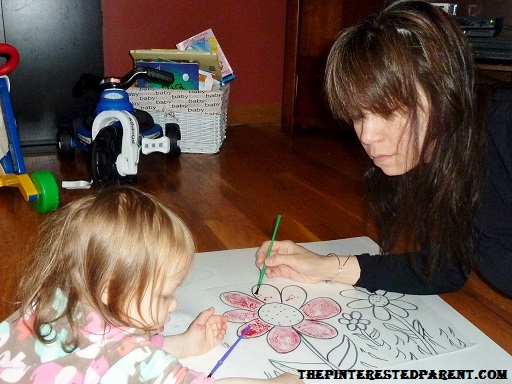
I love to eat with chopsticks when I can.

024

Mai wanted to learn too.

023

This was a huge hit. My husband ate 3 full plates worth. That is all the applause I need.

Related Topics:

http://aimslicious.wordpress.com/2014/04/27/chicken-biryani/ http://angeladelight.wordpress.com/2014/04/27/risotto-broccoli-gruyere/

A Very Public Meltdown

tantrumSince the terrible twos have hit, I have felt pretty good about my ability in diffusing tantrums and meltdowns. While I sometimes complain or joke about how awful it is, inside I felt as if I had a good handle on it. I even kind of found a few of her fits humorous, although I would never laugh. I thought to myself the two aren’t so terrible. She was such a challenging infant that this is a breeze. As usual in life as soon as you think something like this, there will be a moment to prove you wrong. Today, was a very bad day. It started off innocently enough. In the morning, we read books in bed, we painted pictures & did a little house cleaning.

026

I tried putting Mai down for an early nap, but she was not sleepy. I was taking her to story time at a local museum today. A children’s author and illustrator was going to read some of his favorite stories and then show the kids how he did some of his illustrations. I thought this was right up my daughter’s alley as she loved books and has always enjoyed watching me draw, plus I try to let her interact with other children as often as possible. When we arrived at the museum, we were greeted with Hawaiin leis, sunglasses and juice boxes for the kids. There were rows of stools for all the children to sit on while they listened to an amusing tale about a jelly fish and his fish friend Peanut butter. Mai interacted with the other children and happily listened to the story and clapped at the colorful illustrations.

045 049 After the stories, the author pulled out an easel and engaged the children, asking them to give him a sea creature and an emotion to draw. The older children shouted out answers “happy trout”, hungry salmon”,”burping shark”. Mai pushed through the crowd to get closer to the action.

052
Inching closer to the action.

As she got to the front where all of the kids were sitting Indian style, she kept going. “Mai Mai wants to draw”. Uh Oh! Mommy jumped up and ran to get her. “No honey, he is drawing. You can sit with the other kids and watch.” “Mai Mai wants to draw too.”. “Mai, come on and sit down with mommy.” But, she kept pushing forward. I scooped her up and brought her to the front of the pack, where we sat down. She fought to get up and go to the easel. “Mai we will have to go home if you don’t sit down.” I whispered. She arched her back & wriggled out my arms, screaming. It was definitely time to go. As I gathered up her backpack and our spring jackets, she continued her frustrated display. We walked out of the room leaving a trail of yells and cries echoing over the voice of the author. Stares & glares were directed our way as I struggled to hold my frantic daughter in my arms as she yelled the words “Don’t take me”. I quickly left the building before the desk attendant had the opportunity to dial 911 and report a child abduction.

The scene in the parking lot was not much better. She continued to scream “don’t take me “while kicking her feet & trying to thrust herself out of my arms. It is amazing how freakishly strong your child is when they want to get away. While trying to load her in the car, her tiny little hands grabbed the edge of the door and she spread her body out wide to make it nearly impossible for me to get her into the car. I tried to calm her down with some toys that were in the backseat. I tried to calm her with soft words and then a few loud ones. The screaming and resistance would not end. I could not get her in the car seat. I sat in the backseat with my daughter writhing on my lap and closed the door. I let the tantrum run it’s course as I took long deep breaths in order to keep my composure. After a short while that felt rather long, she flipped the switch. She picked up the toy I presented her earlier and said “Mama look.” It was finally over.

When something like this happens, it makes you question your parenting. What am I doing wrong? Why did this happen? How should I have handled this? When all eyes are on you, you can’t help but feel judged. You are even judging yourself.

We both went down for a nap when we got home. When she woke up both our batteries were recharged and my lovely girl was back again. The rest of the evening was filled with living room picnics, more books and sheet forts. The horrors of the afternoon almost seemed a distant memory. Besides, how can I stay mad at this face?

061

Related topics:

http://mommytrainingwheels.com/2014/04/25/holy-tantrum-batman/ http://thirtydaysofhealing.wordpress.com/2014/04/25/im-a-child-and-you-cant-make-me/

Oatmeal Chocolate Chip Cheesecake Bars

Oatmealchocolatechipcheesecake.jpg

I think I have mentioned before that my work has a monthly pizza party to celebrate all of the birthdays in that month within our company. On pizza day, they bring in a variety of different topping pizzas and a ton of desserts. Oh the desserts, oh so many delicious desserts. Ever since the last pizza party I have become obsessed with cheesecake. Not that I didn’t love it before, but now I find myself craving it all the time. Last week it was french toast with cheesecake filling and this week, it is cheesecake bars. This does not really fit into my diet, but oh well. These are super simple to make and so good.

Oatmeal Chocolate Chip Cheesecake Bars

Ingredients:

Cookie crust

A package of Betty Crocker oatmeal chocolate chip cookies

1 egg (per directions)

1 stick of margarine (softened) (per directions)

Filling

1 8oz  package of cream cheese (softened)

1/4 cup of sugar

1/2 cup of vanilla greek yogurt

1 egg

1/4 cup of chocolate chips

Directions:

Preheat oven to 375. Prepare cookie mix per package directions. Press 1/2 the cookie mixture into a square 8″ baking pan. In a mixing bowl, blend cream cheese, sugar & yogurt on low speed until blended and smooth. Do not overbeat. Add the egg & quickly beat in. Add the chocolate chips & stir. Pour the cheese mixture over the cookie crust. Take the remaining cookie dough & press and flatten between hands and place over the cheese mixture. Do this in pieces and spread out evenly. Bake for 40-45 minutes or until cookie is golden & is firm in the middle. Cook times will vary. Let cool before cutting and serving. They will set as they cool.

013

015

016

017

019


021

023

025

026

029


IMG_20140426_242626895

Related Topics:

http://rhythm-of-food.com/2014/04/26/banana-and-cacao-muffins/

http://toniandrukaitis.wordpress.com/2014/04/26/friday-life-is-short-eat-dessert-first/

http://toosexytocook.wordpress.com/2014/04/26/chocolate-chip-cookies/


Paper Towel Roll Crafting

Papertoweltubecrafting.jpg For the past few months now I have been hoarding away empty paper towel rolls. I had built up quite the collection and the sight of the rolls piled up on top of my kitchen cabinet was starting to give me hives. It was finally time to put them to some use. Mai and I have been on a craft frenzy this week. We made a mess, had a few tantrums & a few laughs and smiles too. Each of these crafts that we made uses one of our paper towel tube.

Paper Mache Maracas

What you will need:

Plastic Easter eggs (1 for each maraca made)

An empty paper towel roll cut in half or two toilet paper rolls

Uncooked chickpeas or dried beans

Newspaper

Glue

Water

Masking tape

Paint

Directions:

Fill each Easter egg with chickpeas or beans

012

Use one or two full pages of newspaper & wrap in around the chickpea filled Easter egg. Form it into a ball shape.

023

Tape the edges in place to hold the shape tightly.

025

029

Enlist the help of your favorite little crafter to tear up strips of newspaper for you.

035

018

In a bowl, mix 3/4 glue and 1/4 water to form your paper mache adhesive.


024

Dip a strip of the paper into your glue mixture.

020

Wrap your strip of paper around your ball shape smoothing it out carefully as you work it around.

030

After you receive a desired shape, allow it to dry & then place your ball on top of the paper towel tube halve.

033

Adhere the ball to the tube using masking tape & then cover the tape with more newspaper strips.

034

Continue to wrap your project with the paper strips and glue until you reach the desired shape. Make sure that all areas are smooth and that edges are not sticking up. Let it dry.

038

Paint the handles of your maracas first in the color of your choice and allow to dry.

057

Once dry, continue to paint the rest. You may now use the handle to hold on to while you paint.

064

Papermachemaracas.jpg

Make beautiful music.

084

Mai thought these were rattles. As she was shaking them, she kept saying “Ooooooh, I’m a baby..so cute.”

086

Paper Towel Kaleidoscope

What you will need:

An empty paper towel roll

Colored beads

Thin plastic (I used old plastic packaging)

Heavy duty aluminum foil

Glue gun

Craft paper

Ribbon

Directions:

Cut out two pieces of plastic small enough to fit snuggly inside of the paper towel tube.

023

As deep in the tube as you can, use your glue gun and squeeze out a line of glue rotating until it meets the starting end.

002

Give it a few seconds to cool slightly and then press your plastic disk into the glue.

003

Pour the beads on top of the disk, leaving enough room for the beads to move around. Add hot glue to the top edge of tube over the beads and place the other disk in place.

008

Fold a piece of tin foil into a triangle. Push your triangle into the open end of the tube. Trim the end as needed. Make sure to reform the shape. It will work best if the triangle has crisp, hard edges.

018

Cut out another disk using cardboard or thick scrapbook paper. Poke a hole through the middle of it & glue it to the tin foil end.

043

I wrapped my kaleidoscope in craft paper, but you can decorate however you like, paint, crayon, beads, ribbon.

003

004


005

006

Papertoweltubekaleidoscope1

Not quite like the real thing, but it still is fun to play with.

045

Butterfly Craft

What you will need:

An empty paper towel tube

Foam sheets

Scrap book paper

Pipe cleaners

Craft pom poms

Glue gun

Elmer’s Glue

Directions:

This was a pretty simple one. You could also do this on a smaller scale with a toilet paper roll.

Cut out foam pieces in the shape of the wings.

040

Using different colored scrap strips, wrap around the tube and glue using the hot glue gun.

042

045

048

Run the glue gun along the edge of the wing where they should meet with the paper towel tube.

049

Pour some glue into a paper bowl and let your munchkin dip the pom poms in and glue to the butterfly.

051

Mai decides it is way more fun to stuff the pom poms in the tube than to decorate with them.

054

Glue one large pom pom to the top for your head & use pipe cleaners to make antennas. Let dry and your craft is done.

papertoweltubebutterfly.jpg

So Why Can’t I Tell My Daughter That She Is Beautiful?

pretty_.jpgFrom the day that my daughter was born, I was smitten. I would just stare at her for hours in disbelief. I couldn’t believe that this beautiful little girl was mine. I look at that sweet face and tell her, “Mai, you are so beautiful.” It seems like such a natural thing to say. So what is so wrong with muttering this phrase to her?


I have read article after article telling me not to do this. The experts will tell you that this is setting your daughters up for a life time of body image problems and that it would put too much emphasis on physical appearance. It is said that instead you should place a focus on their accomplishments. Of course I acknowledge her accomplishments as well. I praise her for new lessons that she’s learned, pictures that she has drawn or for listening when told to do something. She is complimented on many things, but if we are praising our children for being smart or funny wouldn’t the same principles apply? Are we then creating an issue with them putting undue pressure on themselves to be the smartest because we told them that they were smart instead?


It seems that there are less and less things that are safe to say or do these days when it comes to our children. Everybody is judging you. I cannot tell my daughter that she is pretty, I am not supposed to say the word “No”, you shouldn’t spank, you should not yell. Aren’t all of these things setting our children up for something even worse? What will happen when they get older? They will hear the word no at some point in their lives, whether it is from a university, a potential employer or a rejection from a love interest. How will they handle these things when they were treated with kid gloves their whole lives?


I am not a psychologist, I don’t have all the answers, but I am a woman and once was a little girl. I was raised by a woman who told me that I was pretty every day. It did not damage me or leave me believing that the only thing that is important is my outer appearance. I was spanked. That did not leave me with violent tendencies or take any love away from my mother. I was told “no” because it was what I needed to hear.


My daughter is smart. She is imaginative. She is artistic. She is funny. And while she has several attributes that result in her being a pretty girl, with her big heart, humor and vivacious personality, the truth is she is beautiful and I am going to tell her that.


0571


10 Ways for Mommy to Pamper Herself

Pamperyourself.jpg
Today I was on the phone with a good friend of mine. We have been trying to make plans to get together for almost a month now, but it has been nearly impossible to find time.
Before having my daughter, I had responsibilities & life was still busy, but it was only as busy as I wanted it to be. I completely took for granted the little things in life that I was able to do. Not that long ago a Facebook friend had posted something to the effect of “I get mad when I see people waiting in line in the drive though at Dunkin Donuts. Get off your asses and go inside.” Obviously he never tried doing this with an infant or a toddler. I miss the “run in” to the store. There is no such thing when you have a little one. There is a “get your kid out of the car seat, pull them out kicking & screaming, chase them through the store while trying to grab a gallon of milk.” trip to the store. I wish there was a drive through everywhere. This is one of those little things taken for granted & missed.

I miss…

Sleeping in on the weekends
Taking showers when I want to
& just plain…
Pampering myself

The weather has been getting warmer & I put on flip flops for the first time this season & realized I still had remnants of polish from last summer on my toes. GROSS!
Like most mommy’s I rarely take time for me. It is important for mommies (and daddies too) to recharge their batteries & pamper themselves every once in a while. I know you are thinking when do I have the time. With Mother’s Day coming, it is time to make the time and allow yourself a little “me time”. So put down the dishes & the laundry and give yourself a treat.

Pamper yourself at home

Give yourself a homemade facial. Facial are wonderful. They leave you feeling fresh & clean. There are many simple facial treatments that you can make for yourself at home. I found this list a little while back with some amazing recipes for homemade facial. http://www.huffingtonpost.com/organic-authoritycom/face-mask_b_1690401.html

Meditate. Being a mother can be stressful. One of the best ways that I have found to release that stress is through meditation. It takes a little practice, but when done properly, it can clear your mind and spirit and prepare you for the challenges of your day.

Have a glass of wine. I am not much of a drinker since I had a baby, but I have to admit that every once in a while one glass of wine or a beer is just what the doctor ordered.

Take a bath. Light some scented candles, grab a good book & your favorite bubble bath & sink in and relax.

Take a walk or a run. A nice leisurely walk on a beautiful day can be so calming and therapeutic.

Get out & pamper yourself

Get a massage. I can’t think of many things that I enjoy better than having a massage. It is so relaxing that I have to fight to stay awake on the massage table. Actually a massage & a nap sound pretty good too.

Get a pedicure. Even though chipped nail polish & scaly feet are my signature look, an hour with a pumice stone & a fresh coat of paint on my toes would be nice.

Get a new haircut. There is something about a new hair style that makes me feel like a completely new woman. With every big life change I change my hair. When I got married, I chopped of all my hair. When I got pregnant, I cut bangs. It makes me fell renewed.

Go shopping. Like most women, I love new clothes. I used to shop for myself all the time, but after my daughter was born the only new clothes purchased were for her. Buy yourself a new outfit or a new pair of shoes.

Have a night out with the girls. It is always nice to catch up with your friends over dinner or drinks and fight over whose kid has the worst tantrums. Mine always wins. My new favorite girls nights out are the “Paint nite” classes. Look for one near you. They are worth it.

What are some things you do to pamper yourself?


Yarn Embellished Initial Wall Hanging

yarninitial.jpgMy daughter as many of you may well know, is named after my mother. Mai is a less than common name, which is one of the things I love about it. She will always be unique. We have a lot of personalized & monagrammed things for her. I cannot see the letter M without thinking of my little munchkin. So when I was shopping at Michael’s and saw a giant wooden M for sale, I had to scoop it up. Her room is purple with golden & neutral tones, so I chose colors to compliment her room. What you will need: A wooden letter Different colored yarns Elmers glue Scissors Glue gun

Purchase a cheap wooden letter from a craft store or make one yourself.

023

Form a circle using the glue. Starting from the center begin circling the yarn around itself.

Form a circle using the glue. Starting from the center begin circling the yarn around itself.

Continue to circle around until you cover the glue circle.

Continue to circle around until you cover the glue circle.

Snip the end of your yarn off and form into the circle.

031

Working off the edge of the first circle add another glue circle and repeat the circling method.

032

For circles that are not full because off cut out edges, form half circles around each side cutting off the ends at the edge.

033

Continue this pattern, making circles as big or as small as you desire.

036

To fill in uncovered spaces around the circles, fill in with a different colored yarn following the same lines as your circles.

006

001

Line the edges of your letter with the accent yarn to smooth out your edges & add a more finished look.

004

Braid the different colored yarns together & knot each end.

015

With a glue gun add hot glue on the back of your initial where you would like your hanger.

017

Press your braided yarn into the glue & repeat on the other side.

018

Find a place to hang your craft.

yarninitial.jpg


Kale Chips

Kalechips.jpg
I am finally jumping on the kale bandwagon. People keep telling me about the benefits of kale. I was told that kale chips were a must try. This sounded so bizarre to me. I couldn’t imagine that a lettuce like green like kale could be a tasty snack, but I had to try it out.

Ingredients:

Kale (washed & dried or pre-washed)

Olive oil

Sea salt

Directions:

Preheat oven to 350. Tear the kale leaves from the middle veins. Discard the veins. Rub the leaves with olive oil & sprinkle with sea salt. Place on a baking sheet lined with foil. Bake for 15 minutes. Kale does shrink during baking.

002 004

I definitely see what all the buzz is all about. These were wonderful. They bake up light and crispy & have a great flavor. The leaves do shrink quite a bit while baking, so make extra. These are a great alternative to greasy or sugary snacks.


Chick Pea Burgers

ChickPeaBurger.jpgI have a love/hate relationship with food. I love food, but it hates me. If I have one day of bad of eating, my body pays for it for days. I am in the throes of body payback right now. I don’t know when I will learn my lesson. The funny thing is I enjoy eating healthy, sometimes it is just too fun to be bad. Today,I am back to being a good girl. I am a big fan of veggie burgers & bean burgers. They are a staple in my diet. The same thing is the case with chick peas. I was craving falafel today, but as I am trying to stay away from fried food I wanted to make a baked version of one of my favorite meals ala a burger patty.

Chick Pea Burgers

1 can of chick peas (drained)
1/4 cup of diced onions
1/2 cup of diced water chestnuts
1/2 cup of diced red peppers
1 tsp minced garlic
1 egg
1/3 cup of wheat flour
1 1/2 tsp of baking powder
2 tbsp of grated parmesan
1 tsp cumin
1/2 tsp sea salt
Pepper to taste
Additional wheat flour for dusting

Preheat oven at 350. In your food processor combine, chickpeas, onion, water chestnuts, red peppers, garlic, cumin, salt, pepper & egg. Blend ingredients leaving it somewhat slightly chunky. Add in the flour, parmesan & baking powder. Blend slightly on pulse. Dust your hands with some wheat flour to keep mixture from sticking to hands. Roll a plum sized ball between your palms. Place on a greased baking sheet & flatten the ball into a patty by pressing with your hand. Continue until all the mixture is gone. This will make about 6 patties. Bake for 10-15 minutes. Serve on a bun with lettuce & yogurt dressing or tzatziki sauce. https://thepinterestedparent.com/2013/11/06/greek-nachos/.

005 006007 011012 013IMG_20140412_202727825

IMG_20140412_202615608


These were wonderful. If you like chick peas, hummus and falafel, these are a must try. My husband even liked these.

Thank you as always for stopping by. Please follow us on Facebook as well.

Krispie Peanut Butter & Chocolate Balls

krispiepeanutbutterchocolateballs.jpg

Here is a simple fact of life…women love chocolate. We do! Men do not understand this as much. My husband would prefer a bowl of Doritos, but hand me a piece of chocolate and I am happy.

Tonight I had a craving. Why is it when ever you want candy, there is not a piece to be found, but as soon as you are on a diet, there is chocolate around every corner?
I wanted some chocolate, but I like my candy with nuts or some kind of crunch. We had chocolate chips, but I needed something more.

Krispie Peanut Butter & Chocolate Balls

Ingredients:
1 tbsp of butter
1/2 cup of crunchy peanut butter
2 cups of chocolate chips
1 cup of white chocolate chips
2 cups of Rice Krispies

Directions:
In a large saucepan melt the butter over low heat. Add the peanut butter. Stir for about a minute until melted. Add your chocolate chips. Stir until melted and smooth. DO NOT OVERCOOK. Once chocolate is melted add the Krispies. Mix until all of the Krispies are covered. Spoon out the mixture & fill a ball pop mold. Refrigerate until chocolate has hardened & then pop candies out of mold.

028 029033 034krispiepeanutbutterchocolateballs.jpg