Month

November 2014

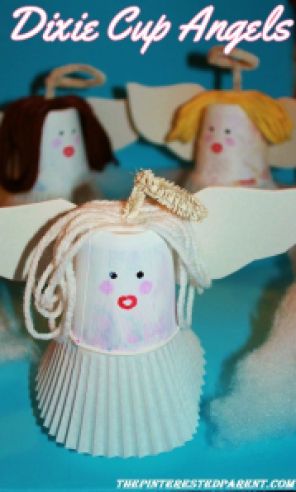
Dixie Cup Angels

DixieCupAngels.jpg

We had our first big snowfall of the year.  I thought Mai would be overjoyed when she woke up & saw the ground covered in powdery white. She was, but when I tried to get her in her snow suit to go outside, the protests did not stop. She put on her furry boots & headed for the front door in her diaper. Of course, this was not going to happen. We did not make it out of the house that day. She refused to wear her snowsuit because she insisted that it was plastic. Where does she come up with this stuff?

The next day however, Nana got her to finally don her snowsuit & brave it out into the snow. My little angel made her first snow angel. I love angels. I believe in them. Tonight my little snow angel & I made our own.

image

Dixie Cup Angels

What you will need:

Dixie cups (3oz) – 2 cups for each angel -white works best (I couldn’t find any so we painted ours)

White acrylic Paint

White cupcake liner

Elmer’s Glue

White foam sheet or construction paper

White pipe cleaner

White yarn

Toothpick

Directions:

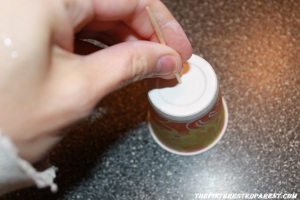
Poke a hole in the top of a Dixie cup with a toothpick. Use this as the top cup.

IMG_7520

Paint 2 Dixie cups in white paint & let dry. Like I said white cups would work best, but I could not find the 30z cups in plain white.

IMG_7509

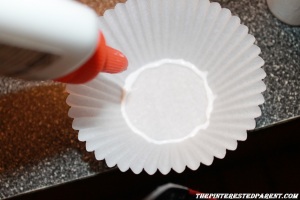
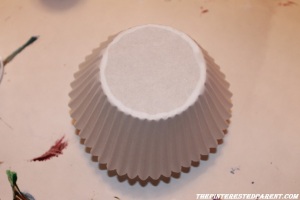
Once dry, line the edge of a cupcake liner with glue.

IMG_7511 IMG_7538

Glue the liner over one cup right side up.

IMG_7512

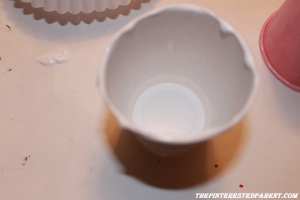
Line the rim of the second cup with glue.

IMG_7513

Press the cup upside down over the first cup & cupcake liner.

IMG_7514

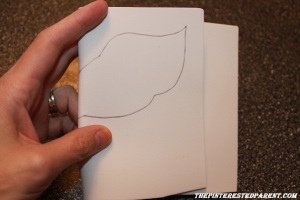
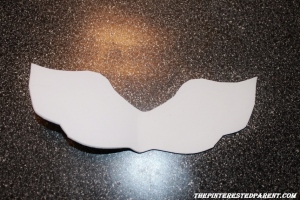
Draw & cut out a set of angel wings. We like to use foam because it doesn’t rip or wrinkle, but you can use paper too.

IMG_7502 IMG_7503

Glue the wings to the cups as shown. Lay your project down to put weight on the wings. Let dry.

IMG_7515 IMG_7516

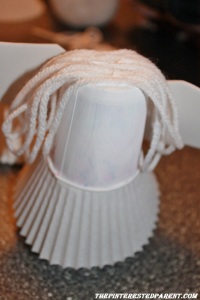
Loop 6″ long yarn strands around 10 times. Glue to the top of the upside cup.IMG_7517 IMG_7519

Draw on your face & loop a pipe cleaner to form a halo & insert into the hole on the top cup.

img_7527

Christmas Pasta Crafts

pastachristmascrafts1

My love for pasta crafts needs no intro. If you follow me regularly, you already know about my many boxes of pasta set aside just for projects such as these. This weekend we spent 2 days making crafts out of a variety of pasta for the latest article that we were doing in this month’s SEEK. I have to admit, we got a bit carried away. I could not stop once we started.

For these crafts you will need assorted pasta, Elmer’s school glue or a glue gun (for adult use only), paint, glitter & some ribbon

Pasta wreath

Pasta needed:

Bow ties

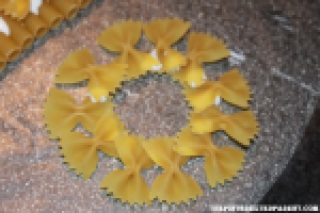
Place your pasta on wax paper & glue bow ties in a circle as seen below. Let dry. Paint the wreath in green & paint 3 more bow ties in red. Let dry & then glue the red bows to the wreath. Attach a bow, string or pipe cleaner around the wreath to hang.

IMG_7293

IMG_7289

pastawreath

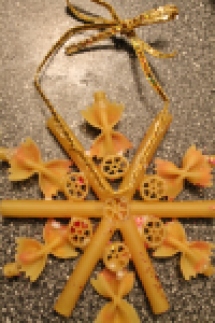
Pasta snowflake

Pastas needed:

Ziti

Wagon wheels

Bowties

Ditalini

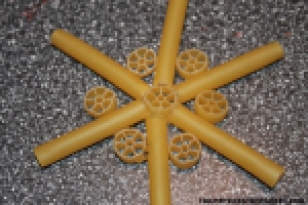
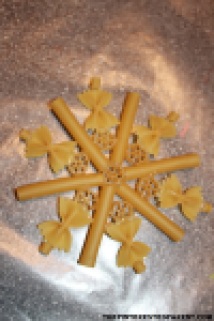
Place your pasta on wax paper & glue as seen below. Let the glue dry. In a small container mix the school glue with a few drops of water to thin out the glue. Paint the entire assembled snowflake with the mixture & the sprinkle with glitter. Let the glue dry & flip over. Attach a ribbon with glue to form an ornament,

IMG_7283 IMG_7284 IMG_7285 IMG_7287 IMG_7390

IMG_7391 IMG_7395 IMG_7420

pastasnowflake

Pasta Ornaments

Pasta needed:

Large shells (stuffed shells pasta shells)

Wagon wheel pasta

Elbow macaroni

Glue a wagon wheel on top of the flattest end of a pasta shell. Glue an elbow to the top of the wagon wheel. It should form a half circle hole.

Paint your ornaments in colors of your choice. Let dry completely. Using glue draw an ornament design on your shell. Shake glitter over the top. Let dry & then shake off excess glitter. String a ribbon or string through the hole.

IMG_7426 IMG_7430 IMG_7431

pastornaments

Pasta Rudolph 

Pasta needed:

Large shell

bow ties

Elbow macaroni

Medium sized shells

Uncooked chick pea for the nose

Googly eyes

Paint both sized shells brown. Paint the bow ties and elbows in black. Attach the pasta as pictured. Add the googly eyes & a red painted chickpea for his nose.

IMG_7424

pastarudolph

Please stop in & visit us at Seek and check out our latest article. Fun With Pasta Crafts

IMG_7409

Christmas Ornament Potato Stamps

IMG_7452

Sitting in our cupboard in the kitchen is a sack of old potatoes that are growing sprouts. Those potatoes had seen better days and were on their way out. It would be such a shame to have to waste them, so we had to make sure that we put them to good use. In the fall, we made potato Jack-O-Lanterns. With the holidays approaching our potatoes have taken on a new form.

Christmas ornament potato stamps

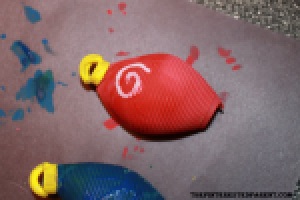
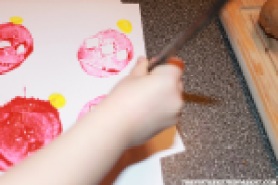
Cut a potato in half & carve an ornament design into a potato.

IMG_7445

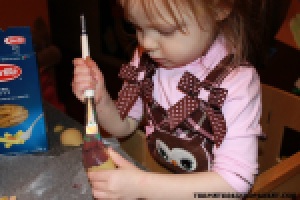
Dip your potato into paint.

IMG_7446

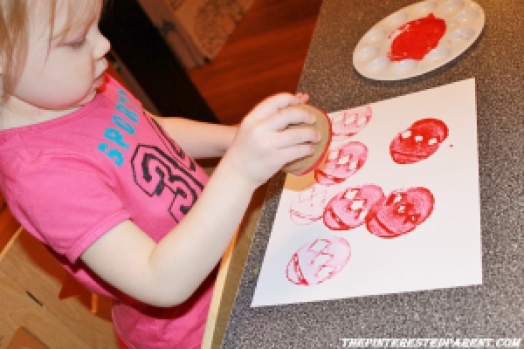
Stamp until the potato does not stamp anymore & dip again.

IMG_7447

img_7448

IMG_7451

With a paintbrush add the ornament tops.

IMG_7454

Make as many different designs as you like and stamp in different colors.

Christmas Ornament Potato Stamps - Holiday crafts for kids

100 Things That I am Thankful For

66959_10203700102216336_7780072121175294854_n

Why is it that it takes the holidays for us to reflect on the things in our life that are most important? On New Year’s we resolve to better ourselves, on Valentine’s Day we show appreciation for our spouses & lovers and on Thanksgiving we give thanks for all of the gifts that god has given us. We should resolve to be better every day. We should celebrate our love & all of these gifts every second, but with the stresses of work, bills & daily life often we do forget. The holidays do offer a great nudge. This week is Thanksgiving. There are many things that I am grateful for but often take for granted. I challenged myself to make a list of 100 things, some are things that I cannot live without, some are the little things that make me smile, but all are things that make be thankful. These are not listed in any particular order.

1. My husband & daughter and my extended family

2. Life and health

3. A good-natured debate

4. Watching my daughter sleep

5. Low fat frozen yogurt

6. Weekends off

7. My memories

8. Sweatpants

9. Art

10. My daughter’s laughter

11. Owls

12. Changes of season

13. My mother-in-law

14. Spanx

15. Meditation

16. The money in my wallet

17. Beauty in unexpected places

18. Our travels

19. Chocolate

20. Inspiration

21. My sister

22. Color

23. Day dreams

24. Heated mattress pads

25. Inside jokes

26. Home movies

27. Forgiveness

28. Good friends that are always there

29. Books

30. Unsolicited compliments

31. Thunderstorms

32. ‘The Princess Bride’

33. Tears of happiness

34. Hugs

35. Upbeat people

36. Decaf coffee

37. Foot rubs

38. Singing when no ones listening

39. Raw honey

40. Our dog

41. All the I love yous

42. Old photographs

43. A good sneeze

44. The blogs that I follow & the ones that follow me

45. Peppermint Patties- Get the sensation

46. My mother visiting in my dreams

47. Pinterest

48. Central Air

49. Post-It notes

50. The Beatles

51. Water

52. My snooze button

53. Dance

54. Finding a solution to a problem

55. Bubble baths

56. The warmth of the sun

57. Cherry blossoms

58. Swiffer

59. Baby feet

60. Traditions

61. Drive through windows

62. “The Big Bang Theory” nerds

63. Naps

64. Movie quotes

65. Moments of silence

66. Kisses

67. Brie & jelly

68. Dimples

69. Anti-bacterial wipes

70. Netflix Streaming

71. Internet shopping

72. Sunsets

73. Family outings

74. That perfect little black dress

75. Herbal tea

76. Pearl jewelry

77. The sound of bagpipes

78. Respect

79. Moments of clarity

80. Snow Days

81. Looking up at the stars

82. Cuddling on the couch

83. Our home

84. Christmas Carols

85. The sounds & smell of the beach

86. Toe socks – Have you ever worn a pair? You would be thankful too.

87. A blank canvas

88. A quick-witted comeback

89. Girls’ nights out

90. Kindness of strangers

91. Nutella

92. The lessons I have learned from the mistakes I have made

93. Puns

94. Musicals

95. Vicks Vapor Rub

96. A lit fireplace on a cold night

97. Hair colorant

98. Over-sized sweaters

99. My glue gun

100. God for blessing me with all of these gifts

What are you most thankful for? Can you list 100 things that you are grateful for? I challenge you to post your list. Link back to me if you do so that I may see what makes you thankful.

Gingerbread Christmas Tree

Gingerbread Christmas tree - a great baking and cooking project to do with the kids for the holidays. Preschoolers and food

I realize that it is not even Thanksgiving yet.  It’s not that I have anything against Thanksgiving because I have a lot to be thankful for, but I am overjoyed for this upcoming Christmas season. I understand that most do not like how early the holidays seem to come more & more each year, but for me I can’t wait, especially after having our daughter. Christmas is magical. The Christmas carols, the twinkling lights & the smells are all divine.

I am one of those people that have gotten into the spirit a little bit early, but I don’t care. My daughter doesn’t know any different. To her it is Christmas time already. This weekend we put on some Christmas carols & filled our house with the delicious smell of gingerbread. My daughter loves baking with mommy & she loves eating it too. One of the great things about gingerbread is it has the same consistency as Play-Doh. This of course made my Play-Doh obsessed daughter happy.

Gingerbread Christmas Trees

Bake your gingerbread. Here is the recipe that we used. Gingerbread Recipe

IMG_7185

IMG_7190IMG_7193IMG_7197IMG_7202

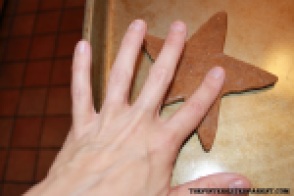
You will need star cookie cutters. Using different sized cookie cutters, cut out about 10 cookies. If you do not have 10 different cutters, you can improvise.
I had 5 cutters in various sizes. I cut two of each size, cutting one a little thicker than the other. I worked the thicker star out carefully using my fingers to make it a little bit larger than the first star.

IMG_7204 IMG_7207 IMG_7209 IMG_7214

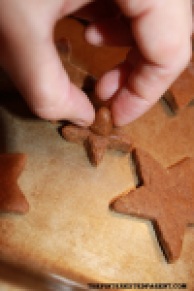
On the smallest star I added a small point for the top of the tree.

IMG_7221

Bake your cookies according to the recipe.

IMG_7222

Make your icing while the cookies bake.

Icing:

1 cup of confectioners sugar

2 Tbsp of milk

1/2 Tsp vanilla

Stir your ingredients together until smooth.

IMG_7234

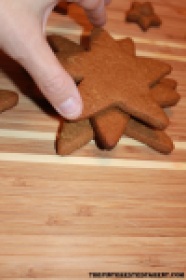
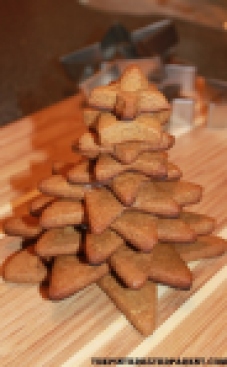
Stack the cookies from biggest to smallest. Use the icing to hold the pieces together. Stagger the star points so that they lined up every other cookie.

IMG_7235

IMG_7236

IMG_7244

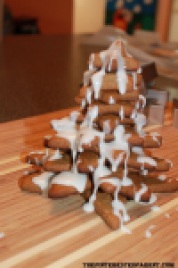
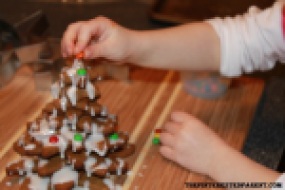
Drizzle icing over the top of the tree & add M&M minis or another candy of your choice.

IMG_7245

IMG_7247

Gingerbread Christmas tree - a great baking and cooking project to do with the kids for the holidays. Preschoolers and food

As I said already the gingerbread dough has a similar consistency to Play-Doh. I let my daughter use the leftover dough to craft her own cookies.

She crafted these as birthday cakes for me & her. The birthday cakes looked a bit like a pile of something else that I don’t want to say, but otherwise they still tasted delicious. Mai iced up her cookies and they passed her taste test. The only problem was trying to wrestle away all of her cookie creations from her so that she didn’t eat them all.

IMG_7267IMG_7269IMG_7239

We also made these cute little trees imparting the same concept of stacking the stars as with the cookie tree.

Foam Christmas tree craft for kids

We cut out 10 different sized stars using foam sheets & cut out a hole in the middle of each big enough to fit around a toilet paper roll. Cut only a small hole in your top star & loop a pipe cleaner through it to for the peak of the tree. Attach 2 small foam stars to either end of the pipe cleaner. Paint a toilet paper roll & a Dixie cup (The Dixie cup will be used for your base. Let dry. Glue the toilet paper roll into the cup. Stack the stars from biggest to smallest over the toilet paper tube & glue the top star over the top of the toilet paper roll. Let dry & let your child decorate the tree with craft pom poms, yarn, cotton snow etc.


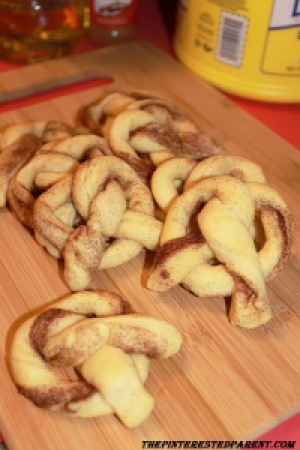
Cinnamon Sugar Crescent Pretzels

CinnamonCrescentPretzels.jpg

Cookie monster is to cookies as my daughter is to Play-doh. She just can’t get enough of it. Her favorite of all Play-Doh creations is crafting baked goods. She makes cakes & cookies and asks mommy to join in as well. I got creative the other day and made Play-Doh pretzels. This got a giggle out of my daughter & also inspired her tummy with a pretzel craving. I thought it might be fun to make some soft pretzels with her & combine the fun of playing with dough and the deliciousness of getting to eat our creations after.

Once I suggested it though, my laziness kicked in & I looked for an easy way out. Hurray for crescent rolls. These are not exactly your classic soft pretzel, but they were a quick, easy and yummy treat.

Ingredients:

1 tube of low fat crescent rolls

1 Tbsp sugar

1/2 Tbsp cinnamon

1/2 Tbsp vegetable oil

Directions:

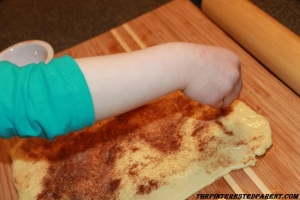
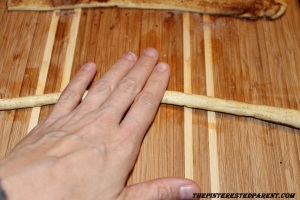
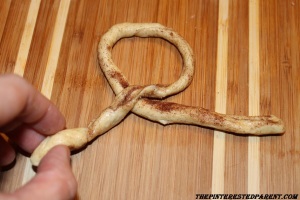
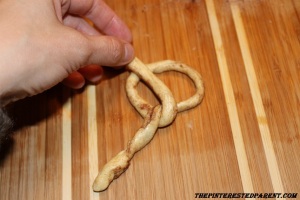
Preheat oven to 375. Unroll your tube of crescent rolls. Pinch the perforated seams together & roll out into a rectangular sheet. With a rubber spatula spread out the oil evenly over the sheet. Stir the cinnamon & sugar in a small bowl. Sprinkle the entire mixture evenly over the crescent sheet. Mai did the sprinkling for us, so it was not entirely even. Cut a 1/2″ wide strip lengthwise. Roll the strip just enough to form a rope like strip. Fold & twist into a pretzel. Place on an ungreased baking sheet. Bake for 8-9 minutes. Serve while warm.

IMG_6929 IMG_6930 IMG_6935 IMG_6937 IMG_6939 IMG_6940 IMG_6941  IMG_6944 IMG_6947 IMG_6959

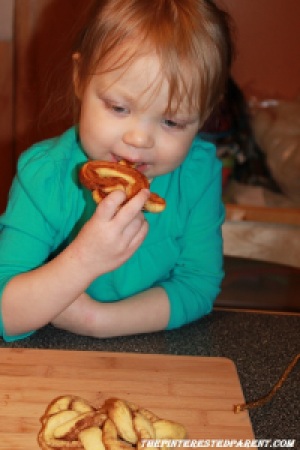
Mai loved these. I gave her one pretzel, but our sneaky little girl smuggled a few extra when I wasn’t looking.

Learning To Write The Alphabet With Tracing

We have had a rough couple of nights at the old homestead. My daughter had been sick with a bad cold, fever & vomiting. Yesterday my husband & I stayed home from work with her. She was in good spirits and seemed to be on the mend. She was very excited to have us both home. IMG_7061

*This post contains affiliate links*

We did a lot of snuggling and drew some pictures & colored. The other day Mai wrote the letter “T”. It was her first written letter. She was so proud & so were we. She held up her piece of paper & showed my husband & me. She beamed. Today in the midst of some of her drawings she made some more Ts. She has mastered the letter T now, but what about her other letters. T doesn’t want to stand alone. He wants his friends.

IMG_20141120_210415638_HDR

Lately she has been talking a lot about school. She throws on her backpack & tells me she is going to school on the school bus. She will kiss me goodbye & drive away on her little pink buggy. It is adorable.

IMG_7064

Today, we took her role play a little further & had a mock classroom. She took the bus into school, walked into class & removed her backpack just in time for roll call.  Today’s lesson…learning to trace our letters.

Laminated Tracing Cards

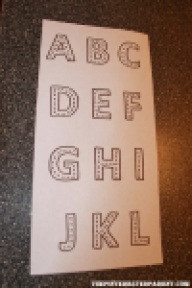
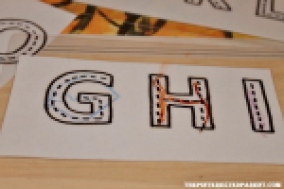
These were quick & easy to make. You can print out ABCs from your computer or write them out yourself. I did 3 letters per row. I added dash marks to the inside of the letters to give her a guide to trace.

IMG_7043

Cut out a rectangle around each row of letters to form a card. Place each card into a laminating pouch or sheet & trim if needed. The laminating pouches come in different sizes. We used 3 1/2 X 5 1/2. We used a laminating machine, but you can find self-adhering laminating sheets or pouches at an office supply store.

This will create 9 cards total.

IMG_7044 IMG_7048

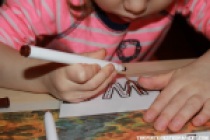
Class is now in session. I quickly showed Mai how to trace inside of the letters.

IMG_7082

She jumped right into to each card and showed me what she could do. “Look Mama teacher. I traced it.”

IMG_7088IMG_7089IMG_7090

She very carefully traced within each letter.

IMG_7094

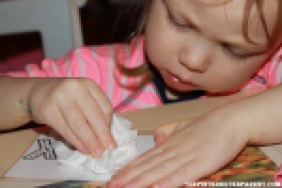
She was upset when she had realized that she used the brown marker instead of the pink. I showed her that she could just wipe the card clean with a tissue. She was happy to clean off the card & mark it again in the pink.

IMG_7093

We had a great lesson today. She even taught her baby how to trace her letters.

IMG_7096

I made a great discovery tonight as well. I found out that when I am mama teacher, she listens and follows directions much better. Our next lesson was cleaning up the classroom. All of her Legos & Play-doh cookie cutters were put back in their boxes without debate this evening. It was fabulous. Mama teacher will have to work on a potty training lesson next.

tracing.jpg

Play Dough Ornaments

playdohornament1

Over the last couple of months my daughter has found a new obsession. Morning, noon & night you can find her at our coffee table buried up to her elbows in Play-Doh. She has become quite creative with her dough. There are so many possibilities. The fun is endless. Check out our list of fun Play-Doh activities this week at Seek Magazine.

The only problem with Play-Doh, is that we go through it so quickly. It is not always convenient or cost effective for me to run out to the store to buy more, so I often make it at home. I have tried many different recipes. I have made it cooked, uncooked, with hair conditioner, with Jello, but my favorite one is a recipe I found on Instructables.

There is a lot that you can do with a basic play dough recipe. You can add different colors, spices, scented oils and various textures. My daughter is in a sparkly phase. She likes to wear her sparkle tutu everyday & her sparkle shoes & she loves playing with glitter. We decided to mix our dough with glitter. Mai called it sparkletastic play dough.

IMG_6838 IMG_6840

IMG_6858

glitterplaydough

It looked so pretty after we were through with it. It looked so festive. One of the activities that was on our play dough activities list was making Christmas ornaments. So that is just what we did.

Snowflake ornament

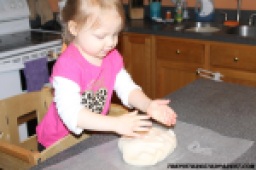
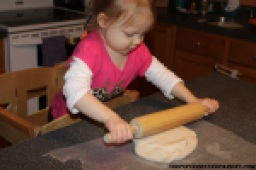
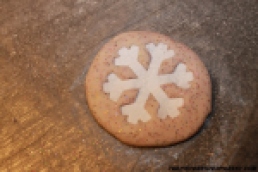
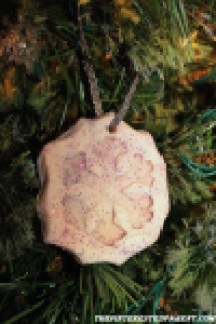
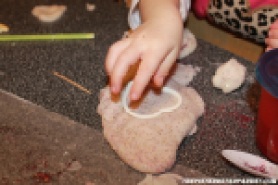
I rolled out a circle about 3″ around. I pressed a felt snowflake into my circle to make an imprint.

IMG_6868

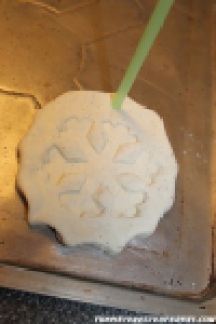
Use the back side of a spoon & press in all the way around to form a snowflake shape. Pull the felt piece out of the middle of the ornament.

IMG_6870

Use a straw to poke a hole in your ornament where you would like your string to go. You may have to lift the ornament up so that the straw goes all the way through.

IMG_6812

Let dry to harden. This might take a couple of days depending on the thickness of the ornament. Do not bake as the glitter will melt & cause the ornament to explode. Add a ribbon or string.

IMG_6888

Family Hearts Ornament

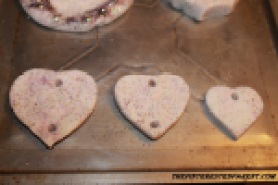
Using a cookie cutters cut out three heart shaped ornaments. If you have 3 different sized heart cutters use the 3 different sizes. If you do not, use the same sized cutter & just spread out 2 of the hearts to form larger hearts so that you have three in increasing sizes.

IMG_6875 IMG_6871

Poke a hole into the smallest heart at the top center part of your heart. For the larger two hearts poke a hole in the top center & bottom center.

IMG_6876

Let the hearts dry & harden for a day or two. Using a ribbon or string, string your 3 hearts together with the largest on top & the other 2 dangling beneath in descending order.

IMG_6882

Using a marker or paint, write your names onto each heart.

IMG_6883


ornament

You may also paint your ornaments after hardening. Mai is very excited to put up the tree in a couple of weeks & now we have some new lovely ornaments for our tree.

Pancake Battered Banana Bites

IMG_6775

For those of you that have been following me for a while, you know that I have had a long hard battle with my daughter over eating. She has been known to be a picky one. Not only is she picky, she doesn’t like to eat. She has much more important things to be doing & she will tell you. “Mama I don’t want to eat. I am so busy.” This is coming from my 2 year old. I am not sure what it is that could have my toddler so busy, but whatever it is, it has kept her from the dinner table on many occasions.

We have come a long way over the last few months and have seen great improvements. Her appetite has increased which is wonderful, but her variety of foods remains the same. Breakfast is one of her better meals. Thank goodness. And as luck would have it, it is my favorite meal to make. I love making bite-sized foods & if it is something that she can dip, it is usually a home run.

Pancake Battered Banana Bites

Ingredients:

6 ripe bananas

1 1/4 cup of all-purpose flour

1 tbsp of brown sugar

3 tsp of baking powder

1/4 tsp salt

1/2 tsp cinnamon

1 large egg

1 tsp honey

1 cup of milk

2 tbsp vegetable oil

Directions:

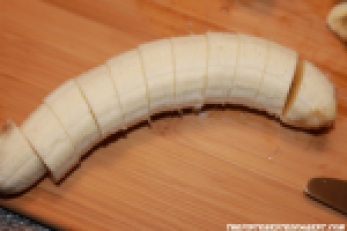
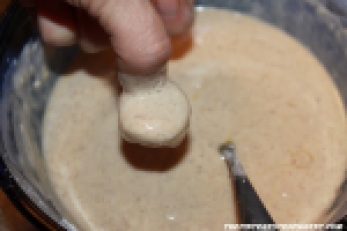
In a large mixing bowl add the flour, sugar, baking powder, cinnamon, salt, milk & vegetable oil and stir well. In a mixing bowl, beat the egg & add to the rest of the batter. Mix in the honey. Slice bananas into 1/2″ slices. Dip the banana in the pancake batter. Place on a hot griddle or frying pan set to medium heat. (Test with water, water drops should dance across the surface when added.) Cook until the edges are cooked & firm up. Flip & cook on the other side. Cook until the batter on the sides is firm & cooked.
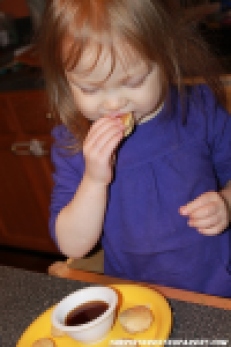
We served ours with a peanut honey sauce, but you can also use maple syrup or eat as is.

Peanut Sauce:

2 tbsp peanut butter

2 tbsp water

1 tbsp honey

Heat the peanut butter & water for 20 seconds in a microwave safe dish. Stir well until smooth. Add the honey & stir well. Serve warm

IMG_6771 IMG_6772 IMG_6773

IMG_6774

These were a big hit with both my daughter & my husband. Mai loves to dip, so she had hers with peanut sauce & syrup.
 

IMG_6779


Tissue Box Christmas Chimney Craft


Up on the housetop, click, click, click
Down through the chimney with good Saint Nick…

When I was a child my grandmother used to have a wonderful Christmas record of children singing. This was my favorite carol on the album. I have gotten into the holiday spirit a little bit early & have started singing Christmas carols around our house & even at work. Not everyone appreciates my caroling, but my little one loves mommy’s songs. I think this one is going to be a favorite of hers too. Our tissue box chimney craft is inspired by this wonderful song.
Continue Reading…