Tag

Arts & Crafts

Footprint Animal Crafts From A – Z Featuring O, P & Q

Footprint crafts from A - Z featuring o,p & q

We have been having a great time working on our footprint animals. I am excited to finish all of them from A-Z. They will make a lovely addition to our daughter’s new playroom in our new house. Our latest crafts are O for octopus, P for panda & Q for quail. Because of her new-found obsession with the movie ‘Home’, we made one bonus footprint craft inspired by the movie.

O is for octopus

Paint your child’s foot purple.

IMG_7071

Press it onto a piece of paper.

IMG_7072

Paint the octopus’ tentacles on & dab on two circles for the eyes. Draw in facial details with a magic marker.

IMG_7080

Outline the underside of the tentacles in white. Let the paint dry.

OIMG_7081

Paint in eyeballs & dab on the suction cups.

Footprint Octopus Craft - Footprint Crafts A - Z O is for Octopus

P is for panda

Paint your child’s foot in mostly white. Paint the toes & around the sides of the foot, avoiding the heel, in black.

IMG_7074

Dab on circles of black for the eyes. Let dry & then dab on a circle of white. Paint in the ears, nose & mouth.

IMG_7082

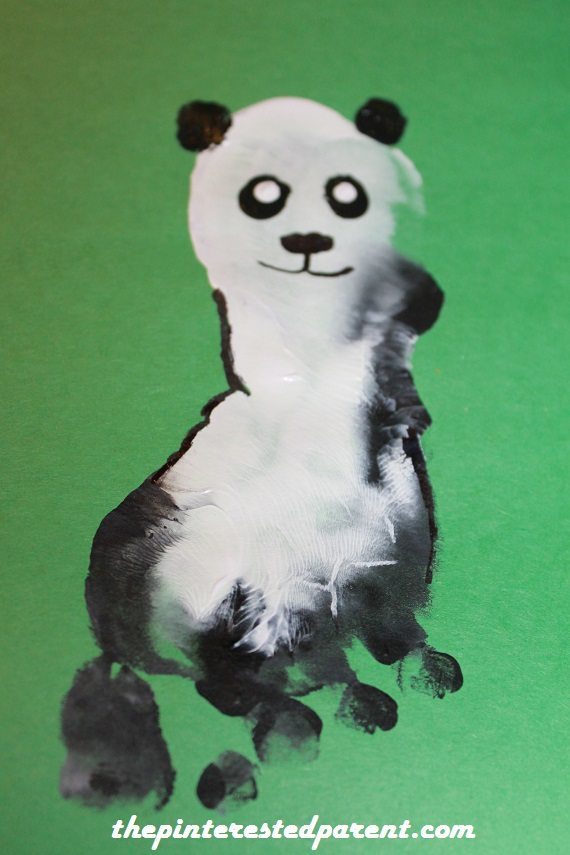
Paint in small arms & add bamboo to finish off your craft.

Footprint Panda - Footprint Crafts A - Z P is for Panda

Q is for quail

Paint your child’s foot in a few different colors as shown & press into a piece of paper.

IMG_7075

Paint in the tail feathers, the top plume & dot on an eye. Paint a “c” shape in to define the face.

IMG_7076\

Add a beak & feet. Dot on an eyeball & add details for the feathers.

Footprint Quail - Footprint Crafts A - Z Q is for Quail

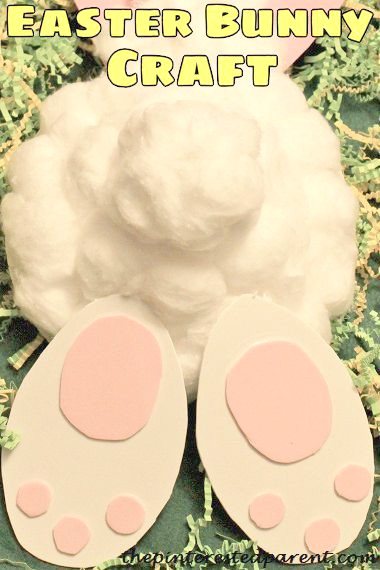
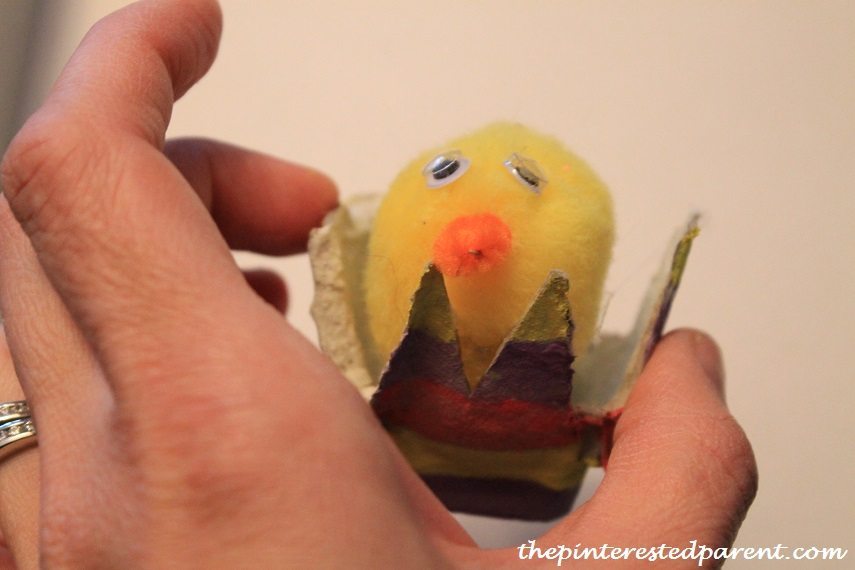
As promised, we also did a bonus footprint this week. Mai is just in love with the movie ‘Home’. We made a footprint craft inspired by the movie.

Home Inspired Footprint Craft - Oh the alien

Thank you as always for stopping by. Please follow us on Facebook as well.

Toilet Paper Roll Grapes

Toilet Paper Roll Grapes Craft


Before we had our daughter we kept a pretty neat home. We had little knick knacks on our coffee table, there weren’t scuffs & marker on our hardwood floor & I used to have a clean & bare refrigerator. I hated having things on my refrigerator. I thought it looked ugly to have shopping lists & magnets hanging off of it. Fast forward to today & things are a bit different. My kitchen is now an art studio. Our kitchen cabinets, our refrigerator & our kitchen windows are covered with all of my daughter’s arts & crafts.

IMG_0572 IMG_0573IMG_0574

This would have made the old me cringe, but now it just makes me smile. Since these days our art projects have become part of the decor, I thought at least we could make a craft that matches with our kitchen’s theme. It is Tuscan themed with grapes & vines, so we made a grape craft.


Toilet Paper Roll Grape Craft

Gather a few rolls & snip into 1/4″ rings.


IMG_0566 IMG_0567

Shape & arrange the rings as you go, to make sure that you have enough cut & map out your project.

IMG_0544

Glue each piece into place. Mai helped apply the glue & I put them in place. Let the rings dry.

IMG_0543IMG_0542

Let them paint within the glued shapes to make a pretty picture perfect craft & then let dry.IMG_0550IMG_0551

This will make a great addition to our artastic kitchen.


Toilet Paper Roll Grapes Craft


Thank you as always for stopping by. Please follow us on Facebook as well.

Ink Blot Artwork

Ink Blot artwork craft & activity for kids


When my daughter was much younger I was very curious about how her little mind worked. I was & still am fascinated with how the world looks through her eyes. Quite a while back we did an ink blot experiment on her. It was interesting to hear her thoughts on the abstract. Over a year later we are bringing the ink blots back with a kick. The idea was to make the ink blots, have her tell me what she sees & turn the pictures into her visions.

Continue Reading…

Bunny Tail Craft

Paper plate or paper bowl cotton tail Easter bunny craft for kids. Arts and crafts


My daughter loves crafts that allow her to play with glue. We have bottles of glue in our house & she just loves getting her paws on them whenever she gets a chance. Tonight I thought we could make little bunny bottoms. It would give her a chance to use some glue & play with fluffy cotton, which I thought she would love.

What you will need:

Paper bowl

Cotton balls

Glue

Construction paper


Directions:

Glue cotton balls all around the bowl.

IMG_9845

After you have covered the bowl, add extra cotton to the middle to form the bunny tail.

IMG_9846

Cut out two ovals for the foot paws.

IMG_9847

Cut out a pink oval & 3 circles for each foot & then glue them into place to form the bunny paws.

IMG_9848

Cut out ears & glue them under the bowl in place.

IMG_9856

Glue the feet into place & let dry.

Easter bunny tail craft with paper bowl or plate & cotton balls

To be honest, Mai did not take to this craft. When I told her that we were making bunny bums, she laughed. She grabbed her bowl & grabbed her glue. She added one cotton ball to the middle of the bowl & said “I done, mama.” That looks great too, baby.

IMG_9865

Thank you as always for stopping by. Please follow us on Facebook as well.

Pasta Shell Easter Bunny Craft

Pasta Easter bunny craft.jpg


The best thing about doing arts & crafts with my daughter is the time that we get to spend together. My daughter says to me all the time. “Mama, I have fun with you. I like making projects with you.” This melts my heart. I love doing crafts with her as well. She is becoming so creative & is learning so much from our craft time together. When I told her today that we were going to make bunnies out of pasta shells, she cheered loudly & pulled her safety stool right up to our work space. So began this evening’s craft.

Pasta Shell Easter Bunny Craft


What you will need:

Jumbo pasta shells (3 for each bunny made)

Spaghetti (just one strand)

Paint

Hot glue


Directions:

Paint the inside of the shells in pink. These shells will be the ears.

IMG_9808

IMG_9815

Paint the outside of the shell in the color that you choose for your bunny’s ears. I chose gray, Mai wanted purple ears.

IMG_9810

Paint a shell for the head.

IMG_9812  IMG_9817

IMG_9806

Paint a strand of spaghetti in black. Let it all dry.

IMG_9820

Paint a nose in the middle of the face.

IMG_9822

Add in the eyes & mouth.

IMG_9824

Break the spaghetti into small pieces for the whiskers & glue on to the face.

IMG_9825

Glue the ears into place from the back using a hot glue gun. Use a generous amount of glue to secure.  (Sorry kids, hot glue is only for us grown-ups)

IMG_9826


IMG_9842

Pastashellcraft.jpg

Thank you as always for stopping by. Please follow us on Facebook as well.


Hatching Chick Craft

Hatching chick Egg carton kid's craft for Easter


Egg cartons have become my new favorite craft material. We eat a lot of eggs, so we always have them in abundance. There are so many fun & simple things that you can do with them.  I like to pre-cut them & keep on hand for when we are ready to use them. Mai was playing with them and made a monster face with a couple of them. “Rrrrwwwarrr” “Let’s make monsters mommy.” She is going through a monster phase right now. How about we make something less scary? Since Easter is upon us, we changed the monsters into little hatching chicks.

Cut up your egg cartons. Like I said, I have a lot of them.

IMG_9715

For this craft you will need two individual sections for each egg that you will be making. One side of the piece will be solid. On the opposite end, it will be more jagged. On the jagged end, cut out an upside down V to form the look of a crack. Do this to both pieces.

IMG_9716

Paint both sections in pastel colors.

IMG_9720 IMG_9723

Let dry.

IMG_9724

Form your chick with yellow pom poms, googly eyes & a small piece of pipe cleaner glued into place for the beak. IMG_9717

Place a chick in the bottom half of your egg.

IMG_9727

Glue the top half on to form your hatching Easter egg. Peep,peep, peep. This is a cute and simple craft for kids of all ages.

IMG_9734

Thank you as always for stopping by. Please follow us on Facebook as well.


St. Patricks Day Crafts

Marshmallow paint stamped shamrocks for St. Patrick's Day. Easy kid's arts and craft projects for preschoolers and toddlers

I love the holidays. I love all of them. St. Patrick’s Day is a little more than a week away & even though I am not Irish, I get into the spirit all the same as if I were. This weekend Mai & I devoted a lot of time to St. Paddy’s day crafts or as Mai calls it St. Crafter’s Days. It makes sense considering all the painting, gluing & glittering that was done in our home. Here are some crafts that you can try at home with your young artists whether they are Irish or not.

Egg Carton Shamrocks

Use a clean & empty egg carton. You will need to cut out 3 individual sections for each shamrock made.IMG_9547

Paint your sections in different shades of green. Let dry.

IMG_9551 IMG_9555

Cut a piece of green construction paper for your stem.

IMG_9575

Using a hot glue gun (not for children’s use), glue your egg carton sections together on the sides & then to the top of the stem. Let dry.

IMG_9574

Egg carton shamrock kid's craft for St. Patricks Day


Marshmallow Shamrock Stamping

My daughter loves stamping. It is an easy way to make a lovely & easy craft. We happened to have a bag of jumbo marshmallows from last weekend Rice Krispie Treat Rainbows, so we put them to good use. This is an easy one. Give your child a marshmallow & some green paint. Show them how to stamp the shape of a shamrock by stamping twice side by side & one centered over the top of the two.

IMG_9566IMG_9559

IMG_9564


To be honest Mai kind of went in her own direction here. She made green snowmen instead. They were equally cute & she was quite proud.

IMG_9603

Shamrock marshmallow stamping craft & activities for kid's on St. Patrick's Day


St. Paddy’s Day Glitter Peels

Glitter & glue peels are one of our favorite crafts at home. They combine my daughter’s 2 favorite craft supplies. I helped Mai by drawing the outline of the shamrocks for her & then let her apply her own glitter.

IMG_9578 IMG_9594

Let dry. This may take a while, if not overnight depending on how thick the glue is.

IMG_9580

We left ours outside with weight on them to dry. They dried quicker & we were able to peel faster.

Shamrock Glitter Peels - St. Patrick's Day Kid's crafts

Check out our rainbow too…

IMG_9604

Paper Plate Leprechaun Mask

On the back side of a paper plate, draw a set of eyes.

IMG_9567

Paint the center of the plate in a flesh tone.

IMG_9568

Paint around the outside in orange or red for the hair & beard. Add eyebrows, eyelashes & a goatee.IMG_9569

IMG_9570

Let dry.

Draw out a bow tie & a hat on construction paper.

IMG_9571

For the hat add a band & buckle.

IMG_9572

Glue the pieces to the top & bottom of your plate & paint or draw in the rest of you face with marker.

IMG_9573

Paint in any other embellishments such as shamrocks or polka dots for the bow tie.

IMG_9576

Leprechaun paper plate mask - crafts for kids on St. Patrick's day

Thank you as always for stopping by. Please follow us on Facebook as well.

Pasta Wind Chimes

Windchime.jpg


This has been a rough week. I have not been feeling well & our daughter has been testing her limits with us. She was so irritable & melty this week that the majority of the week was spent trying to keep her tantrums under control. Tonight was another challenging evening, but we somehow managed to turn it around towards the end of the night & my sweet, fun-loving girl made an appearance. When Mai asked to do a project, I was so excited, I jumped all over it.

Since we love our pasta crafts so much, I thought we could make something special with our pasta. We were not quite sure what we were going to make, so we just started painting different shapes. Mai loves painting pasta pieces. She painted a bunch in different colors & did some special creations of her own. Here she made a pasta car by painting the body of the car in blue & then adding the wheels using wagon wheel pasta. I love that imagination.

IMG_9405

We painted side by side until we painted a pile of different shapes & colors.

IMG_9372


IMG_9400IMG_9403

After looking at our pile of shapes & colors, I decided that these pieces would make a great wind chime.

IMG_9406

We cut out several strings of yarn of the same length.

IMG_9408


I started by gluing one shape of pasta shell to each string with a glue gun. With each new piece of yarn I glued the pasta slightly higher.

IMG_9410 IMG_9411

I did the next row in a similar fashion. Continue to the top leaving yourself about 2 inches at the top of each.

IMG_9412


We had a paper bowl that Mai had painted last week that we used as the base for our chimes. I poked a hole in the direct center of the bowl.

IMG_9413

Cut another few strips of yarn. Group together & poke the yarn pieces through the hole & tie off into a loop on the top & tie off into a knot on the bottom to secure.

IMG_9414

Glue the bare area at the top of the yarn to the inside of your bowl. Spacing them out evenly. Cut just below the last pasta shell on each string. This should give you different lengths all the way around.

IMG_9415

When you are finished, let the glue dry & find a place for you & your little painter to display your new craft.

PastaWindchime.jpg


Thank you as always for stopping by. Please follow us on Facebook as well.

Paper Plate Umbrella Craft

Paper plate umbrella craft for spring. Spring arts and crafts ideas for kids.

Tomorrow is finally March. We can kiss February goodbye & start the countdown to the spring. I feel as if it is all that I can think about. I am over the cold & snow and am longing for the outdoors. The snow may melt in the spring, but it is not without its weather challenges too. April showers bring May flowers & the showers certainly do fall. Here is a cute umbrella craft that you can do to welcome in the spring & its raindrops.

Paper plate umbrella craft

All you will need is a paper plate, paint,  a pipe cleaner, a straw & glue

Cut a paper plate so that there are 6 pie sections. Cut so that there is an uncut circle in the center. Poke a hole through the center with a pipe cleaner & pull the cleaner back out.

IMG_9198

IMG_9199

Paint the bottom side of the plate. Paint each segment in a different color. Let dry.

IMG_9214

IMG_9215

Using a glue gun, glue the edge of one piece of the pie. Overlap it slightly with the next pie segment. Continue all the way around.

IMG_9217

IMG_9218

Poke the pipe cleaner through the top again. Form a loop and push the point back through the center again, keeping the loop on top and the end on the inside of the umbrella. Push a straw of the same color over the pipe cleaner until it reaches the top. Add a dab of hot glue to the inside center. Let it cool for about 30 seconds and then push the straw into the glue. Curve the bottom of the pipe cleaner to form the handle.

 IMG_9219

IMG_9224

Share your umbrella with a friend.
Paper plate umbrella craft for spring. Spring arts and crafts ideas for kids.

Paper plate umbrella craft for spring. Spring arts and crafts ideas for kids.

Thank you as always for stopping by. Please follow us on Facebook as well.