

Tag
easy
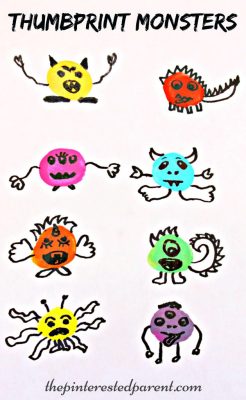
Thumbprint Monsters
*This post contains affiliate links*
We are huge fans of hand, foot & finger printed projects. They are fun to make & some of those sweet little prints make for wonderful keepsakes to save & look back at later.
My daughter is going through a little bit of a monster phase lately. She loves to draw them and make clay sculptures of them, which is funny because she doesn’t like anything scary, but she always makes sure to tell me that they are nice monsters.
Monsters are simple & fun to make and have so many possibilities. We made some adorable & “nice” monsters this week with our thumbprints.
My daughter picked out a few different colors of acrylic paint & we squeezed out just a bit of each onto a paper plate. I explained to my daughter that after she dipped her finger in the paint, she needed to blot off a bit of it before pressing onto the paper. She blotted her fingers & pressed firmly onto a sheet of white paper & then we set the paper aside to dry. Acrylic paint dries rather quickly, so we were able to work with our thumbprints without much wait.


I drew a couple of starter monsters onto the thumbprints & my daughter quickly grabbed a Sharpie and went on to finish the rest of her thumbprints. I took this photograph of her as she drew, but she insisted that I do not look until the end, so she asked for privacy while she worked on the rest. A true artist never wants to reveal their work until it is finished.

When she finished her last one, she proudly ran over to me to show me her friendly monsters. They were so cute. She pointed all the differences out to me & told me that she likes her monsters to have tails.

I made some of my own & thought the tails were a cute option for some of mine as well.

For more great finger & thumbprint ideas, check out …
We also recreated a thumbprint idea that we made a couple of year’s ago. We used all of our fingers for this one to form spooky Halloween eyes. I showed my daughter how to press both fingers down on the paper at the same time to form the eyes. She alternated fingers to make different sized eyes and since the angles and shapes would vary with each pressing this made for a great variety of eyes.

When the paint dried, she drew in eye balls and lashes & cracks in the eyes. She got a kick out of the eyes. “Look at how spooky they are, mama.” “They are looking at me.”

Our spooky eyes were fun & will be a creepy addition to our front window.


Thank you as always for stopping by. Please follow us on Facebook as well.
Simple Balloon Experiment

My daughter is obsessed with balloons. There are balloons bouncing around our house most of the time. We have bags of them & she asks me to blow up new ones for her all the time. Yesterday, she picked up one of her balloons & started coloring it with a marker. Looking at her colored balloon gave me an idea. I grabbed one of our noninflated balloons and used markers & sharpies to color in a design. It did not need to be anything elaborate, just a quick design.
Egg Carton Cars

My daughter has the most magnificent imagination. It is fascinating to watch her play. She loves to build villages & towns with her blocks & she picks up random odds and ends around the house often to incorporate into her pretend worlds.
We painted some egg carton pieces & toilet paper roll earlier this week to keep for future crafts. We started playing with the painted pieces & we thought of a great craft that she could use later for her pretend play.

We made these simple egg carton cars. All you need is buttons for the wheels & some foam pieces or construction paper for the windows and headlights. Use a Sharpie to draw in the doors.


These were quick and easy to make and made a fine addition to my daughter’s block city. “Look mama, I parked all the cars in the parking lot.”

Thank you as always for stopping by. Please follow us on Facebook as well.
Cute & Simple Spring Crafts For Kids

Paper Plate Umbrella Craft

Tomorrow is finally March. We can kiss February goodbye & start the countdown to the spring. I feel as if it is all that I can think about. I am over the cold & snow and am longing for the outdoors. The snow may melt in the spring, but it is not without its weather challenges too. April showers bring May flowers & the showers certainly do fall. Here is a cute umbrella craft that you can do to welcome in the spring & its raindrops.
Paper plate umbrella craft
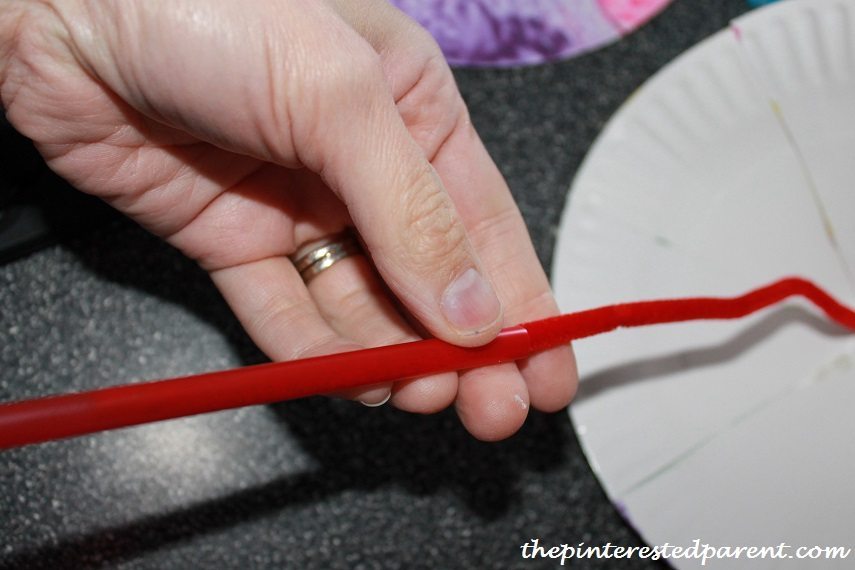
All you will need is a paper plate, paint, a pipe cleaner, a straw & glue
Cut a paper plate so that there are 6 pie sections. Cut so that there is an uncut circle in the center. Poke a hole through the center with a pipe cleaner & pull the cleaner back out.


Paint the bottom side of the plate. Paint each segment in a different color. Let dry.


Using a glue gun, glue the edge of one piece of the pie. Overlap it slightly with the next pie segment. Continue all the way around.


Poke the pipe cleaner through the top again. Form a loop and push the point back through the center again, keeping the loop on top and the end on the inside of the umbrella. Push a straw of the same color over the pipe cleaner until it reaches the top. Add a dab of hot glue to the inside center. Let it cool for about 30 seconds and then push the straw into the glue. Curve the bottom of the pipe cleaner to form the handle.

Share your umbrella with a friend.

Thank you as always for stopping by. Please follow us on Facebook as well.
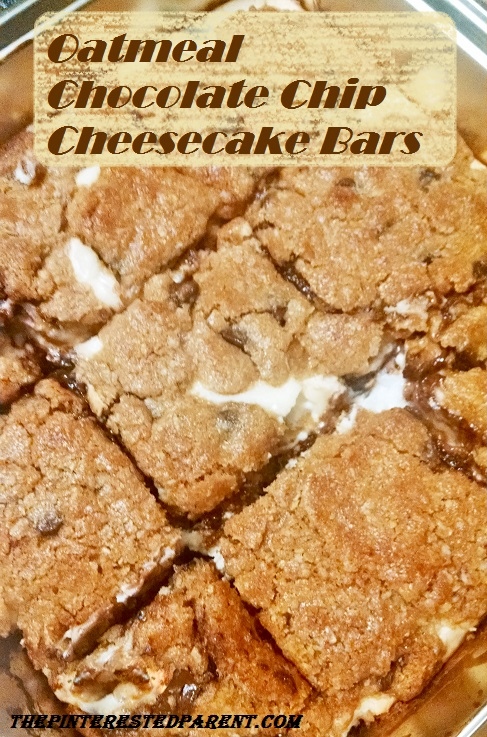
Oatmeal Chocolate Chip Cheesecake Bars

I think I have mentioned before that my work has a monthly pizza party to celebrate all of the birthdays in that month within our company. On pizza day, they bring in a variety of different topping pizzas and a ton of desserts. Oh the desserts, oh so many delicious desserts. Ever since the last pizza party I have become obsessed with cheesecake. Not that I didn’t love it before, but now I find myself craving it all the time. Last week it was french toast with cheesecake filling and this week, it is cheesecake bars. This does not really fit into my diet, but oh well. These are super simple to make and so good.
Oatmeal Chocolate Chip Cheesecake Bars
Ingredients:
Cookie crust
A package of Betty Crocker oatmeal chocolate chip cookies
1 egg (per directions)
1 stick of margarine (softened) (per directions)
Filling
1 8oz package of cream cheese (softened)
1/4 cup of sugar
1/2 cup of vanilla greek yogurt
1 egg
1/4 cup of chocolate chips
Directions:
Preheat oven to 375. Prepare cookie mix per package directions. Press 1/2 the cookie mixture into a square 8″ baking pan. In a mixing bowl, blend cream cheese, sugar & yogurt on low speed until blended and smooth. Do not overbeat. Add the egg & quickly beat in. Add the chocolate chips & stir. Pour the cheese mixture over the cookie crust. Take the remaining cookie dough & press and flatten between hands and place over the cheese mixture. Do this in pieces and spread out evenly. Bake for 40-45 minutes or until cookie is golden & is firm in the middle. Cook times will vary. Let cool before cutting and serving. They will set as they cool.


Related Topics:
http://rhythm-of-food.com/2014/04/26/banana-and-cacao-muffins/
http://toniandrukaitis.wordpress.com/2014/04/26/friday-life-is-short-eat-dessert-first/
http://toosexytocook.wordpress.com/2014/04/26/chocolate-chip-cookies/
Who Needs Toys – Playtime Made Easy
 You always hear people joke that you don’t need to buy young children expensive toys because all they end up wanting to play with is the box. This is no joke. There is no truer statement. Toddlers are easy; they can find the fun in anything. Their little spongy minds are absorbing and exploring everything. Things as simple as the box, are still new and fascinating territory for them. At 2 years old, my daughter is past the excitement of the box, but still has a taste for the simpler things in life.
We have more toys in this house than we know what to do with. Between the play kitchen, Little People Villages & Twisty Tracks, she should have enough to keep her occupied until she is in her teens, but as kids tend to do, she gets bored of these things very quickly. There are many things that you can do to occupy your child’s day without the use of fancy toys.
Here are some simple and fun things for your child to do.
Water play
It doesn’t get much simpler than this. This is one of my favorite activities to give my daughter while I am cooking or doing dishes. Lay out a towel & fill a large container half way with water and add some measuring cups & spoons. Here my daughter told me she is making coffee.


Chick Peas, Beans & Rice
Similar to above, I have a container of chickpeas & colored rice set aside just for play. It is amazing how long my daughter will play with them. She will count them out & transfer them from cup to cup.

Couch Cushion Fun
My daughter has a lot of energy. She loves to jump & is always throwing herself on the ground for some odd reason. Take your couch cushions off the couch & place them on the floor & let your child roll around on the pile of pillows.
Stringing Pasta
Pasta necklaces are an old classic. This requires a little bit of hand – eye coordination. Mai strung up the 3 shown below & told me that it was the mama pasta, daddy pasta & baby pasta.


Read, read & read some more
We spend about a half hour before bed reading books every night, but books are not just for bedtime. We often read to our daughter while she is eating to keep her firmly planted in her chair during her meal. Many times even if my daughter insists that she does not want a story, if I just start reading she will eventually jump up on my lap.

Bubble Wrap
We order from Amazon a lot, I mean a lot. Bubble wrap comes with most of these packages. I think that bubble wrap is fun for small children and adults alike. Who doesn’t love popping that stuff?
Blanket forts
Being that mommy is always cold, even in the summer, we have blankets all over the house. Mai loves it when we make forts over the couch. “Mommy, play in the fort toooooooo?” Definitely! Here she is reading with a flashlight under her fort.

Song & Dance
My daughter loves music. She has been dancing as long as she has been walking. She also loves to sing songs with mommy & daddy. Don’t underestimate the power of music.

Red Light, Green Light & other games
My daughter loves running around our house in circles. I had to teach her Red light, Green light just to catch my breath in between chases. Pheeew! Also try Simon Says or Hide and Seek.
Get outside
If your toddler is like mine, then he or she loves to run free. Take them outside, weather permitting & let them run & jump and play. Here is Mai walking the track at the Relay for Life in memory of her grandmother & namesake.

Color & Draw
I have an unlimited supply of poster board in our home. My daughter loves to doodle & color. She also loves when we draw for her too. She & I will lie on the floor and she will ask me to draw pictures of caterpillars & horses. She has a vivid imagination. She creates different scenarios for these pictures. Here Mai asked Mama to draw a mama & dada spider. She said that they were both sick & needed medicine.

Stacking boxes
I love stacking boxes & have quite a few sets strewn all over the house. My daughter shares my love for them. She likes piling them up & placing them inside of one another.
Styrofoam & Yarn
Seriously! Yarn sticks to styrofoam. If you are like me & have styrofoam cones laying around this is a great busy activity.

What easy & simple activities do you have for you & your toddler. I would love to hear.
Sloppy Joe Cornbread Casserole

Because sometimes you just need comfort food…
Ingredients:
1 lb of ground meat (for this recipe we used venison but any ground meat will work.)
2 Cups of chopped peppers (red,yellow & orange)
1 cup of shredded cheddar
1/2 tsp olive oil
1 packet of sloppy joe mix
1 can of tomato paste
1 1/4 cups of water
1 box of Jiffy corn muffin mix
1 egg
1/3 cup of milk
Directions:
Preheat oven to 400 degrees. Brown the meat in a large skillet & drain. In a separate pan, add oil & peppers. Cook until tender. Add the peppers to the cooked meat. Stir in a packet of sloppy joe seasoning, can of tomato paste & water. Stir well, bring to a boil & then simmer for about 10 minutes. Mix Jiffy mix according to directions using the egg & milk. Stir the cheese into the Jiffy mixture. Pour the meat mixture in a baking dish evenly. Spread out the cornbread mixture along the top of the meat & bake for 15-20 minutes. Let cool & serve.


Related Topics:
Polenta Baked with Tomatoes, Corn & Basil
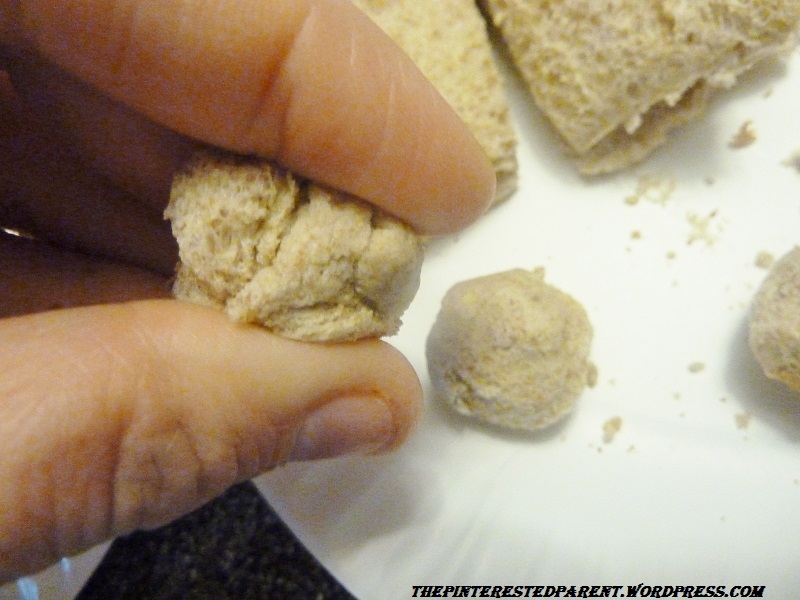
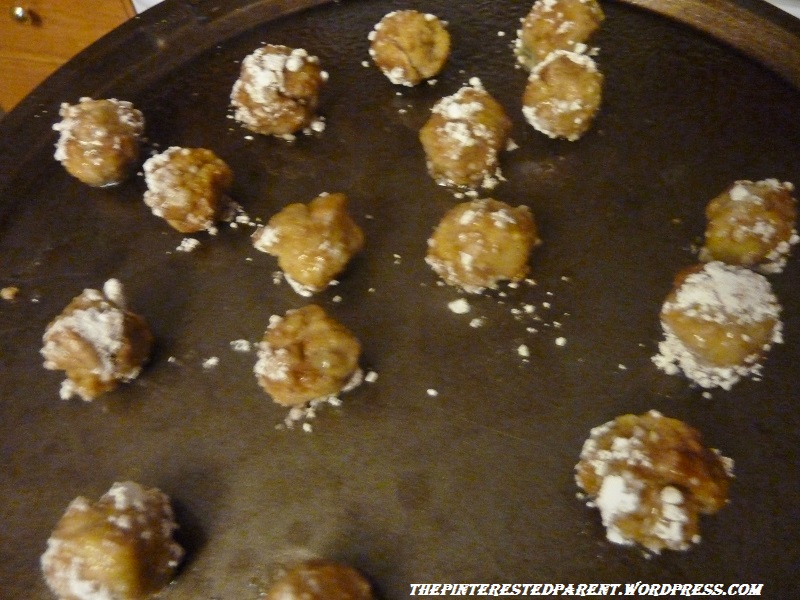
French Toast Balls

*Featured image has been updated*
Happy Christmas Eve Eve. We are only two days away & it has been a busy & exciting holiday so far. I am thrilled that we have the next few days off together as a family because it is so rare. Yesterday, there was a party for the kids at a Polish club from my husband’s home town. Mai saw Santa for the third time this season. She was still not impressed.

With all of the excitement from yesterday, Mai hardly ate a thing. As you all already know if you tune in with me often, she is not the best eater. This morning I wanted to ensure that she had a good breakfast before we headed out for some last minute Christmas shopping. There is one thing that I know about my toddler, she loves to eat anything bite sized. She is a snacker. It is not the same if I cut in to small pieces. It has to be a bite sized morsel on it’s own. She knows the difference.
One of my favorite breakfast foods is French toast. My daughter likes it too…sometimes. It depends on her mood. This morning we had an idea to form our French toast into little balls. Our hopes were that it would make her breakfast more appetizing. Will it work?
French Toast Balls
4 slices of wheat bread
1/2 tsp Cinnamon
1/4 cup Powdered sugar
2 tbsp Brown Sugar
1 tbsp apple juice
One egg
1/2 tsp vanilla
Preheat oven to 350.
Beat egg slightly. Mix in the vanilla & juice.

Cut bread into quarters. You may remove crusts for better shape or choose to keep them on.
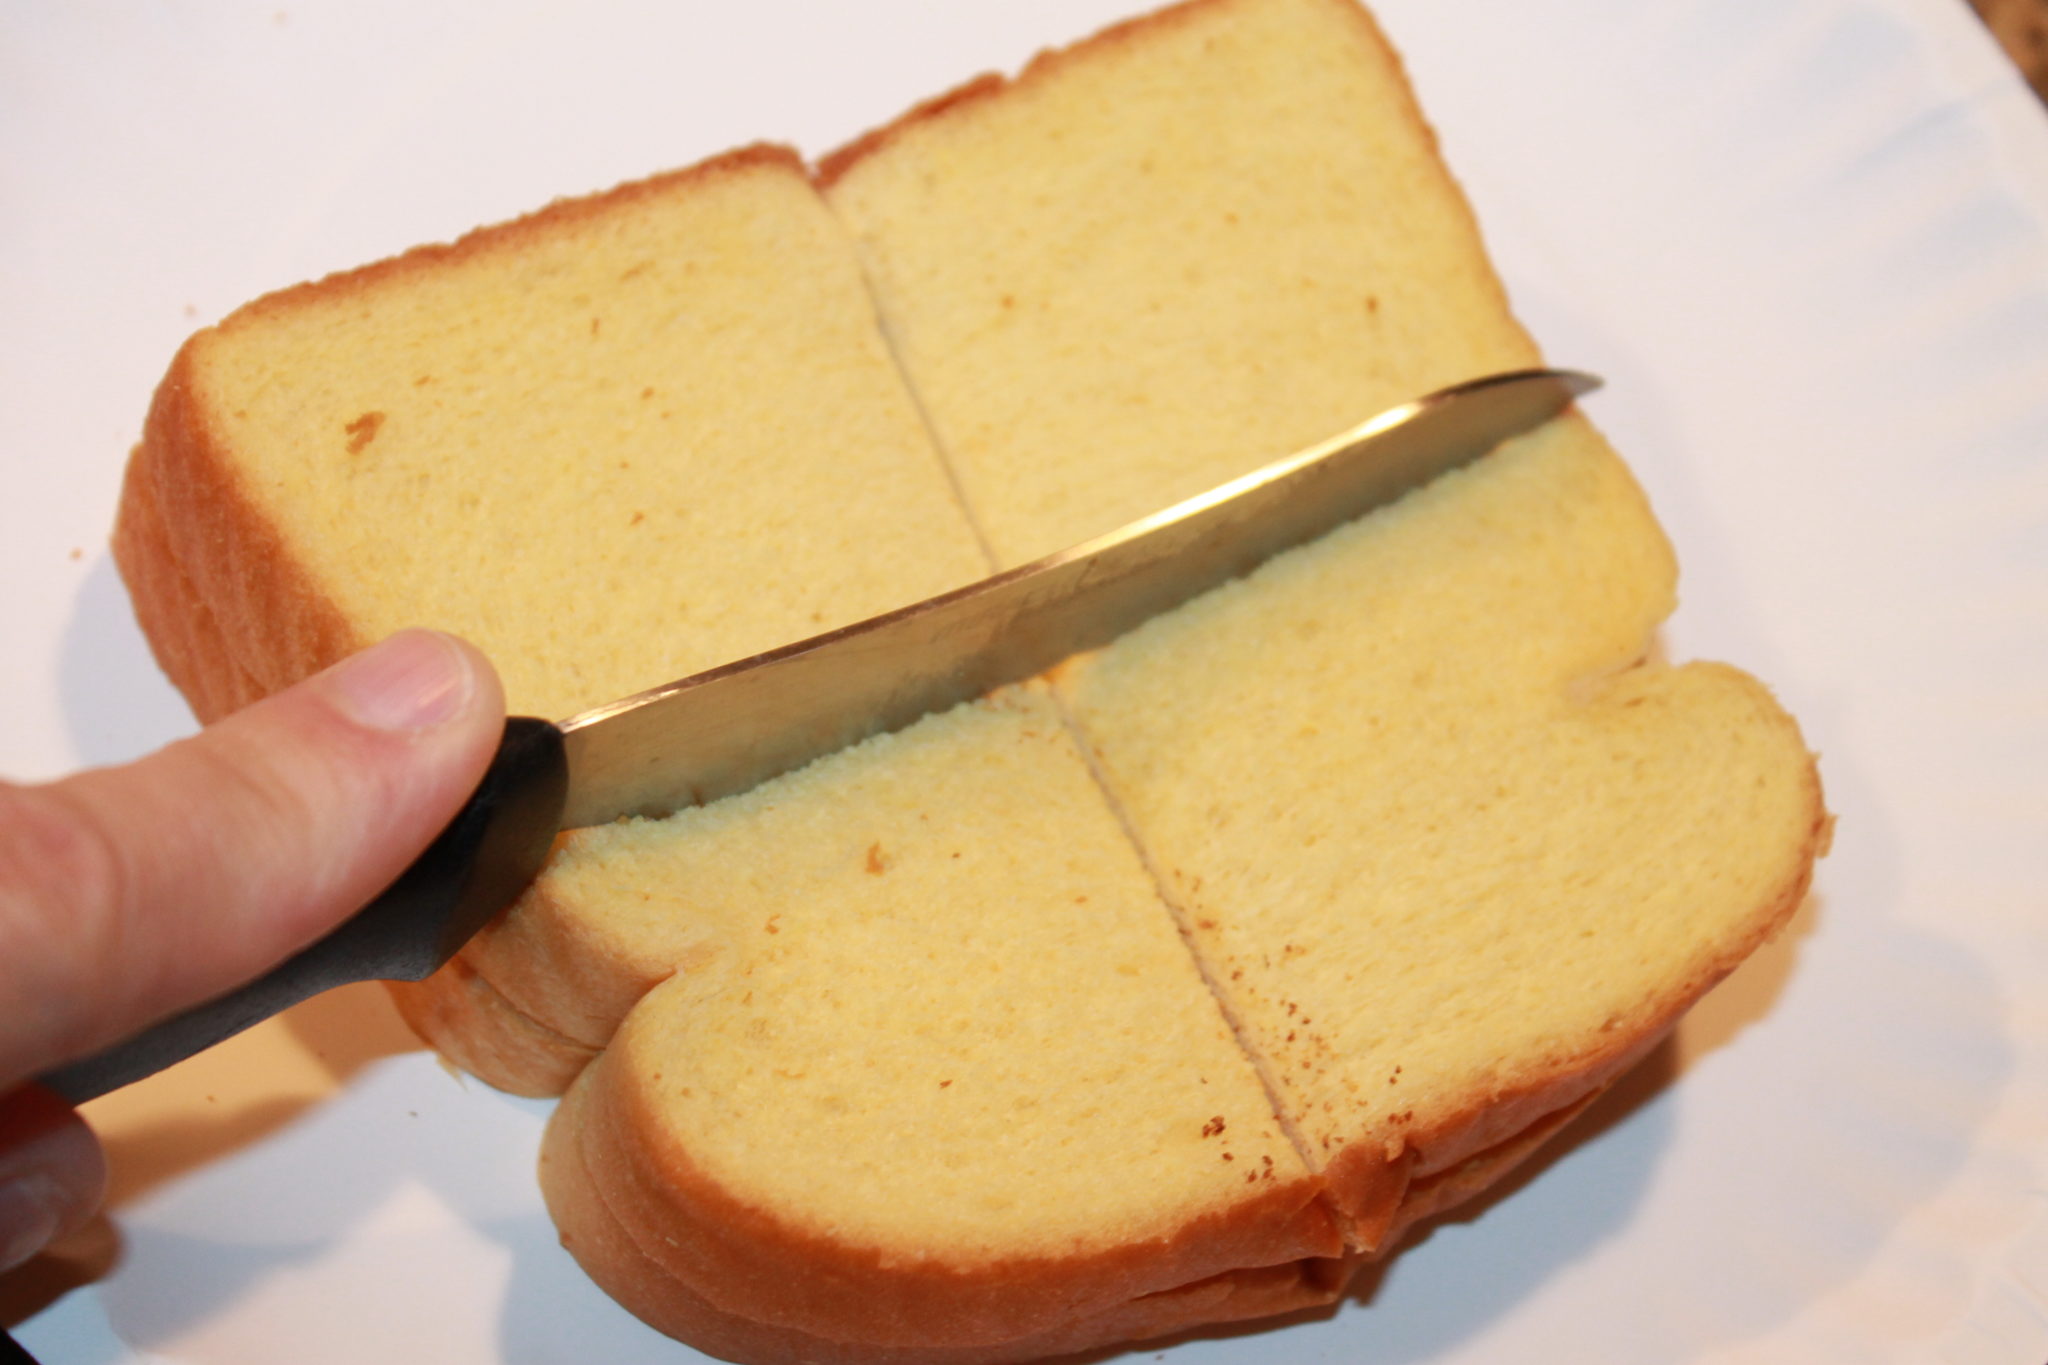
Roll into a bite sized ball with your fingers.
Place balls into beaten egg. Let sit for a couple of minutes to absorb the egg. Scoop the balls out.

Dip into the mixture of cinnamon, brown sugar & powdered sugar.

Place on a greased cooking tray & bake until golden brown & slightly crispy on the outside. This usually only takes a few minutes & cook time varies, so watch them carefully.
Watch your munchkin enjoy.
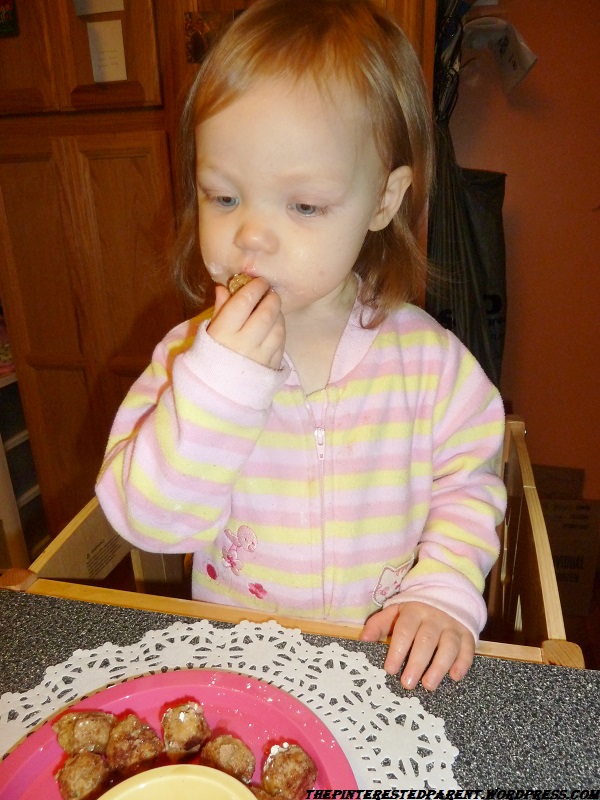
She loved helping mommy make them & she loved eating them too. I even got a “Mmmmmmm” out of her this morning. Try our quick and easy trick for your finicky toddler.
Try it with cinnamon raisin bread too.

Thank you as always for stopping by. Please follow us on Facebook as well.
Related Topics:
http://gwwministry.wordpress.com/2013/12/23/cream-cheese-cinnamon-rolls/
http://beingmrspierce.wordpress.com/2013/12/23/pumpkin-streusel-coffee-cake-new-recipe-103/
http://zosedesigns.wordpress.com/2013/12/23/christmas-pancakes/