

This has been a weird summer. I hate the heat so I am not complaining, but there haven’t been many hot days. We have had quite a few rainy ones lately.. Rainy days in our home mean books & crafting. With August winding down, I am getting ready for my favorite season, fall. Like I said, I am not a fan of the heat, but I love the cool fresh fall air. I love when the leaves change color, the apple cider & I love Halloween.
I bought a boat load of tissue paper a while back that has been sitting around our house for way to long. Today we finally decided to put some of it to good use with our fall themed projects.
Fall Leaves
What you will need:
Tissue paper in greens, yellows, oranges & reds
Pipe cleaners
Cardboard
Glue
Directions:
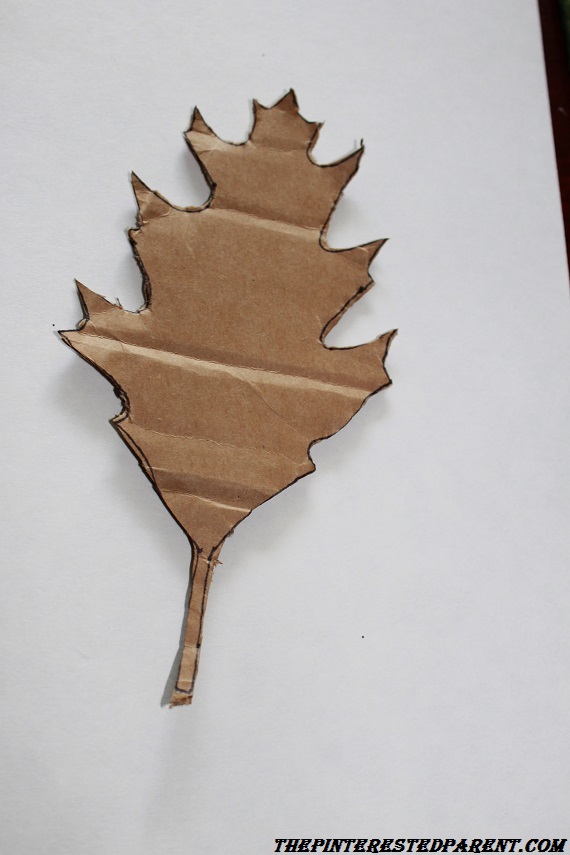
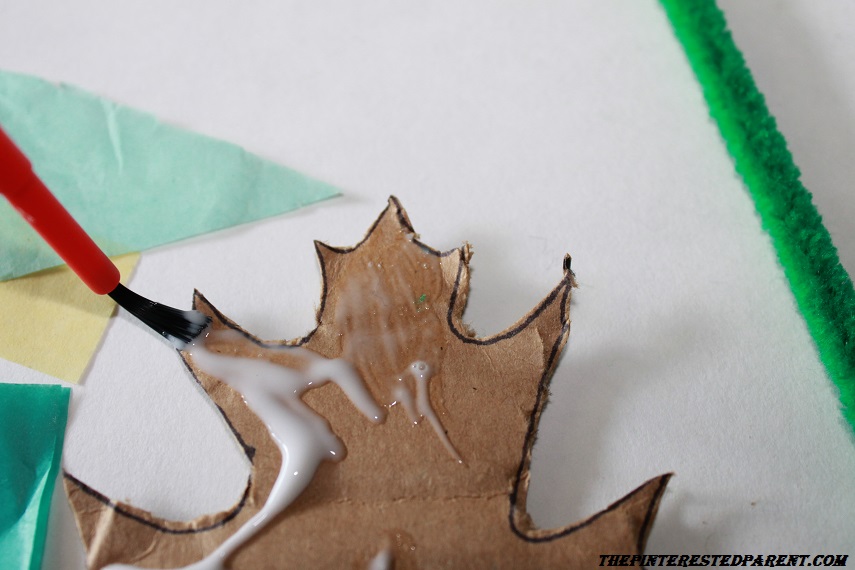
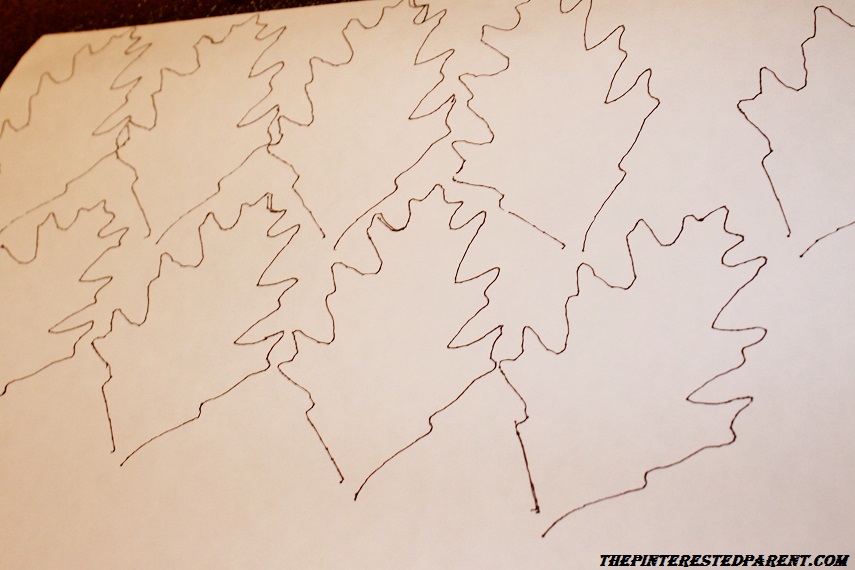
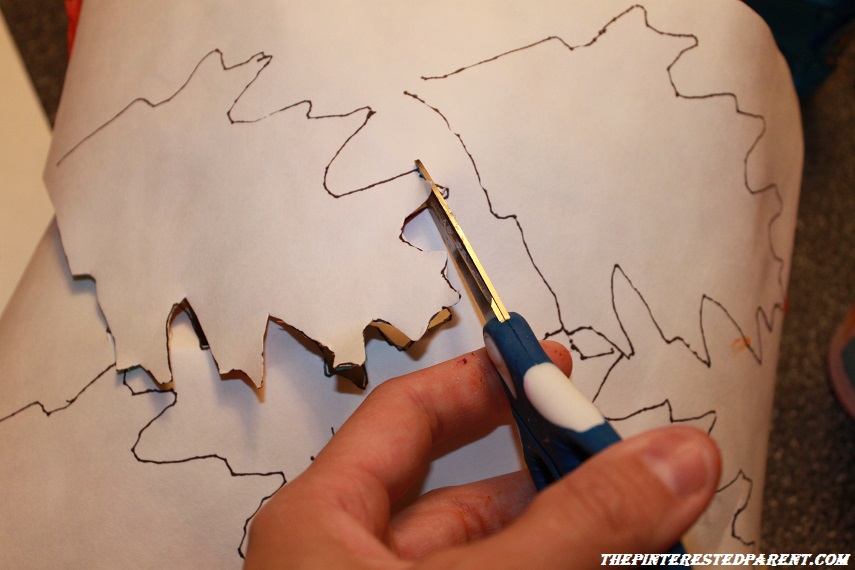
Sketch out different leaf shapes on a piece of cardboard.
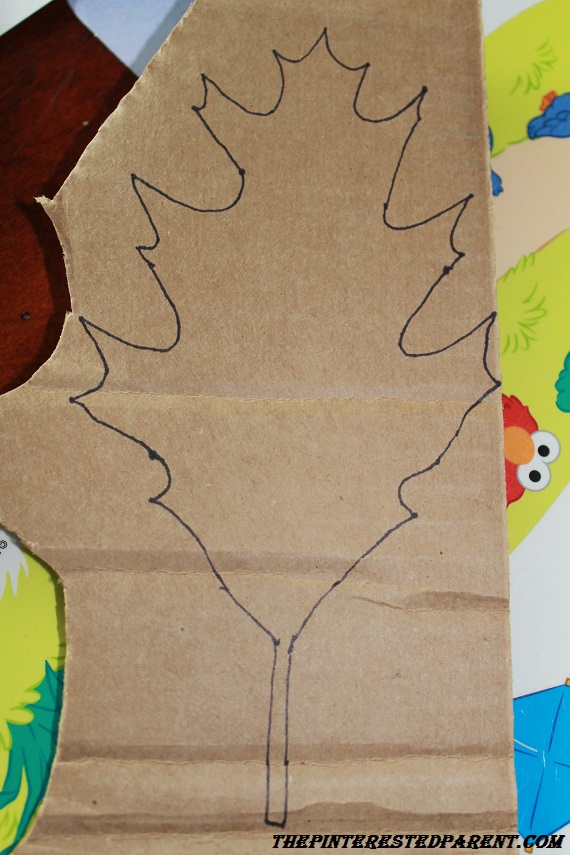
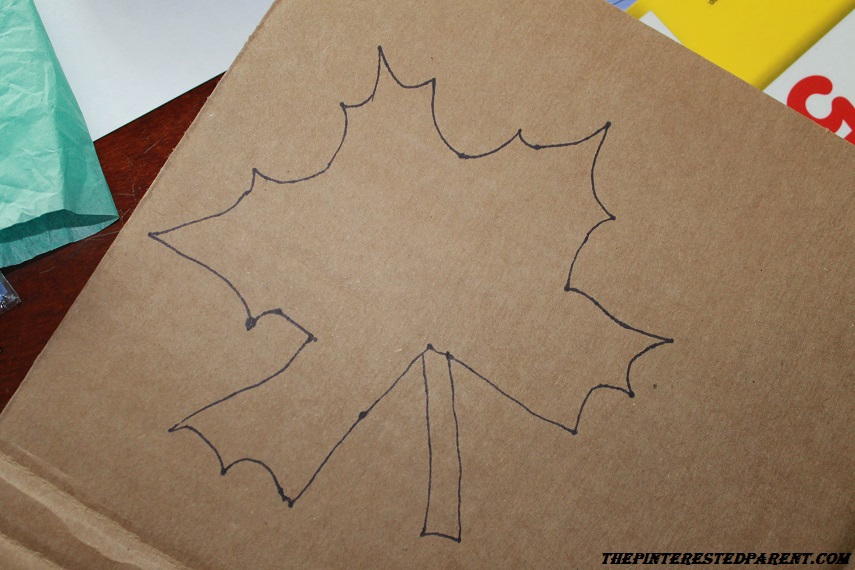
Cut out the leaf shapes.
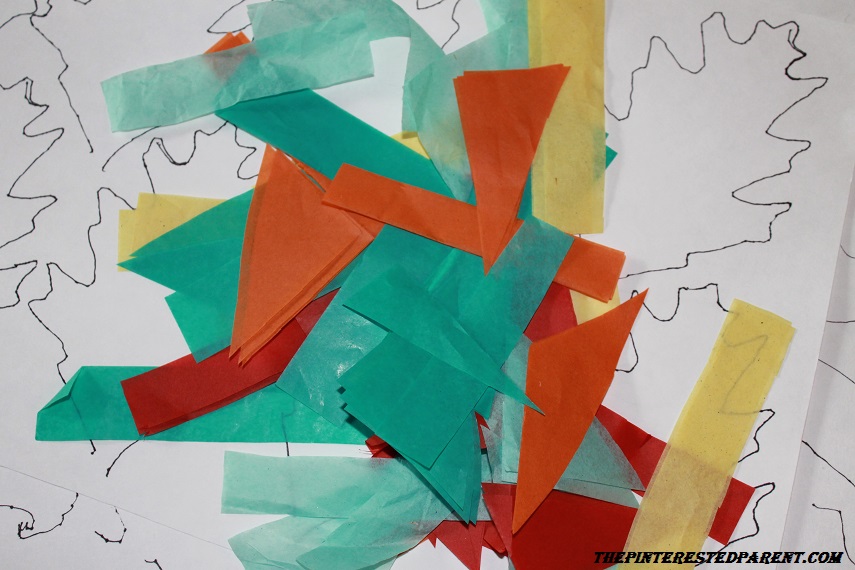
Cut out pieces of tissue paper in each color. Try different shapes pieces.
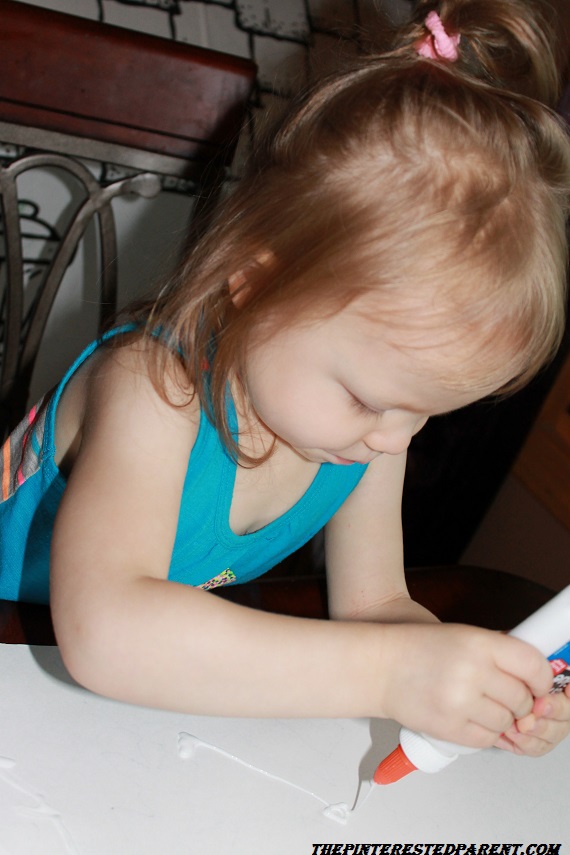
Brush the cardboard with glue.
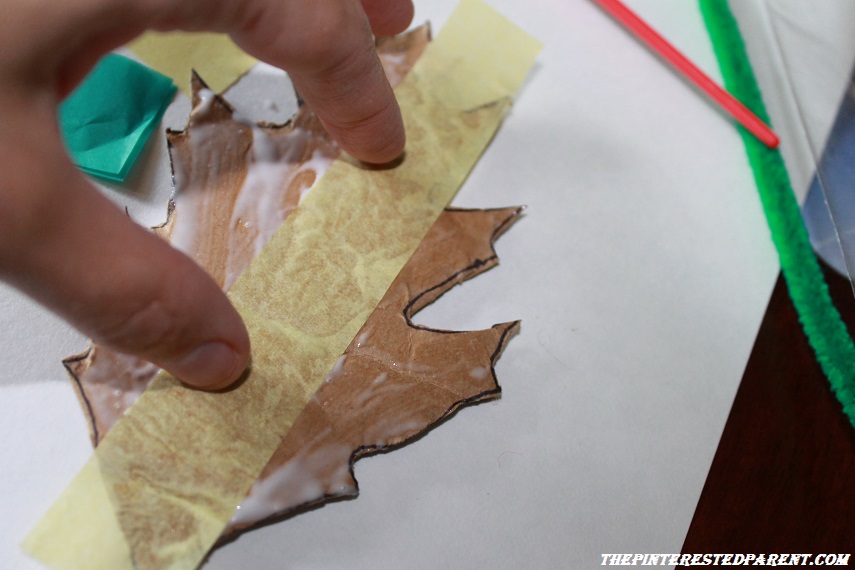
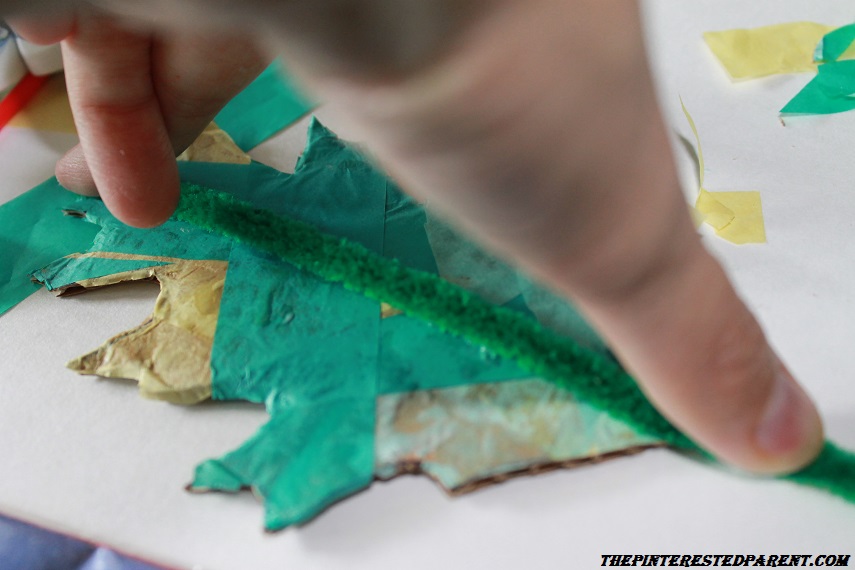
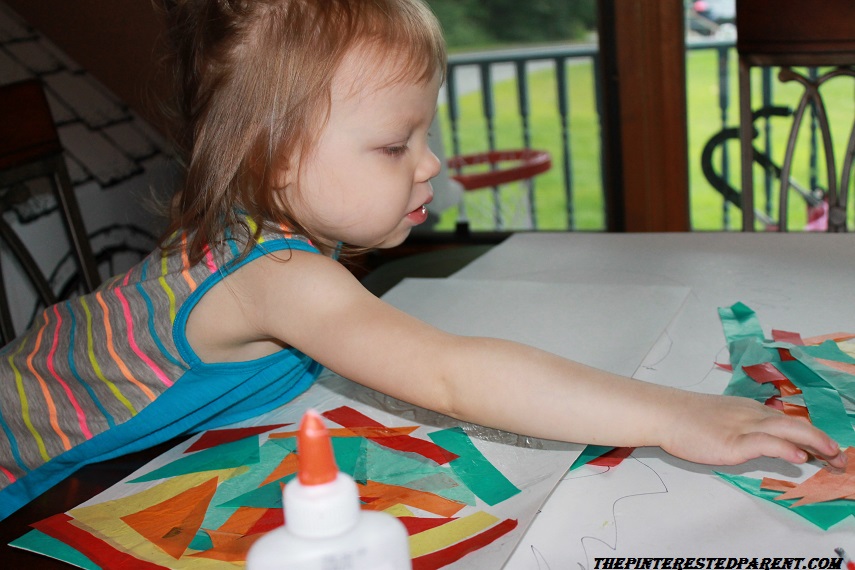
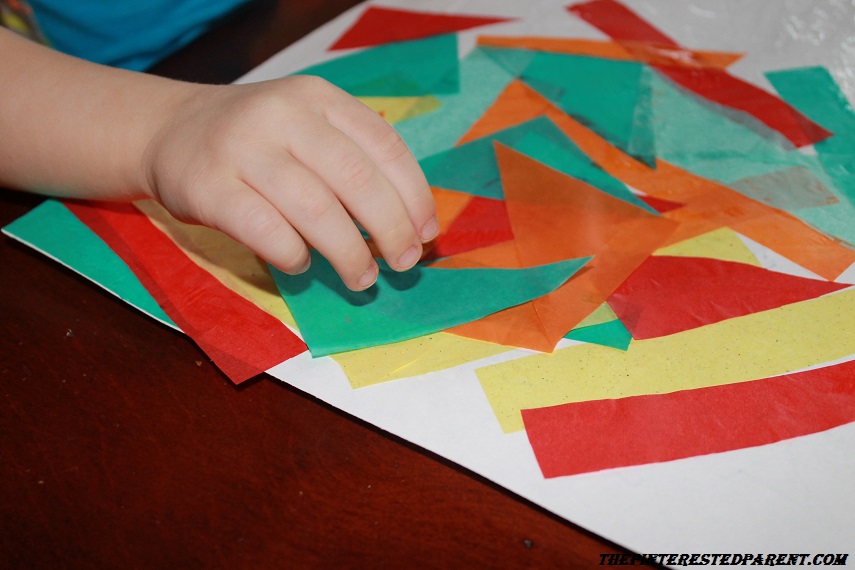
Lay the strips of tissue paper over the cut-outs overlapping until the cardboard is completely covered.

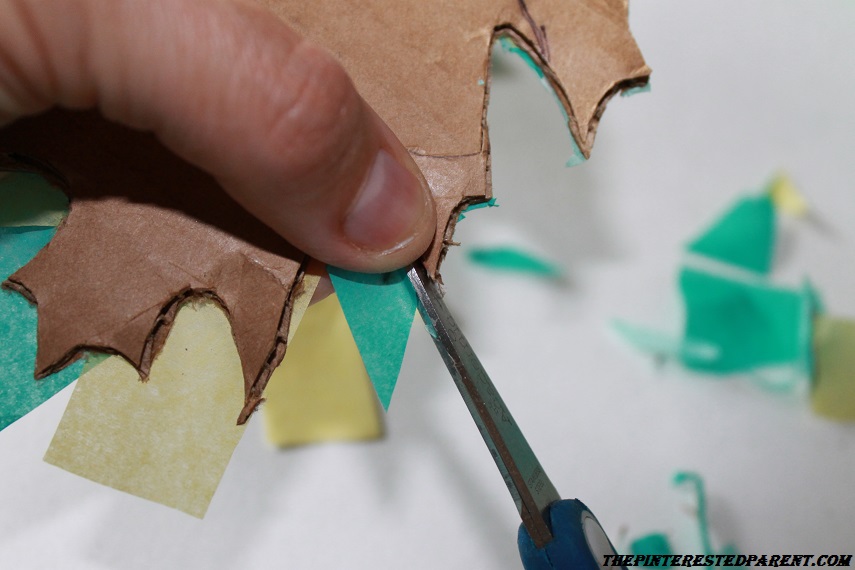
Let dry & then flip over & cut the excess paper hanging over the edges.
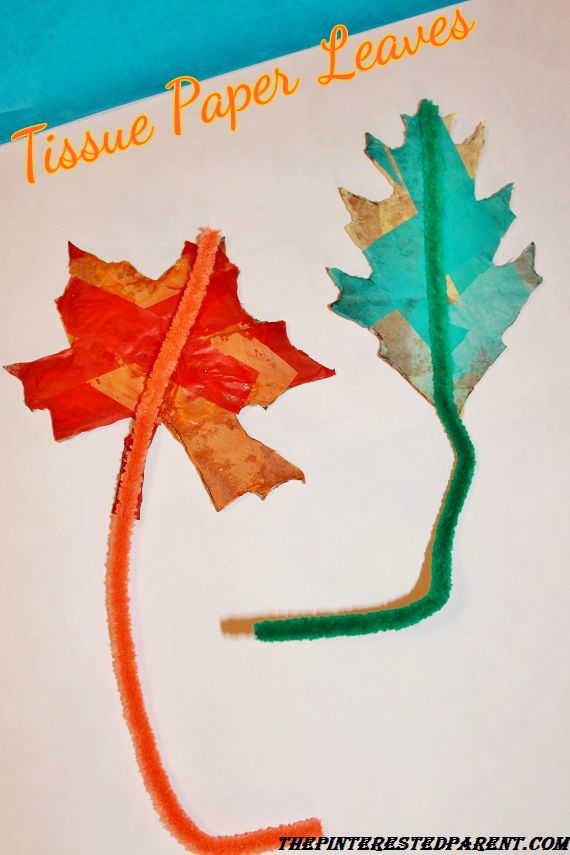
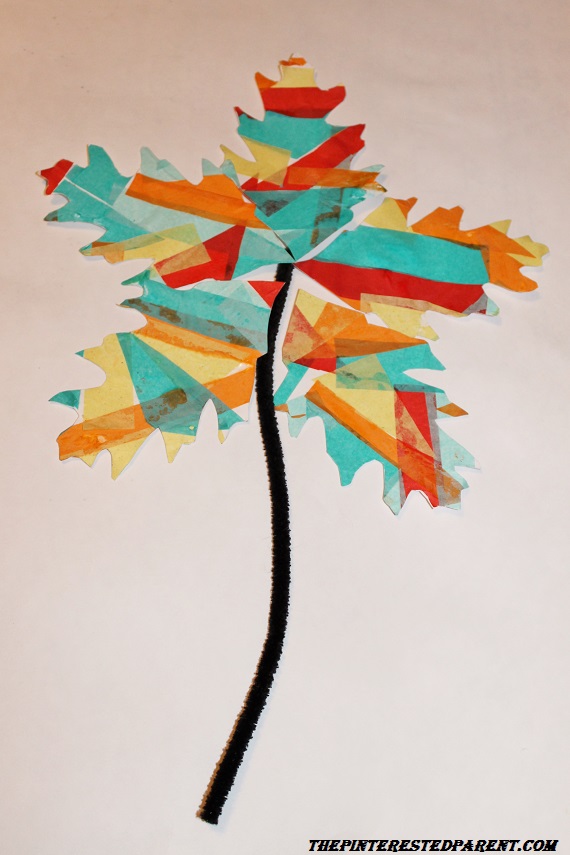
Glue a piece of pipe cleaner down the middle of your leaf to form the vein & stem of your leaf. Weigh down with something until dry.

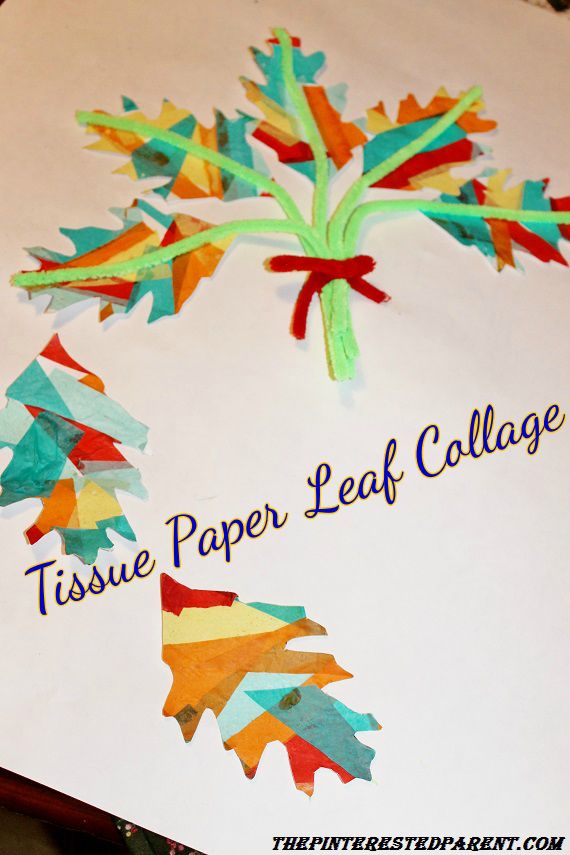
Tissue Paper Leaf Collage
What you will need:
Tissue paper in greens, yellows, oranges & reds
Pipe cleaners
Thick card stock like paper
Glue
Directions:
Draw out your leaves. We drew out 12 in all, 5 for one collage & 7 for the second one.
Cut out more tissue paper same as above.
You may cut out each leaf & layer the same as above or for a variation, flip over the paper & apply the tissue to the clean side, let dry & then flip back over & cut out the leaves.
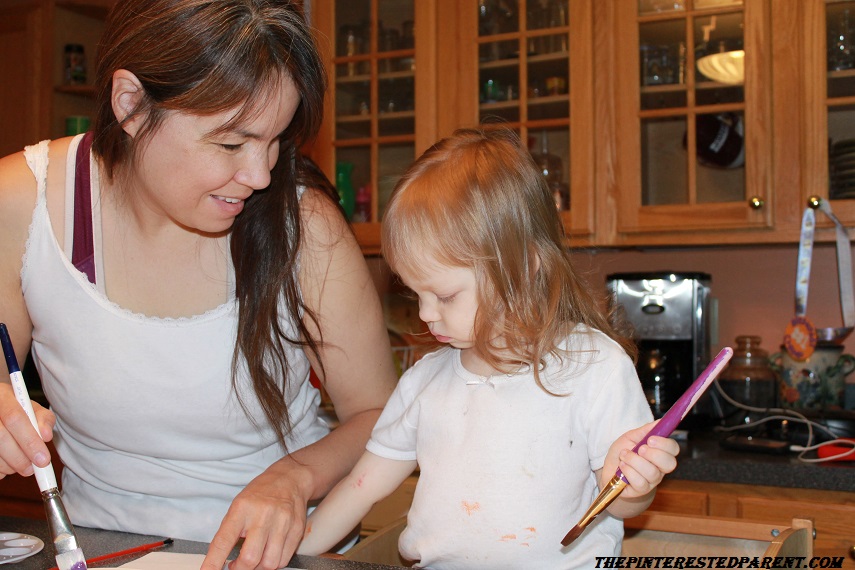
Mai loves playing with glue. I had to stop her from squeezing too much. “Glue & then tissue, Mai.”

We made two different leaf collages. For one we used a single pipe cleaner as a stem with five leaves surrounding it glued down to another piece of card stock.
For the second one we glued pipe cleaners through the middle of the leaves & bunched them together with a pipe cleaner bow & then left a couple of stray falling leaves.
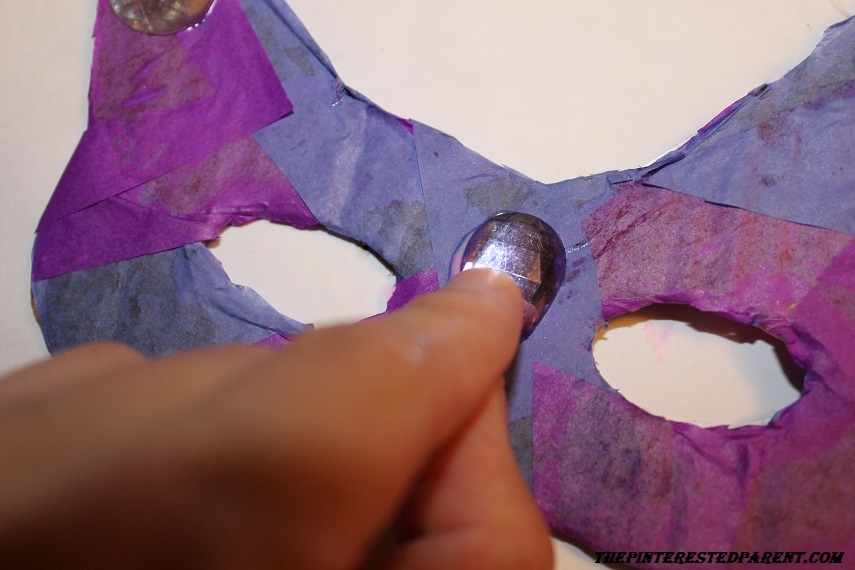
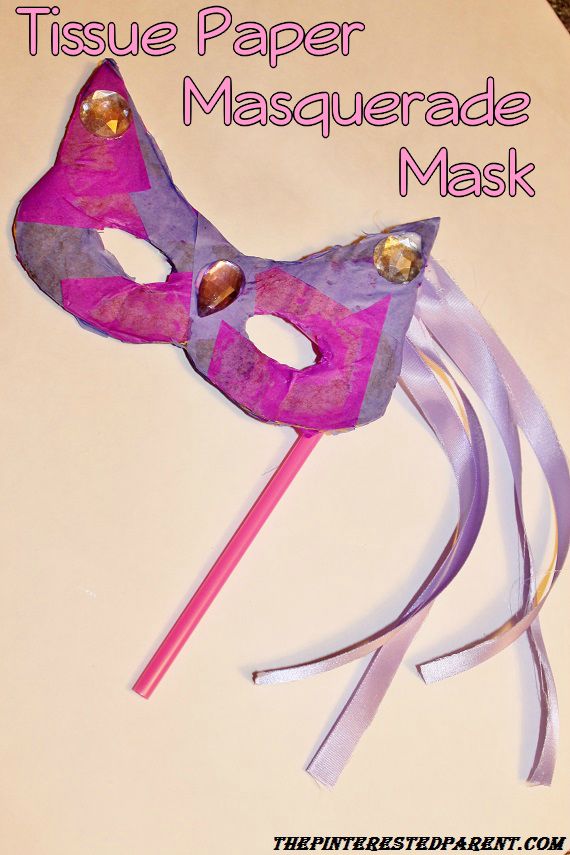
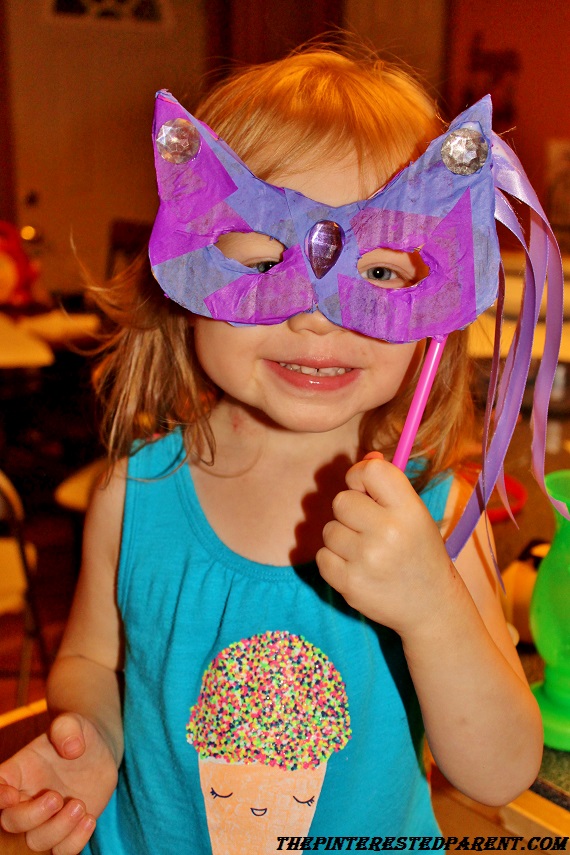
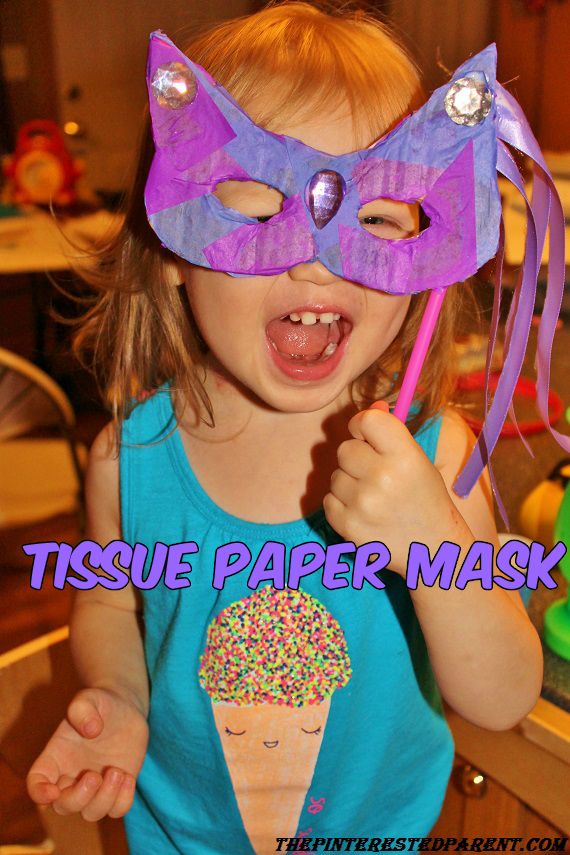
Tissue Paper Masquerade Mask
What you will need:
Tissue paper in the colors of your choice
Cardboard
Gems stones, sequins or glitter
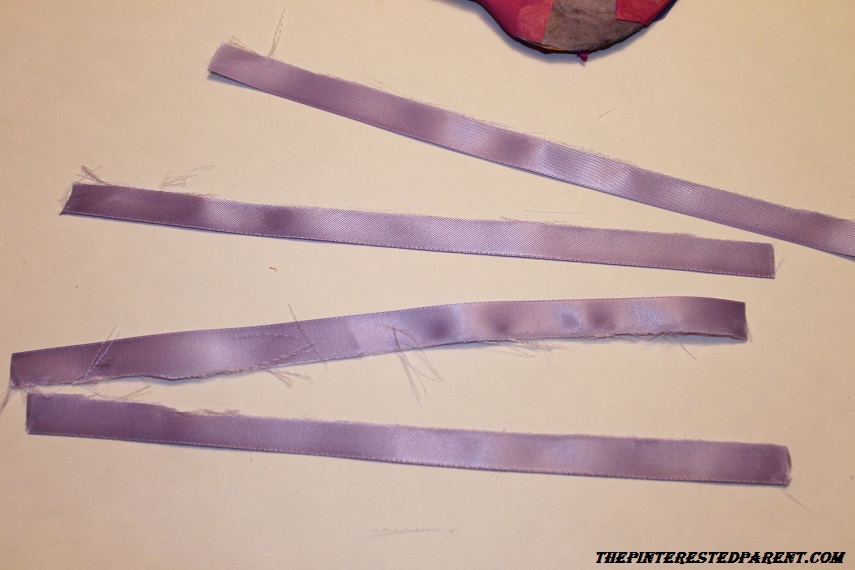
Ribbon
1 bendy straw
Glue
Directions:
Draw out the shape of your mask.

As with above, cut out your shape & your strips of tissue paper & glue the tissue paper until all the card board is covered. Let dry & trim the excess paper from the edge.
Add gems, sequins or glitter to the front of your mask for added embellishment.
Trim 4 strips of ribbon.
On the backside of your mask, glue the ribbon strands side by side at the very top edge (either side is fine.)
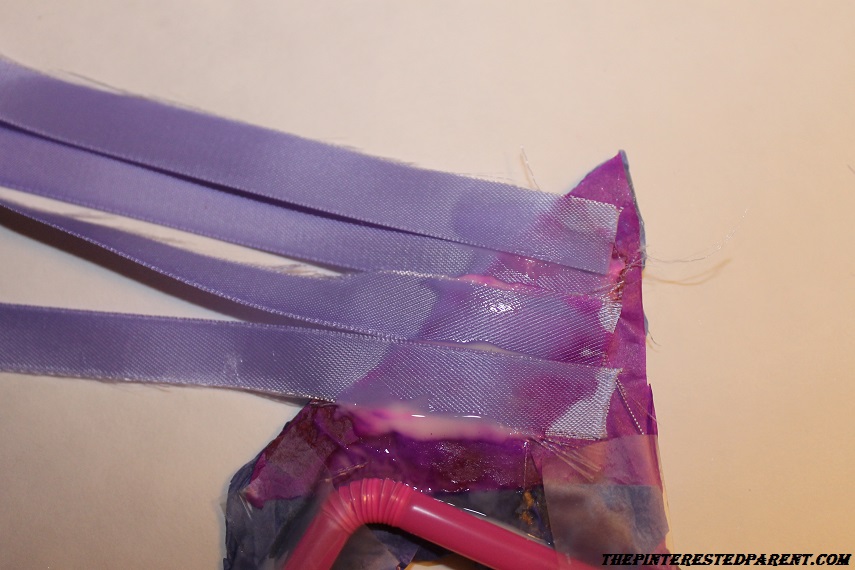
Under your ribbons, glue the bendy straw. Tape in place for extra security.

We can’t wait for the fall. Happy crafting!


11 comments
This is so very cute and must admit not a warm enough summer for me and truly kind of shocked how quickly fall feels like is approaching. But still I too do love Fall and Halloween, too, but still wish summer would not be fading away so quickly to be honest. Definitely conflicted, but loving the crafts you shared and pinning to try with my girls soon 🙂
It was so cold when I woke this morning. I couldn’t believe it. Yuck! Fall is just around the corner.
love the purplle mask
Thank you. My daughter loves it too.
Your daughter is too cute! I love the tissue paper for the crafts also. Awesome idea!
Thank you. My daughter likes anything that means she can squeeze glue.
LOVE!! You always have the best ideas! I, too, am a huge fan of the fall season. 🙂
Great projects! I’ve been trying to do some planning for fall activities lately and I’ll be adding these to the list. Thanks!
Thank you and you are welcome. I have to admit I am excited for fall crafts.
The leaves came out so pretty and I love the idea of the pipe cleaner! The masquerade mask is cool too! Way to re-use some cardboard!
Thank you. They really did look nice and my daughter loves anything that involves glue.