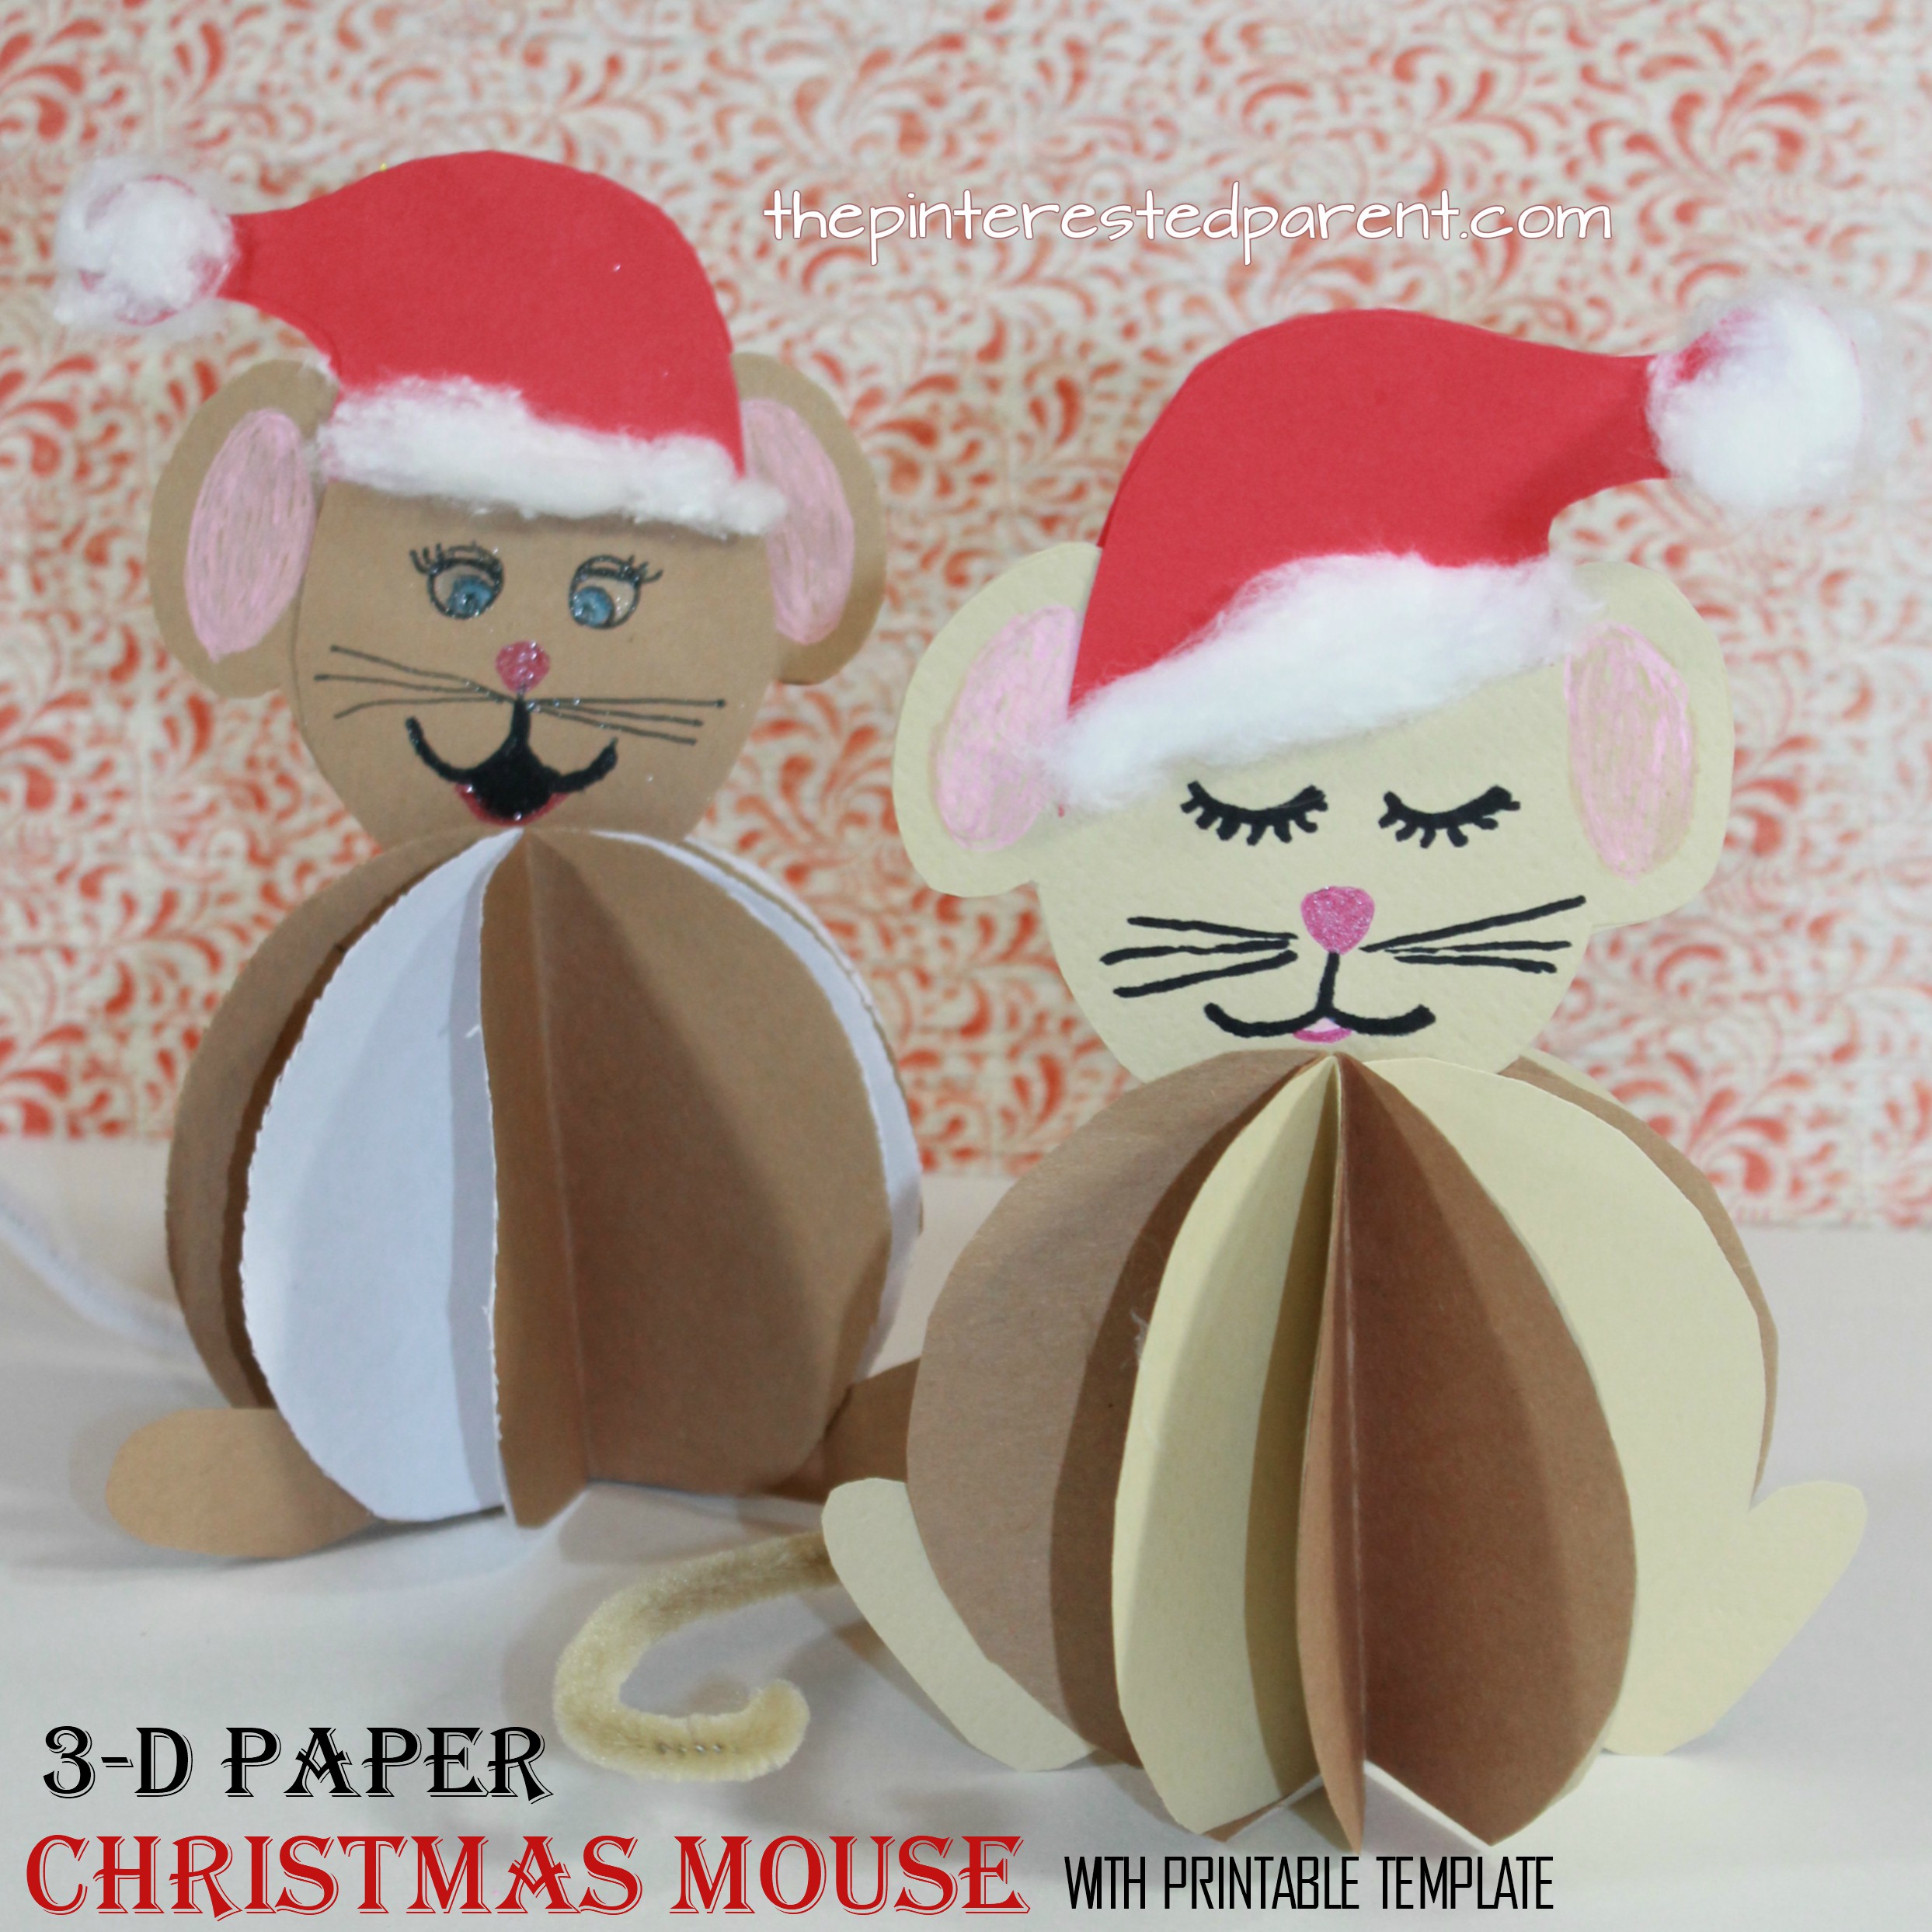
*This post contains affiliate links”
Ever since my daughter made the announcement that this year she was going to be a princess witch for Halloween, she has been talking about all things witch.
“Mama, I need a witch broom.”
“Mama, you need to be a mama witch.”
“Mama, I need a witch hat.”
While we already purchased her witch costume, I thought it would still be fun for us to make a witch hat.
Paper Plate Witch Hat
Paper plate
Paper bowl
Black & yellow construction paper
Black paint
Purple ribbon
Glue (School & hot glue)
Glitter
Directions:
As with all of our paper plate hats in the past, we began this one with a paper plate with the center cut out & a paper bowl.

Place the paper plate over the bowl & glue them together.

Paint the paper plate portion. My daughter opted to paint the whole thing. When you are done, let it dry.

While it dries, form the cone for your hat. Leave a small opening at the tip of your cone.

Roll up a narrow strip of paper, about 8″ long, into a skinny cone & glue, tape of staple in place.

Push the skinny cone through the hole at the top of the bigger cone.

Allow about 6″ to poke out at the top. Squeeze a glue gun into & around the edge of opening to glue the smaller cone into the larger one. (Use caution when using a glue gun. Adult operation is recommended.)

Glue the cone over the top of the bowl & bend the tip of the thin part of the cone.

Glue a ribbon around the hat where the cone & the paper plate meet. Glue it in two sections to prevent bunching.

Cut a yellow square & cut out a smaller square in the middle to form a buckle. Glue it to the ribbon. Cover the seam from the two sections of ribbon.

Squeeze glue all over the hat & sprinkle glitter onto the glue. Let dry & enjoy.


Thank you as always for stopping by. Please follow us on Facebook as well