Tag

diaper

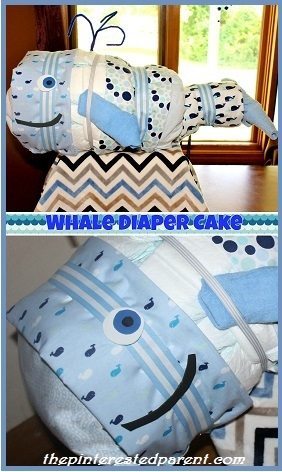
Whale Shaped Diaper Cake

Whale Diaper Cake - Adorable idea for a baby showerThis has been a big year for babies in our family. I just became an auntie for the first time last week & I have a few cousins that are expecting soon as well. I have had and still have quite a few baby showers this year. A couple of months ago I was feeling brave & tried my hand at my first diaper cake.

IMG_2159

I had so much fun making it, that I was feeling brave again. My cousin is expecting a little boy in June. Her nursery has a whale theme, so in keeping with her theme, I decided to make a whale shaped diaper cake.

If you have ever thought of making a diaper cake, it can be a lot of fun, but it requires a little bit of patience & in the case of the whale, the ability to improvise.

What you will need:

A box of diapers (about 150 count)

Receiving blankets

Wash clothes

Paper towel roll core

Ribbon

String or yarn

Foam sheet (to make the face)

Pipe cleaners

Craft sticks

Safety pins

Glue gun

Directions:

Start with an empty paper towel roll. Wrap two rows of diapers side by side around the roll. Overlap the diapers slightly until they go all the way around. Secure in place with string or yarn. We used yarn.

IMG_4165

Wrap diapers around one end of the roll covering the hole & rounding the end. Layer them in different directions to achieve this. Secure with yarn. Secure with yarn after each layer.

IMG_4166

Wrap another layer of diaper around the first layer of diapers. Leave the rounded portion peeking out.

IMG_4167

IMG_4168

Bend another paper towel roll & insert and glue into the existing roll. Be careful that you do not get glue on the diapers.

IMG_4170

Layer diapers around the new tube. Make this layer of diapers thinner than the others. Grab another paper towel tube & cut a 1/4 of it & glue & insert into the other. Place another smaller layer of diapers adjacent to the last layer.

IMG_4172

Our tail was formed from craft sticks. Glue 2 craft sticks in a wide “v’ shape to the top of 2 more craft sticks. Insert & glue the bottom sticks into the tube so that the “v’ shape is sticking out & let dry. Add another small layer of diapers.

IMG_4175

Add another layer of diapers down the center of the front portion of your whale, so that it covers the divide between the first two diaper layers. Do this all the way around. This will help round out the head more.

IMG_4171

Add another layer of diapers now running horizontally to the same front portion. Do this all the way around.

IMG_4173

Once you have achieved the whale shape that you want, you can begin decorating. Mai informed me that this looked like a plane, not a whale. I guess this would work as a plane as well. (Please excuse the messy work space.)

IMG_4176

Wrap the whale’s tail with a folded receiving blanket. Secure into place with yarn. Wrap a ribbon around the yarn. Secure it with a safety pin it at the bottom. Make sure not to pin the diapers.

IMG_4178

Wrap as many more blankets as you would like in the same fashion. Fold a couple of washcloths to form a fin. Tuck into an existing ribbon or add another ribbon. Form another fin for the other side. Wrap washcloths around the craft sticks to form the tail.

IMG_4179

Cut eyes and a mouth out of foam & glue them to the ribbon. Be careful not to drip glue on the blankets or diapers. Finish the whale off with a pipe cleaner water-spout.

IMG_4207

The whale was a huge success. My cousin loved it.

IMG_4278

Thank you as always for stopping by. Please follow us on Facebook as well.