Tag

cake

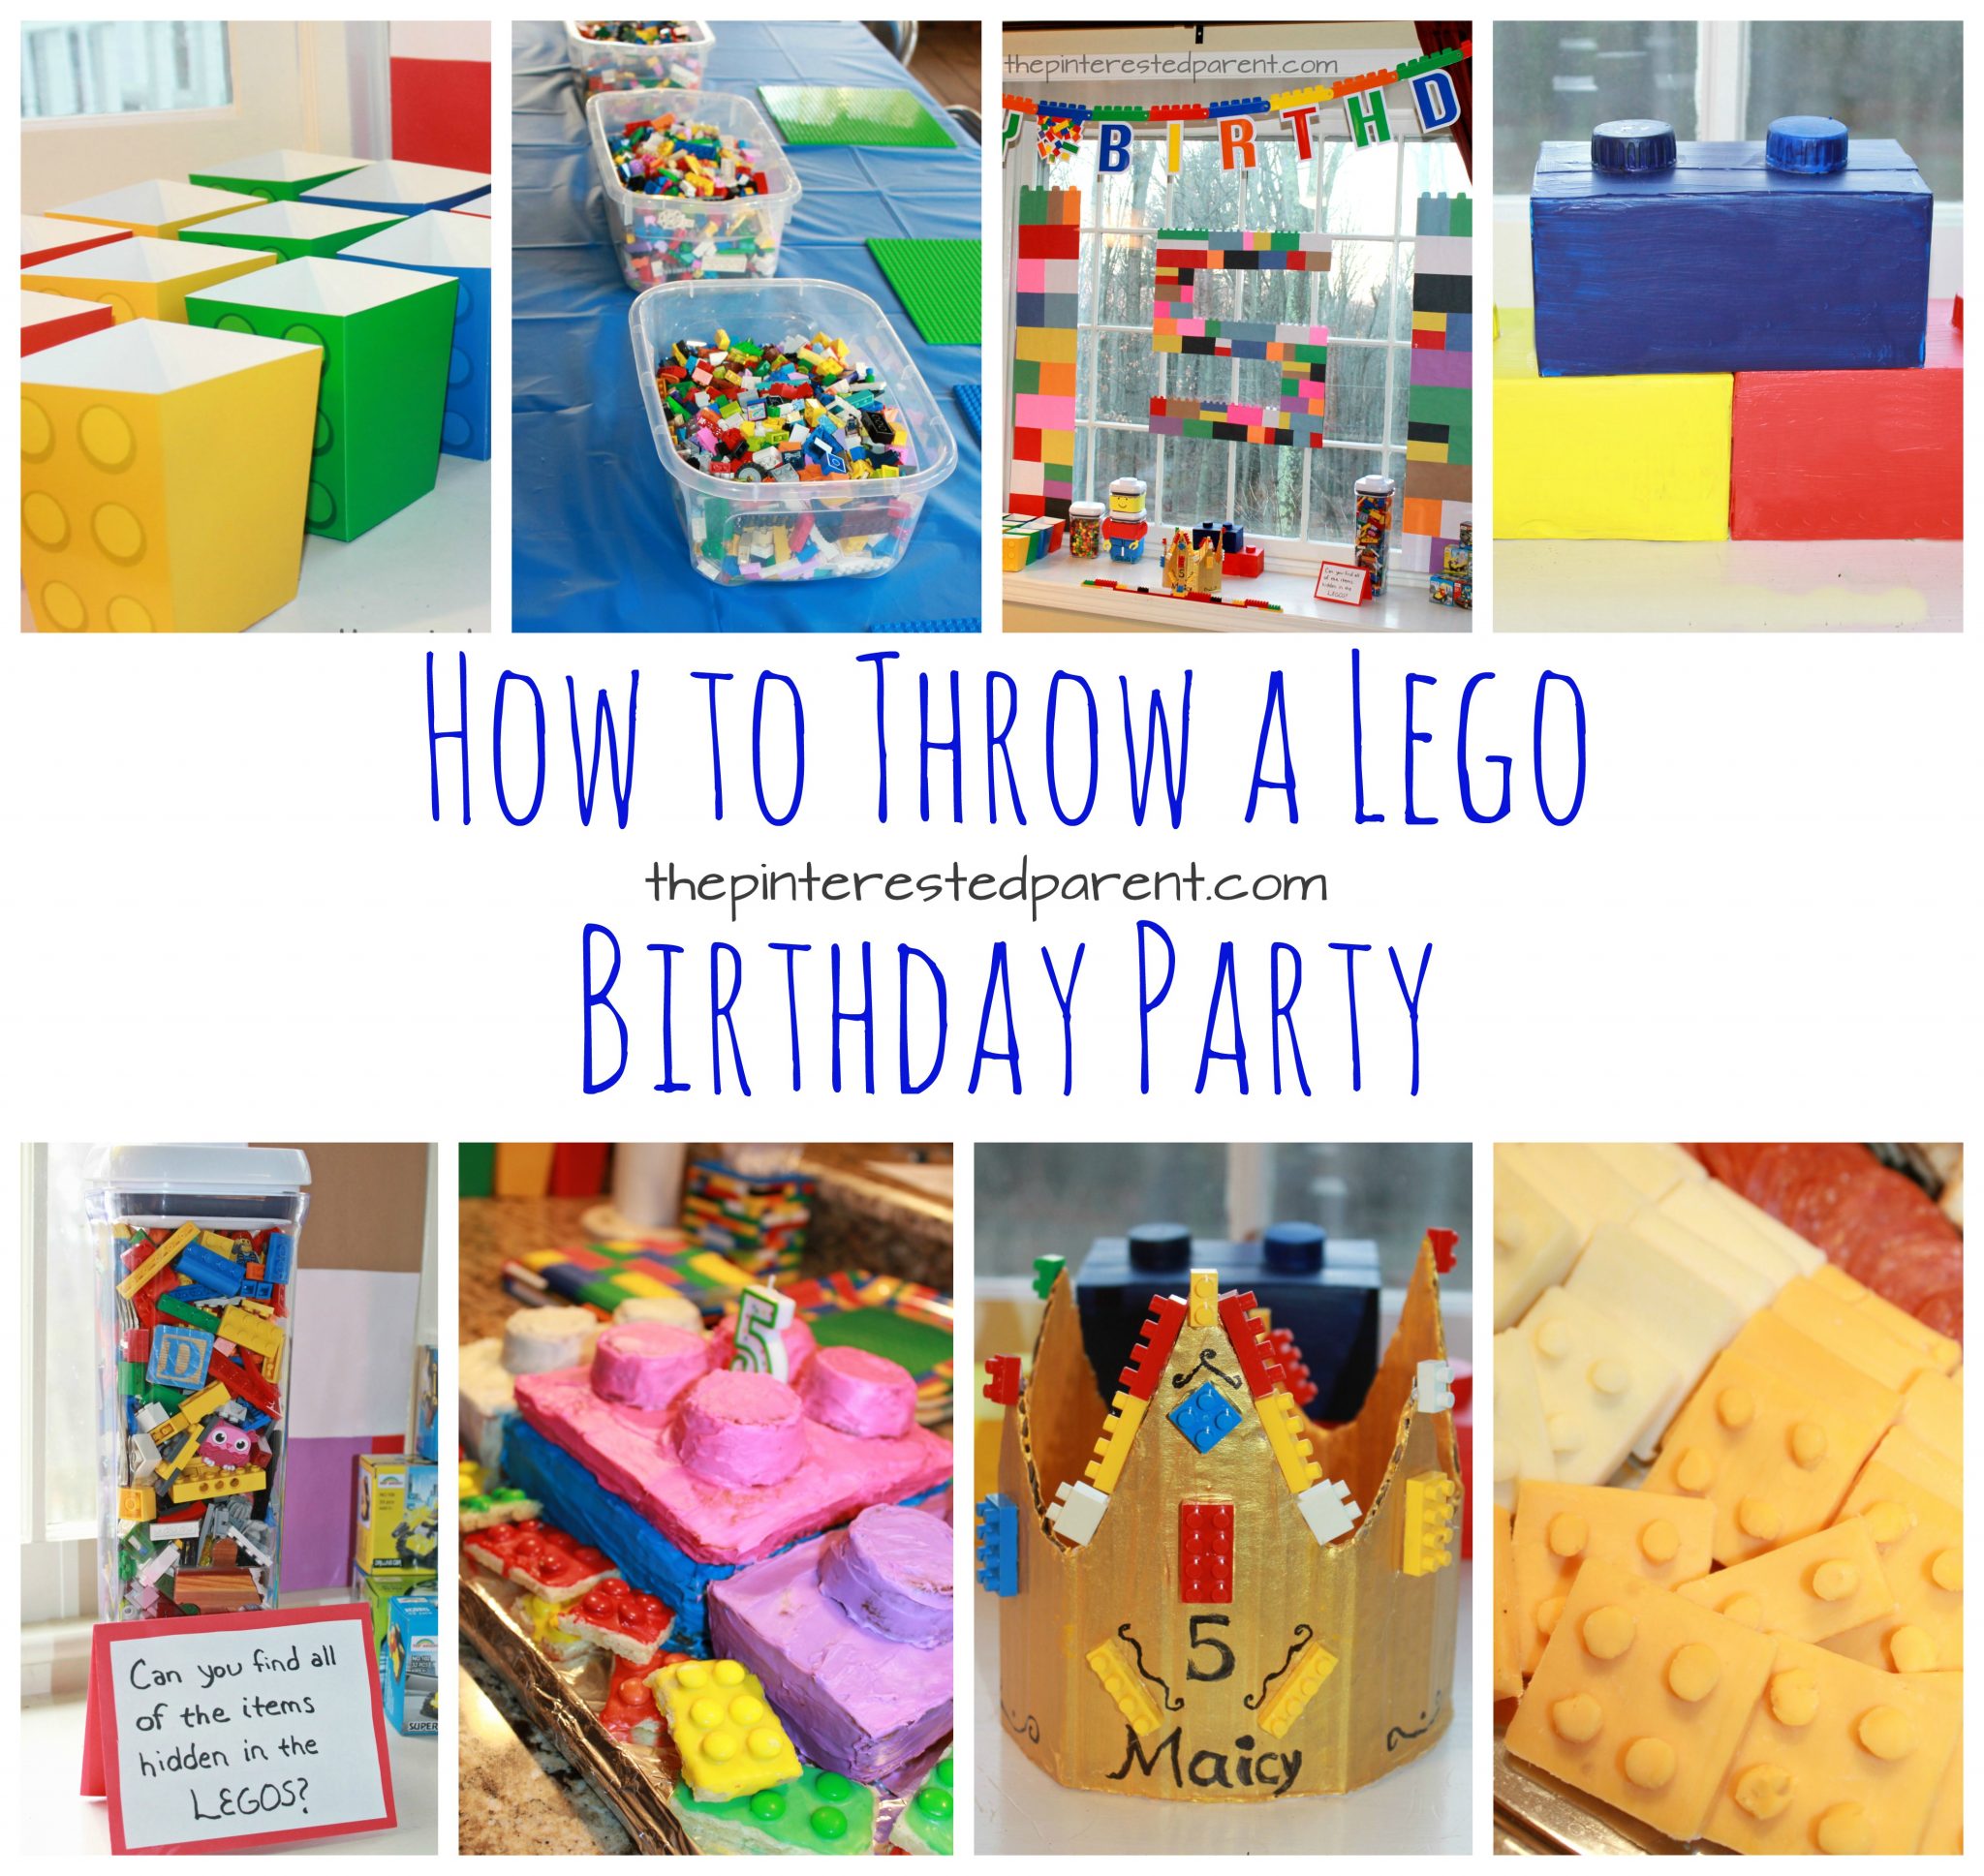
Great Lego Party Ideas for the Kids

Time has flown by so quickly. My little girl turned 5 last week and I can hardly believe it. A few months ago, I asked my daughter what kind of party she wanted. She asked for a Lego party and an art party. I loved the idea of having both. Both would be wonderfully interactive for my daughter and all of her guests.Great Lego themed birthday party ideas for kids. decorations, food and activities. Kid's

*The Pinterested Parent is a participant in the Amazon Services LLC Associates Program, an affiliate advertising program designed to provide a means for sites to earn advertising fees by advertising and linking to Amazon.com. In addition, text and image links in this post may be affiliate/referral links, which means we may be compensated if you make a purchase after clicking through these particular links* See full disclosure policy.

I have to admit, I love throwing parties, especially theme parties. I knew that my daughter and I would have fun with this one.

Continue Reading…

Whale Shaped Diaper Cake

Whale Diaper Cake - Adorable idea for a baby showerThis has been a big year for babies in our family. I just became an auntie for the first time last week & I have a few cousins that are expecting soon as well. I have had and still have quite a few baby showers this year. A couple of months ago I was feeling brave & tried my hand at my first diaper cake.

IMG_2159

I had so much fun making it, that I was feeling brave again. My cousin is expecting a little boy in June. Her nursery has a whale theme, so in keeping with her theme, I decided to make a whale shaped diaper cake.

If you have ever thought of making a diaper cake, it can be a lot of fun, but it requires a little bit of patience & in the case of the whale, the ability to improvise.

What you will need:

A box of diapers (about 150 count)

Receiving blankets

Wash clothes

Paper towel roll core

Ribbon

String or yarn

Foam sheet (to make the face)

Pipe cleaners

Craft sticks

Safety pins

Glue gun

Directions:

Start with an empty paper towel roll. Wrap two rows of diapers side by side around the roll. Overlap the diapers slightly until they go all the way around. Secure in place with string or yarn. We used yarn.

IMG_4165

Wrap diapers around one end of the roll covering the hole & rounding the end. Layer them in different directions to achieve this. Secure with yarn. Secure with yarn after each layer.

IMG_4166

Wrap another layer of diaper around the first layer of diapers. Leave the rounded portion peeking out.

IMG_4167

IMG_4168

Bend another paper towel roll & insert and glue into the existing roll. Be careful that you do not get glue on the diapers.

IMG_4170

Layer diapers around the new tube. Make this layer of diapers thinner than the others. Grab another paper towel tube & cut a 1/4 of it & glue & insert into the other. Place another smaller layer of diapers adjacent to the last layer.

IMG_4172

Our tail was formed from craft sticks. Glue 2 craft sticks in a wide “v’ shape to the top of 2 more craft sticks. Insert & glue the bottom sticks into the tube so that the “v’ shape is sticking out & let dry. Add another small layer of diapers.

IMG_4175

Add another layer of diapers down the center of the front portion of your whale, so that it covers the divide between the first two diaper layers. Do this all the way around. This will help round out the head more.

IMG_4171

Add another layer of diapers now running horizontally to the same front portion. Do this all the way around.

IMG_4173

Once you have achieved the whale shape that you want, you can begin decorating. Mai informed me that this looked like a plane, not a whale. I guess this would work as a plane as well. (Please excuse the messy work space.)

IMG_4176

Wrap the whale’s tail with a folded receiving blanket. Secure into place with yarn. Wrap a ribbon around the yarn. Secure it with a safety pin it at the bottom. Make sure not to pin the diapers.

IMG_4178

Wrap as many more blankets as you would like in the same fashion. Fold a couple of washcloths to form a fin. Tuck into an existing ribbon or add another ribbon. Form another fin for the other side. Wrap washcloths around the craft sticks to form the tail.

IMG_4179

Cut eyes and a mouth out of foam & glue them to the ribbon. Be careful not to drip glue on the blankets or diapers. Finish the whale off with a pipe cleaner water-spout.

IMG_4207

The whale was a huge success. My cousin loved it.

IMG_4278

Thank you as always for stopping by. Please follow us on Facebook as well.

Felt Birthday Cake For Toddler Play

IMG_50731

Our daughter is a fan of the television. I am not a fan of her watching television, but still we do let her watch videos & toddler appropriate programming in moderation. She does not like it when we shut off the TV. She is a smart cookie though & knows how to work her family.
Daddy: “Mai, we have to shut of the TV.”

Mai: “How bout, we watch Patriots.”

She knows her daddy’s weakness.

She also knows her nana’s. “Nana, do you want to watch Cooking Channel?

Mai enjoys watching cooking with her nana. She also loves helping in the kitchen and pretend cooking in her play kitchen.

IMG_3987

Her favorite pretend food to make is cake. She makes cakes out of Play-doh. She stacks her stacking cups to make tiered cakes & then decorates them with the cherries from her Hi Ho Cherrio game. There is a learning exercise on ABC Mouse that allows you to decorate cakes & she adores this. She will draw with her imaginary icing & place flowers & fruit all over her virtual cake.

To help inspire our future little cake boss to continue to make tasty treats, we came up with this felt birthday cake for her to decorate.

What you will need:

A medium sized plain cardboard hat box

Assorted colors of felt sheets

Yarn

Craft pom poms

Elmer’s glue

Glue Gun

Scissors

Pen

Directions:

Start with a medium sized plain hat box. You can purchase on of these at a craft store for only a couple of dollars.
Start with a medium sized plain hat box. You can purchase one of these at a craft store for only a couple of dollars.
Remove the top & trace out the outline of the top on a felt color of your choosing & then cut it out.
Measure out and mark the felt to cover the side of your box top as well.
Using Elmer's glue, glue down the top & sides. The Elmer's glue will allow the felt to dry flat & smooth.
Using Elmer’s glue, glue down the top & sides. The Elmer’s glue will allow the felt to dry flat & smooth.
To make my icing edge, I braided 3 long strands of yarn & used the hot glue gun to glue down along the edge of the box top.
Cut and glue felt to cover the bottom half of the hat box as well. Allow to dry before proceeding.
Cut out colored felt strips about a 1/2 inch thick. Cut using a waving pattern on one side.
Roll the strip to form your cake flowers.
Glue the flowers in place using a glue gun.
To form a strawberry, cut out two heart shapes. Dot the heart shapes with a green marker to add seeds.
Place a craft pom pom in the center of one of the heart shapes. Add hot glue from the glue gun around the edges & place the other heart over it, dotted side facing out. Press the edge together all the way around . Cut  out a small star shape in green & glue over the top center of the strawberry.
Place a craft pom pom in the center of one of the heart shapes. Add hot glue from the glue gun around the edges & place the other heart over it, dotted side facing out. Press the edge together all the way around. Cut out a small star shape in green & glue over the top center of the strawberry.
To make a cherry, I just used a red pom pom & added a green felt piece for the stem.

Cut out letters & numbers. Make as many different fruits & flowers as you like. Let your little baker go to work decorating their cake.

IMG_5074

IMG_5067 IMG_5066 IMG_5084

Store cake pieces inside the box.

IMG_5081

feltbirthdaycake