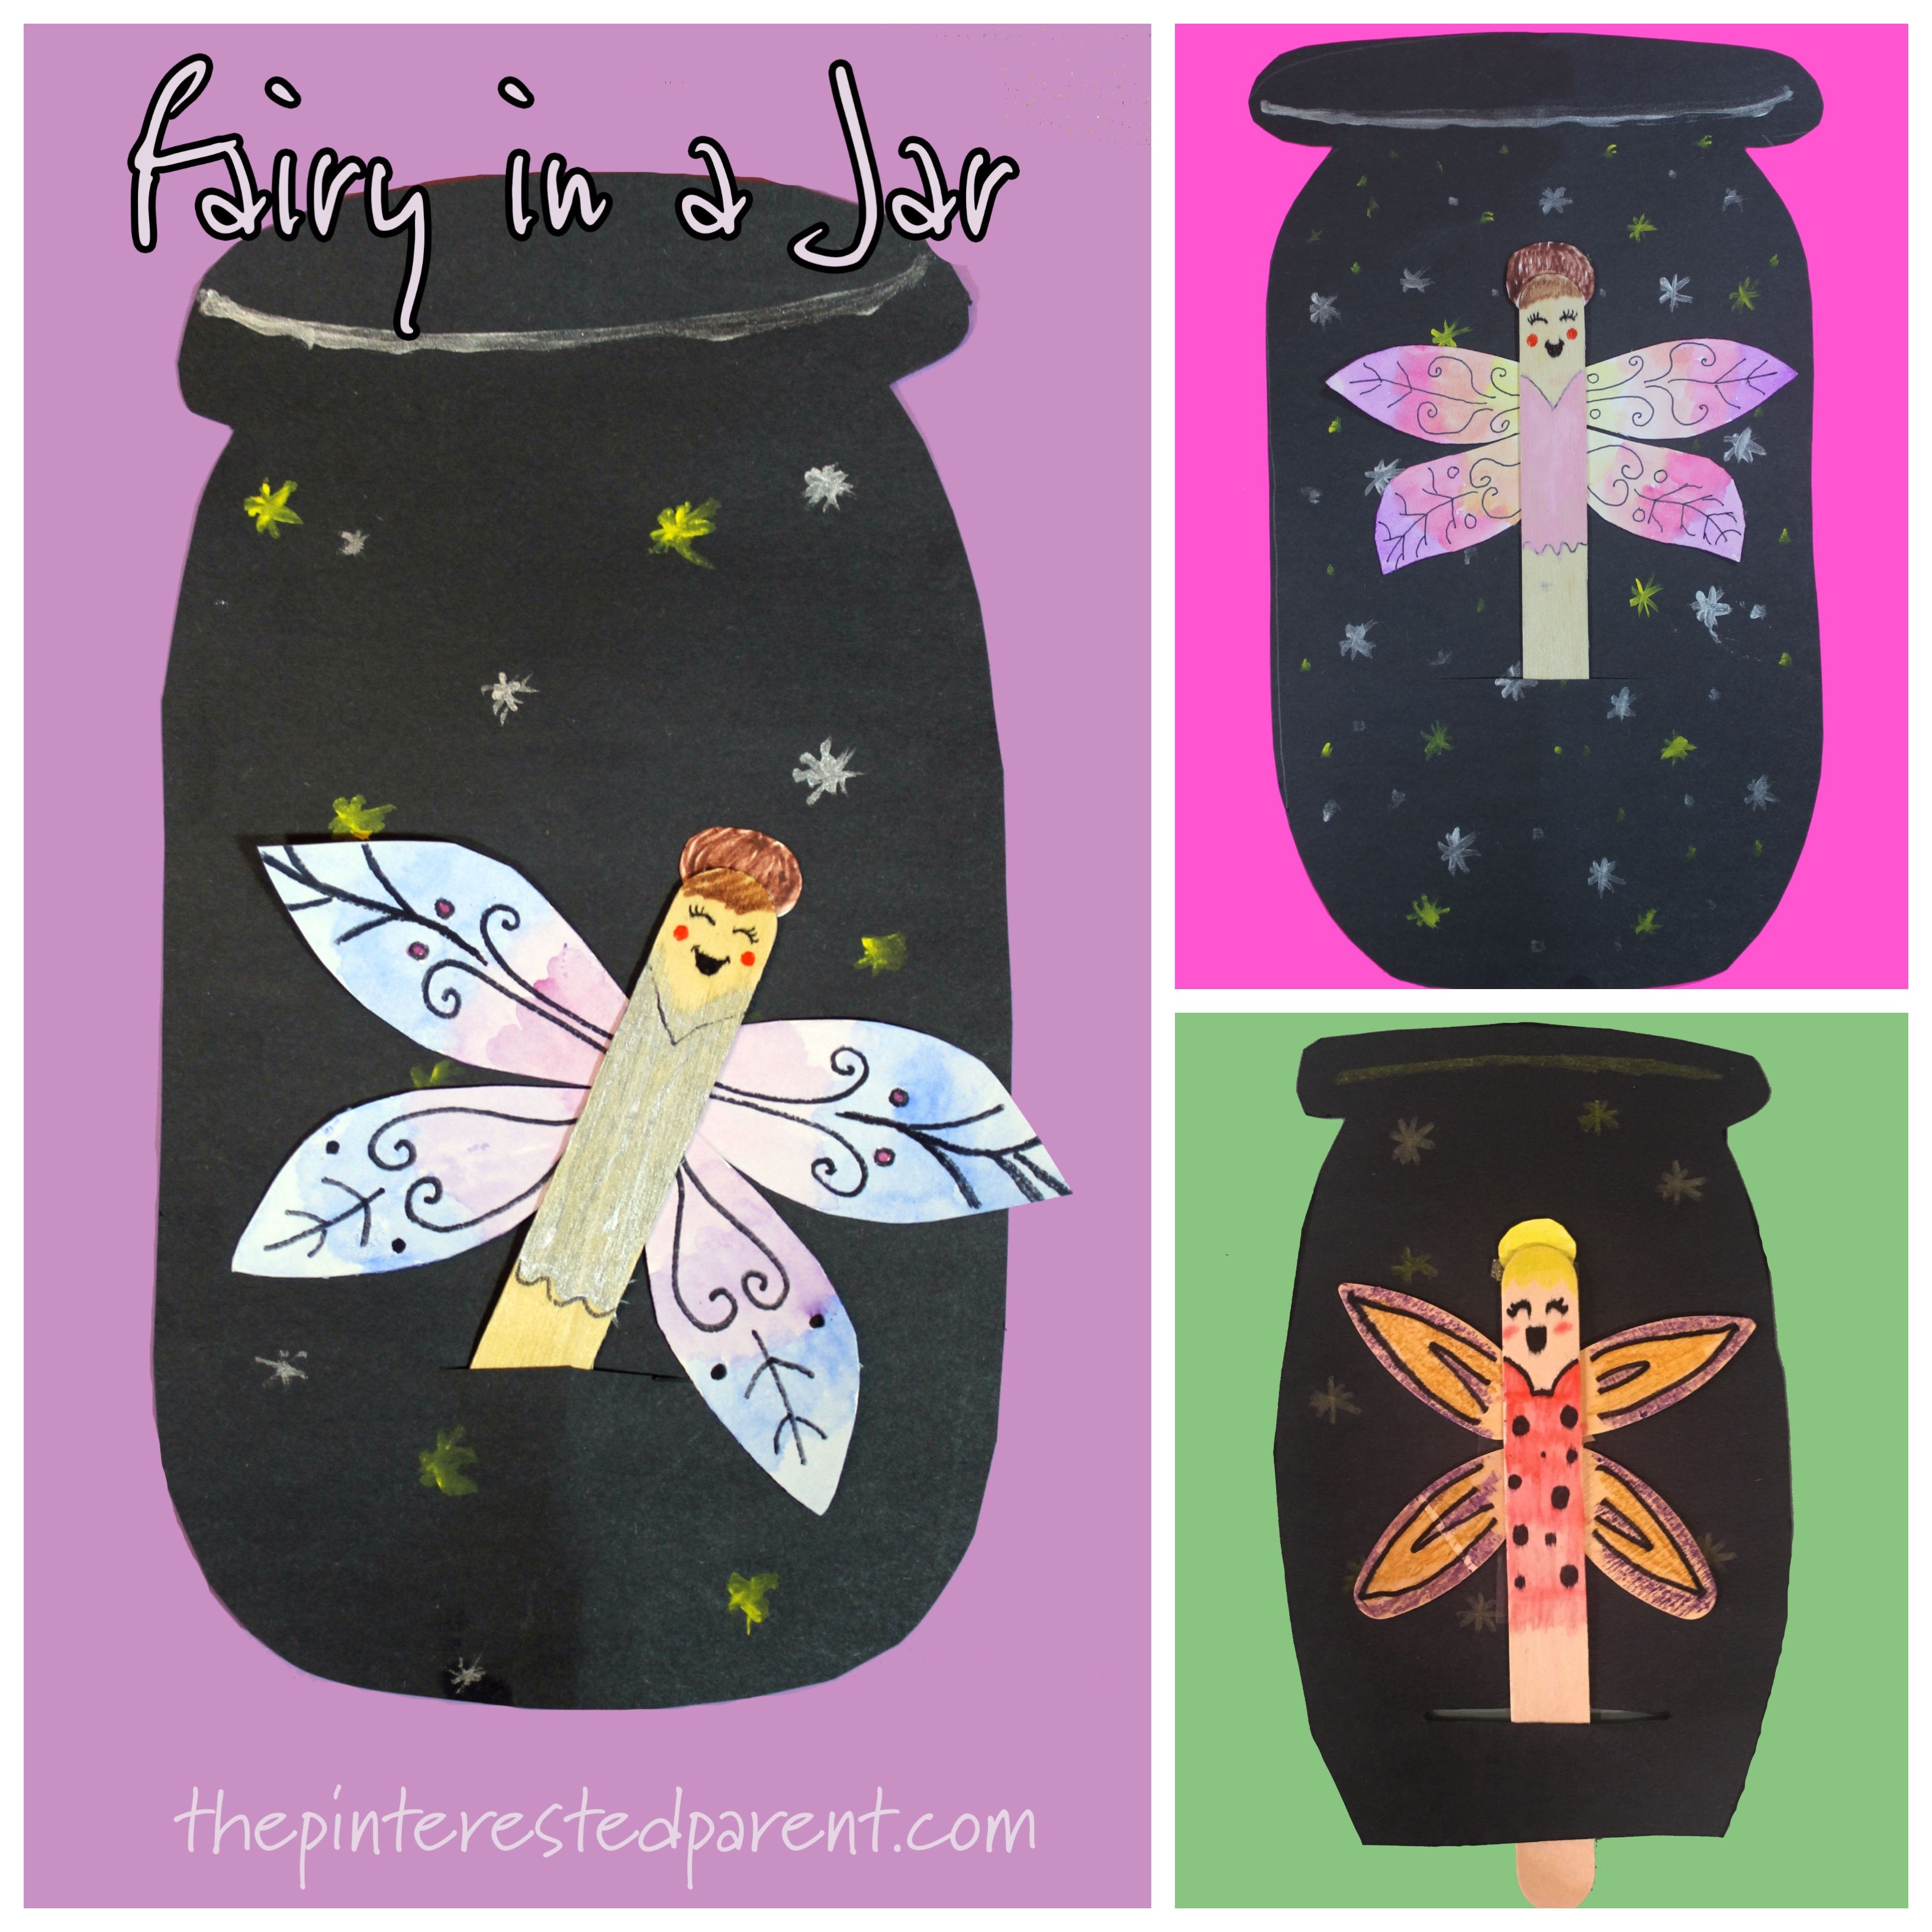
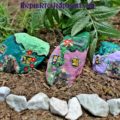
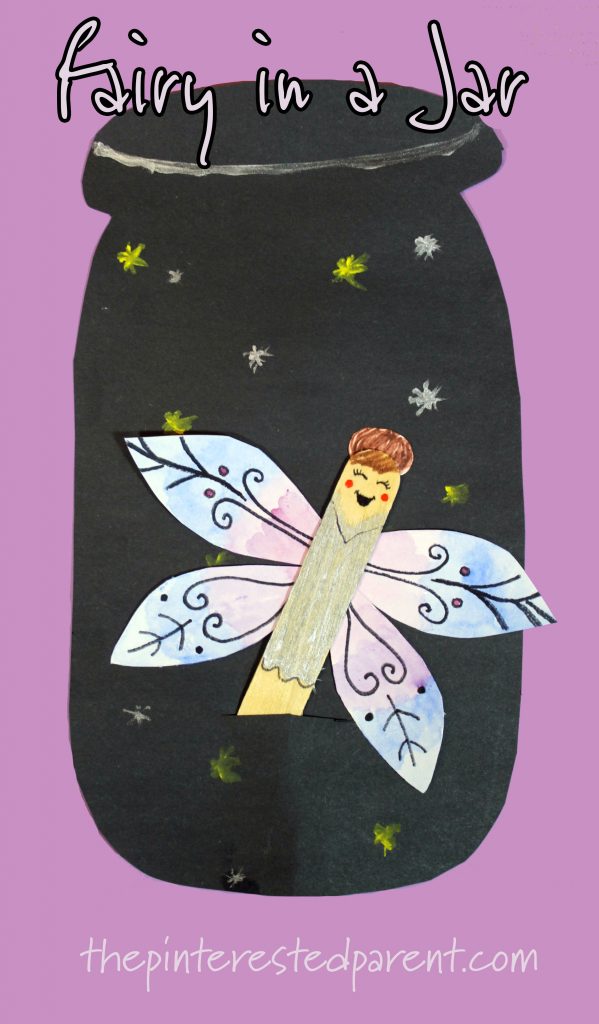
This week I am lucky enough to be directing the arts and crafts portion of our town’s summer camp. I have a group of fun and creative campers that are a joy to work with. While playing around with different materials and ideas today we came up with this flying fairy in a jar craft. I was so excited at how adorable they came out that I had to share it with all of you.
*The Pinterested Parent is a participant in the Amazon Services LLC Associates Program, an affiliate advertising program designed to provide a means for sites to earn advertising fees by advertising and linking to Amazon.com. In addition, text and image links in this post may be affiliate/referral links, which means we may be compensated if you make a purchase after clicking through these particular links* See full disclosure policy.
What you will need:
Markers
Construction paper
Sharpie
Directions:
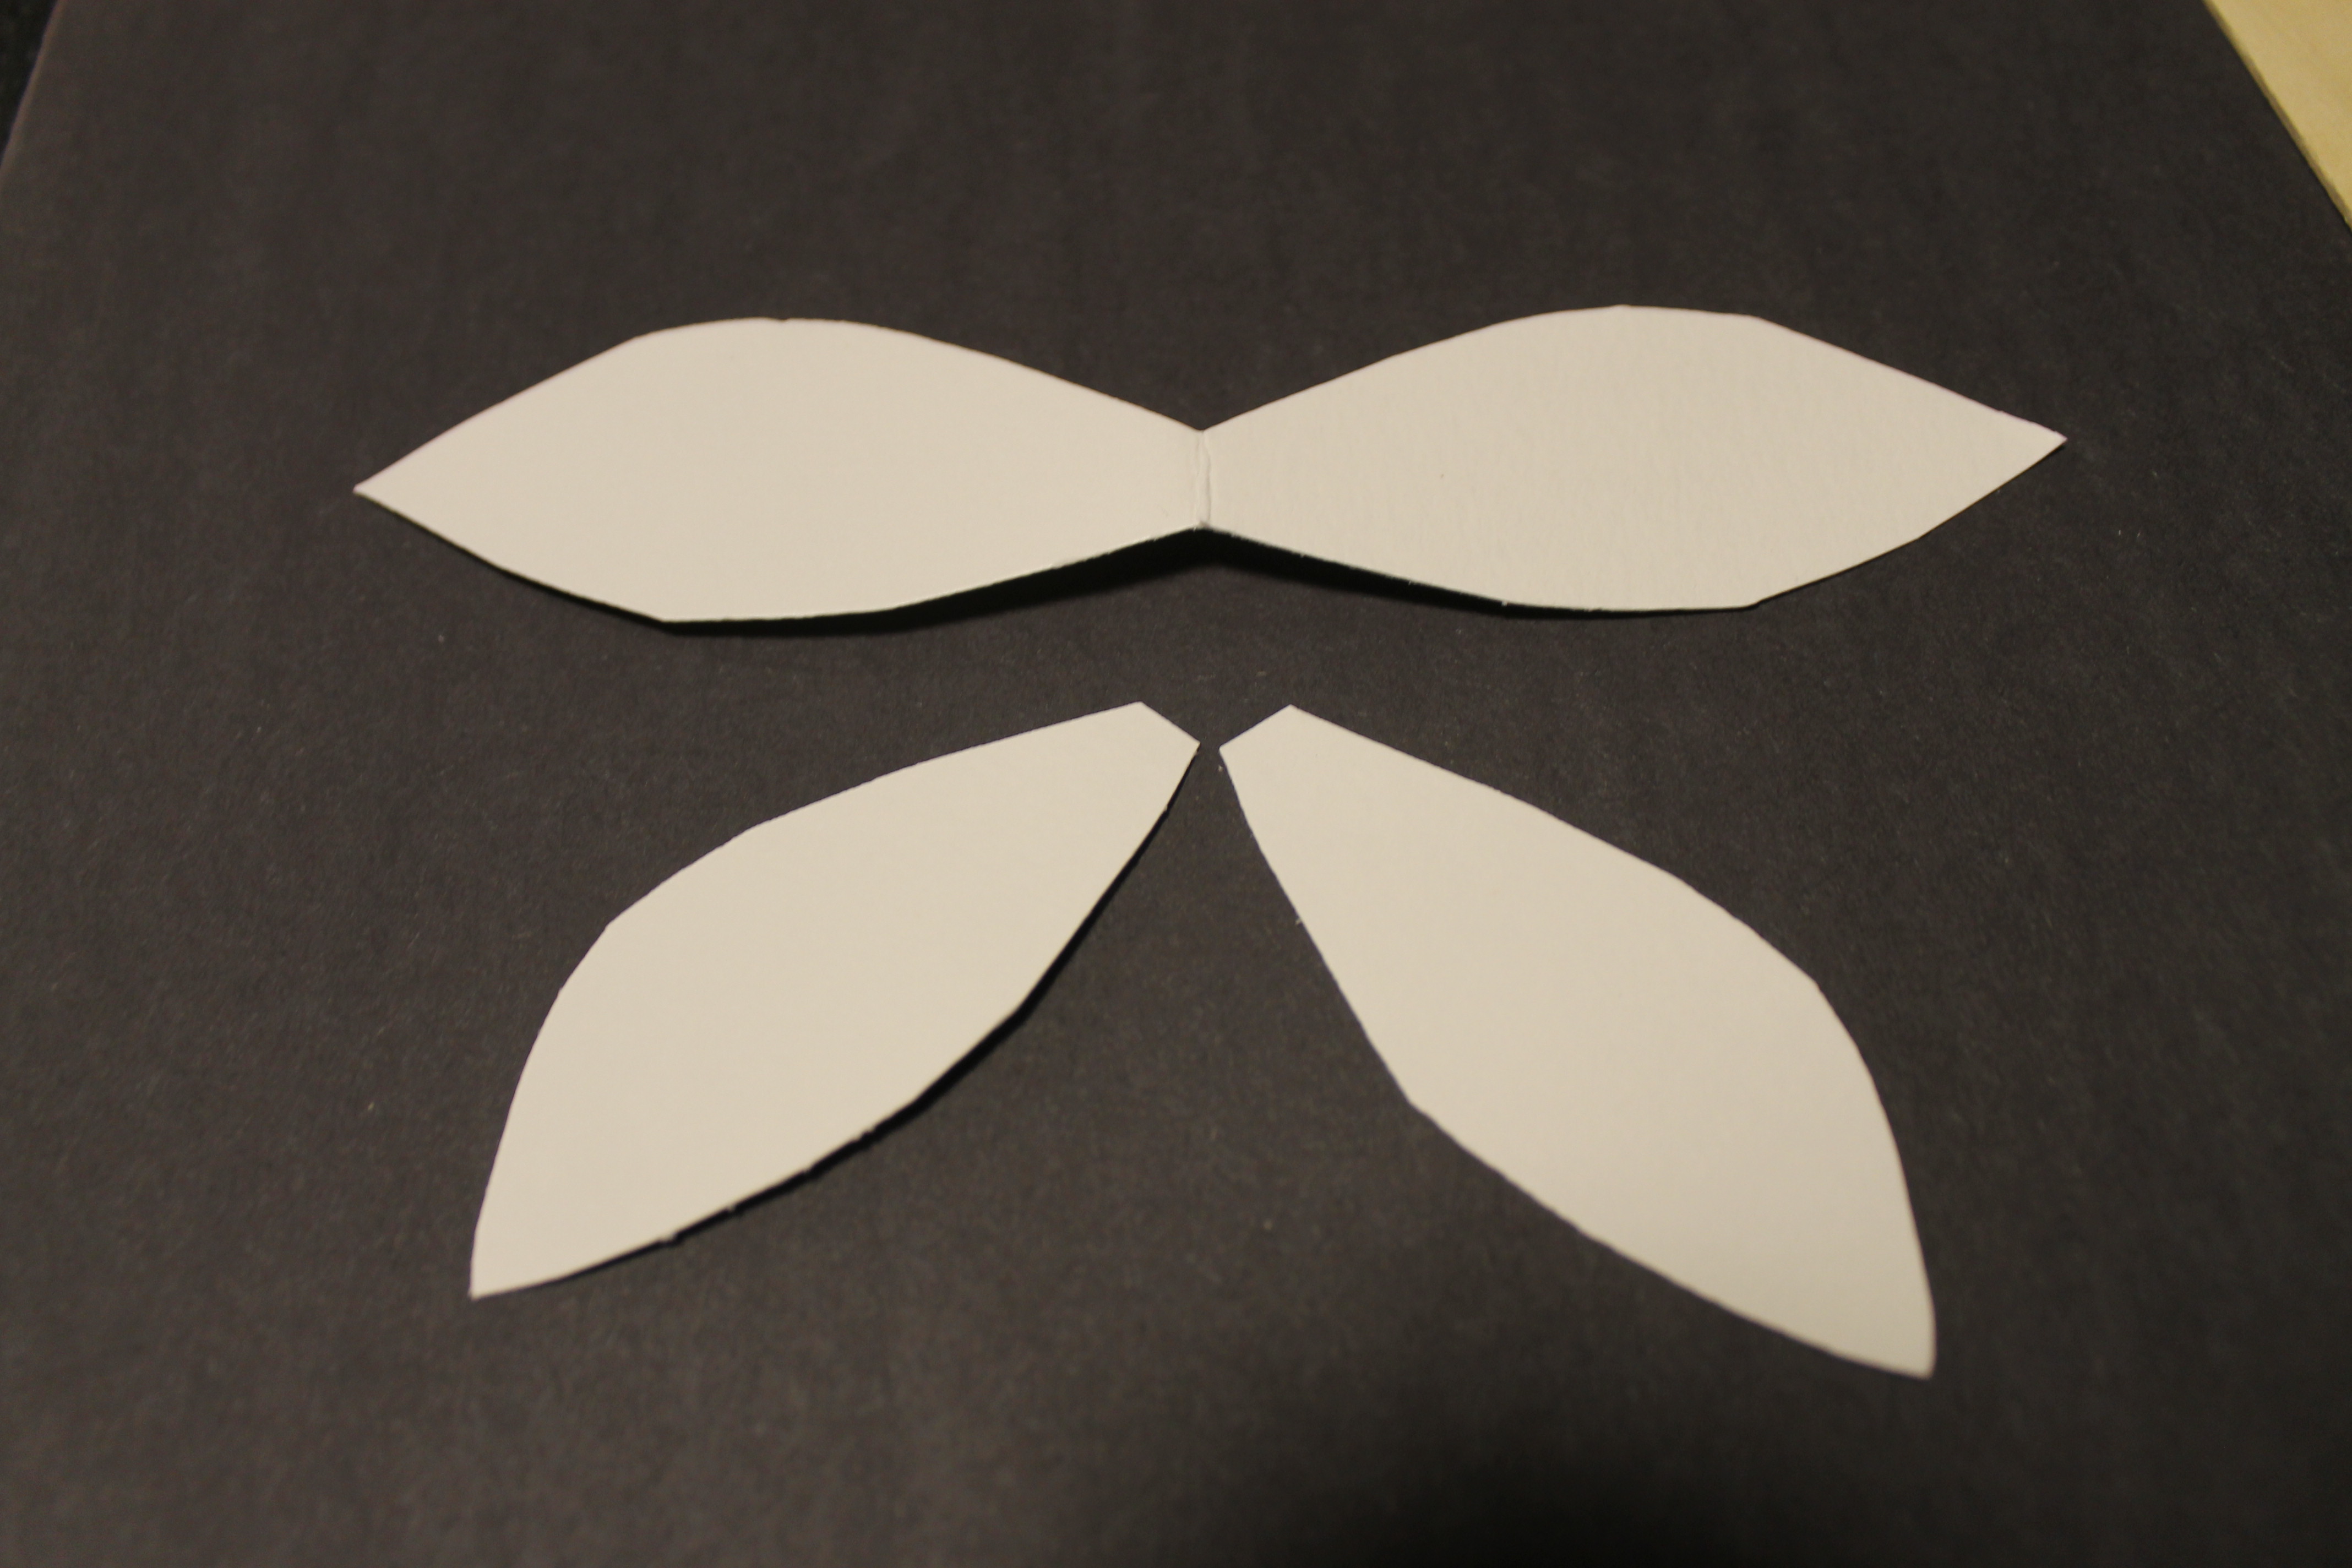
We started with the wings. At camp we actually used wooden shapes for the wings, but at home we used watercolor paper because I thought the watercolors would make a prettier, softer wing. I sketched out the shape of the wings and cut them out of the watercolor paper.
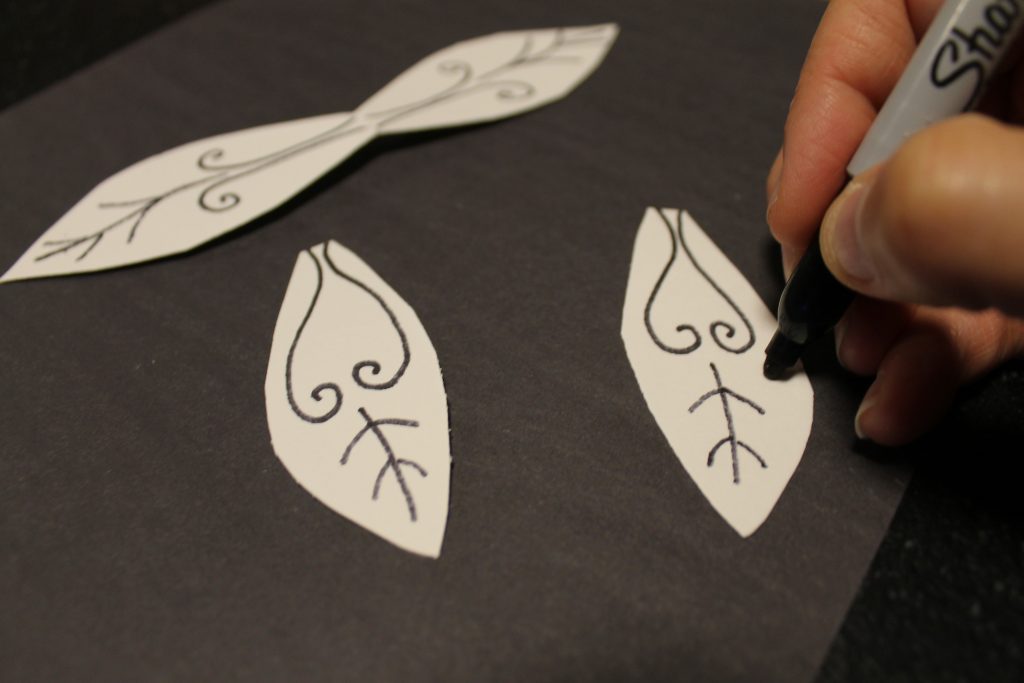
We used Sharpies to add details to our wings.
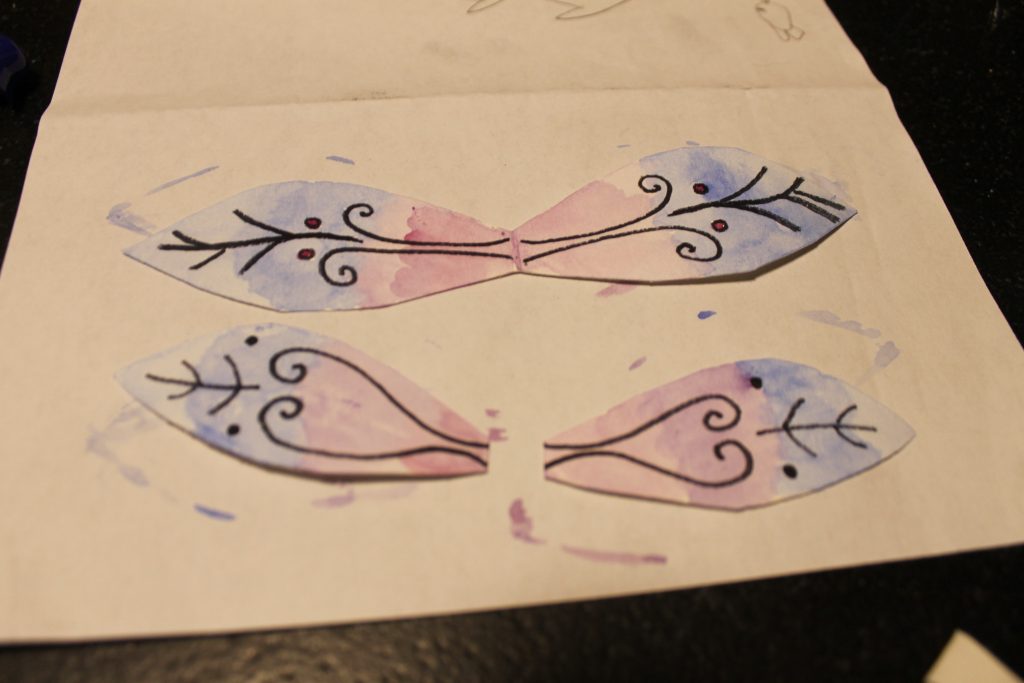
I painted the wings and then set them aside to dry. Again, I love the look of watercolors for the wings, but you can choose markers or colored pencils or whichever medium that you choose to use.
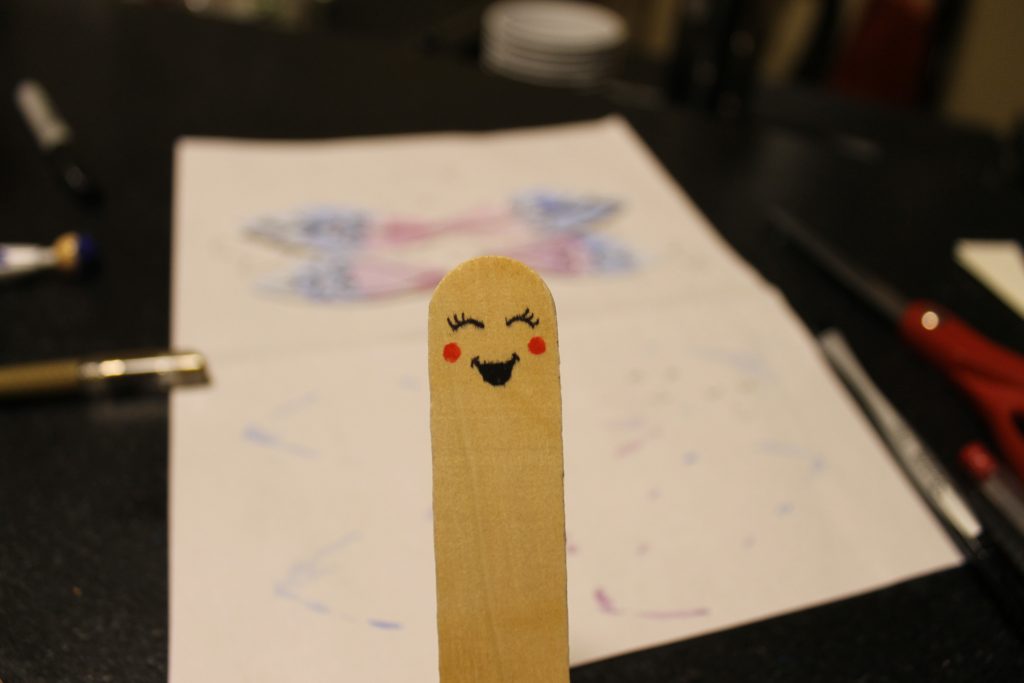
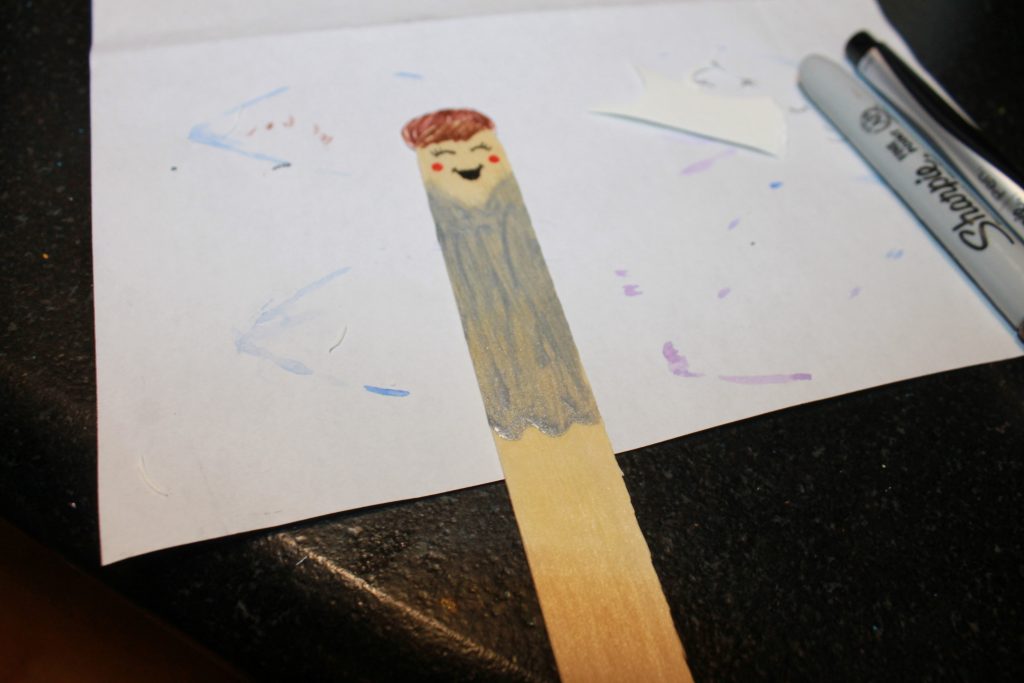
Draw a face onto one end of a jumbo craft stick using a thin Sharpie.
You may draw on the hair or use yarn or paper to create the hair for your fairy. It was one of my campers that came up with the idea of using a circle of paper at the top of the head for a bun and I loved it. We used white construction paper and then colored it in using markers and added bangs to the craft stick. The dress you can also create using the medium of your choice. We just made a simple “V” at the neck and then a straight or wavy line for the bottom of the dress.
To finish off the fairy, we glued the wings behind the fairy’s body.
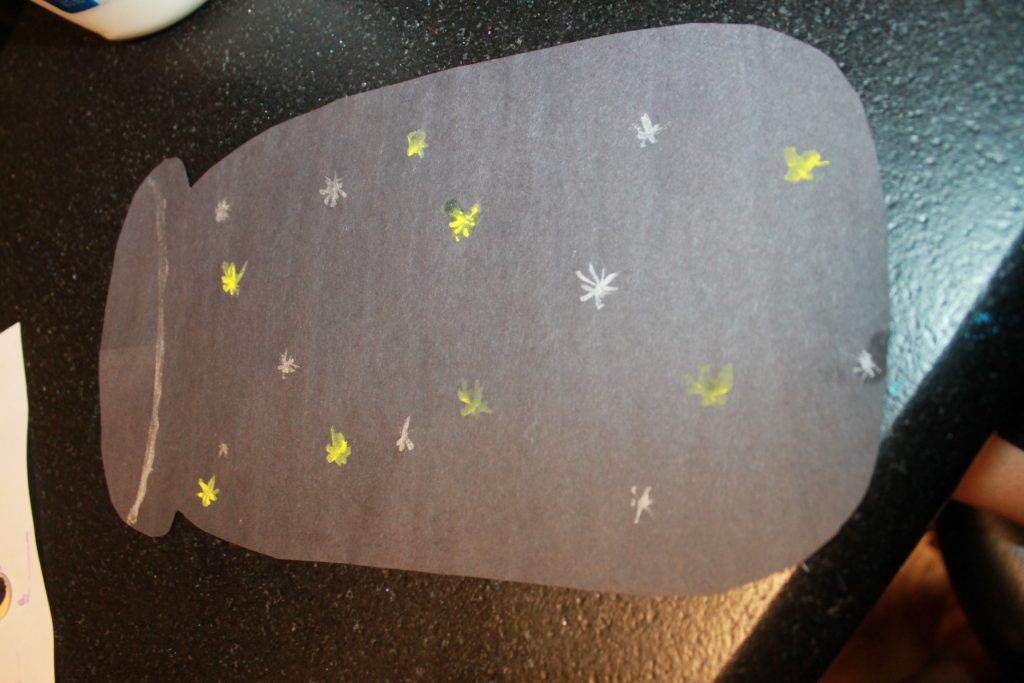
Each of us sketched a large fairy jar onto a piece of black construction paper and then cut them out. Using white, silver and yellow paint we added little twinkles around our jar. Then we carefully cut a slit about 1/4 of the way up from the bottom or our jars. The slit should be long enough that your craft stick fairy can move easily up and down and side to side around the jar.
Now your fairy in a jar is ready to go. Make your fairy fly around its jar and enjoy the magic.