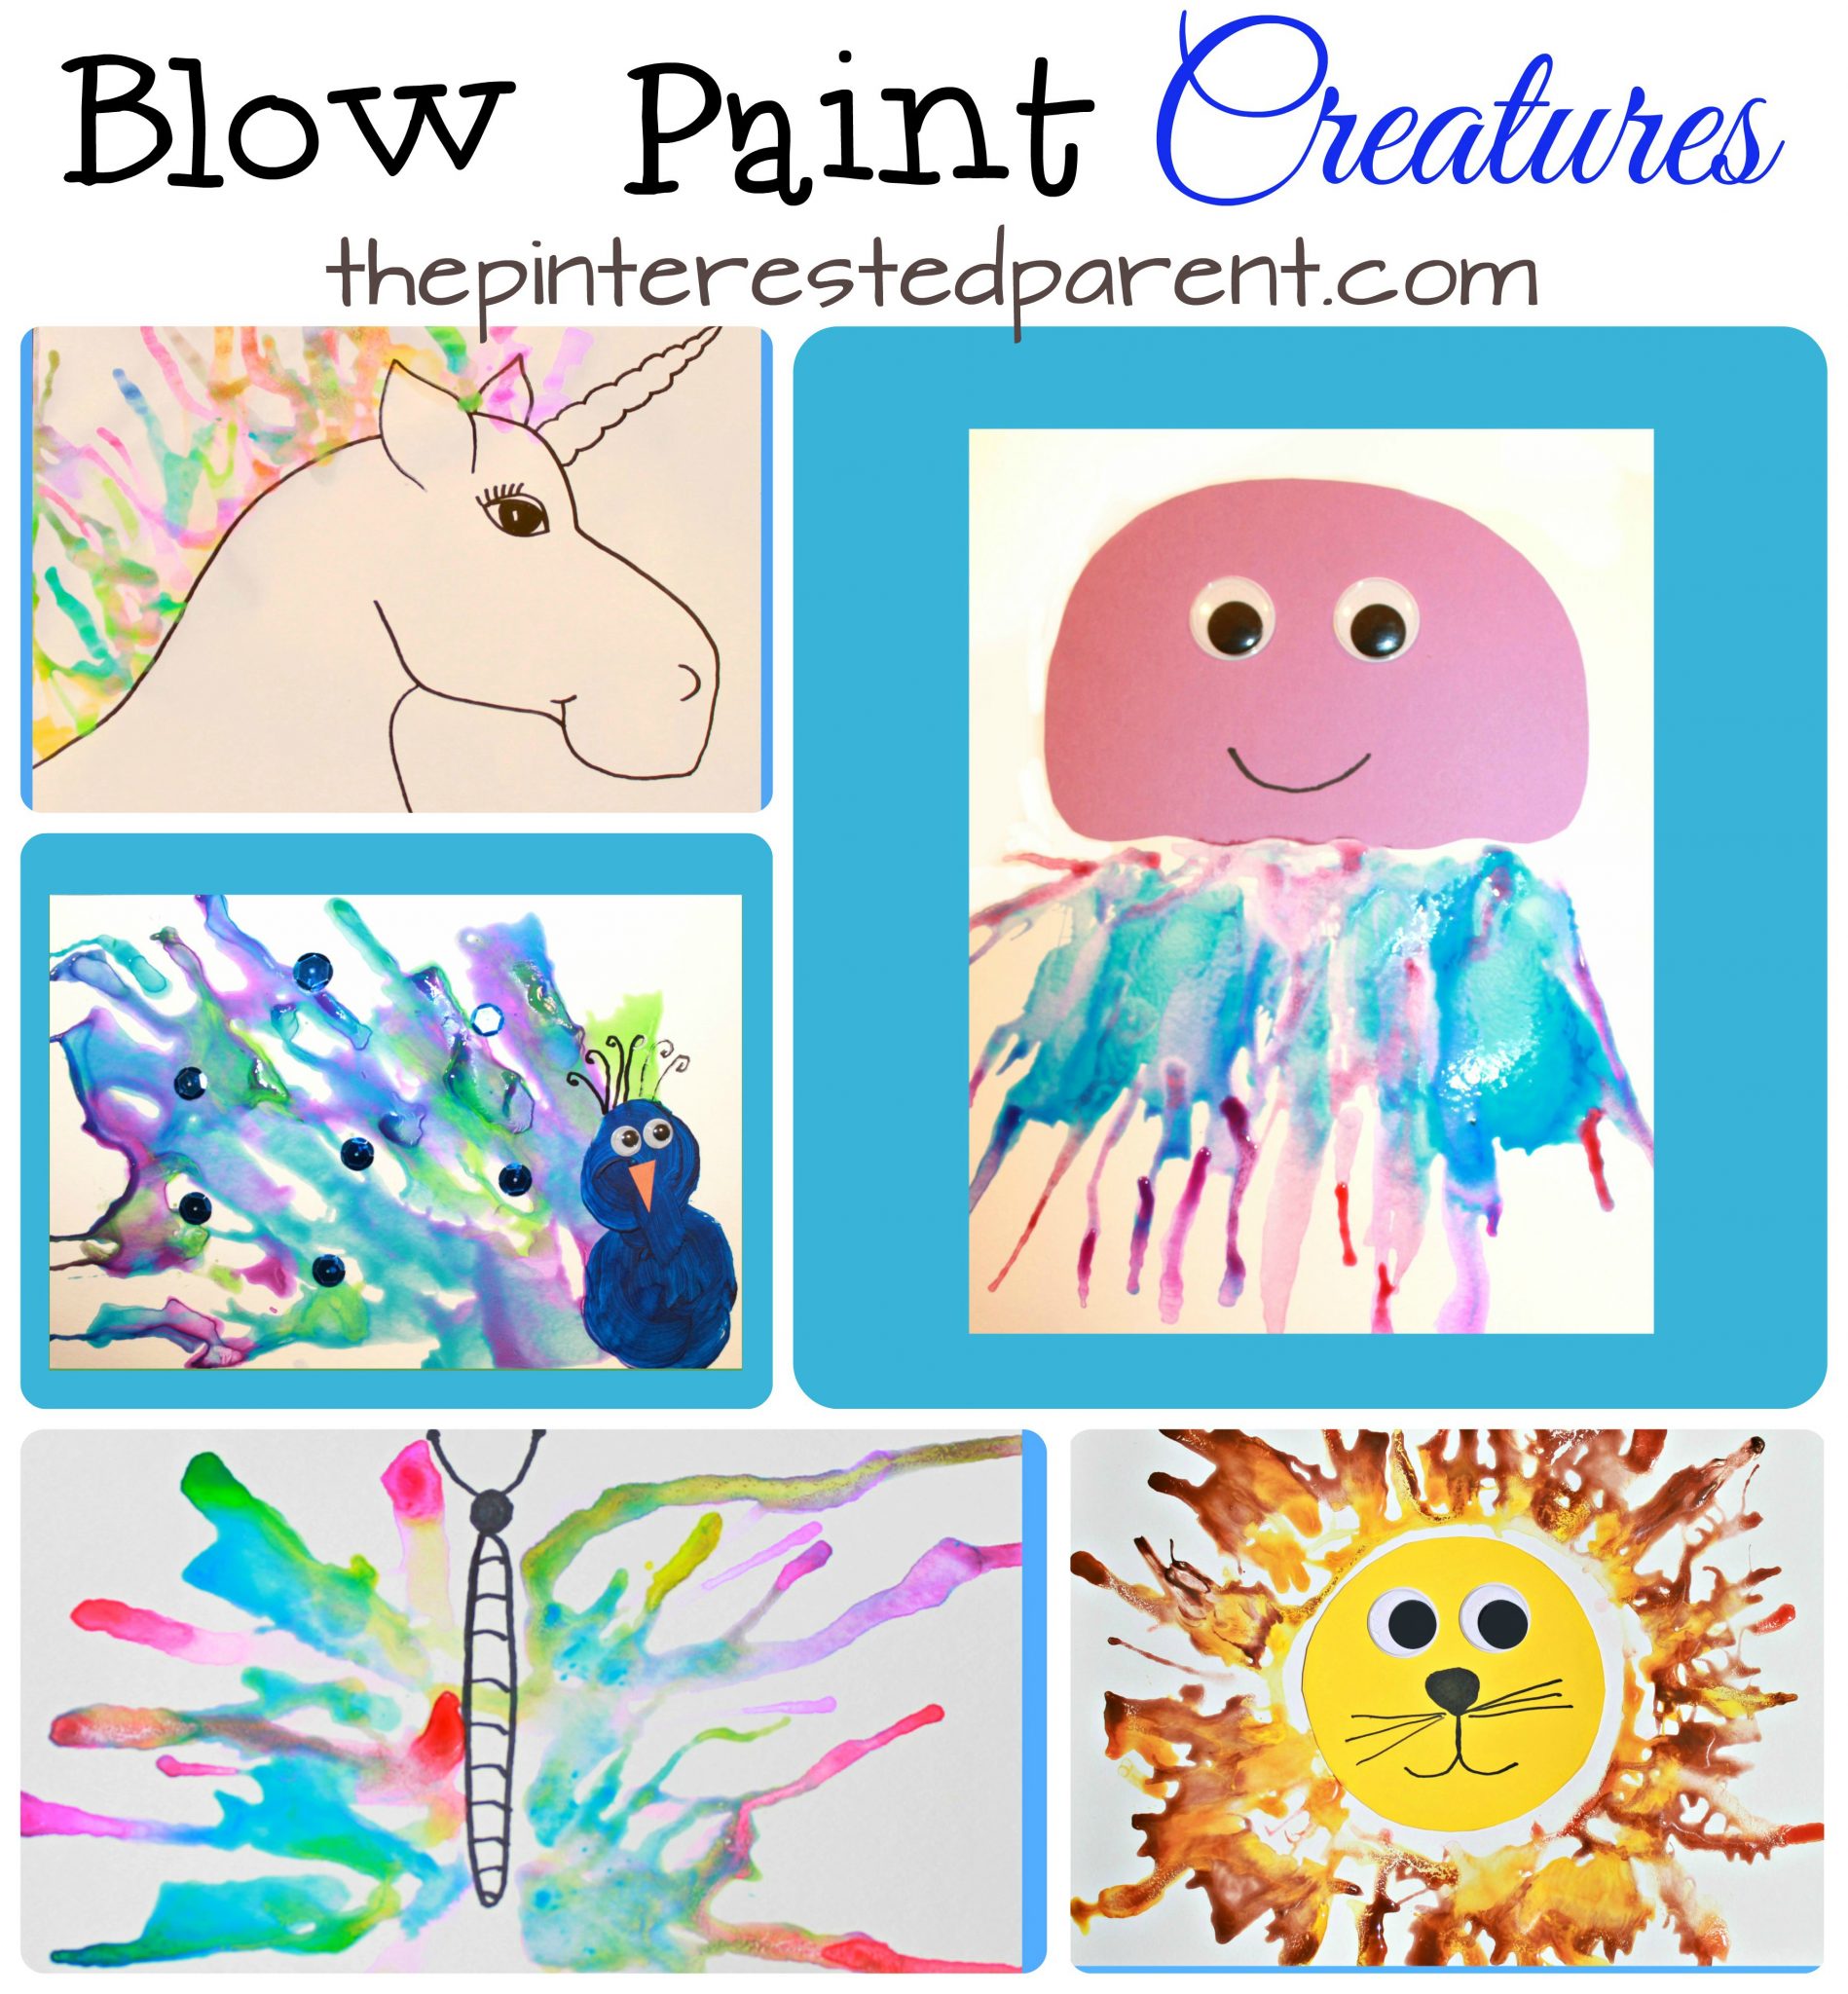
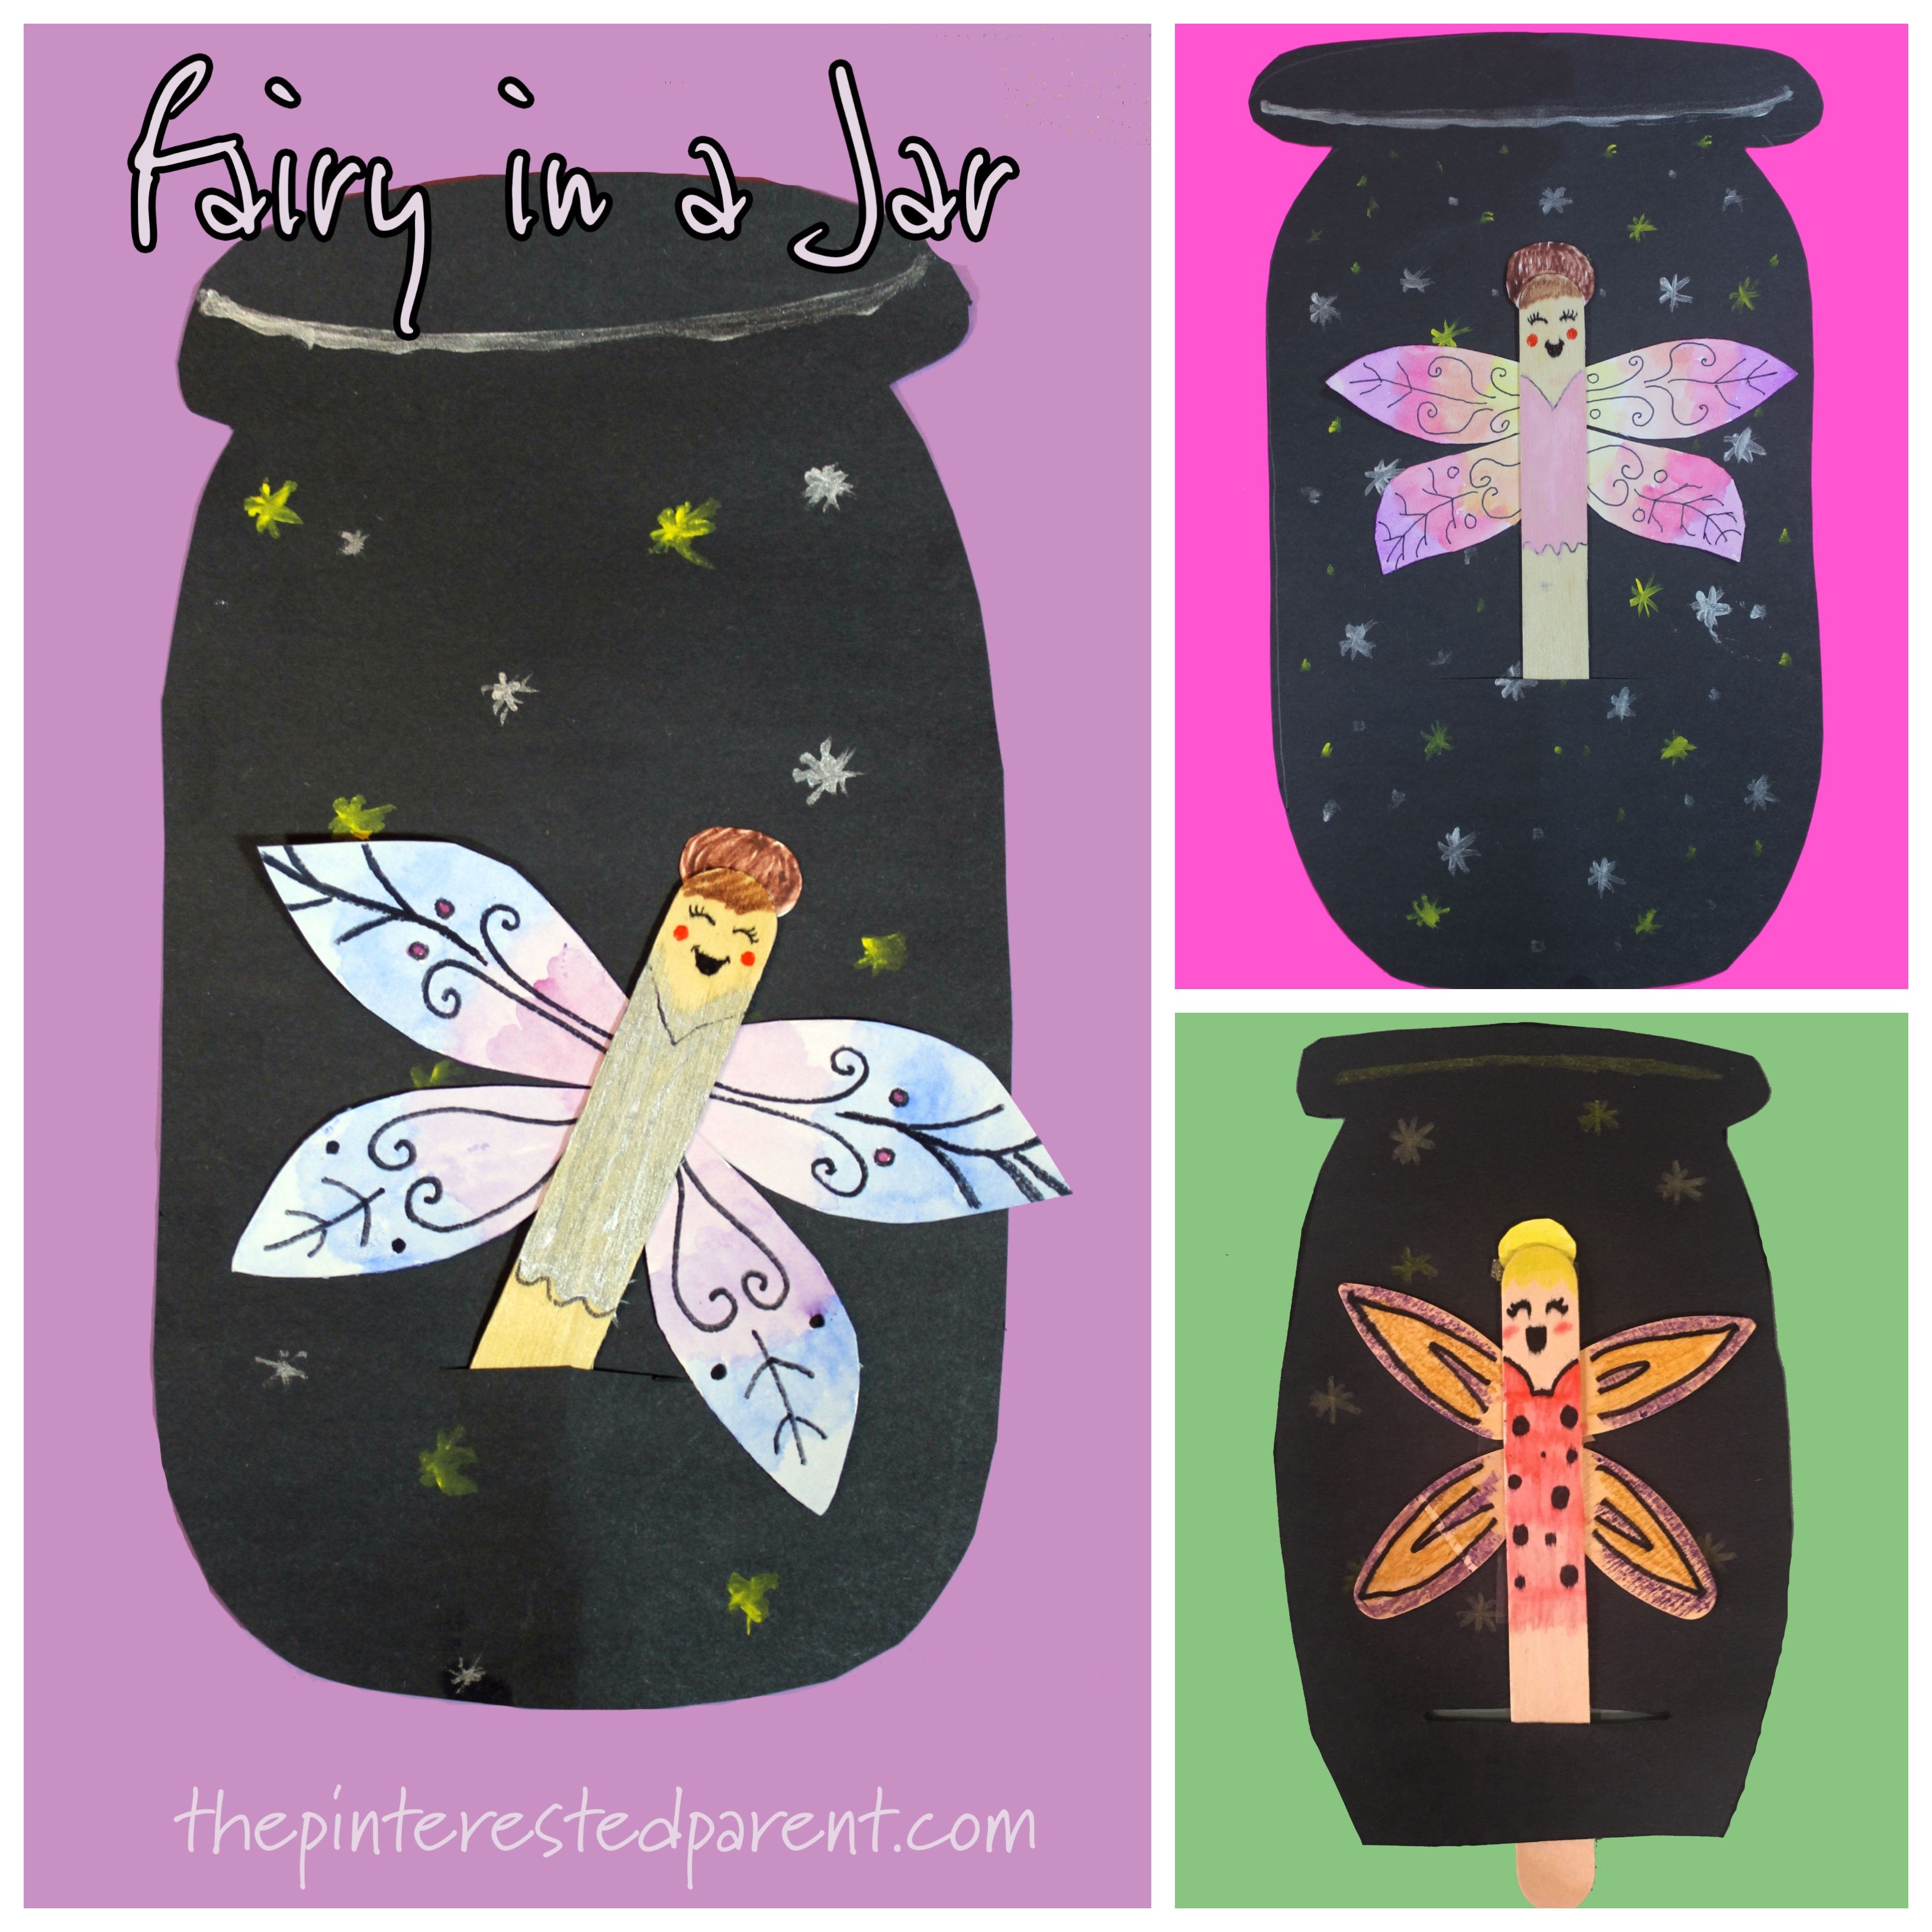
This week I am lucky enough to be directing the arts and crafts portion of our town’s summer camp. I have a group of fun and creative campers that are a joy to work with. While playing around with different materials and ideas today we came up with this flying fairy in a jar craft. I was so excited at how adorable they came out that I had to share it with all of you.
Tag
creatures
Blow Paint Art Creatures
Last week, my daughter and I had a ton of fun making straw blown peacocks. The response was overwhelming and I received a few requests for additional ideas. We are always up for a challenge and were excited to play with this technique some more. So, here are a few more blow paint creatures with a couple of free printables. Also check out our video on Facebook.
Twinkle, Twinkle, Little Sea Star
Twinkle, Twinkle, Little Sea Star. How beautiful and glittery you are.
There is nothing quite as wonderful as watching your children create. It is a fascinating and beautiful thing. My little girl and I spend a lot of time creating together, but my favorite projects are the ones that she comes up with on her own. This lovely sea star was one of her ideas and she was so eager to share it with me.
Cupcake Liner Whale Craft
This weekend we had fun making a whale diaper cake for my cousin’s baby shower. Mai was very excited watching me construct the cake & she was even more excited to see all of the other whale themed gifts at the shower. “I like whales too! They are my favorite.” At least for this weekend that might be true. Since whales are her new favorite, we decided to continue with the whale theme & made a cupcake liner whale craft.
We started with 2 cupcake liners in a light shade of blue. We glued a full liner & then one that was cut into a squared off crescent shape.
Glue a darker shade of blue over the lighter as shown.
Cut a tail out of the darker blue liner.
Add a fin, googly eyes & a spout to finish your craft.
Thank you as always for stopping by. Please follow us on Facebook as well.
Wiggly Pasta Snakes
My daughter loves creepy crawly creatures. Yesterday, we had a family photo shoot with a photographer in a nearby field. There was a snake slithering through the field where our photos were being taken. While the rest of us tried our best to avoid the snake, my daughter went towards it. “I want to see the snake.” “I like snakes”, she told the photographer. She does like snakes… a lot.
If you have a child that likes snakes as much as mine does, here is a fun craft & fine motor skill activity.
Wiggly Pasta Snakes
String & alternate ziti & ditalini pasta onto a pipe cleaner. Leave about an inch off on each side.
String on about 6 ditalini to the tail end. Use hot glue to secure on the end. (Hot glue should be used by an adult.)
Glue a pasta shell to the other end for the head.
Paint your snake & let it dry.
Cut a tongue out of foam or construction paper & glue it to the shell.
Add googly eyes to complete your snake.
Thank you as always for stopping by. Please follow us on Facebook as well.
Cupcake Liner Seahorses
It has been a rough week in our home. I had gall bladder surgery this week & have been sore & very tired. After several days of lying around on the couch, I am just plain bored. I mustered up just enough energy today to make a quick craft. Mai wanted to make seahorses. Mommy wanted to make them out of cupcake liners, but Mai decided she rather draw hers.
She did not want to partake in today’s craft with mommy, but still we worked side by side. She drew a beautiful picture, while I made the seahorse craft. Sometimes she likes to just watch & it helps give her ideas for future projects of her own.
This was luckily a quick & easy craft that only took me a few minutes & then I was back on the couch resting.
All you will need for this craft is mini cupcake liners, glue & googly eyes.
You will need 4 mini cupcake liners for each seahorse.
Fold & glue a cupcake liner in half for the body.
Fold & glue another liner & trim the ridged part away from the inside of the liner. This liner will be used to form the tail.
Use the leftover inside piece to form the curl of the tail.
Fold another in half & trim to form a seahorse head.
Fold a liner into half twice to form the fin & glue all pieces in place as shown.
Add a googly eye to finish him off. Use crayons or markers to add water waves or bubbles.
Thank you as always for stopping by. Please follow us on Facebook as well.