Tag

cat

More Homemade Christmas Ornaments

Hello Kitty Ornament for Christmas

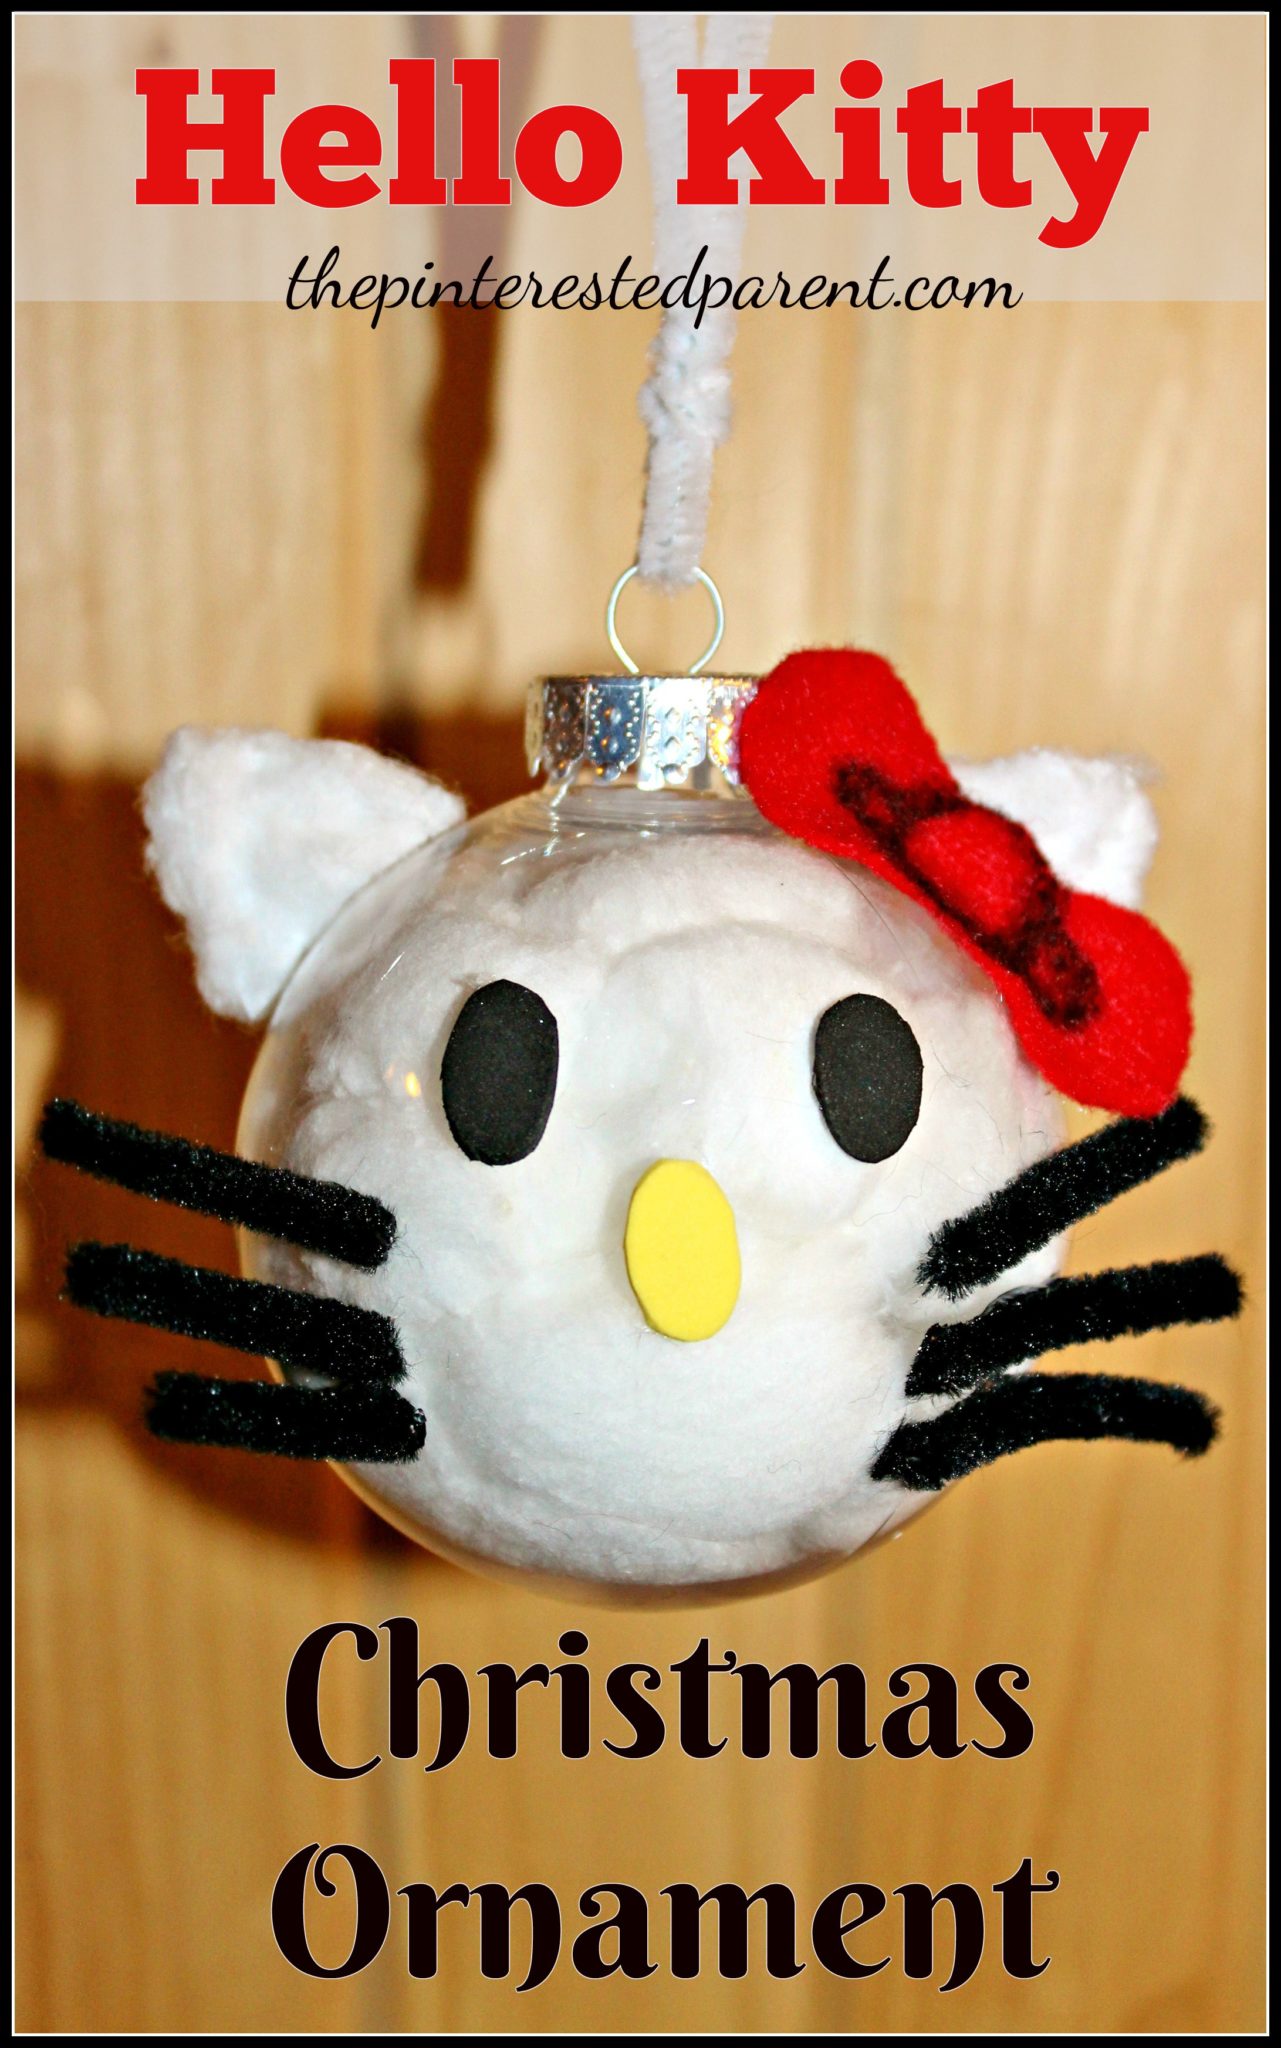
*This post contains affiliate links*

This year because of our living circumstances we will only be putting up a Charlie Brown Christmas tree. As all of our ornaments & decorations are buried in storage until after Christmas, my husband suggested that we hand make all of the ornaments for this tree. Challenge accepted. We already have made a few here & there throughout the season.

Last night we made a couple more for our tree. My daughter loves Hello Kitty & since she is such an easy figure to make, that was our first project of the night.

What you will need:

A medium-sized plastic Christmas ball

Cotton balls

White, yellow & black foam sheets

Red felt

Black pipe cleaners

Hot glue & school glue (Always operate caution when using. Not recommended for small children to use)

Directions

Stuff the inside of the ornament with cotton balls until jam-packed. My daughter loved this. This is a great fine motor skill activity too.

IMG_2420 IMG_2423

Cut two triangles for ears out of the white foam. Put glue on the front & back and cover in a light layer of cotton.

IMG_2425IMG_2426

Use the hot glue to glue ears into place. For best results apply glue to the ear not the ball.

IMG_2429

Cut 2 black ovals out of the foam & one yellow one. Cut a pipe cleaner into six equal pieces & cut a bow out of the red felt. Use a Sharpie to draw in detail on the bow.

IMG_2427IMG_2428

Glue all pieces into place using the hot glue. Buy hooks for your ornament or use a pipe cleaner or string to hang.

Hello Kitty Christmas Ornament

We made one more ornament.

Mai loves to draw & I adore her drawings. I wanted a hand drawn ornament for our tree.

For this ornament, I drew & cut out 2 identical ornament shapes out of an old cardboard food box.

IMG_2447

I glued them together with a loop of yarn in between.

IMG_2448

I painted the top portion silver & let it dry.

IMG_2449

I glued the ornament down onto a piece of red construction paper & then cut the excess off to form a circle. I did this for both sides.

IMG_2451

I cut two smaller white circles & gave them to Mai. I asked her to draw on both pieces.

IMG_2455 IMG_2454

While she drew, I added a bead of glue around the edge of the ball & sprinkled glitter on it. It gives it a lovely sparkly outline & covers up the seam where the cardboard & the paper meet.

IMG_2456

When she was done drawing, I glued her drawings on both ends. This picture is of the whole family looking out the window. I will treasure this one forever.

Kid Drawn Ornament for Christmas

Thank you as always for stopping by. Please follow us on Facebook as well.

Halloween Paper Plate Silhouette Crafts

I have been thinking about Halloween a lot this week. I realized that I had a little planning to do after my daughter informed me that she would like to be a princess witch this year. September is more than halfway through and Halloween is sneaking up on us quickly. With Halloween on the brain, it inspired us to make a few paper plate crafts. I love silhouettes. There us something so beautiful and haunting about them, which makes them perfect for Halloween. These Halloween silhouettes are an easy craft for all ages.

Halloween Paper Plate Silhouettes with printable template . Choose from a black cat, a witch or bat silhouettes - Halloween arts and crafts for kids.

*The Pinterested Parent is a participant in the Amazon Services LLC Associates Program, an affiliate advertising program designed to provide a means for sites to earn advertising fees by advertising and linking to Amazon.com. In addition, text and image links in this post may be affiliate/referral links, which means we may be compensated if you make a purchase after clicking through these particular links* See full disclosure policy.

Continue Reading…