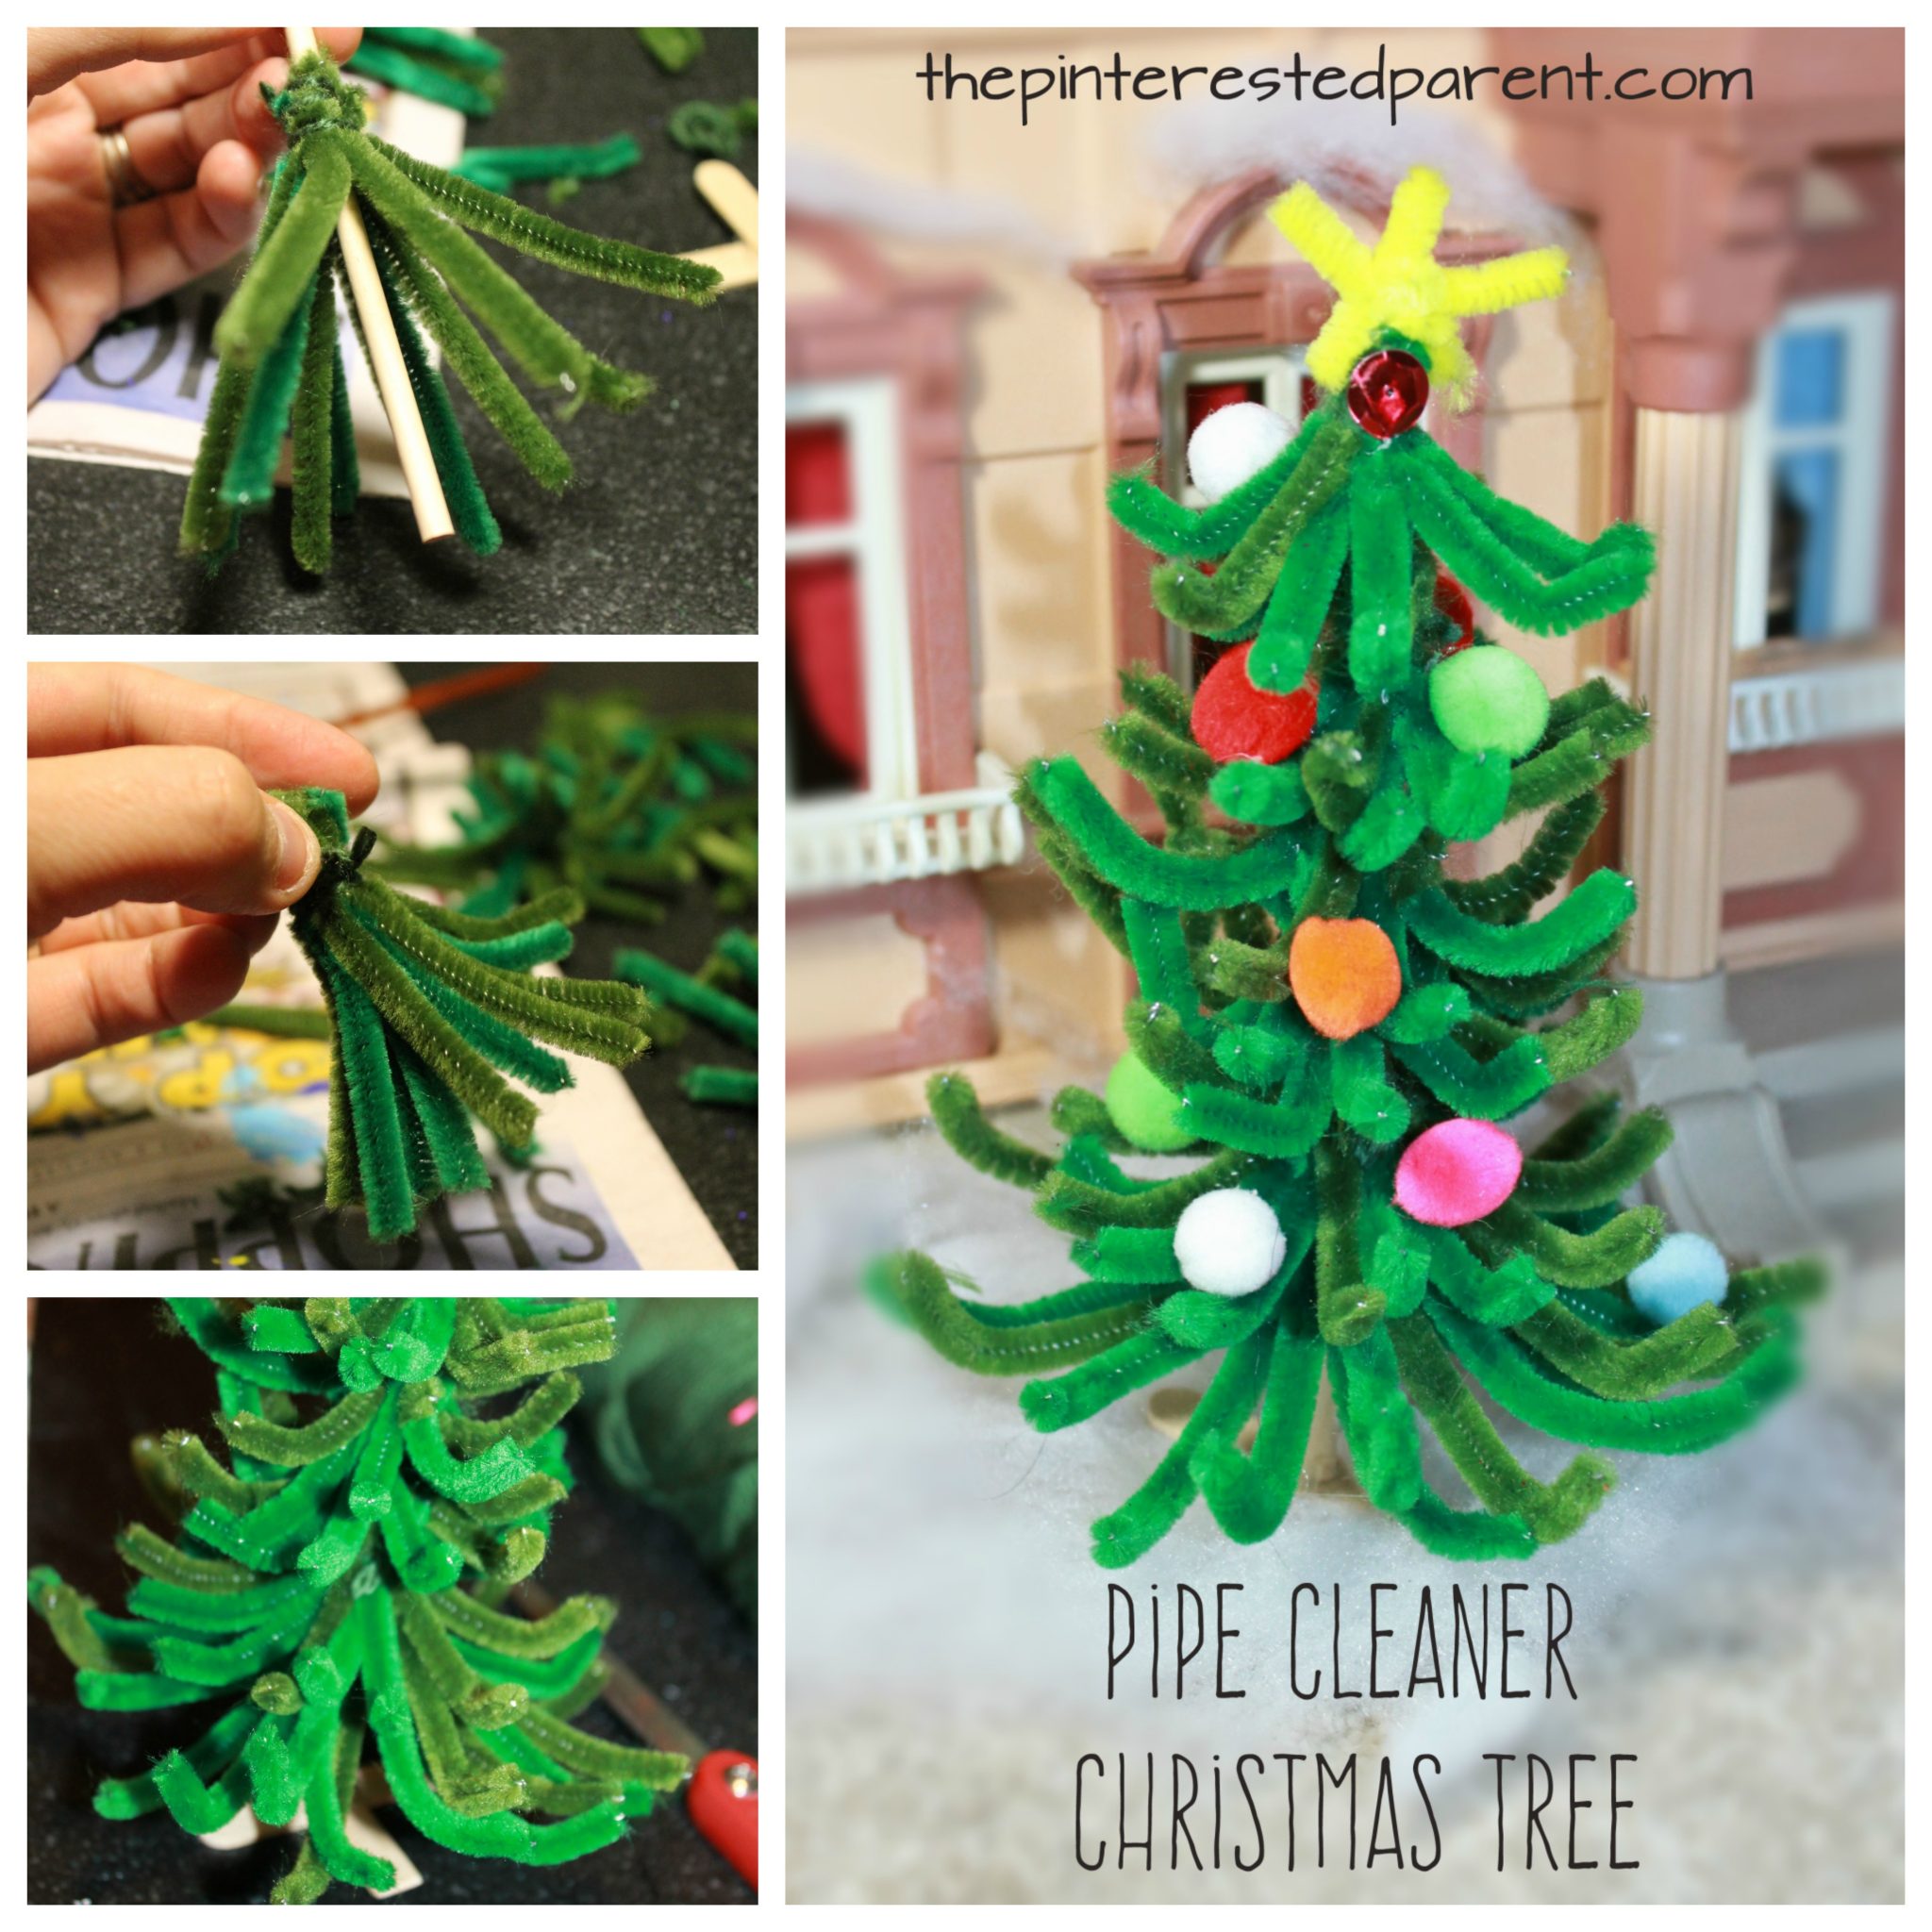
Pipe Cleaner Christmas Tree
Our Christmas tree went up this week. My daughter was excited to decorate for the holidays, but when we finished, she told me that we did not nearly decorate the house enough. *This post contains affiliate links* She went on to tell me that we needed to get her dollhouse ready for Christmas. “My dollhouse needs […]