Tag

hanging

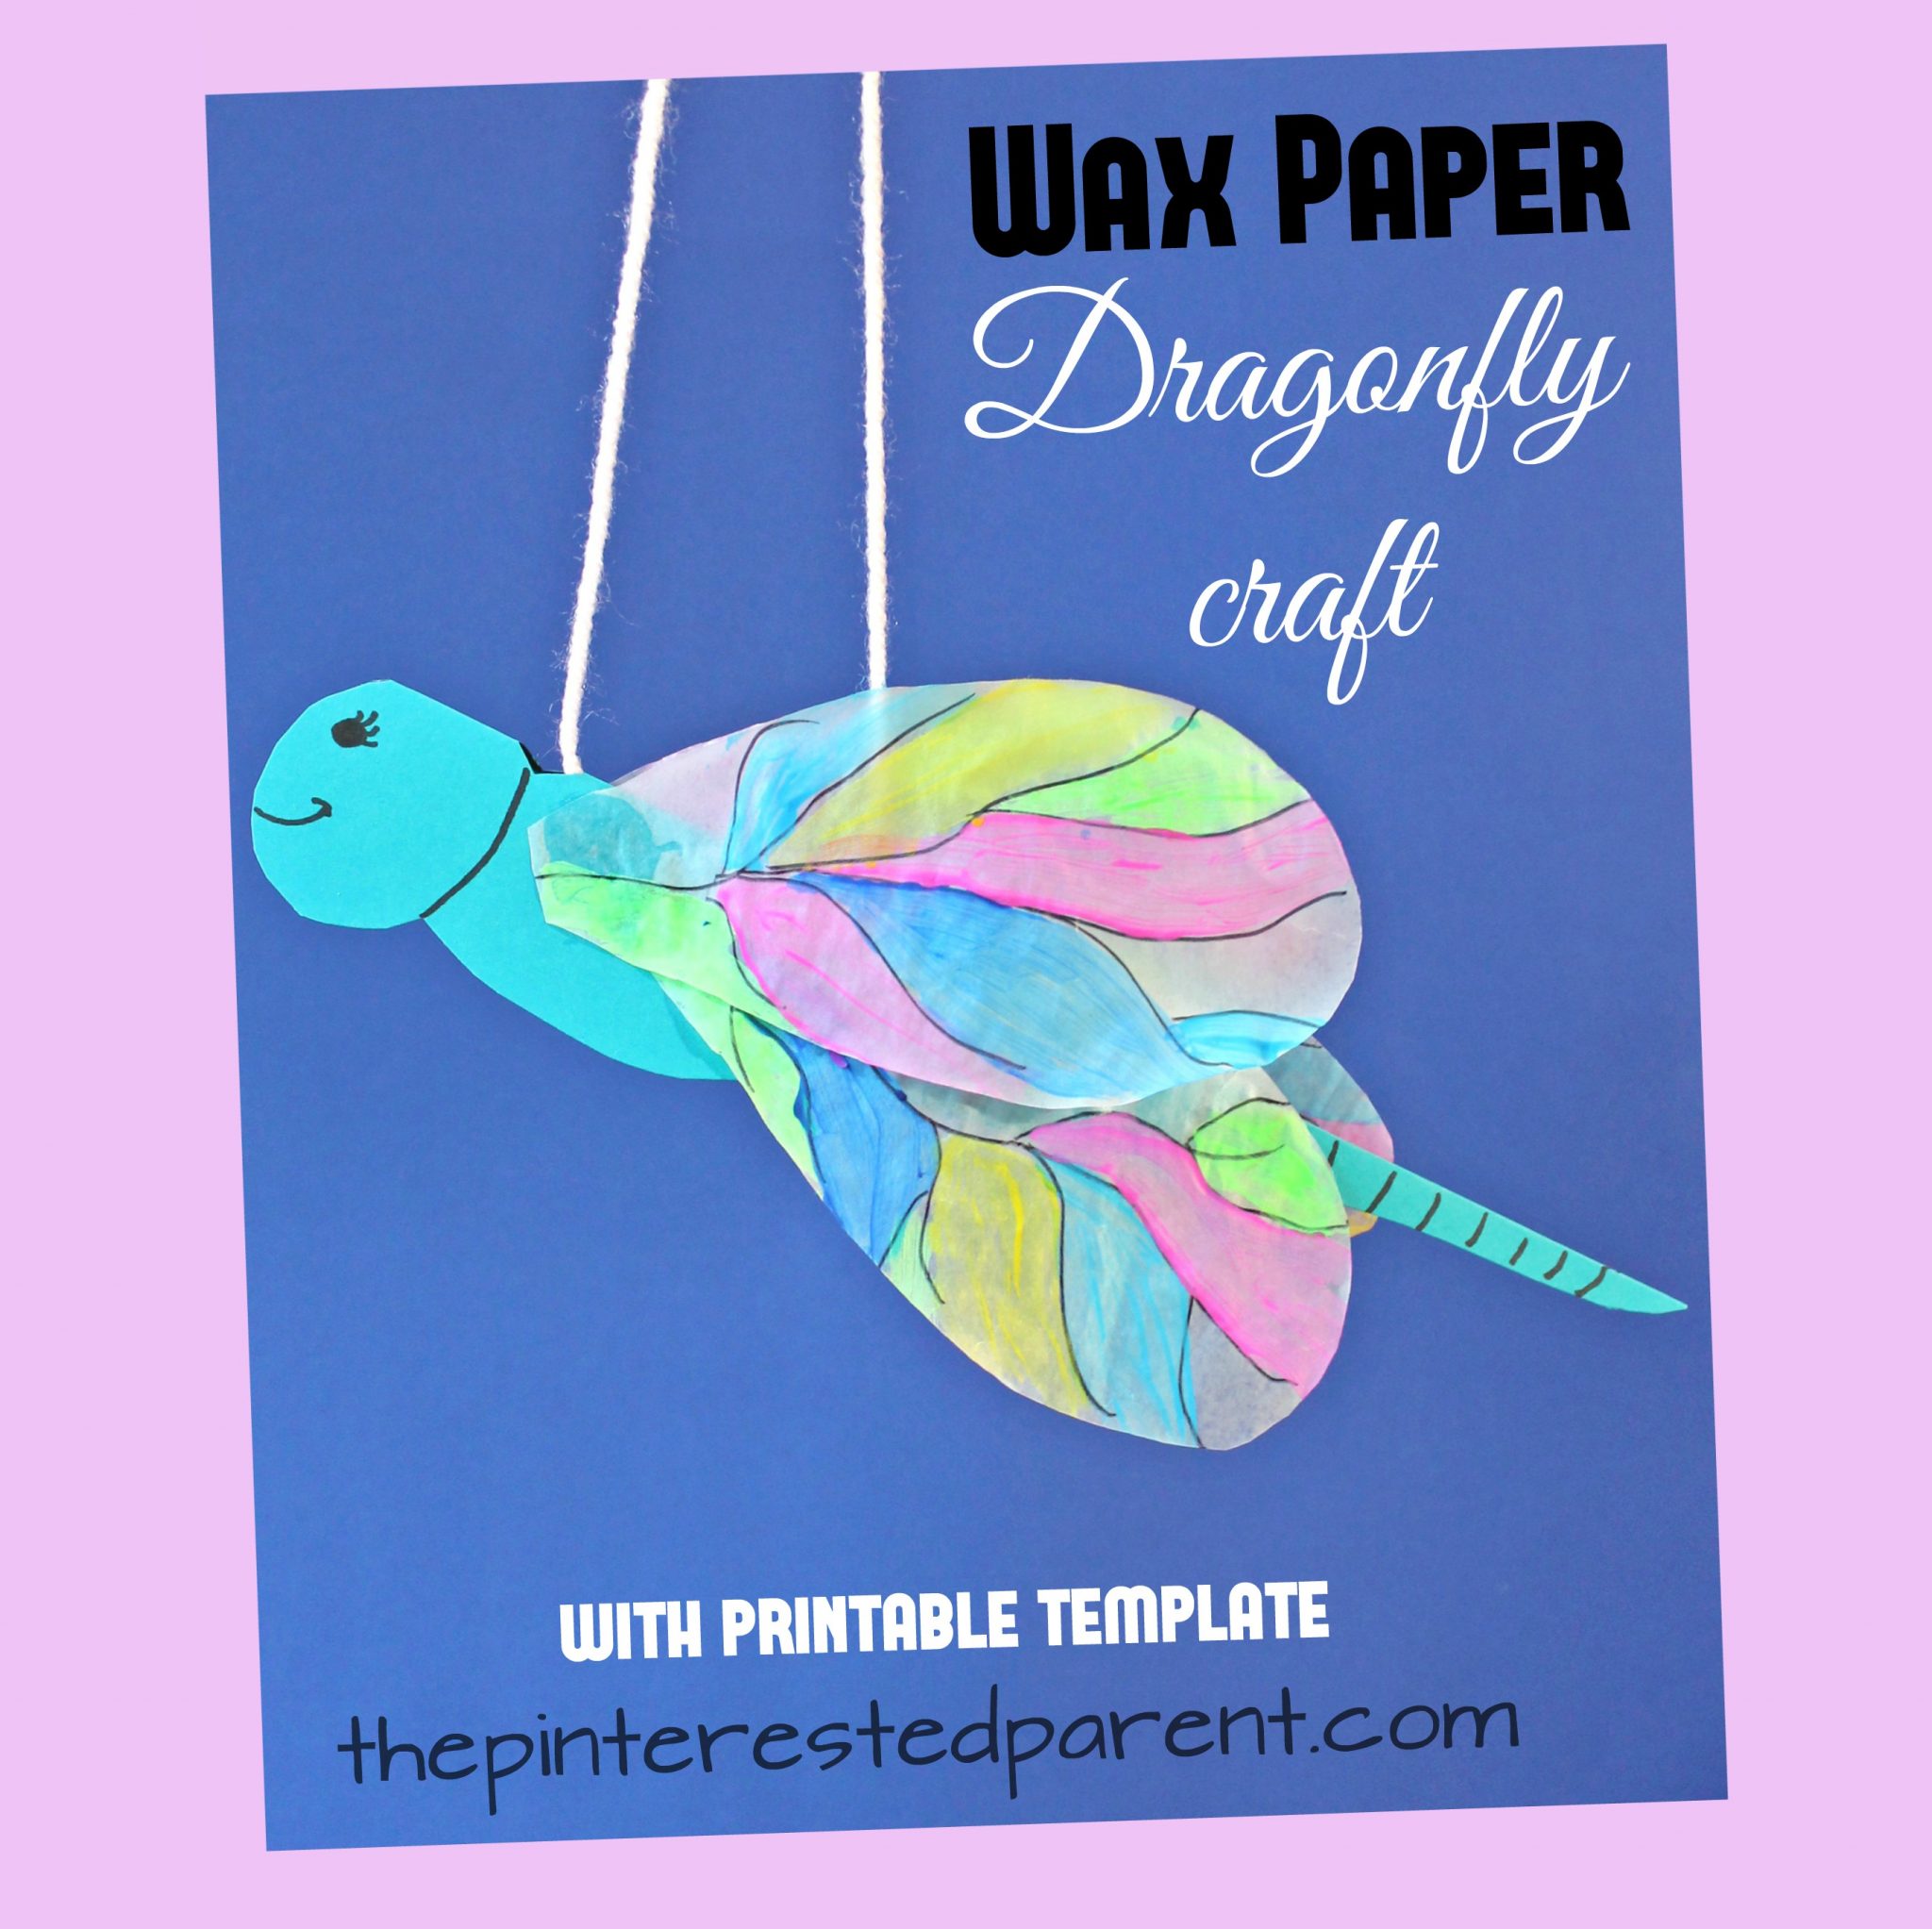
Wax Paper Dragonfly Craft

You can make this wax paper dragonfly as a hanging craft or glue it to a piece of paper, either way the result is lovely.

We love crafting with wax paper. It’s transparency and delicate texture make a wonderful canvas for painting and for stained glass tissue paper projects. Because of its transparent and delicate nature, it also makes it the perfect material for making insect wings. Dragonflies are one of our favorite insects. With summer here, they have been out in full force in our yard. They are so beautiful and my daughter and I love to watch them. These gorgeous creatures inspired our latest project. We have provided a printable template for your convenience.

Free printable template. Hanging painted wax paper and construction paper dragonfly. Kid's arts and crafts, Insects and summer

Continue Reading…

Cardboard & Yarn Craft Ornament

IMG_6234

Since Mai has started daycare our craft collection has doubled itself. We have a collection of home crafts & now the take home ones as well. Our kitchen island has a pile of them. This week, we hung up a few of our favorites to display them. This weekend we decided to make some crafts that were meant to be hung. Since Halloween is over & Christmas is everywhere, now was as good a time as any to make our first ornament.

What you will need:

Cardboard

Paint

Yarn

Glue

Directions:

Cut out your desired shape

IMG_6133

IMG_6134

Cut out notches in the cardboard.

IMG_6135

IMG_6136

IMG_6129

Paint the cardboard shape.

IMG_6131

IMG_6132

Wrap yarn around an empty toilet paper roll to make it easier for little hands.

IMG_6210

Pull the end of a piece of yarn through one of the notches. Pull tight around another notch & continue until you achieve the look you like. Younger toddlers may need a hand with this.

IMG_6211

IMG_6214

Pick a side that you like better. Glue a string to the opposite side.

IMG_6219

IMG_6229

Yarn Embellished Initial Wall Hanging

yarninitial.jpgMy daughter as many of you may well know, is named after my mother. Mai is a less than common name, which is one of the things I love about it. She will always be unique. We have a lot of personalized & monagrammed things for her. I cannot see the letter M without thinking of my little munchkin. So when I was shopping at Michael’s and saw a giant wooden M for sale, I had to scoop it up. Her room is purple with golden & neutral tones, so I chose colors to compliment her room. What you will need: A wooden letter Different colored yarns Elmers glue Scissors Glue gun

Purchase a cheap wooden letter from a craft store or make one yourself.

023

Form a circle using the glue. Starting from the center begin circling the yarn around itself.

Form a circle using the glue. Starting from the center begin circling the yarn around itself.

Continue to circle around until you cover the glue circle.

Continue to circle around until you cover the glue circle.

Snip the end of your yarn off and form into the circle.

031

Working off the edge of the first circle add another glue circle and repeat the circling method.

032

For circles that are not full because off cut out edges, form half circles around each side cutting off the ends at the edge.

033

Continue this pattern, making circles as big or as small as you desire.

036

To fill in uncovered spaces around the circles, fill in with a different colored yarn following the same lines as your circles.

006

001

Line the edges of your letter with the accent yarn to smooth out your edges & add a more finished look.

004

Braid the different colored yarns together & knot each end.

015

With a glue gun add hot glue on the back of your initial where you would like your hanger.

017

Press your braided yarn into the glue & repeat on the other side.

018

Find a place to hang your craft.

yarninitial.jpg