
*The Pinterested Parent is a participant in the Amazon Services LLC Associates Program, an affiliate advertising program designed to provide a means for sites to earn advertising fees by advertising and linking to Amazon.com. In addition, text and image links in this post may be affiliate/referral links, which means we may be compensated if you make a purchase after clicking through these particular links* See full disclosure policy.
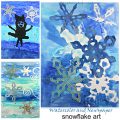
A funny thing happened the other day. A group of my friends were talking about the winter & things to do with our kids. We began talking about cutting paper snowflakes. I had said that it had been so long since I had last made one that I was not quite sure if I even remembered how to. This conversation sparked us to all attempt to make snowflakes with some funny results. We were all out of practice & went through sheet after sheet of paper until we finally figured it out. This crafting adventure with the grown ups led to a couple of fun snowflake crafts at home.
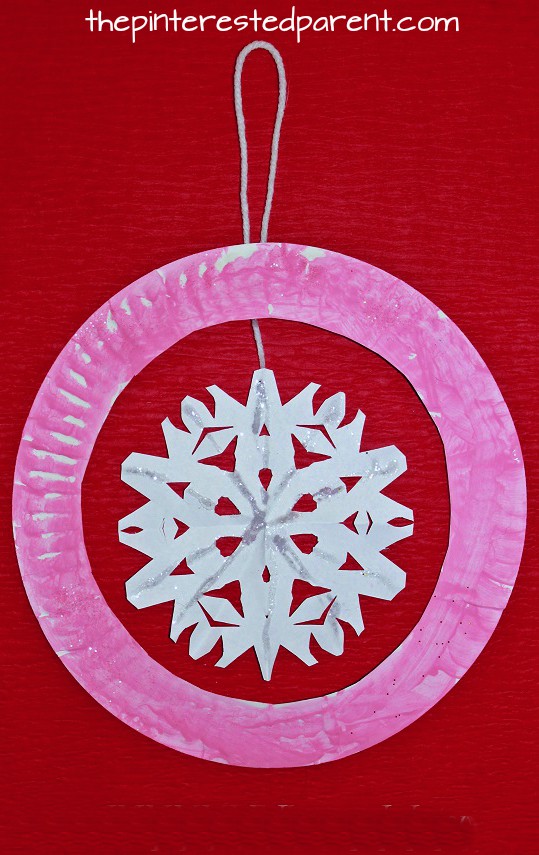
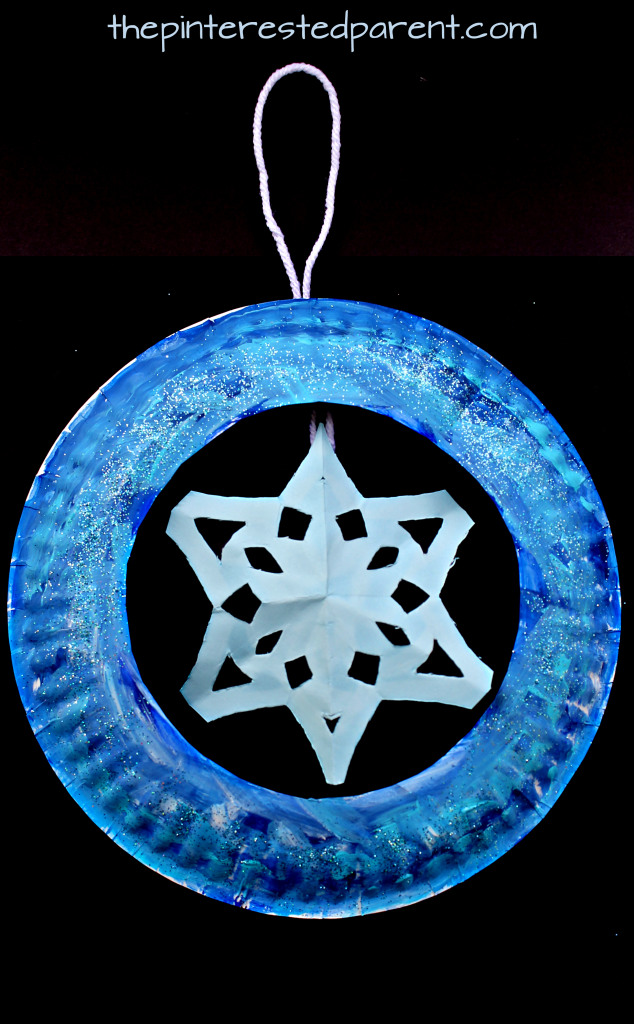
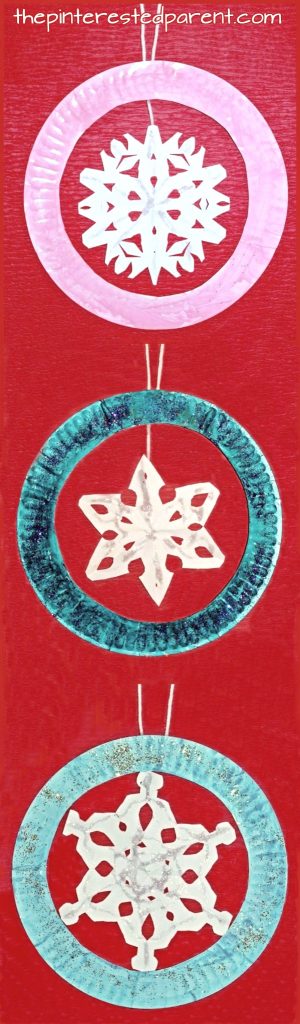
Paper Plate Snowflake Ornaments
Cut out the center of a paper plate until you reach the outer ridged portion. Paint the ring in a color of your choosing.
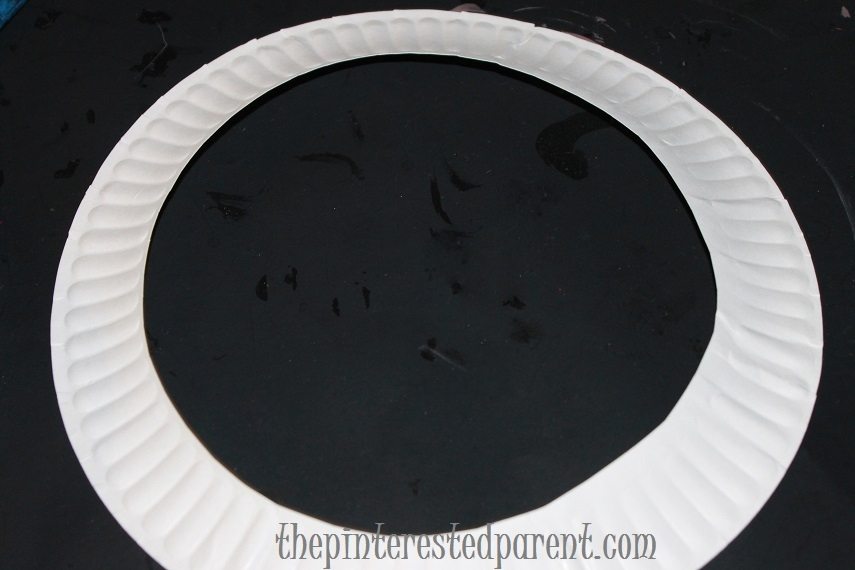
Sprinkle glitter into the wet paint. Let it dry.

How to make a snowflake
Cut a square of construction paper small enough that it fits into the circle.
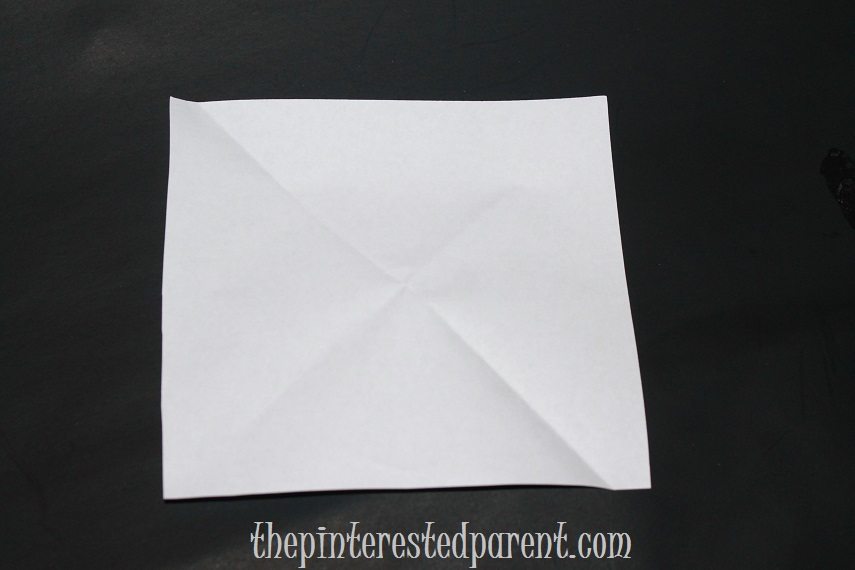
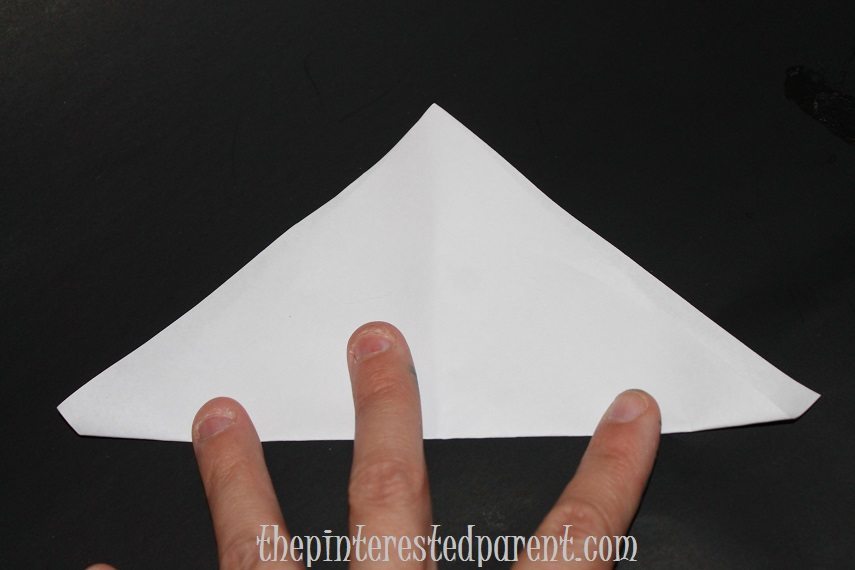
Fold it diagonally & then fold in half. It should form a triangle both times.
Make a fold so that the left edge lines up with the center of the triangle, as shown.
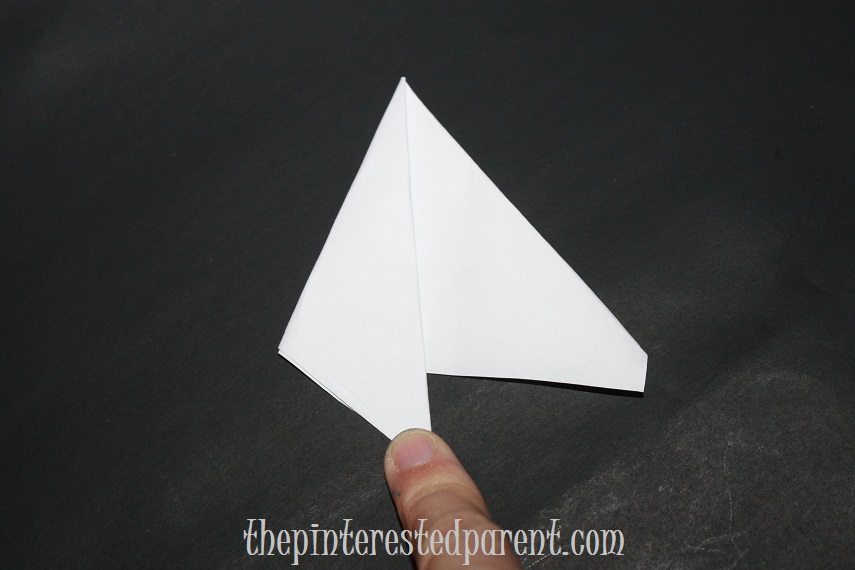
Fold the right side in the same manner.
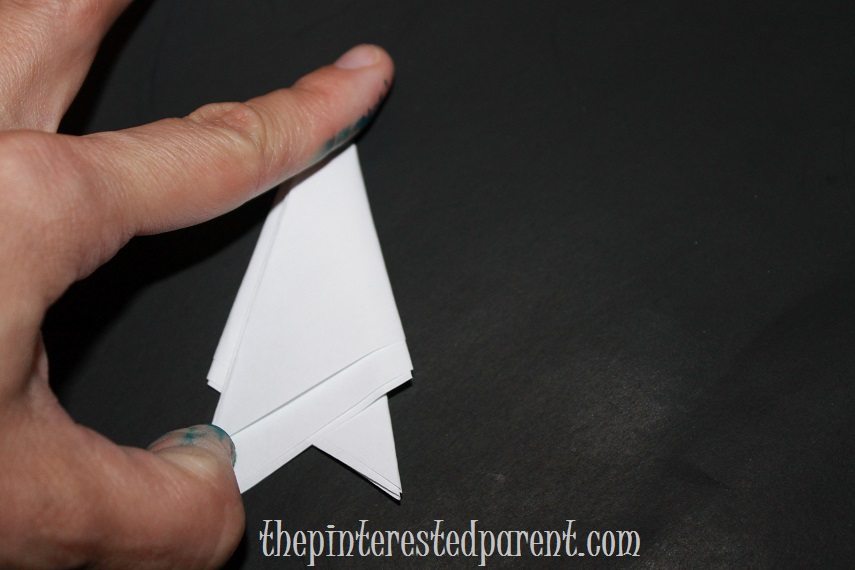
Cut the excess from the bottom so that it forms a triangle again.
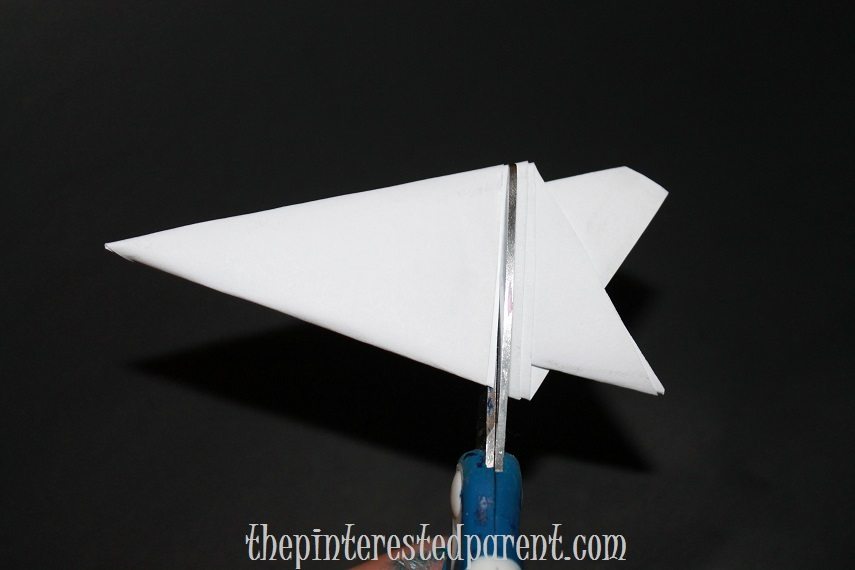
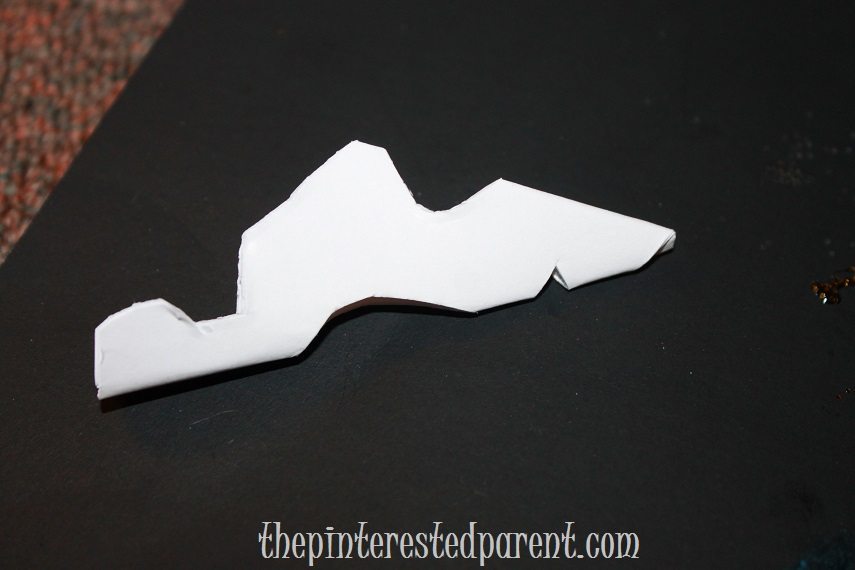
Now cut notches and shapes around the sides & on the wide end to form your snowflake. Add glue & glitter to your snowflake. Here is an example of a cut snowflake.
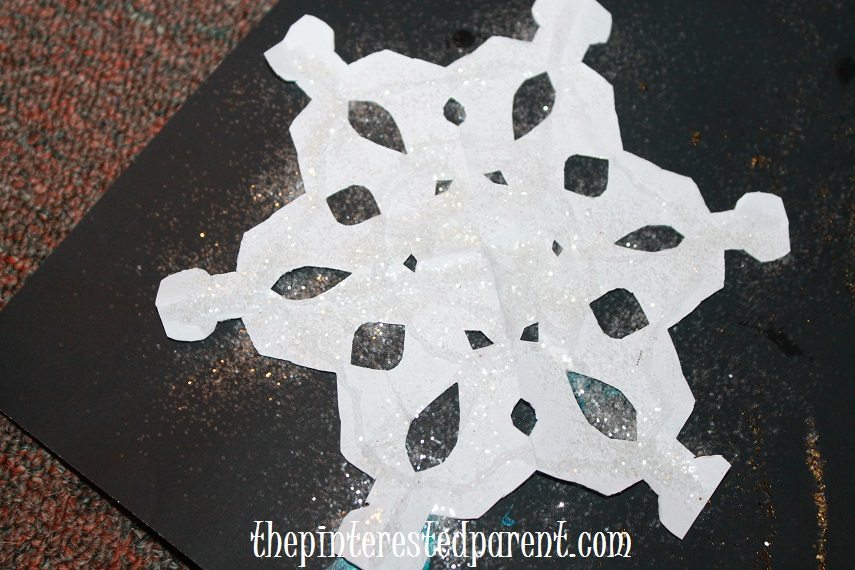
Try different cuts & experiment. That is the fun part. For pointier snowflakes, cut a point on the folded end of the wide part of the triangle. This will mean cutting most of the wide portion of the triangle off. Depending on your children’s skill level with cutting, you may need to assist them with this.
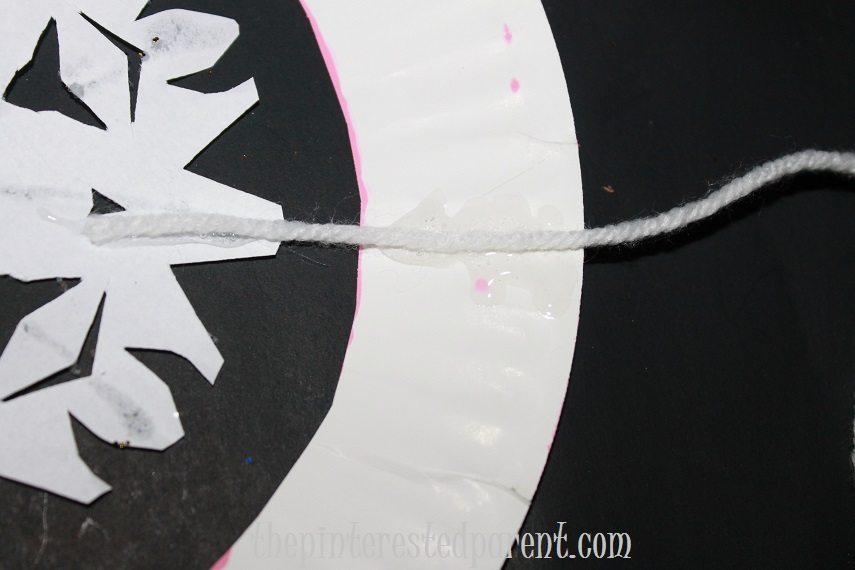
When you have your desired snowflakes, flip them over to the unglittered side & flip your paper plate rings over too.
Cut a piece of yarn & glue it to the back of the snowflake & the paper plate. Make sure that there is a little bit of yarn exposed so that the snowflake may dangle. Form a loop at the top & glue in place. Let the glue dry & then hang your ornament somewhere special.
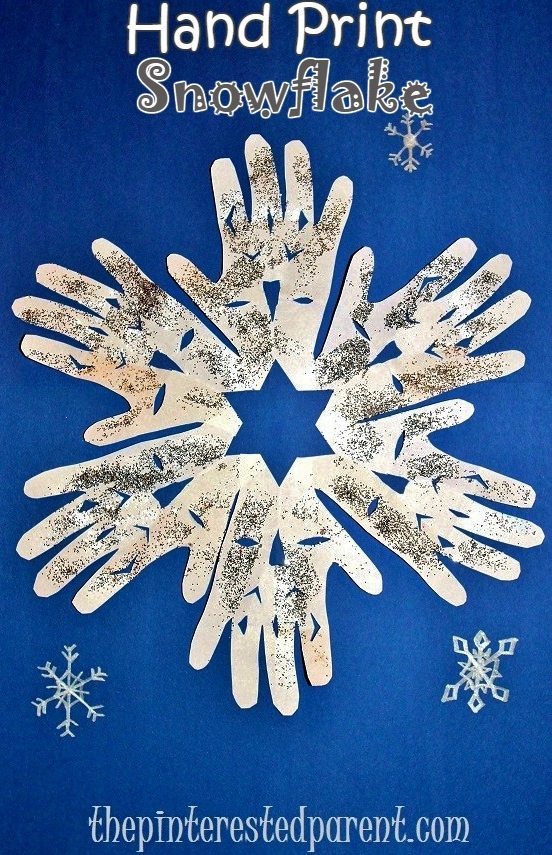
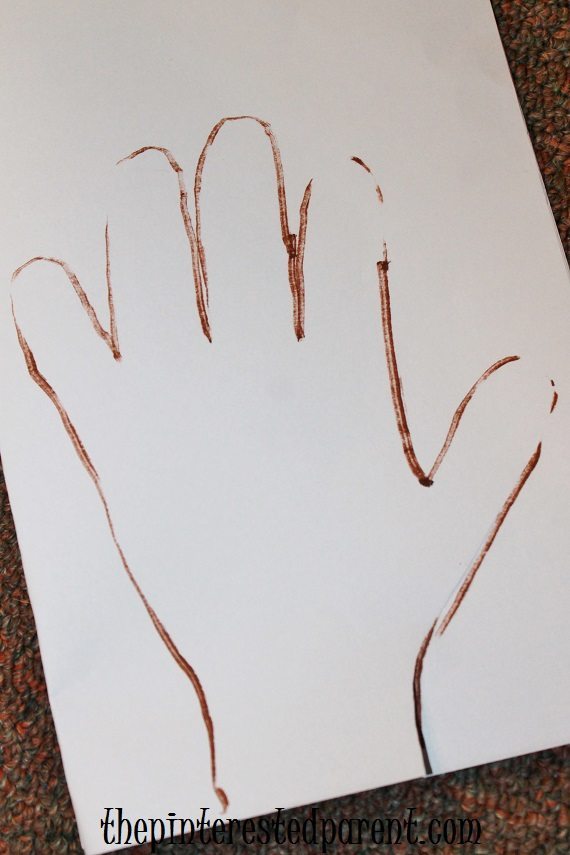
The next snowflake craft I wanted to make using a print of my daughter’s hand dipped in paint. She was not up to this & said, “How about you just trace it, mama?”
So, trace it we did & I think her suggestion was a good one.
Here is how we made a hand print snowflake:
Trace your child’s hand and a bit of the wrist onto a folded piece of construction paper.
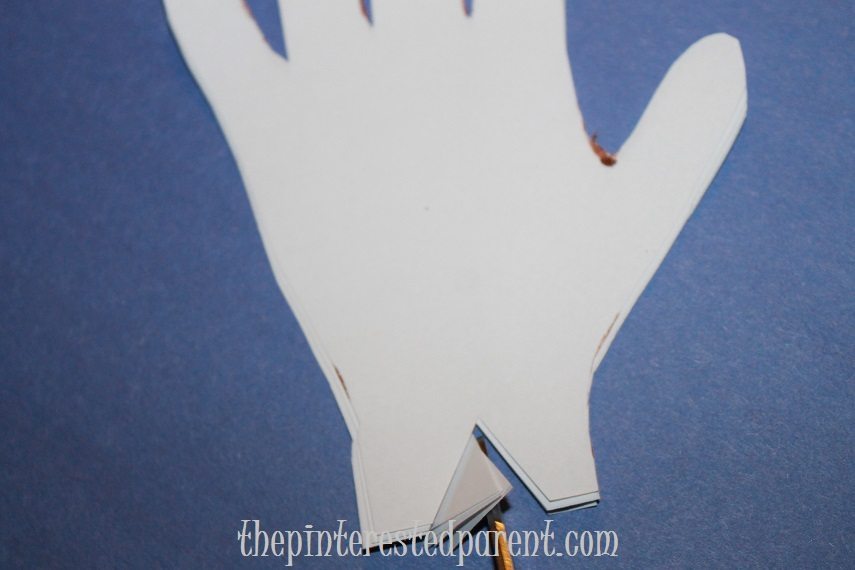
Fold two more pieces of paper & place them under the hand so that the pieces are flush with one another.
Cut the hand out along with the other paper. This should give you 6 hands. Keep the hands together & cut a triangle out of all 6 pieces at the wrist as shown. Don’t forget snowflakes have 6 sides.
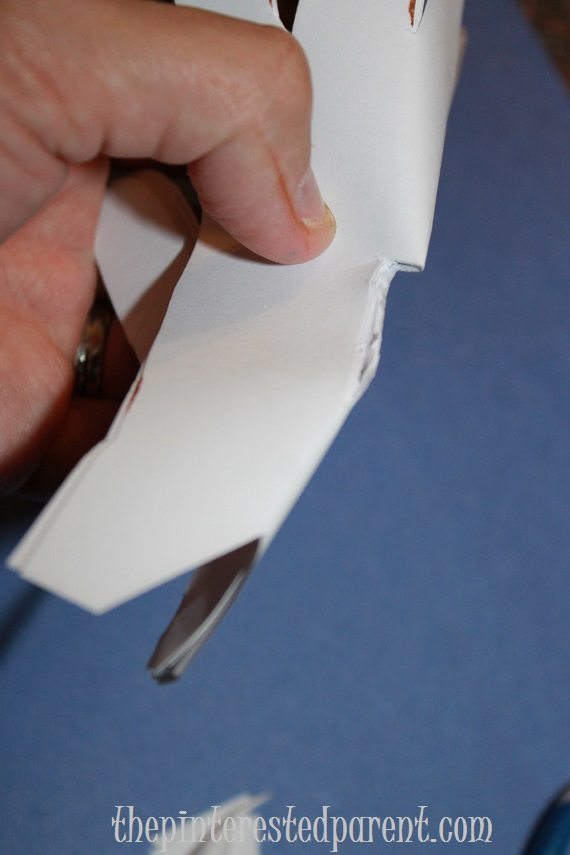
Fold, bend & cut different shapes out of your hands.

Use a glue stick & add glue to the two sides of the wrists.
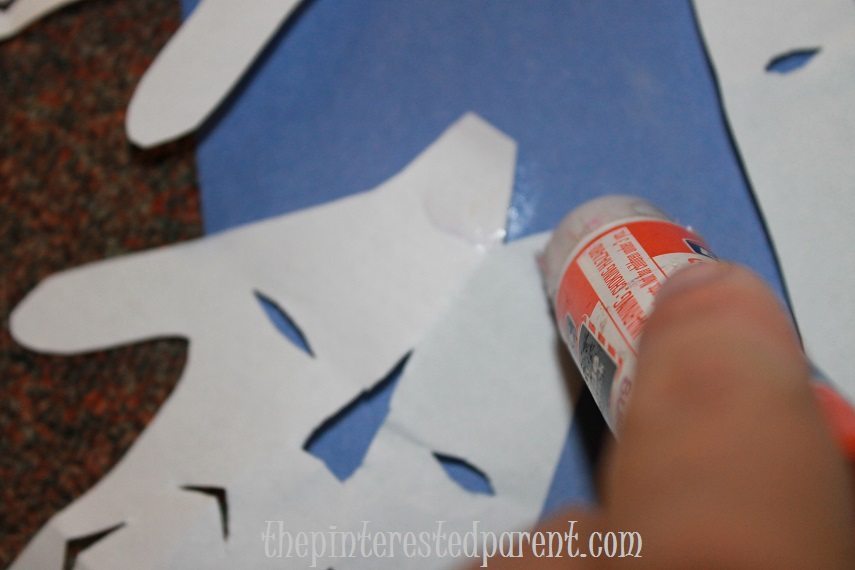
Join the wrists together wrist to wrist all the way around until you have used all of your hands. This should form a star in the center of your ring of hands. Use a glue stick over all of the hands & add silver glitter.
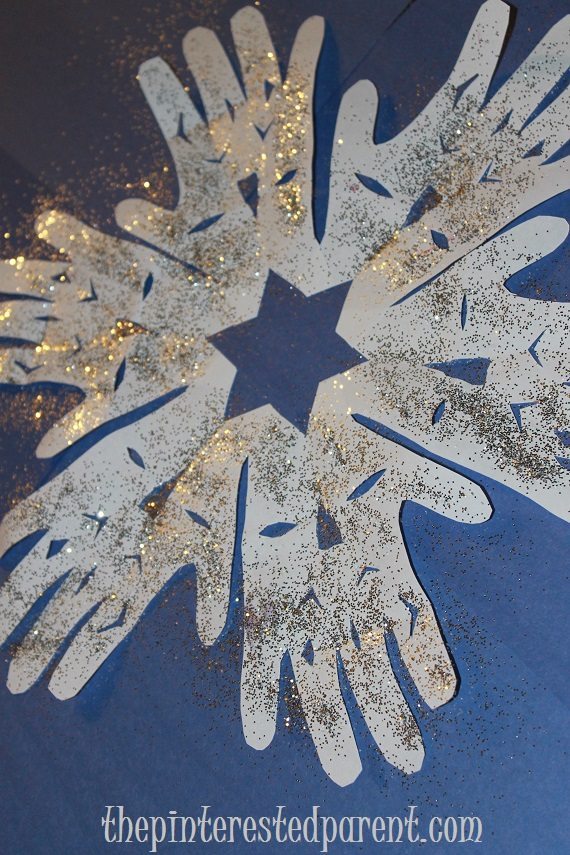
Shake off the excess glitter & let your snowflake dry.

Thank you as always for stopping by. Please follow us on Facebook as well.

I never would have thought to make the hand one for this and seriously love it though!! 🙂
For signed reason I’m not getting the save results. I can only make a star using 5 hands not 6. Been trying forever to get this to work??? Help
Oh No!! I am sorry that you are having difficulty with it. Do you have a little bit of wrist in your cut-outs? Is it possible to send me a picture of your progress? You can inbox me at https://www.facebook.com/thepinterestedparent/. Maybe I can see what it might be.