Tag

crayons

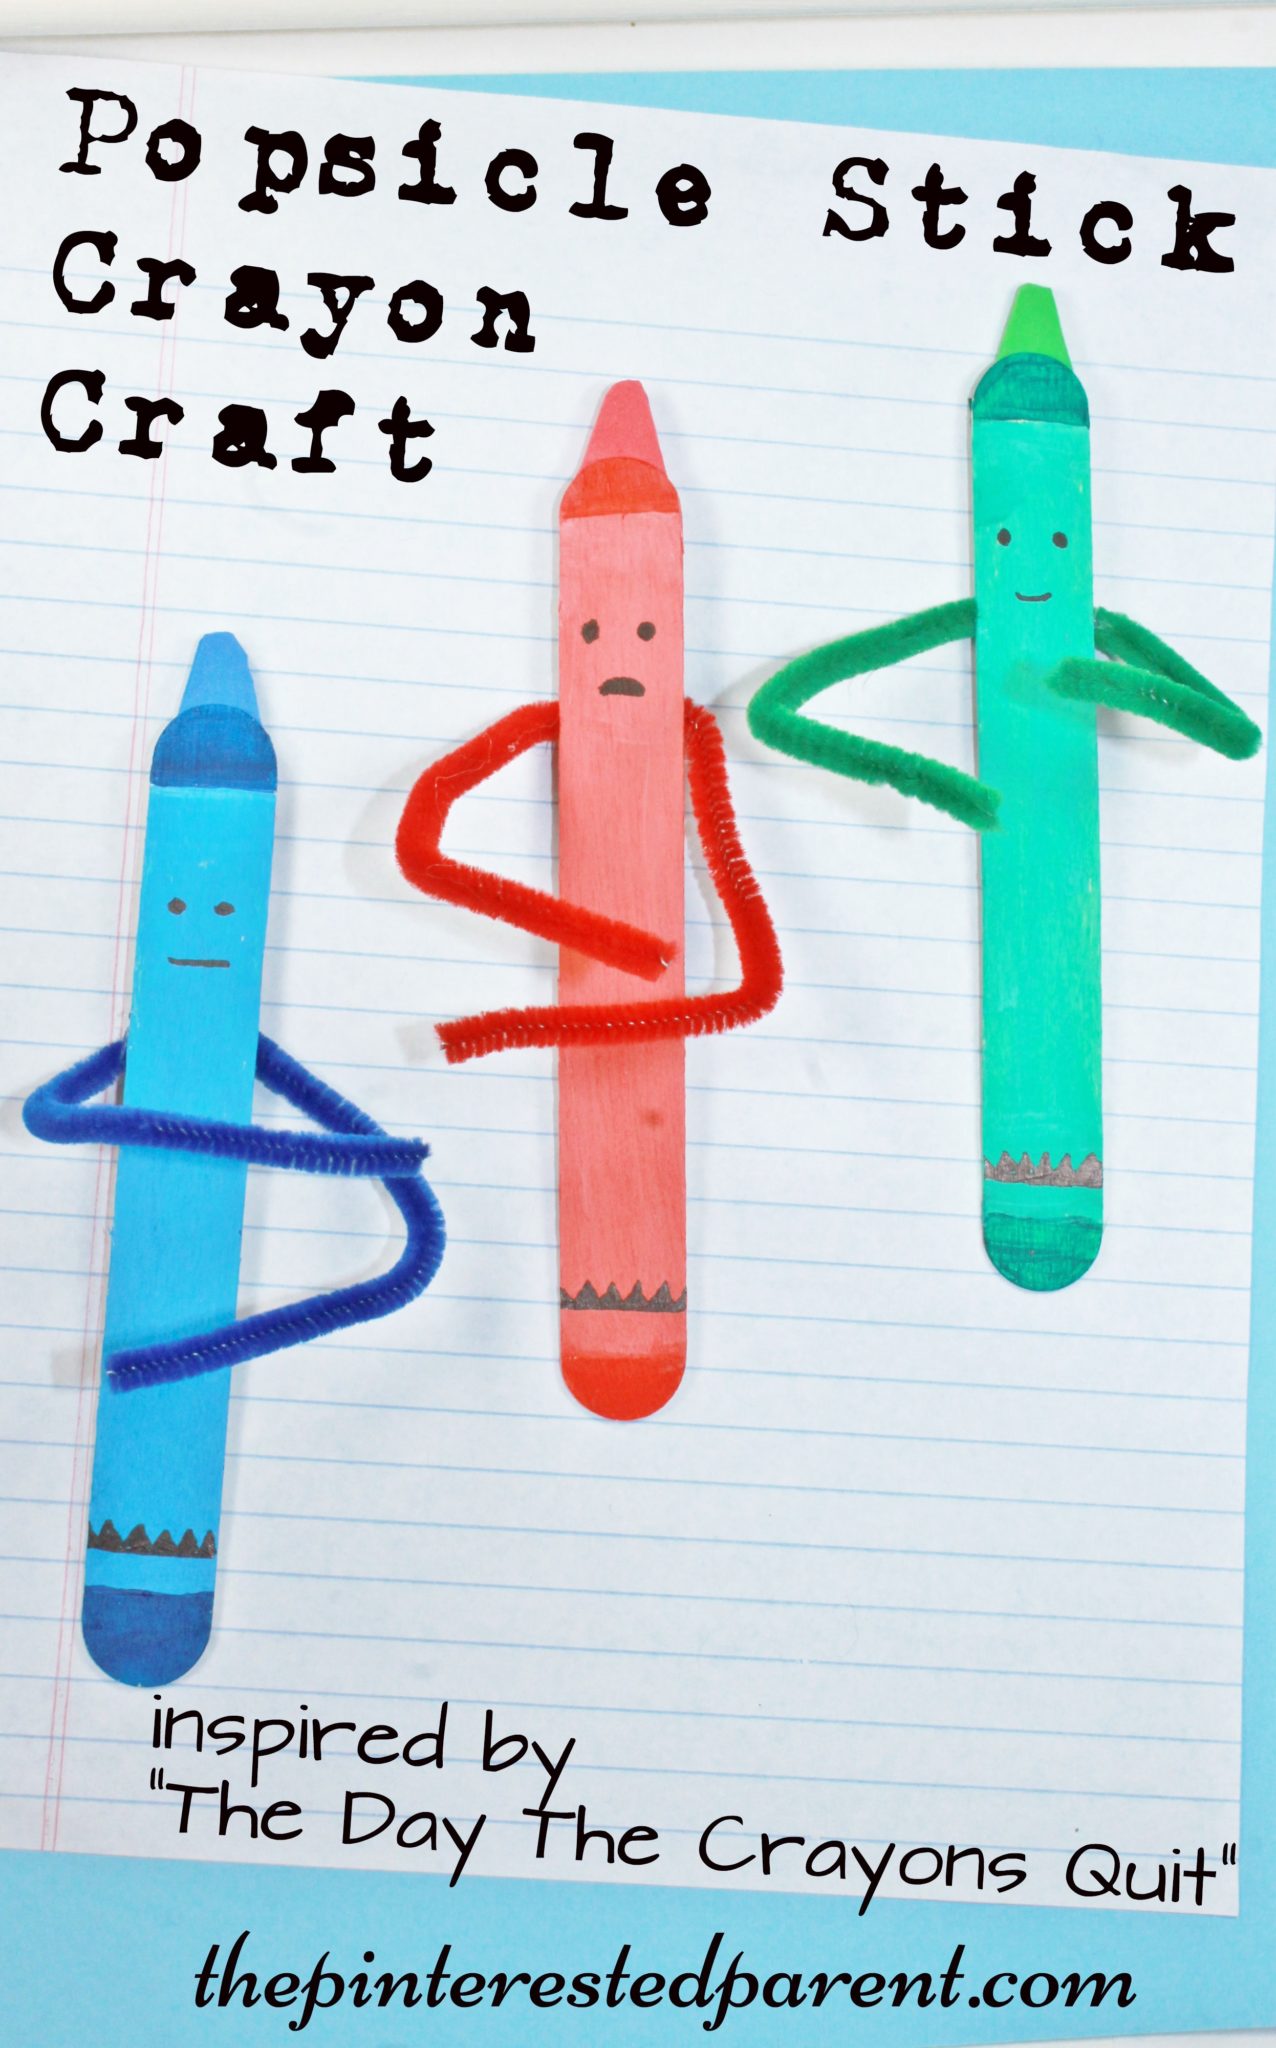
Craft Stick Crayon Craft

We are a family of readers. Mom loves books, dad loves books & our 4 year daughter loves books. We frequent the library every 2 weeks & load up on new books, but we still have our old standby favorites.Craft stick crayon crafts inspired by the book The Day The Crayons Quit - Popsicle stick arts & crafts for kids..

*This post includes affiliates links*

‘The Day the Crayons Quit’ is one of our all time favorites. My daughter loves it.

IMG_9636

This craft was inspired from this wonderful book.

Choose your crayon colors & grab the coordinating paint. Add a touch of white to the paint color. Paint the stick in the lightened color. Add the original paint color to the tips of both ends.

My daughter wanted to make a brown crayon & white. I went with red, blue & green.

IMG_9541 IMG_9546

Set your painted sticks aside to dry.

IMG_9534

Cut a piece of foam sheet to form the crayon tip. Glue your tip to the back of your stick. Use a Sharpie to draw on the face & jagged lines at the bottom.

IMG_9540 IMG_9569  IMG_9566 IMG_9567

Finish it off with pipe cleaners for arms.

They came out so cute & would be great for a bookmark.

Craft stick crayon crafts inspired by the book The Day The Crayons Quit - Popsicle stick arts & crafts for the kids Craft stick crayon crafts inspired by the book The Day The Crayons Quit - Popsicle stick arts & crafts for kids..

IMG_9575

Thank you as always for stopping by. Please follow us on Facebook as well.

Homemade Fashion Plate Crayon Rubs

Last year on Valentine’s Day, I made homemade crayon rubs inspired by a gift that my daughter had received.  We had a lot of success with our DIY crayon rubs from last year and wanted to try them again. I don’t know how many of you used to play with,  fashion plates(affiliate link) as a child, but they were a favorite of mine.  I thought this would be a fun idea for my little girl.Remember Fashion Plates from when you were a little kids? DIY fashion plate crayon rubs . Quick and easy to make & tons of fun. Arts & crafts and activities for kids.

*This post contains affiliate links*

Do you remember Fashion Plates from when you were a kids. Make these easy to make crayon rubs using cardboard and a glue gun. Printable templates are available as well. Use this to make shapes, letters or any designs. Kid's arts and crafts and activities.

All you need to make these are cardboard,  pencil and a low temp glue gun. We have also included printable templates for your convenience. If you choose to use the templates, you will also need scissors and a glue stick.

Crayon Rub Templates

Cut the cardboard into 3X3 squares. Lightly draw in simple clothing designs or print and cut out our printable templates and use a glue stick to glue them on to the cardboard. Use a glue gun to trace your drawings.

Remember Fashion Plates from when you were a little kids? DIY fashion plate crayon rubs . Quick and easy to make & tons of fun. Arts & crafts and activities for kids.

Place a top and bottom clothing section under a piece of paper and use different colored crayons and rub them over the cardboard pieces until images appear.

IMG_7774IMG_7773

Mix and match your pieces to create different outfits. Try this method to make shapes, letters, or any other designs. They are so simple to make and a lot of fun to play with.

Remember Fashion Plates from when you were a little kids? DIY fashion plate crayon rubs . Quick and easy to make & tons of fun. Arts & crafts and activities for kids.

Thank you as always for stopping by. Please follow us on Facebook as well.


Melted Crayon Hearts

Melted Crayon Hearts. This art & craft for kids is perfect for Valentine's Day

*This post contains affiliate links*

My daughter received a new book from her cousins on Christmas. It has since been promoted to her favorite book.

51HoHYJv6TL._SX258_BO1,204,203,200_

The Day The Crayons Quit‘ is a funny book about a group of frustrated crayons that air their grievances to their owner with individual letters to him. In only a short couple of weeks, my daughter has memorized the book from cover to cover. We read it every day, sometime multiple times a day. It made me realize how neglected her own crayons have been. Mai is much more interested in paint & markers these days, but I had a project that I thought might change her mind.

Melted Crayon Hearts

This is a messy project. Lay down paper or a drop cloth for easier clean up.

We started with a piece of cardboard.  I cut the cardboard into heart shapes & used a paper hole punch to poke a hole in the hearts to be able to add ribbon or string to later.

IMG_3389

We grabbed any unwrapped crayons that we had in our collection to start. We tried a number of different methods to achieve our final projects. We started by holding the crayon on the cardboard & using the blow dryer on a low-speed, high heat setting. Mai needed assistance with this because our dryer to too heavy for her to hold with one hand. I held the hair dryer for her as she worked the crayon around. *Operate caution as hair dryers can get very hot on the skin*

IMG_3391

Next we cut small chunks of crayon and laid them a couple of pieces at a time on the heart. I let Mai operate the hair dryer using 2 hands. This created a different effect as the melted crayon ran on its own pattern. I would suggest putting your project into a box or something contained if using small pieces as they do blow around a bit.

IMG_3395

My daughter came up with another idea as well. She grabbed a paint brush and pushed around her melted crayon and painted it on. The crayons cooled quickly, so she had to use the dryer often.

IMG_3397

When the crayon cooled & dried, we wrapped a ribbon through the holes.

Melted Crayon Hearts - process art & crafts for kids

This was a fun project. Mai loved watching the crayons melt. When the crayons got shiny, she knew that they were melting and that she could use them. “Mama, it melts just like an ice cube.” When we finished, she even asked if we could melt more crayons tomorrow.

Thank you as always for stopping by. Please follow us on Facebook as well.

Melted Crayon Hearts for Valentine's Day - process art for kids

Crayon Box Monster

Crayon Box Monster


My daughter loves to draw & color. She will spend hours drawing pictures of the family & practicing writing. What she does not like is picking up all of her crayons after she is done. Most of the time, the crayon box is empty & she puts all of her crayons in a plastic bin. I had given up on trying to get the crayons back in their box & was content with them being put in the plastic bin. Just as I was about the throw away the crayon box, I stopped. I thought we could use it to make a craft instead.


Crayon Box Monster

I asked Mai what color she wanted her monster to be & she chose yellow. We put a base coat of white over the box first & let it dry before applying the yellow.

IMG_0925

We added large googly eyes to the top half of the box.

IMG_0934

We painted the inside cardboard inserts in white & cut jagged edges into the bottom row to make teeth.

IMG_0928

We cut jagged edges into the top of the bottom portion of the box as well.

IMG_0935

We cut out 2 triangles & added them to the top of the box for ears.

IMG_0936

We cut the arms out of foam sheet for better flexibility & durability & glued them to the sides.

IMG_0937

We glued our hands together in the front. Voila & a quick and easy crayon box monster. Mai has added many of her own touches to him over the past few days. Now she actually likes putting her crayons back in the box because she is feeding her hungry crayon monster.

IMG_0943


Thank you as always for stopping by. Please follow us on Facebook as well.

Valentine’s Day Rubs

GlueRubs.jpg

For Christmas this year, one of my dear friends bought my daughter Fashion Plates. When Mai unwrapped her gift, it was Mommy’s face that lit up not hers. I loved Fashion Plates as a girl. I felt like a young girl again. As I sat on the floor rubbing a crayon against the plates, I thought to myself this is probably something that we can do at home with our own designs.

Valentine’s Day Rubs

What you will need:

A few squares of cardboard

A hot glue gun

Crayons

Paper

Directions:

I cut a few squares out of a cardboard box.  Be sure the squares are clean & even. With a glue gun draw a design. (For adult use only) Keep your designs simple & try to apply the glue as evenly and level as possible for the best effect.

P1180544

For our Valentine’s themed designs, we went with a heart, an arrow & the word love. The glue should dry in a couple of minutes.

P1180545

Once dry, place the squares under a piece of paper. Using the side of a crayon, rub back & forth & watch the design transfer onto the paper.

CrayonRubs.jpg

Unfortunately for me, not all of my ideas are winners with my daughter. Like the Fashion Plates, this was more entertaining for mommy than her. She made one arrow & then moved on to drawing a picture of a monster family.

P1180554

It was not a total waste for Mai though. We discovered that the rubs also make a lovely paint stamper.

P1180555

Thank you as always for stopping by. Please follow us on Facebook as well.