

Let the Christmas crafting continue. Last week we made Christmas themed Rice Krispies treats. I needed marshmallows for making these. They were luckily on sale at the grocery store that day & I bought far more marshmallow than any household needs.
While making our treats, I noticed that Mai really enjoyed playing with them. We had enough of them, so let’s play.
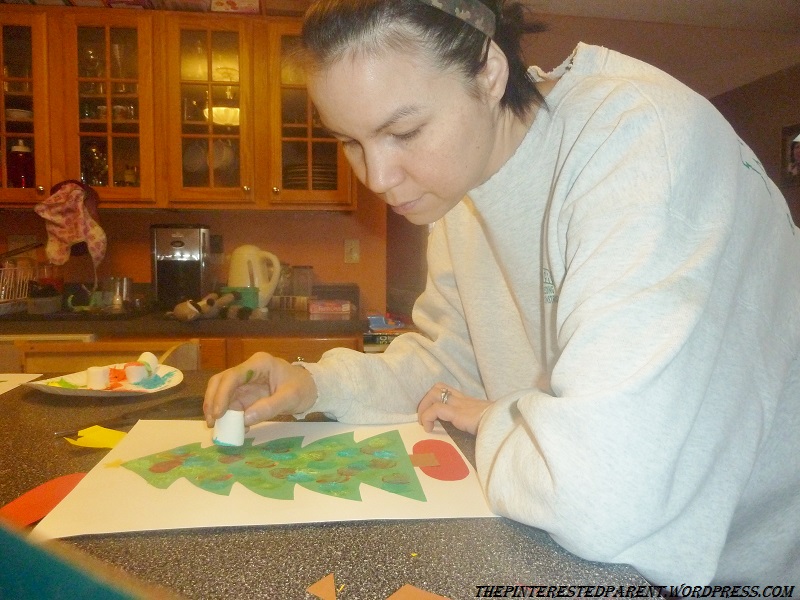
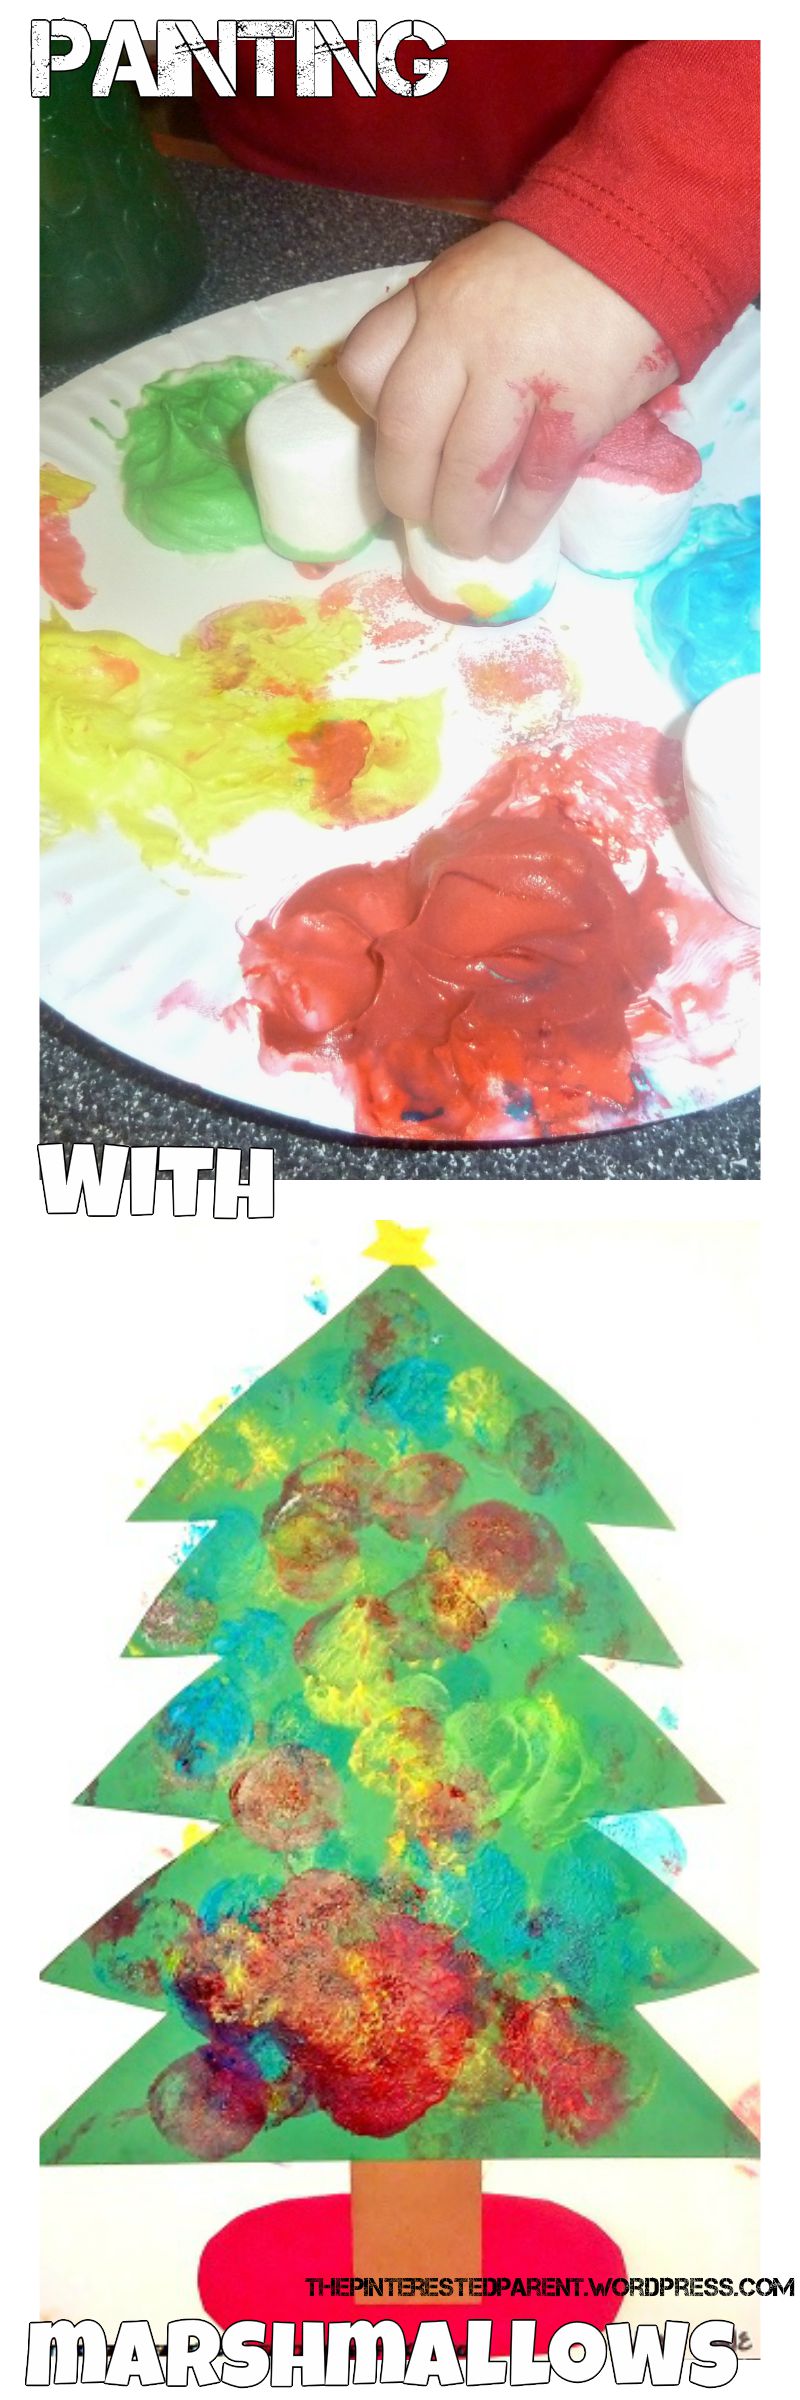
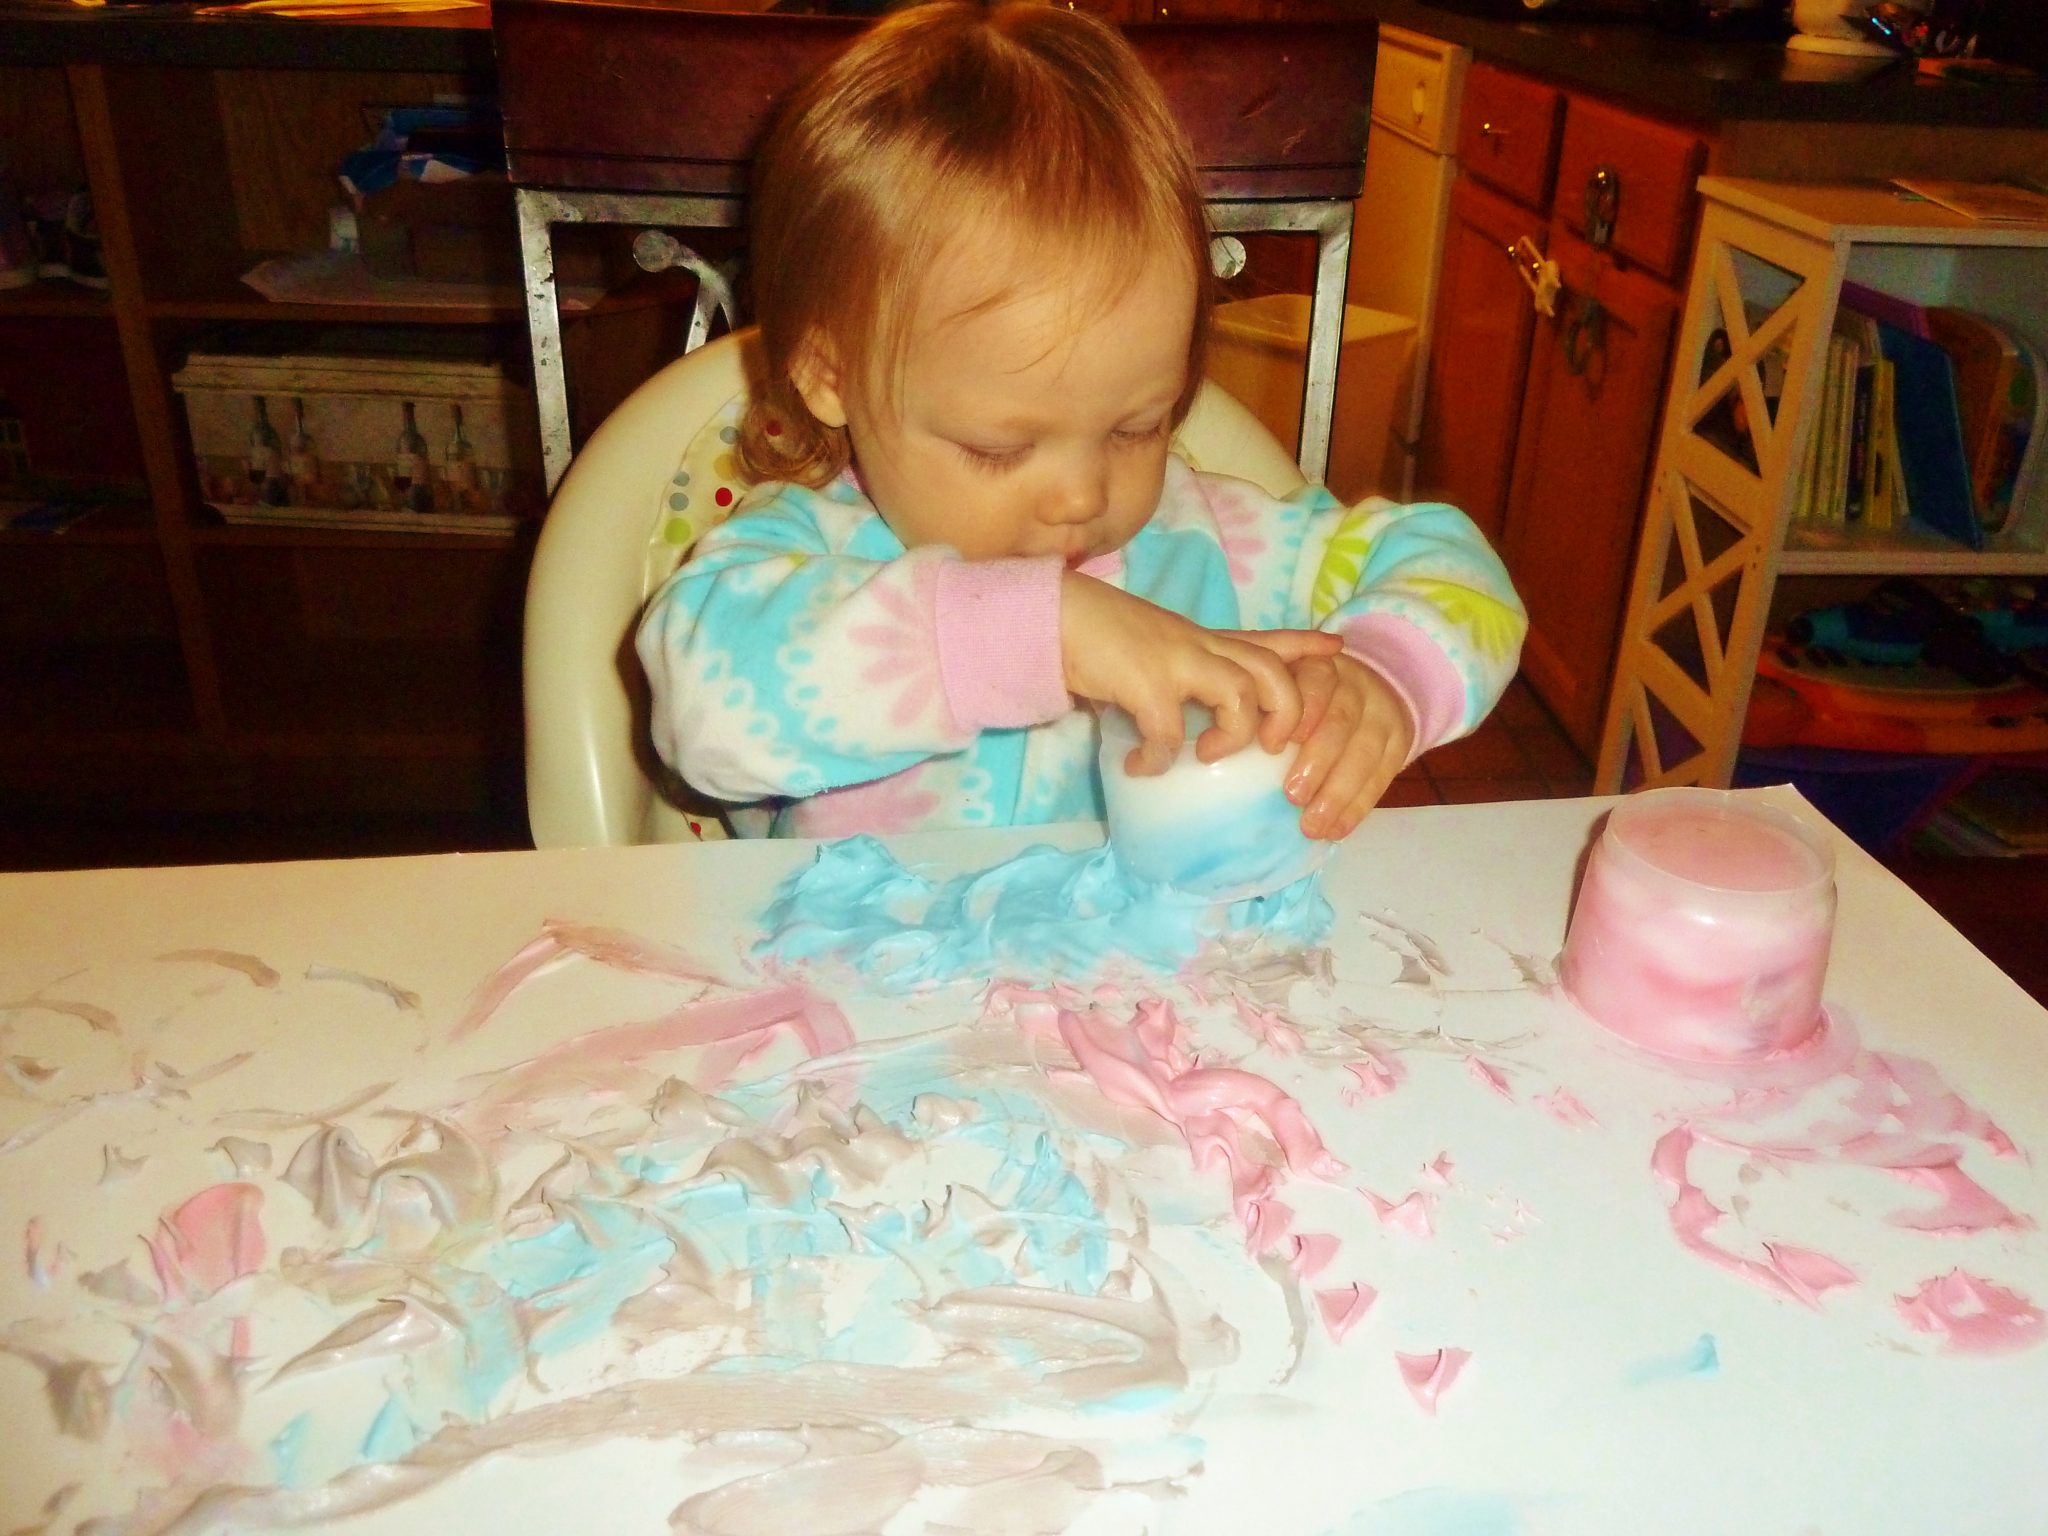
Today, it was Mai & Mommy’s marshmallow crafting day. Lately, Mai has been doing a lot of painting. She asks me almost every day. Today would be no different. “Paint, mama! Paint! Paint!”. Painting it is! We could use the marshmallows to paint with, ala pointillism style. My thoughts were to cut out a Christmas tree & then use the marshmallows to dot on the ornaments with paint.
Here is what you will need..
Construction paper- green, yellow, white, red & brown
Marshmallows
Non Toxic Paint -I whipped up our usual batch of Cool Whip paints http://thepinterestedparent.wordpress.com/2013/11/01/cool-whip-finger-painting-more-messy-play/
Glue Stick
Scissors
Directions:
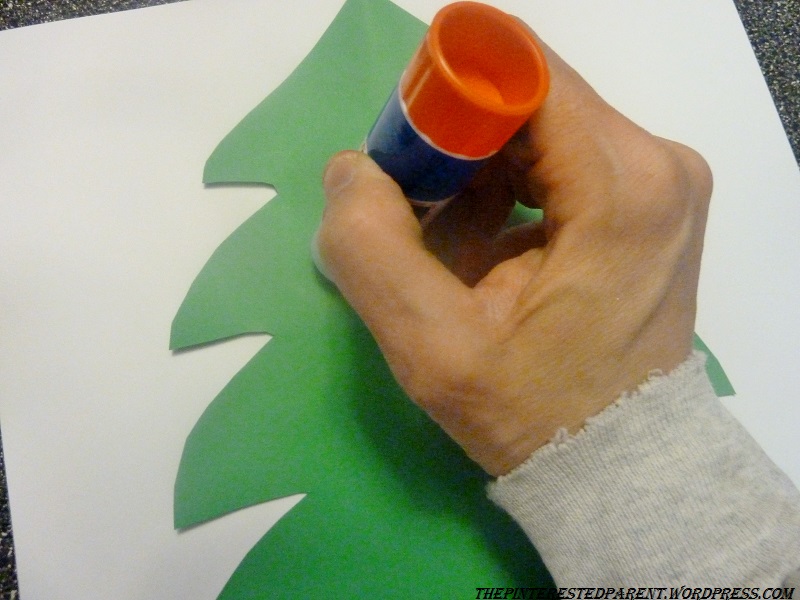
Draw the outline of the Christmas tree.
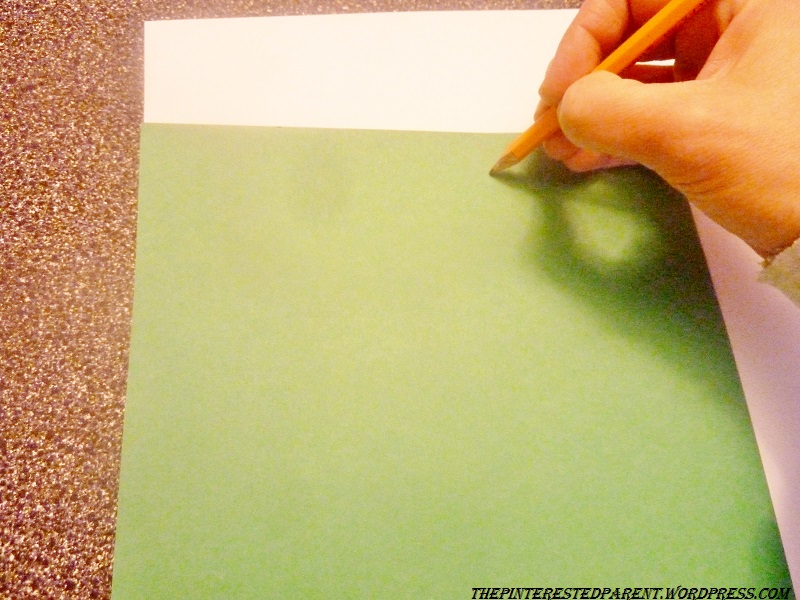
Cut out around the outline of the tree.
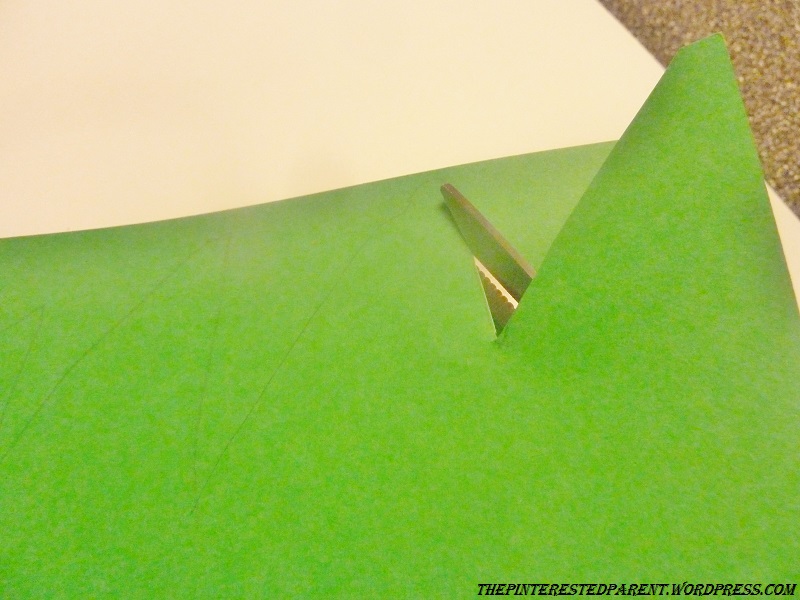
Cut out a rectangle for the stump, an oval for tree skirt & a star for the top of the tree.

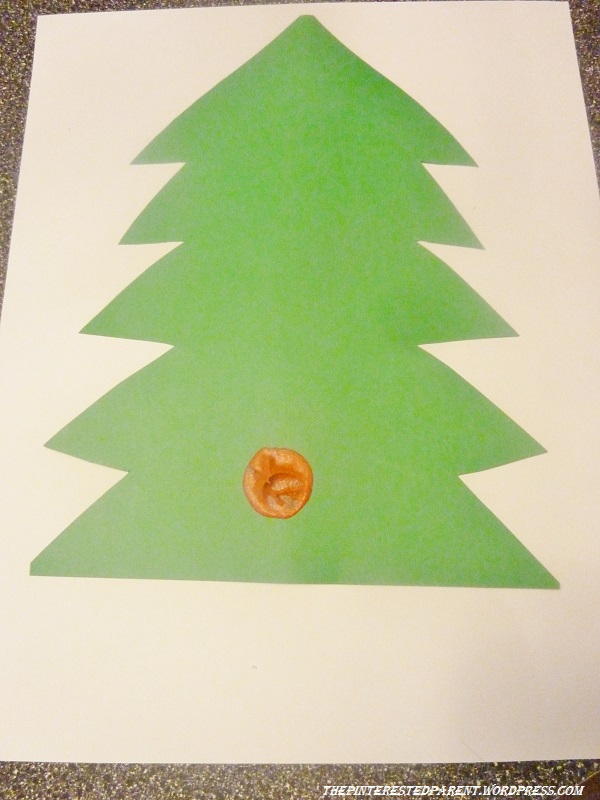
Loosely tape tree to a scrap piece of paper temporarily & then show your child how to use the marshmallow to stamp on the paint.
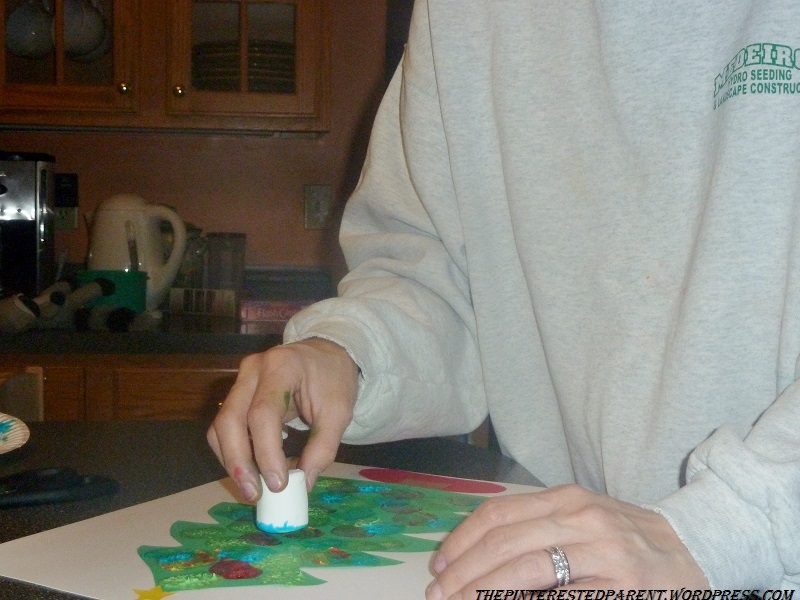
Let your toddler paint their masterpiece.


Mommy wants to join in on the fun too.
Mai’s finished artwork. Mommy’s too.
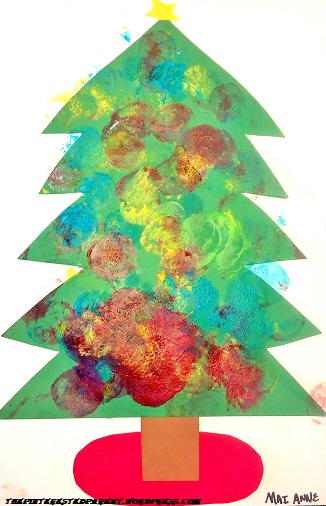
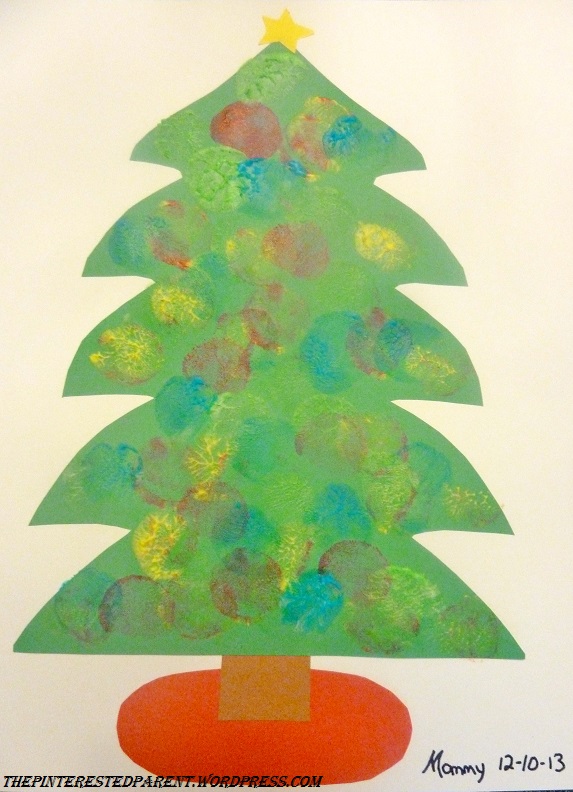
I had as much fun with this as she did. This was a fun & easy project for any age.
The marshmallow fun didn’t stop there. We needed a sweet treat after all that painting.
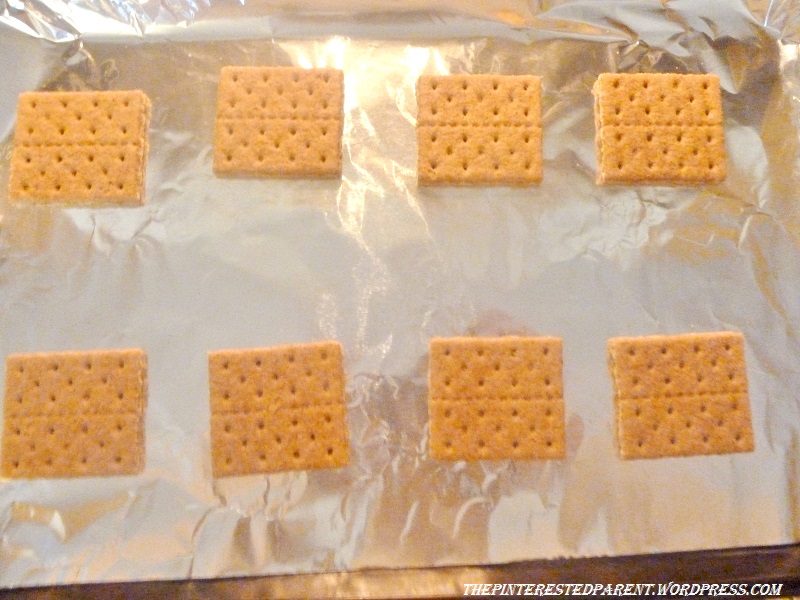
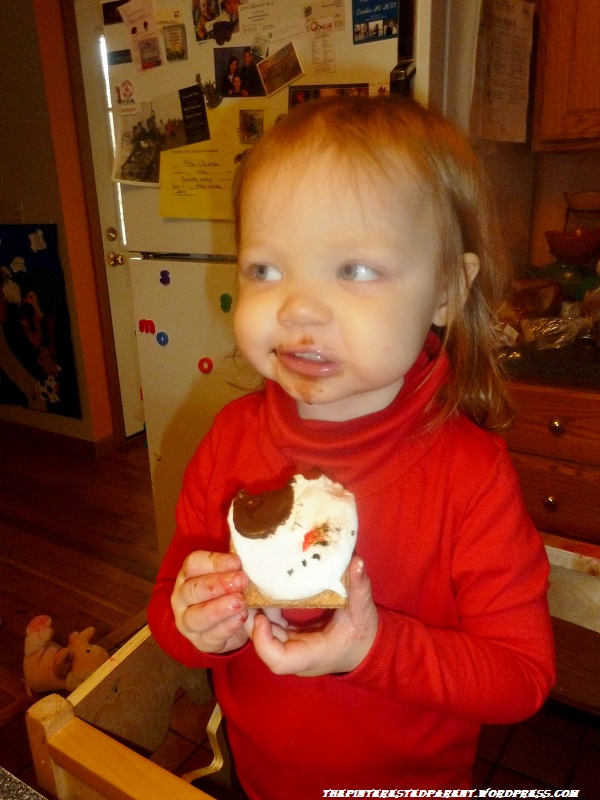
Peanut Butter Melting Snowman Smores
Ingredients:
Marshmallows
Graham crackers
Peanut butter
Peanut butter cup minis
M&M minis
Writing icing
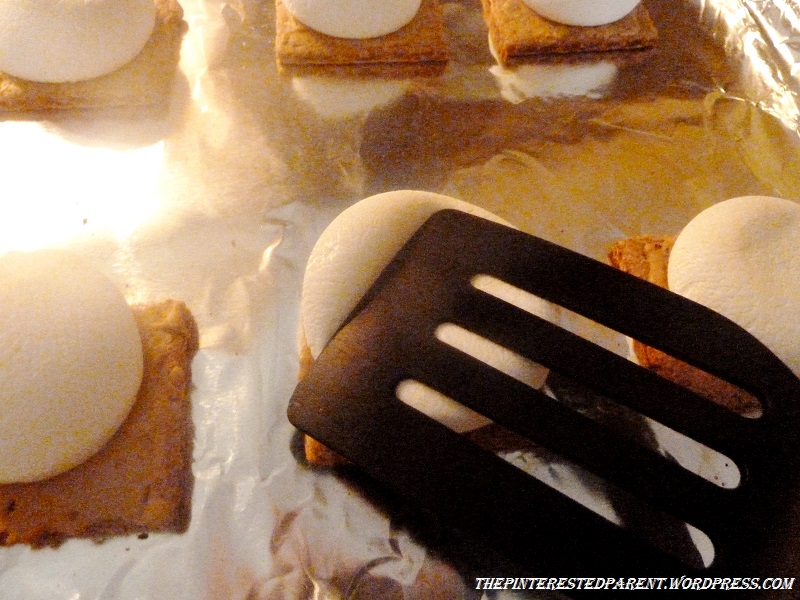
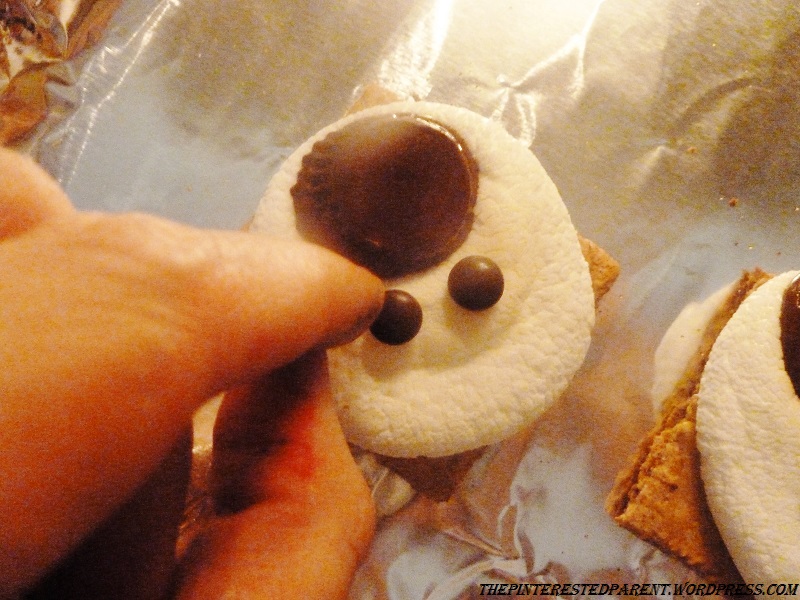
Directions: Preheat oven to 350. Break graham crackers into double square squares. Spread a thin layer of peanut butter on to the cracker. Place one marshmallow on each square. Place in the oven. Bake until marshmallow is almost melted. Do not let burn. Remove from the oven & lightly flatten the marshmallow with a spatula. Let cool for about 2 minutes. Place a peanut butter cup on the still warm marshmallow, where you would like your hat to be. It will melt slightly. Put in the fridge for a few minutes to let the hat cool & set. Remove from the fridge & add two chocolate M&M mini for eyes. Use orange writing icing to make a carrot nose & use black or brown icing to dot on the mouth. Let cool & enjoy.


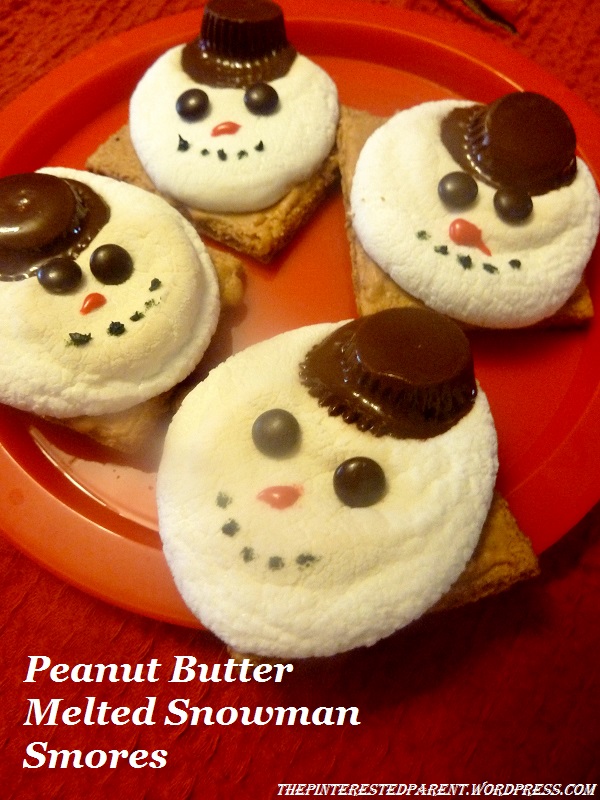
These are delicious. The peanut butter offers a wonderful twist. I know someone that agrees.
Up next: Meet Our Daughter, The Parrot.
Related Topics:
http://glitterbatterandothermatters.com/2013/12/10/smores-dip/
http://stamchocolate.wordpress.com/2013/12/10/bar-in-a-jar/
http://thecraftycultivator.wordpress.com/2013/12/09/gingerbread-marshmallows/
http://zouptonuts.wordpress.com/2013/12/08/baked-smores-not-just-for-the-campfire/
Totally pinned to try both of these with my girls now. Seriously, thank you so much for sharing and loved both the craft and the recipe, too!! 🙂
Thanks Janine. They were fun too. I think I will only paint with marshmallows from now on. Lol
Great Share 🙂
Thank you.
Ilike this project, new homeschool activity for us thanks for this i was looking for our next fun project and walaa i found it thanks to you, KUDOS
Lol! Thank you. I hope you & your kiddos enjoy it.
I love using unusual items for crafting. The marshmallows look fun — now how many of them did your kids eat? Ha!
Jennifer @ The Jenny Evolution
She actually didn’t eat any of them. She did eat the smores, though.
Thanks so much for sharing my Baked S’mores post! I really appreciate it. The snowmen look adorable. I think we might have to try that with all our leftover marshmallows. 🙂 Thank you, again, for the shout out! – Lisa
P.S. Totally agree about the Pinterest addiction. 🙂
No problem. It was a great post. Thank you for stopping by.
Thanks so much for linking to my Gingerbread Marshmallows!
You are very welcome. I love Gingerbread & marshmallows. How could I resist.
Those marshmellow snowmen are not only adorable – but drool worthy! I’ll be coming back to this for when my nieces are in town 🙂
Thank you. They really are delicious. I loved the addition of the peanut butter. My husband did too.
I love the marshmallow Christmas Tree painting! I have been doing some crafts with my daughter lately, but never thought of this. I am definitely going to try it now! Thanks! 🙂
Thank you. My daughter loves to paint. I love it! It is wonderful to be able to share these moments with our little ones.