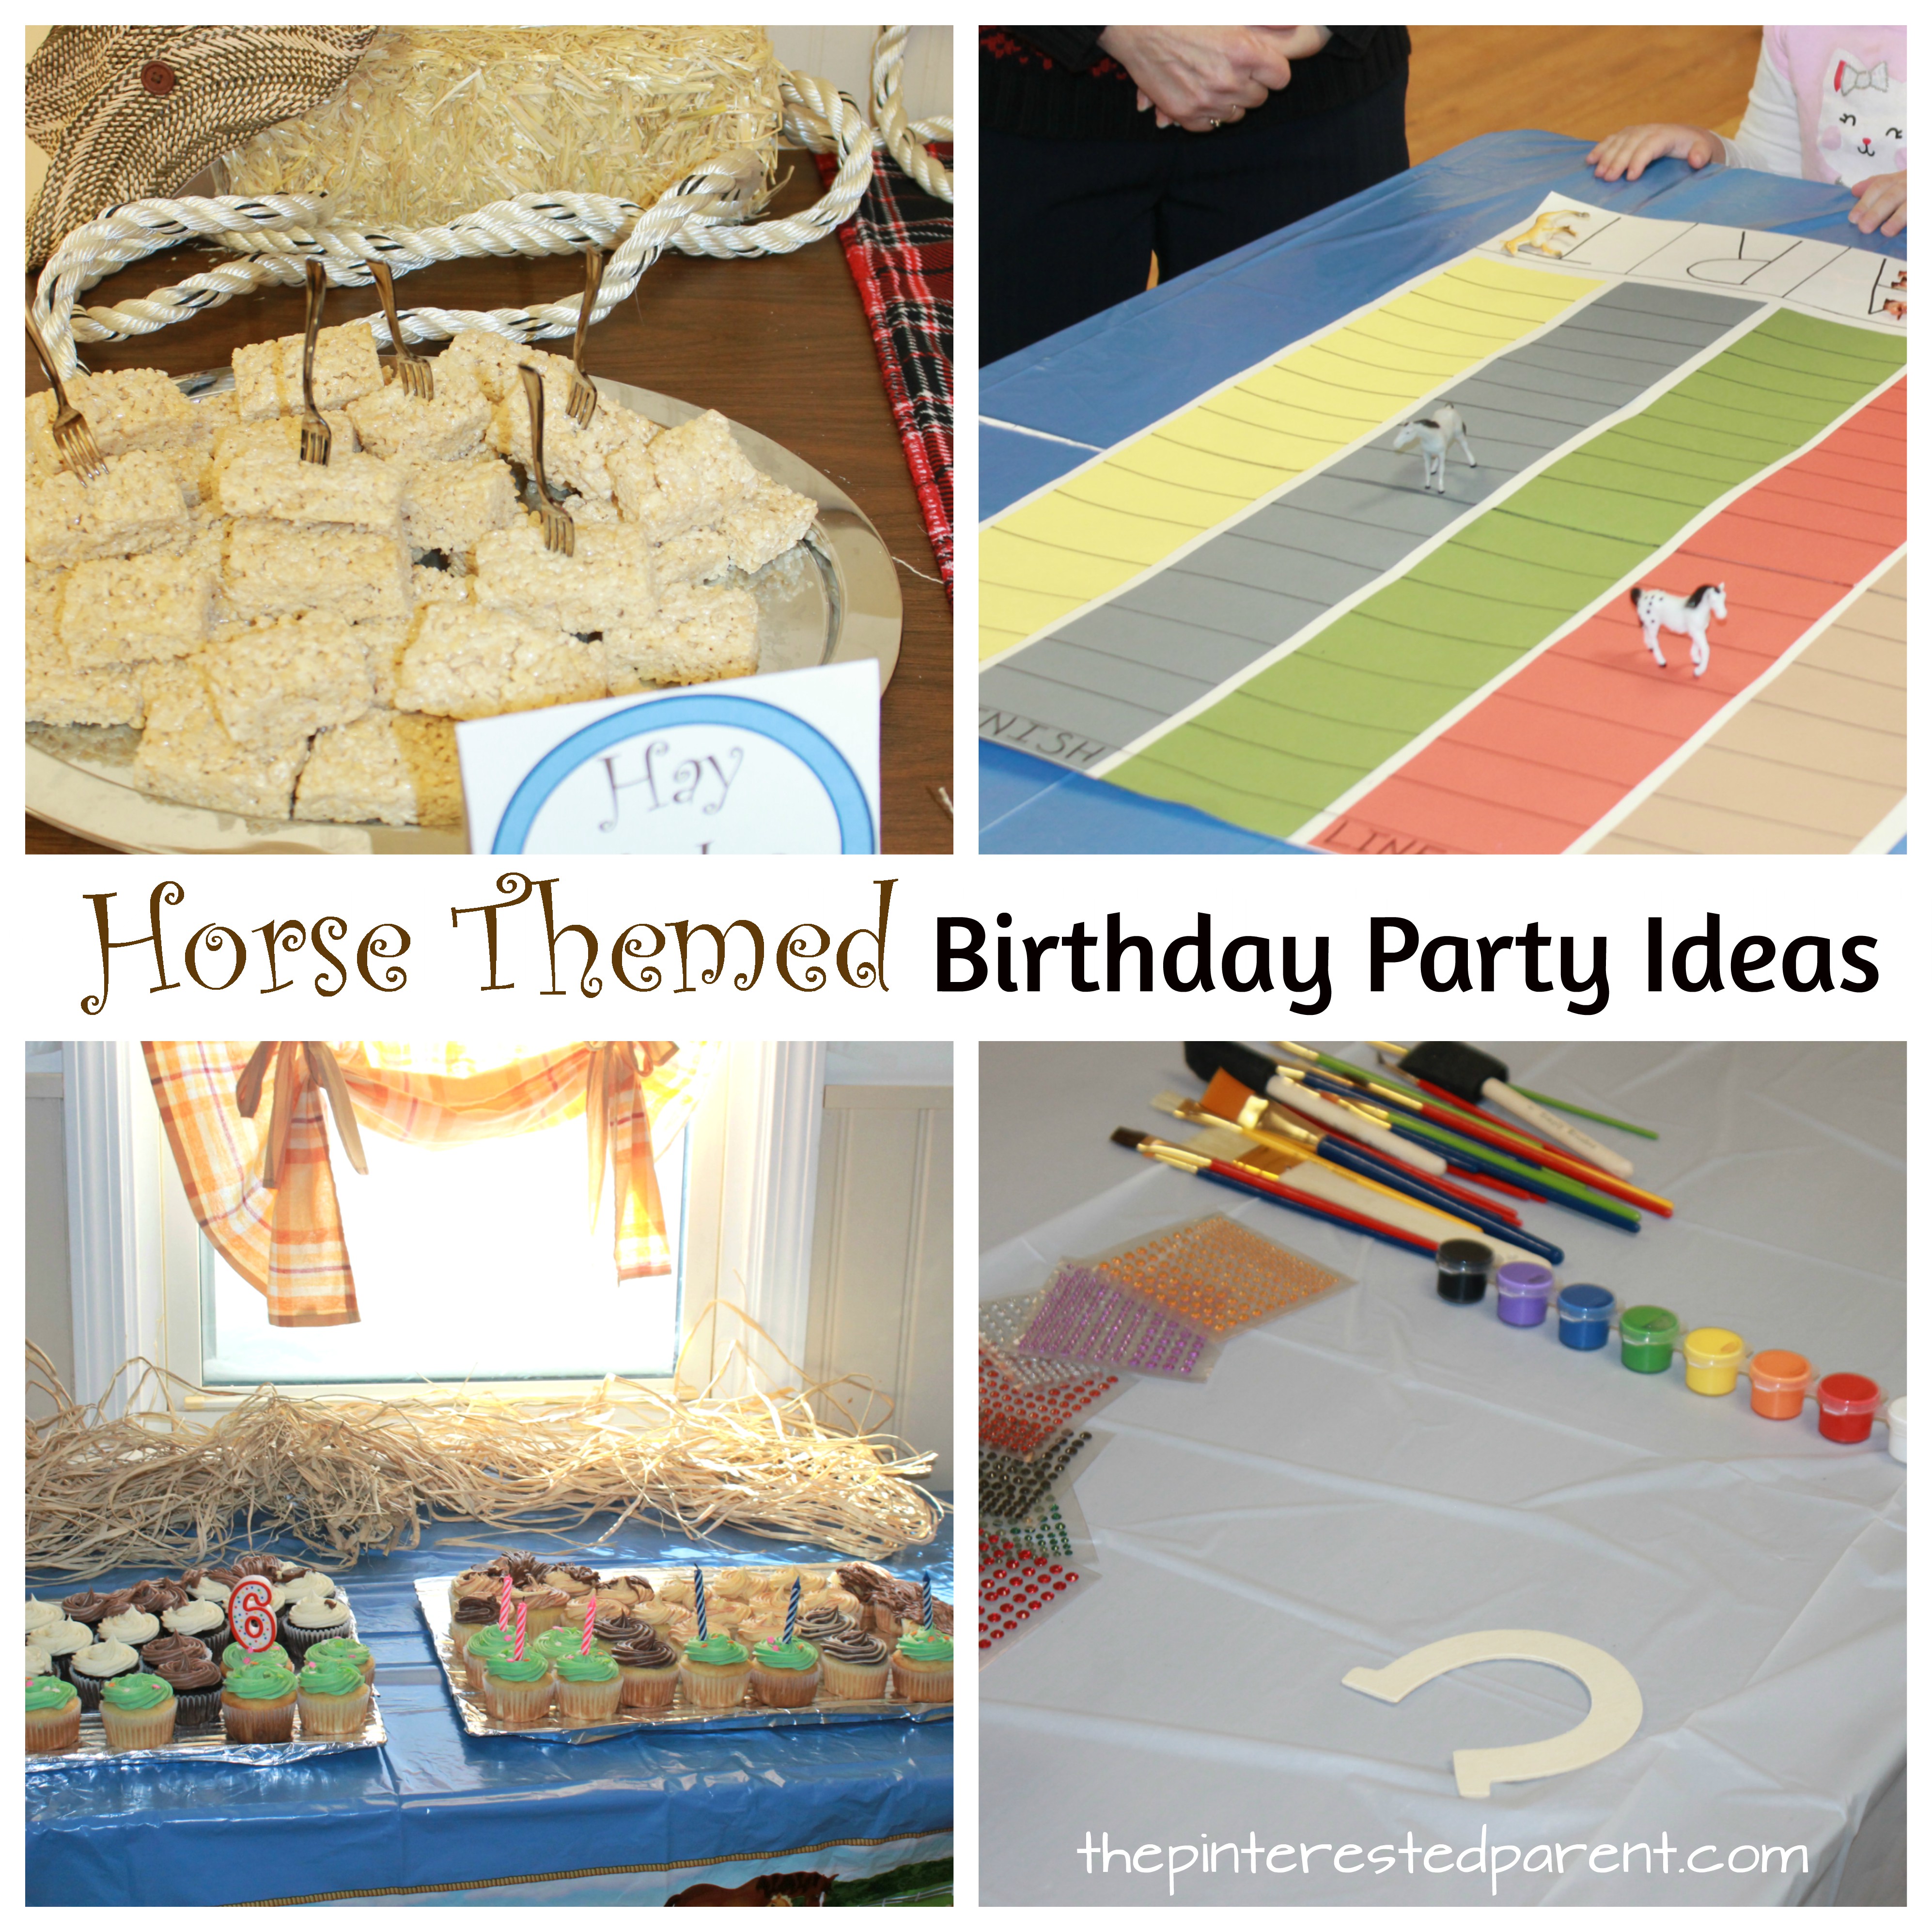
My little girl turned six this weekend. I can’t believe it is possible. She was very excited about her birthday this year, more so than ever before. This is her first year of school and she really wanted to invite her school friends to her birthday this year. So… her whole class was invited and just about her whole class accepted. So what is a mom to do when she has a guest list of close to 30 kids? She better make sure she has plenty of activities.
Tag
Food
Great Lego Party Ideas for the Kids
Time has flown by so quickly. My little girl turned 5 last week and I can hardly believe it. A few months ago, I asked my daughter what kind of party she wanted. She asked for a Lego party and an art party. I loved the idea of having both. Both would be wonderfully interactive for my daughter and all of her guests.
*The Pinterested Parent is a participant in the Amazon Services LLC Associates Program, an affiliate advertising program designed to provide a means for sites to earn advertising fees by advertising and linking to Amazon.com. In addition, text and image links in this post may be affiliate/referral links, which means we may be compensated if you make a purchase after clicking through these particular links* See full disclosure policy.
I have to admit, I love throwing parties, especially theme parties. I knew that my daughter and I would have fun with this one.
40+ Gingerbread Crafts, Activities and Recipes
I’m sure that I have mentioned it before, but I love gingerbread. It is one of my absolute favorite things about this time of year. I look forward to baking it, smelling it, eating it and my daughter and I have fun doing arts and crafts projects inspired by it. Here are some wonderful gingerbread inspired ideas to welcome in the holiday season.
Homemade Butter With Kids
It was our wedding anniversary last weekend. We wanted to celebrate our anniversary weekend together with the whole family.
*This post contains affiliate links*
We went away for a family weekend. We took our daughter to Old Sturbridge Village in Massachusetts. It was a lovely look at life in the 1800’s.
We got to take a horse-drawn carriage ride, see how yarn was made & pretend to churn butter. Our butter making play made me want to churn some butter for real. It reminded me of when I was little and churned butter on class field trips.
I wanted to teach my daughter how to make butter too. Thank to Google & PBS Kids, I was able to find a simple way to make butter with my little. Did you know that you can easily make homemade butter by shaking cream in a jar? Well you can & it is delicious.
The recipe called for a jar, but we chose to use a shaker cup to make our butter.
We added a carton of heavy cream to our shaker & shook in a little salt. We put the lid back on & began to shake.
My daughter helped shake for a few minutes, but quickly got tired & handed it back to mommy. It is a lot of shaking, so if you are doing this with a few children, it would actually be perfect because each could take a turn for a few minutes.
The recipe that we saw said that it would take about 10 minutes, but ours did take a little longer than that, although we did stop many times throughout the process to make observations about the butter.
It was a great arm workout for this mommy. The shaking was fun, but what happened during the shaking was the most interesting part.
The cream hit different forms during the shaking. We stopped & looked at our cream often to see what changes were made. It was fascinating. The first stage was foamy. The cream start foaming & expanding in the shaker cup.
We shook a little longer & the butter started taking on the form of whipped cream.
When it took on the whipped cream form, it became a little more difficult to shake, but after shaking a little bit longer, it began to sound watery again. We checked the mixture & could see the buttermilk & butter starting to separate. We kept shaking and then poured the buttermilk through a strainer into a bowl. We drained the butter well. The strainer will catch the butter, but we were able to scoop most of it out of our shaker with a spoon.
I covered the butter & then refrigerated it until I was ready to use it. We made some toast & tried out our homemade butter. It was delicious. We also used the buttermilk to make fried chicken with later that same evening.
From what I understand, homemade butter does not last too long, so extend the life of your butter by mixing some water into it after the butter is already formed.
The homemade butter is definitely worth making. It was wonderful. I will definitely make it again, but perhaps next time use a beater.
Thank you as always for stopping by. Please follow us on Facebook as well.
50+ Kid’s Birthday Party Ideas
Celebration Pancakes
*This post contains affiliate links for convenience*
If you follow us regularly, you probably already know that we love pancakes. Pancakes are one of the few foods that my daughter will always eat. We have gotten inventive with our pancakes over the last year & breakfast has never been more fun. Pancake art has become a favorite for us both on the weekends. Sometimes, she puts in a special request & it becomes a challenge to see what we can come up with. Even if they don’t come out right they are still delicious. Today, my little girl said that she wanted cupcake pancakes. Here is what we came up with.
Start with a basic pancake recipe. We added a couple of Tbsps of chocolate powder to our recipe.
Use a mixer to blend the batter well. Make sure to get out all the lumps.
Use a funnel to fill a squeeze bottle.
Use the squeeze bottle to draw out your cupcake.
Let the pancake cook until bubbling & flip. Cook on the opposite side for a few minutes & put on a plate.
Add whipped cream and sprinkles to finish your cupcake off. My daughter was so excited & the pancakes were a big hit.
Thank you as always for reading. Please visit us on our Facebook page as well.
\
Alphabet Pancakes
Breakfast is my favorite meal of the day. I love to eat breakfast & I love to make it, pancakes, french toast, omelettes. I love making them all.
*This post contains affiliate links*
Pancakes are definitely my favorite. I have a lot of fun with pancake art.
My daughter will put in special requests & mommy will try her best to make them. We have been working on reading & writing with our daughter. She has been trying to use her letters & form words. She puts letters together just to sound them out, even if they do not form an actual word. She has been working so hard that this weekend we made a special pancake treat to celebrate all the progress she has made. The great thing about these pancakes is that you do not need any artist skill to make them, you just need to be able to write your alphabet.
We mixed up our pancakes.
Ingredients:
1 cup of flour
1 tbsp brown sugar
2 tsp baking powder
1/4 tsp of salt
1 cup of milk
2 tbsp vegetable oil
2 tbsp unsweetened or sweetened cocoa powder
1 egg white
Directions: Mix all the ingredients together. Use a blender to mix the batter to get out any clumps. Mix well. Add more milk if needed.
Use a funnel to funnel the batter into a condiment squeeze bottle.
Use the bottle to squeeze out the letters. Let bubble as usual before flipping. Remember that some of the letters will need to be written mirrored so that when they flip they are not backwards. If the bottle clogs, just squeeze it off to the side. If it keeps clogging, it needs to be blended more.
As always, they were a big hit with my pancake loving girl. She spelled out her name, dog & then our dog’s name, Duke.
Thank you as always for stopping by. Please follow us on Facebook as well.
Owl Shaped Breakfast
My daughter is a sweet girl most of the time, but mealtimes in our house are & have been a battle for quite some time. She is a very picky eater & mealtimes in our house are often very stressful. Over the years, I have found fun & creative ways to try to get her to eat. I have tried it all from reading to her while she eats to bite sized meals to fun food art.
*The Pinterested Parent is a participant in the Amazon Services LLC Associates Program, an affiliate advertising program designed to provide a means for sites to earn advertising fees by advertising and linking to Amazon.com. In addition, text and image links in this post may be affiliate/referral links, which means we may be compensated if you make a purchase after clicking through these particular links* See full disclosure policy.
Egg Slime
Easter is only a week away. We have been shopping & preparing for the holiday. I have a ton of plastic Easter eggs lying around waiting to get filled. I should rephrase that, I had a ton of plastic Easter eggs. My daughter has been slowly depleting my supply & using them in her play kitchen.
*This post contains affiliate links for convenience*
She pretends to crack them open & throws the empty egg shells in the trash. I had to give her a pretend trash because she was throwing them away for real. She take pretend play very seriously. She has been having a lot of fun mixing up her air eggs, but since she likes the realistic, I thought we could add a little something extra to her pretend egg scrambles. Here is what we did.
We made up a quick batch of slime.
Ingredients:
2.5 oz of clear school glue
2.5 oz of white school glue
Water
For Later:
Directions: Pour all of the glue into a bowl. You can use all clear or all white glue, but to achieve the look I was going for I used a mixture of half & half.
Add the liquid starch in very small increments at a time. Stir it well as you go. It will thicken quickly. Be careful not to add the starch too quickly.
When it gets to thick to stir, you can use your hands to knead it. I used just shy of the 1/2 of liquid starch & then added spoonfuls of water at a time until I achieved the consistency I was looking for. My daughter helped.
Use the Play-doh to form little yellow balls for the yoke. Flatten them out a little with your hand.
Grab a handful of your slime & add a yolk to the top for a realistic looking sunny side-up egg.
Or you can put the slime & yolk into an extra-large plastic egg for a fun egg cracking experience.
My daughter thought that this was hilarious. “Mama, it looks like real eggs.” It turns out that just like with regular eggs that she does not like the yolk, so she pulled those out & just played with the whites. Like I said, my daughter likes to keep things realistic.
Thank you as always for stopping by. Please follow us on Facebook as well.
Stained Glass Butterfly Pancakes
My daughter loves pancakes. We make pancakes together every weekend. Sometimes they are just plain pancakes, sometimes she wants apples in them & others it is chocolate chips and on occasion she asks for pancakes in the shapes of her favorite things, like princess pancakes.
*This post contains an affiliate link for convenience*
She had two requests this morning. She wanted butterflies & she wanted sprinkles. Challenge accepted!
Start with a basic pancake recipe or you can use ours.
Ingredients:
1 cup of flour
1 tbsp brown sugar
2 tsp baking powder
1/4 tsp of salt
1 cup of milk
2 tbsp vegetable oil
1 tsp vanilla
1 egg white
Directions: Mix all the ingredients together. Use a blender to mix the batter to get out any clumps.
Use a funnel to funnel the batter into a condiment squeeze bottle.
Squeeze out the mixture to form the butterfly’s body, which is basically a line with a circle on top.
Draw in the wings with the mixture. **Note: If the batter get stuck, squeeze it off to the side to clear any clumps.**
Add lines to the inside of the wings.
Sprinkle rainbow sprinkles into the empty spots between the wings.
Squeeze batter over the sprinkles filling in the empty spaces.
Cook the pancakes as usual until they begin to bubble & then flip and cook on the other side. Serve them up with syrup or plain.
My daughter loved her pretty pancakes. We gobbled all of them up this morning. These were so fun to make & easier then they seem.
Thank you as always for stopping by. Please follow us on Facebook as well.