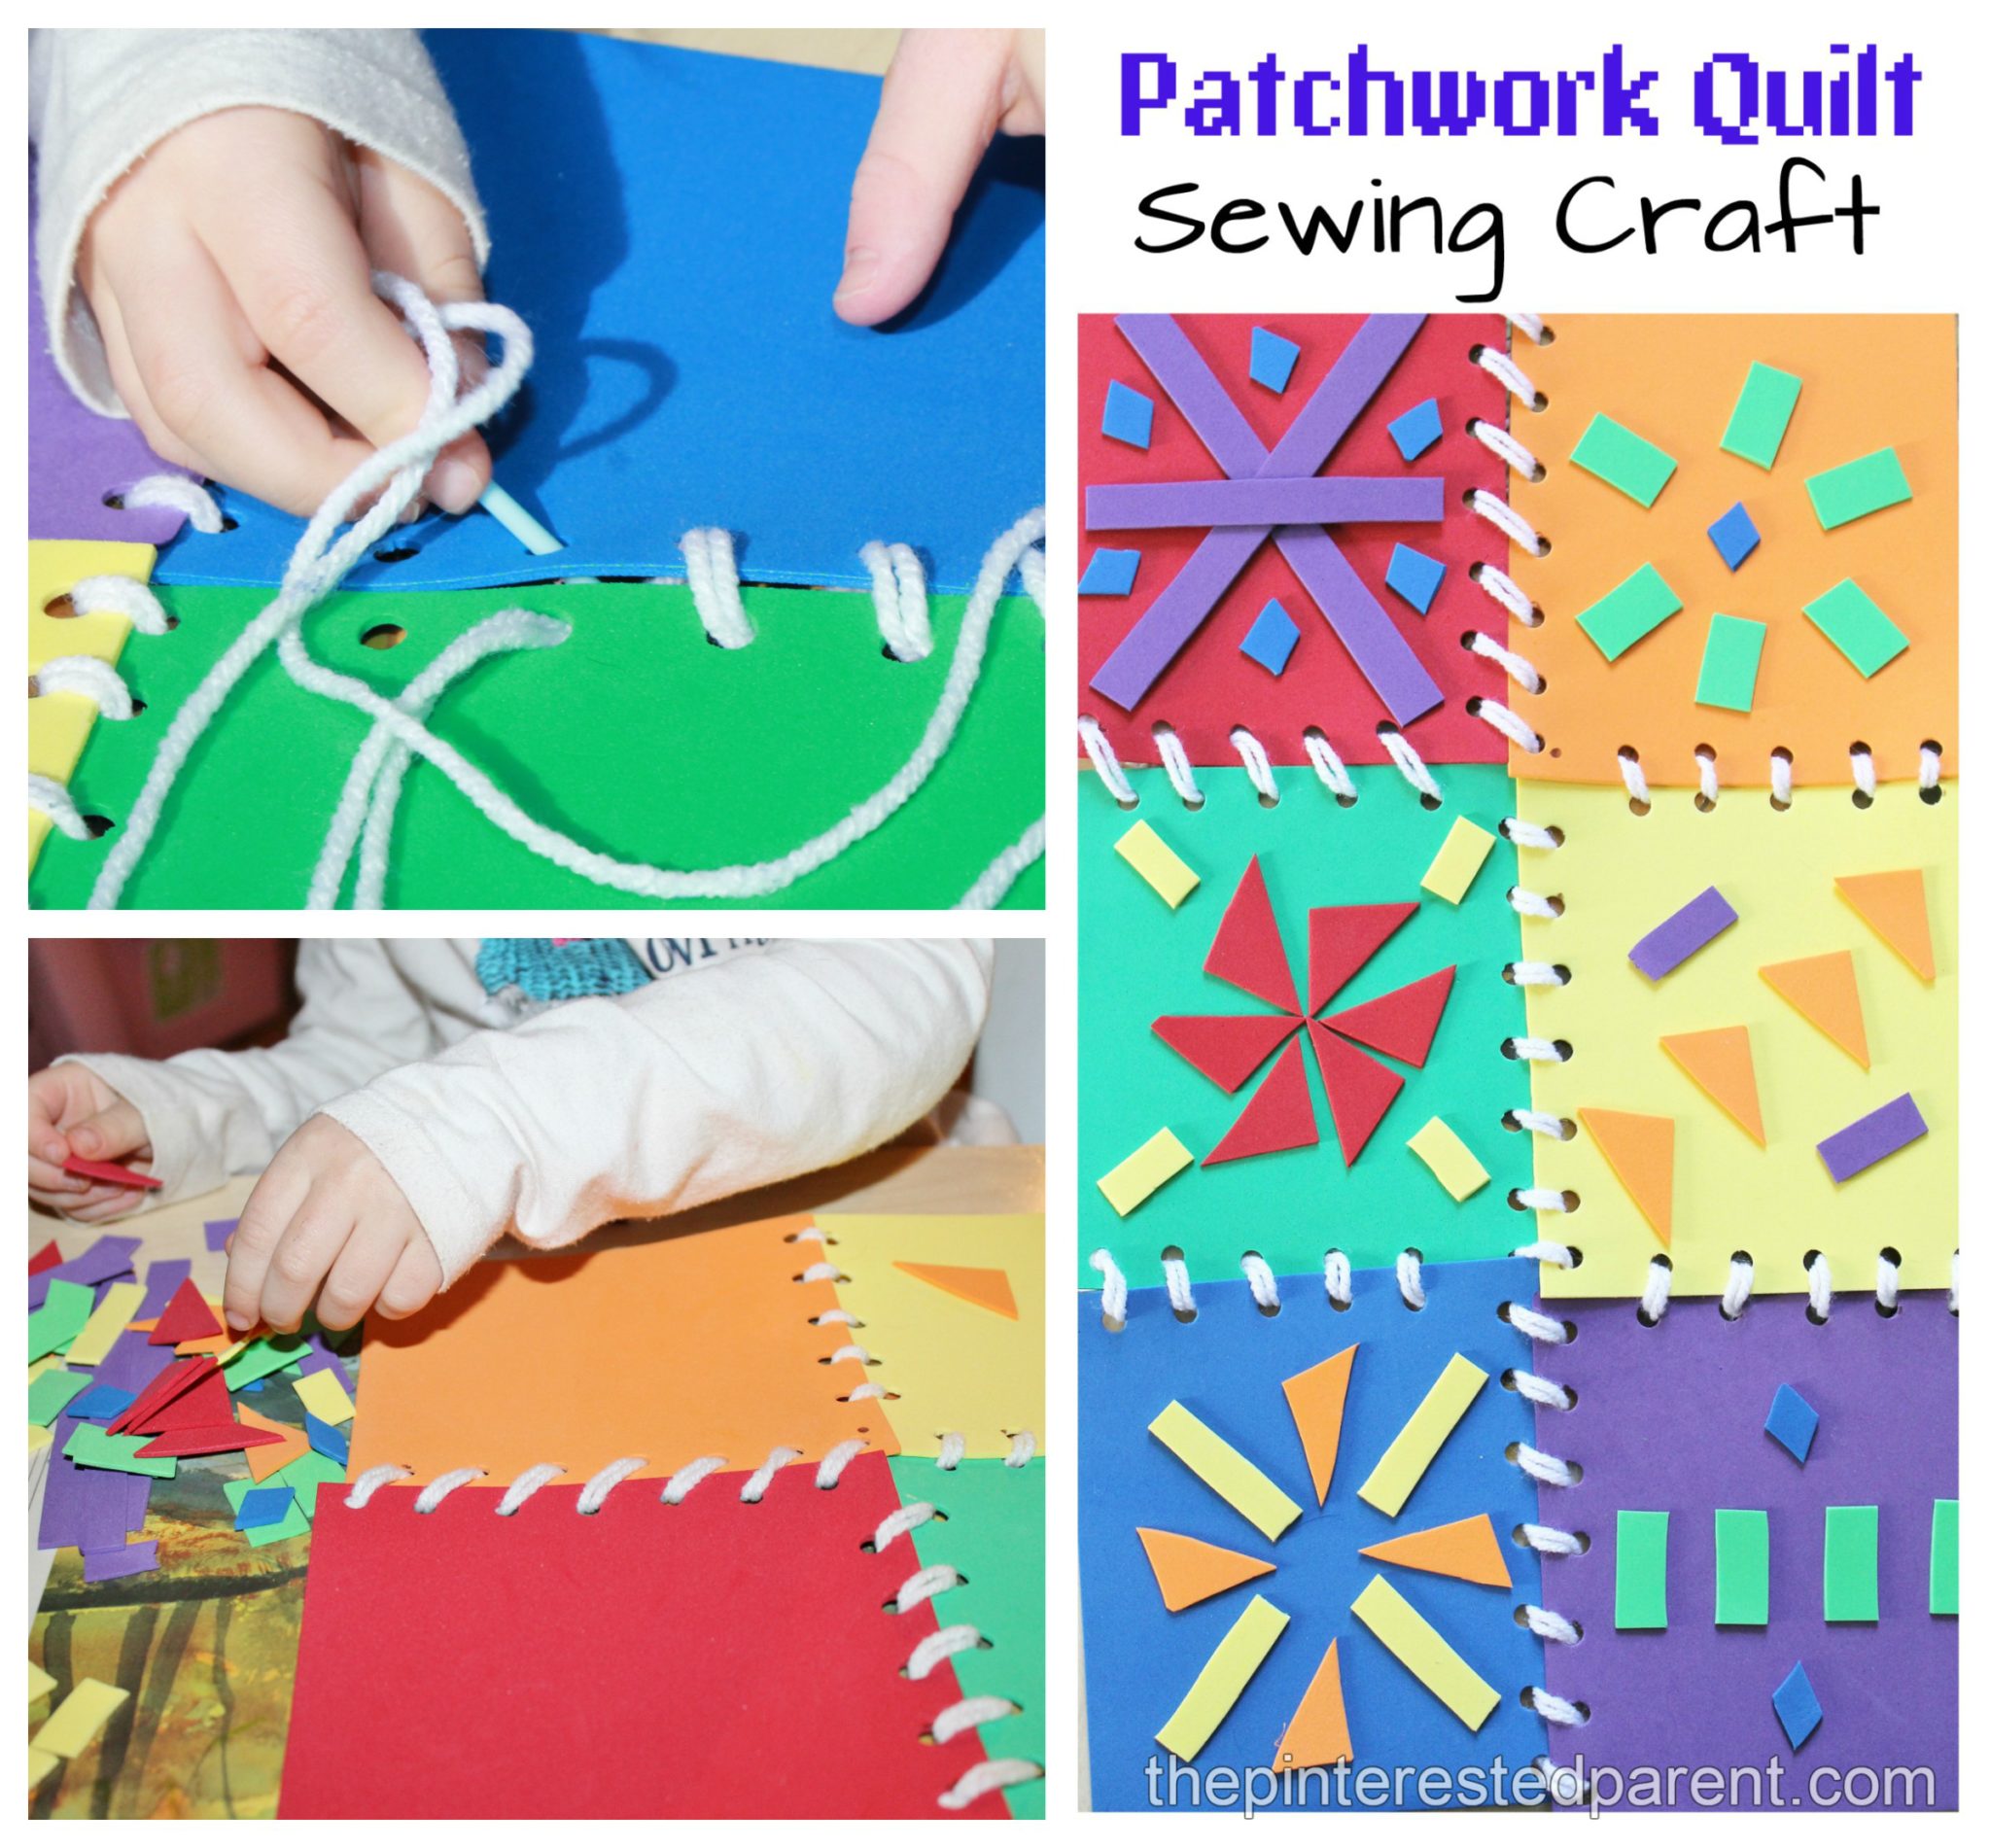
Patchwork Quilt Sewing Craft & Activity
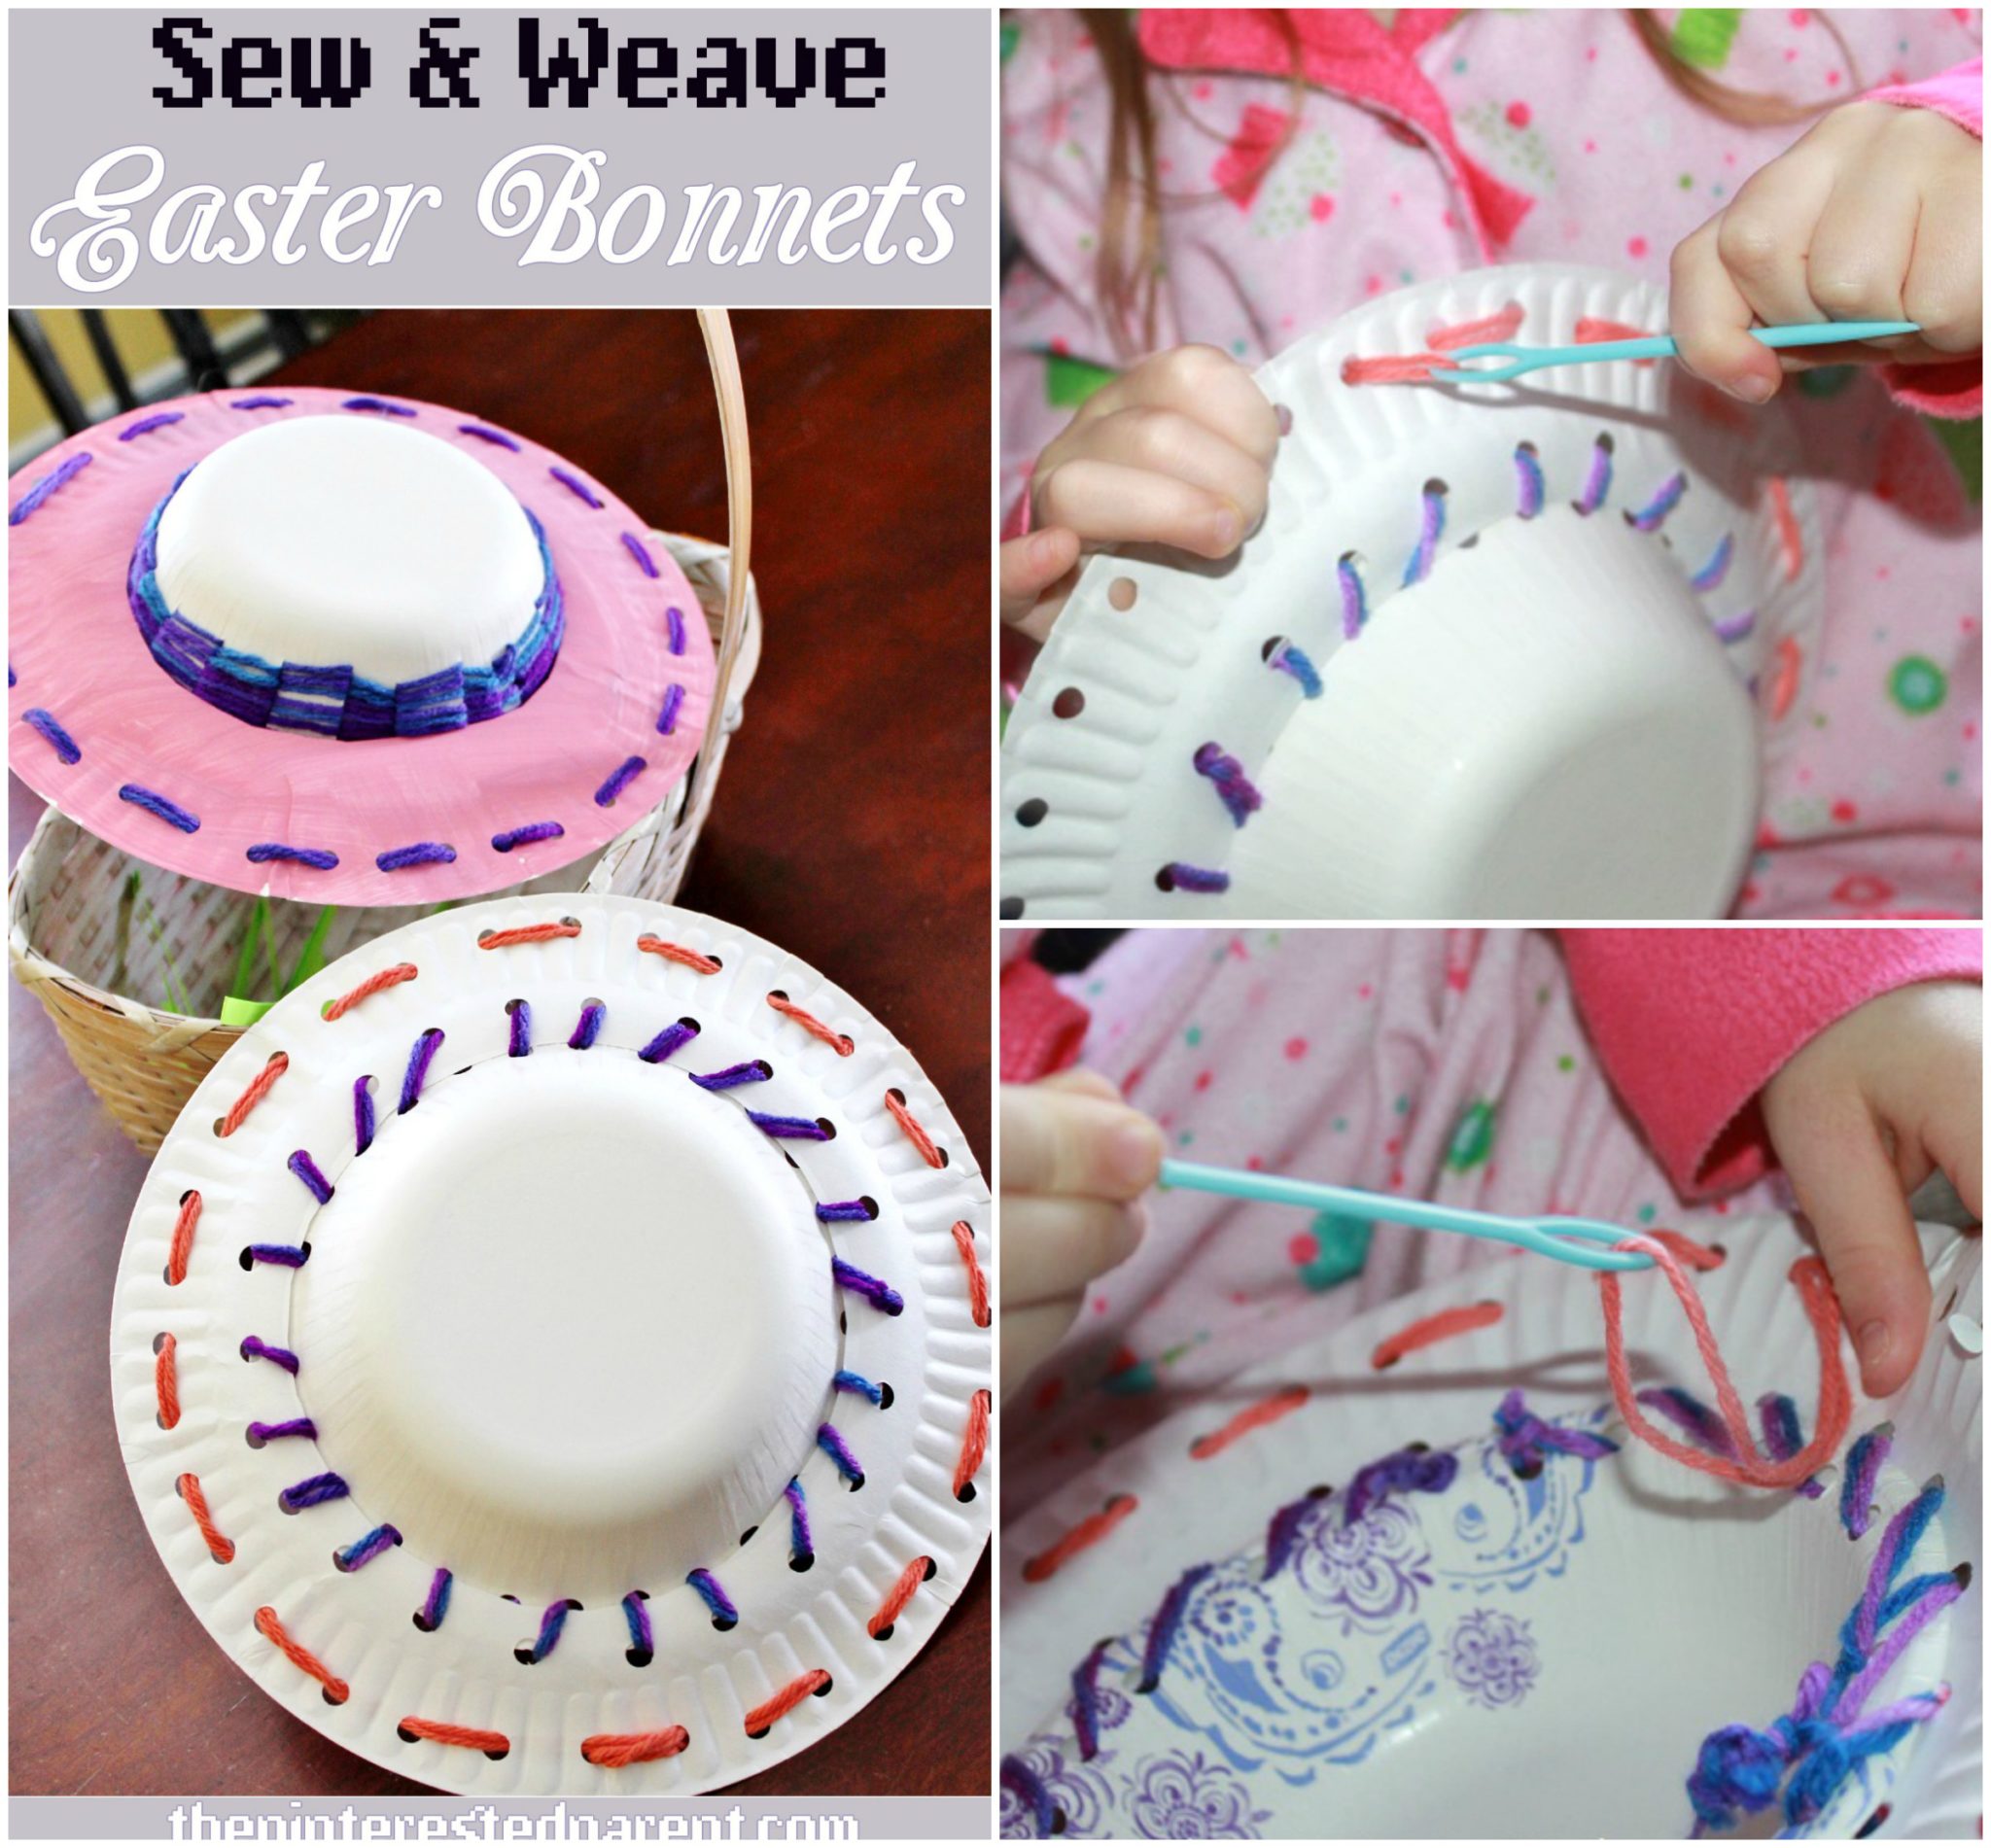
Patchwork Quilt Sewing Craft & Activity * This post contains affiliate links for convenience* A few weeks ago, my daughter & I made sew & weave Easter bonnets. She really enjoyed working with the plastic sewing needle. She liked it & took to it so well that I wanted to give her more sewing projects. […]