My little girl has been obsessed with salt dough & clay for a long time. When she turned 2, we even threw her a Play-doh themed birthday.
Tag
clay
Polymer Clay Cupcake Craft
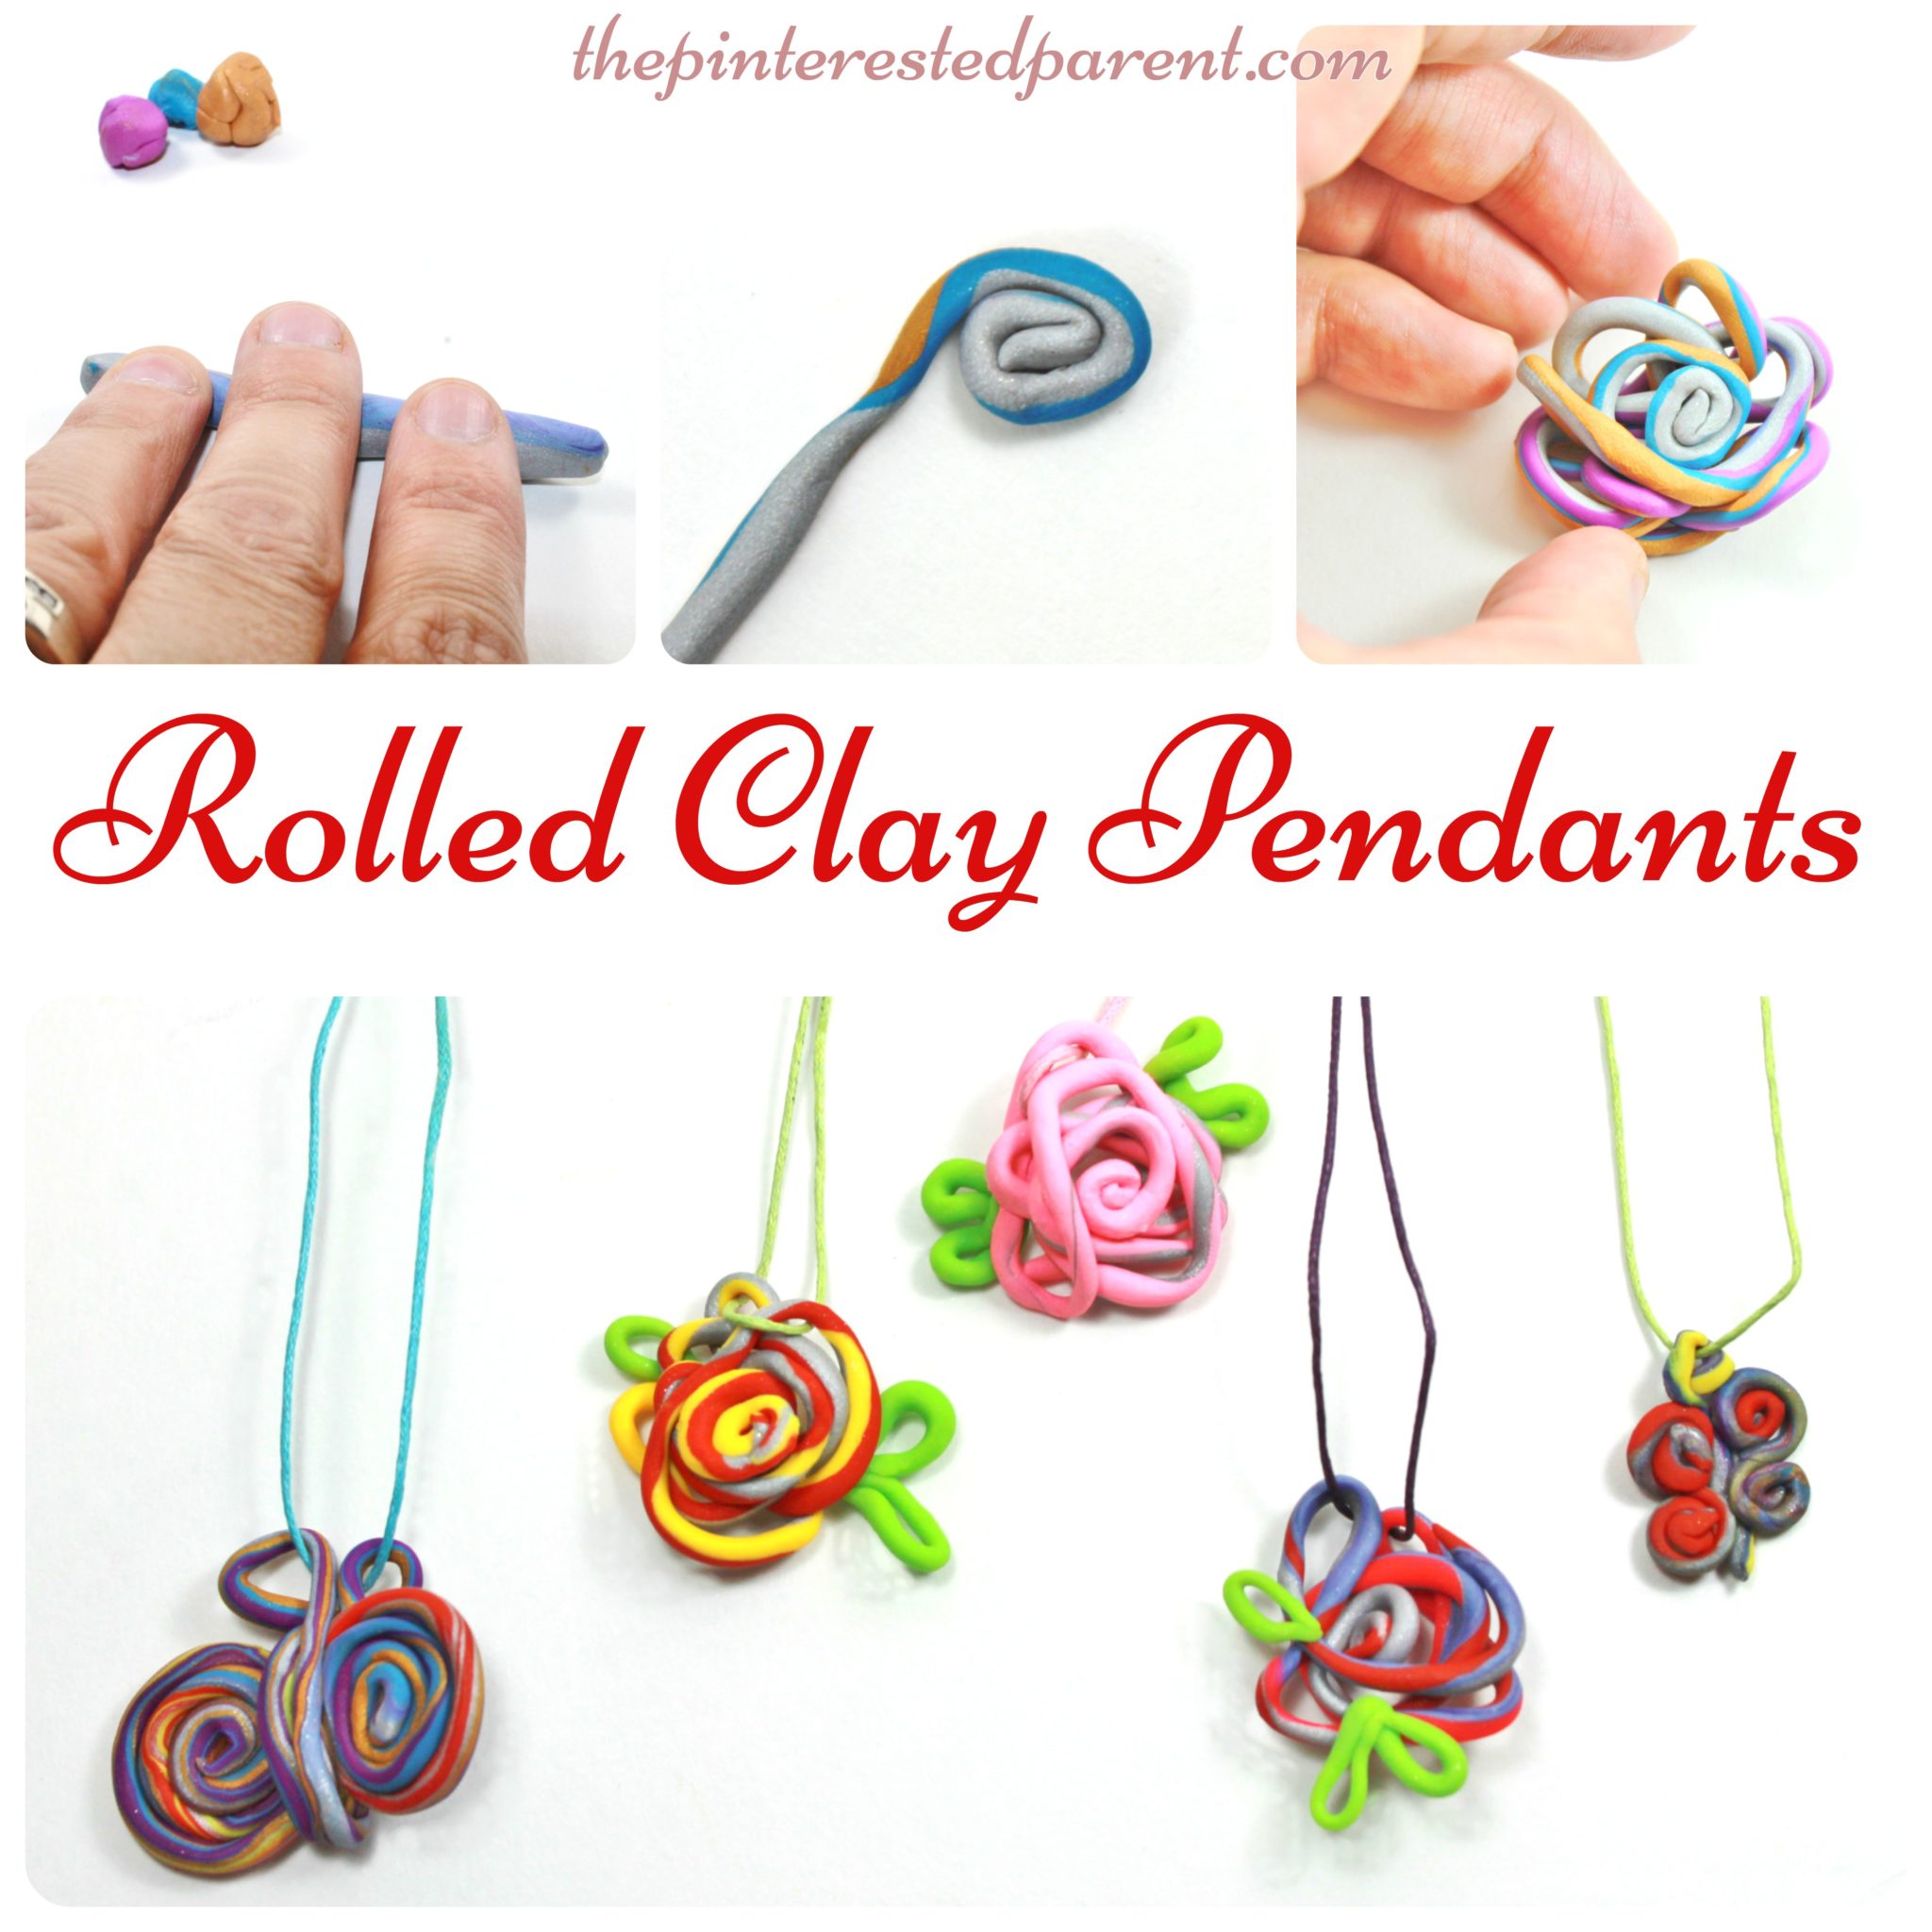
*This post contains affiliate links*
I recently discovered my love for polymer clay. My daughter and I play with Play-doh & homemade salt dough often & we love it, but I just love the feel & look of the polymer. My daughter has been loving playing with it too.
One of her favorite things to make which her doughs & clays is pretend cakes & cookies. She loves to play bakeshop.
We had some mini cupcake liners. We used them to form our clay cupcakes.
We both pressed a clump of clay into our liners. We pressed it in tight, so that the liner would make an imprint on the clay. I kept the liner in a stack so that the liner would keep its shape & not spread out while we worked with it.
We used another color & formed a flat circle to lay over the top of the first layer.
I rolled out a clump of clay so that it formed a long strand & then I circled the strand in a spiral around the top to form the frosting.
The fun part is decorating your little cakes. Add little clay specks for sprinkles or a circle for a cherry, form flowers or anything else that you & your little baker can come up with.
My little baker threw her original design out the window & opted for a fancier cake, complete with lady & handbag on top. She put it in a larger liner & then told me that her cupcake could eat my cupcakes. That gave me a chuckle.
Next, we baked our tasty treats per package directions. These will all make a great additional to my daughter’s little bakeshop.
Thank you as always for stopping by. Please follow us on Facebook as well.
Roll & Wrapped Clay Pendants
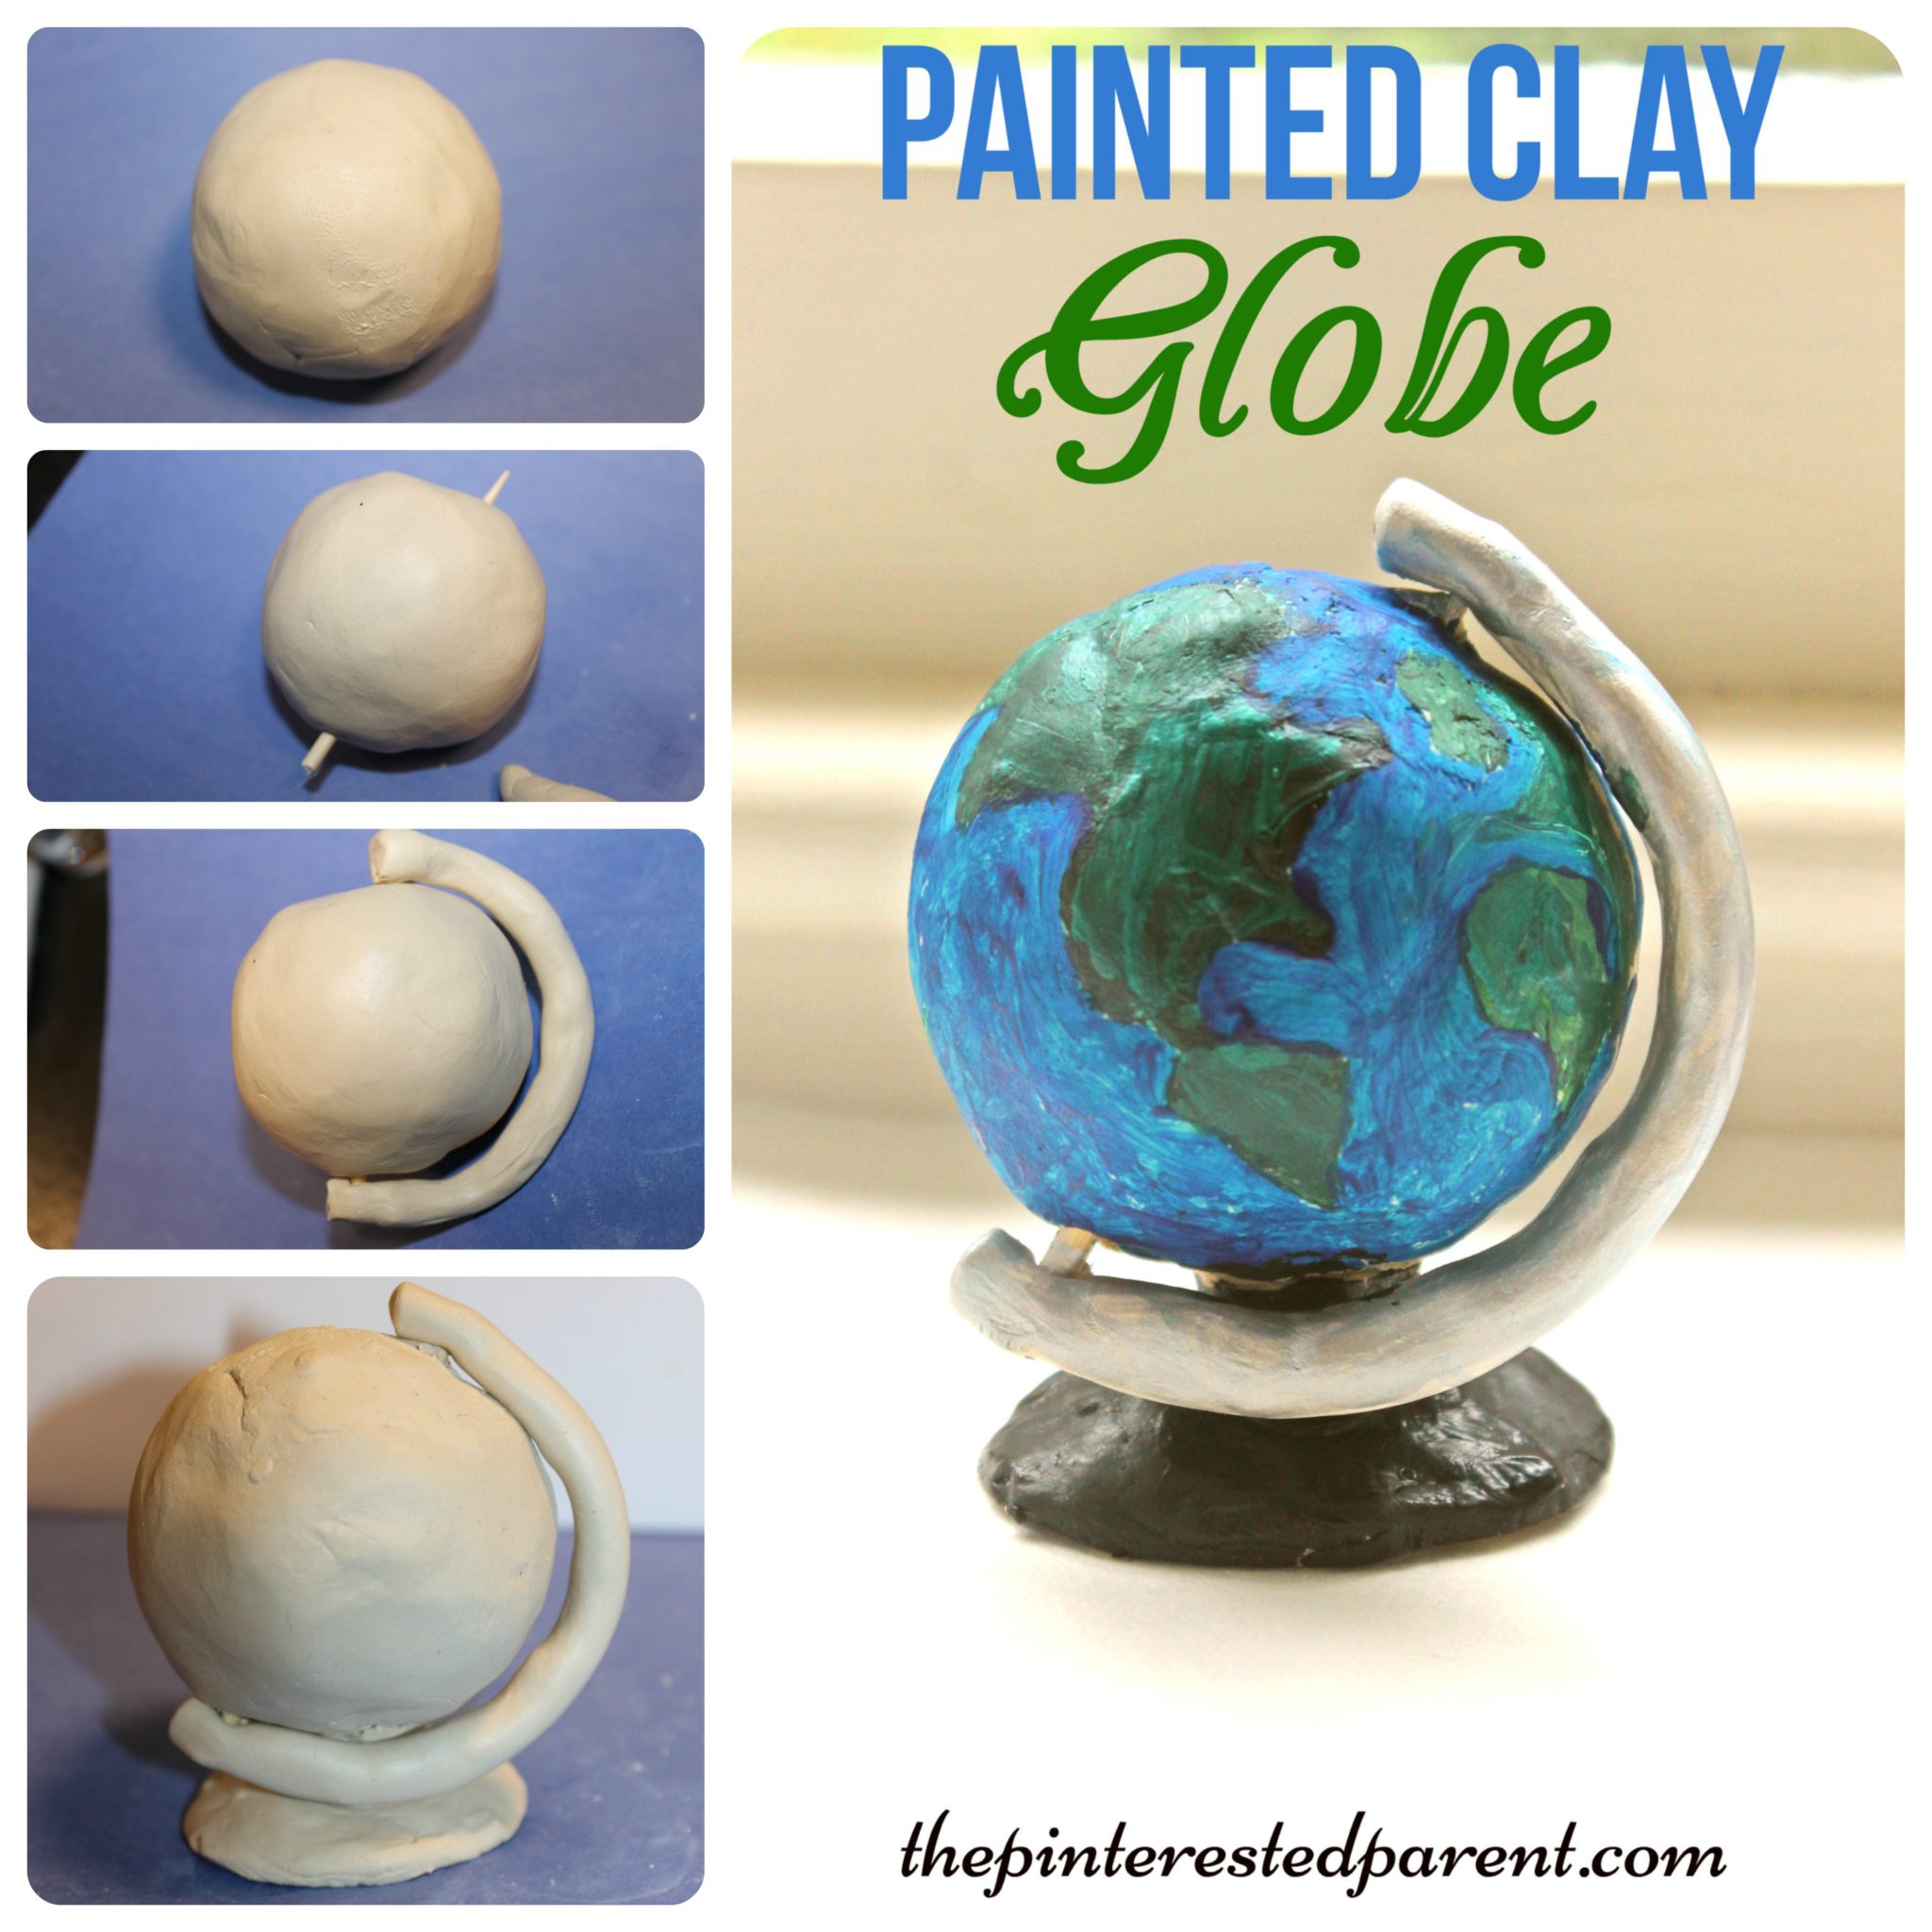
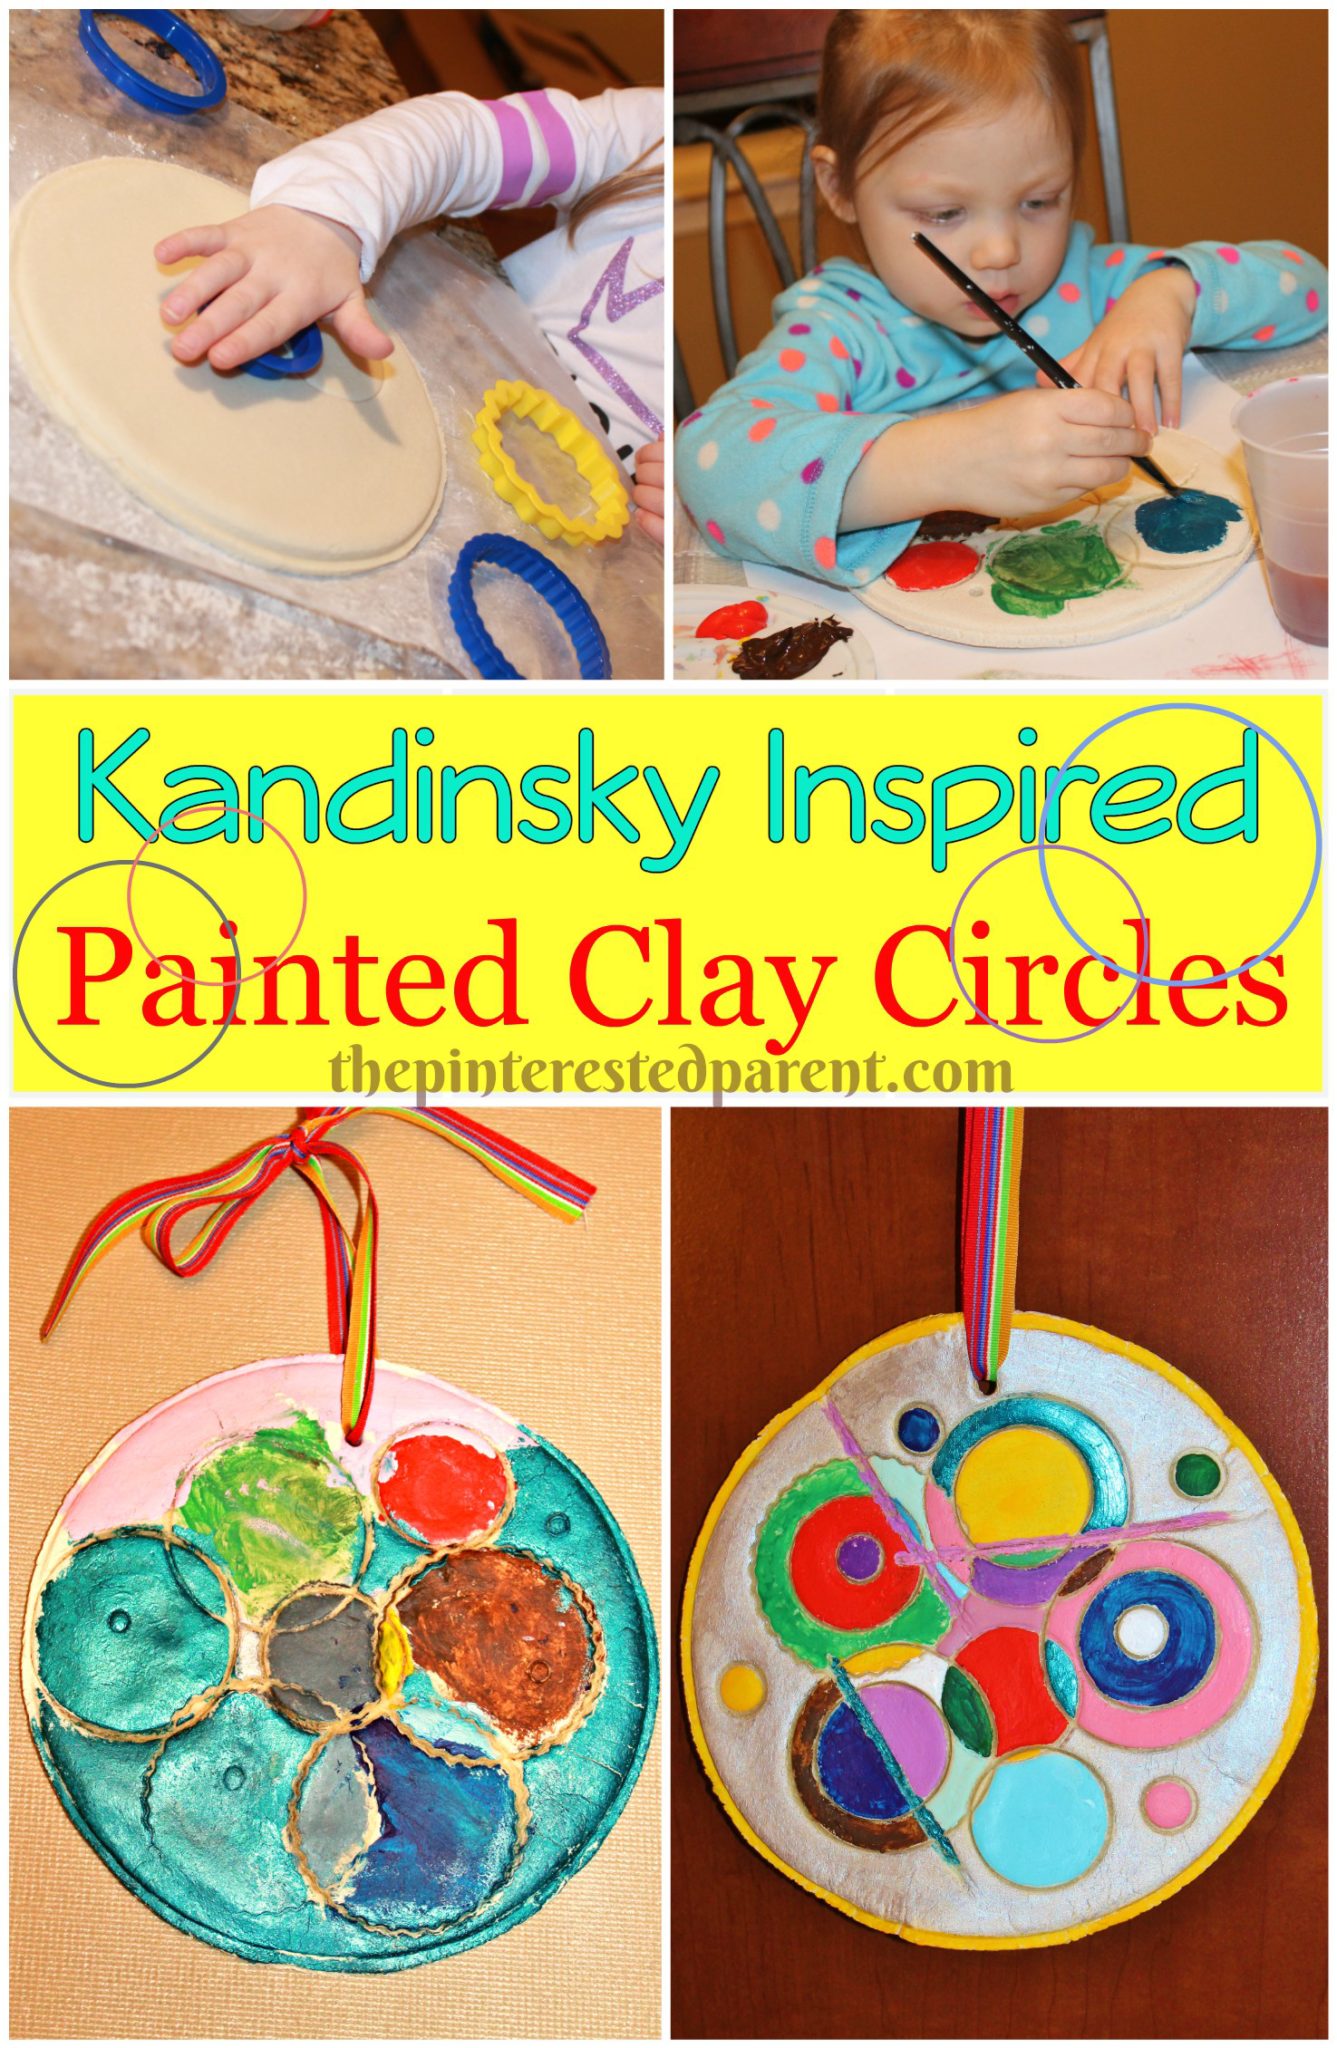
My daughter and I work a lot with clay. We love our clay craft projects. There are just so many possibilities.
*This post contains affiliate links*
We usually just make our own salt dough clay, but I had been curious about polymer clay for a while & wanted to experiment with it. The polymer was so easy to work with & was fun to work with as well.
I didn’t really know what I wanted to make, but just started breaking off chunks & rolling them into balls & long strips. I played with the long rolled strips a little & came up with something cute, fun & easy to make.
Roll & Wrapped Clay Pendants
To form a flower-like creation, break off chunks from a few different colors of clay. Roll them lightly together into a ball & then roll out with your fingers to make a long thin rope-like strip.
Roll in at one end a couple of times to form a small spiral. Then loosely wrap & loop around & under the spiral.
After you have reached your desired size & shape, roll out a strip of green clay & form loops to form leaves.
Follow package directions to bake your pendants. When they are hardened & cooled, run a craft string through one of the loops. You may tie off at the ends or attach a clasp to the string. These were so fun to make. I couldn’t stop making them.
Thank you as always for reading. Please visit us on our Facebook page as well.
9 Flower Arts & Crafts Projects For Kids
Salt Dough Flowers
My daughter is 4 this year. This year I promised her that she could have a garden of her very own. We have selected our spot outside & are getting ready to prep the area. I let her pick the seeds that she wanted to grow. She picked 2 flowers & 2 vegetables.
Clay & Nature Made Fairy Doors
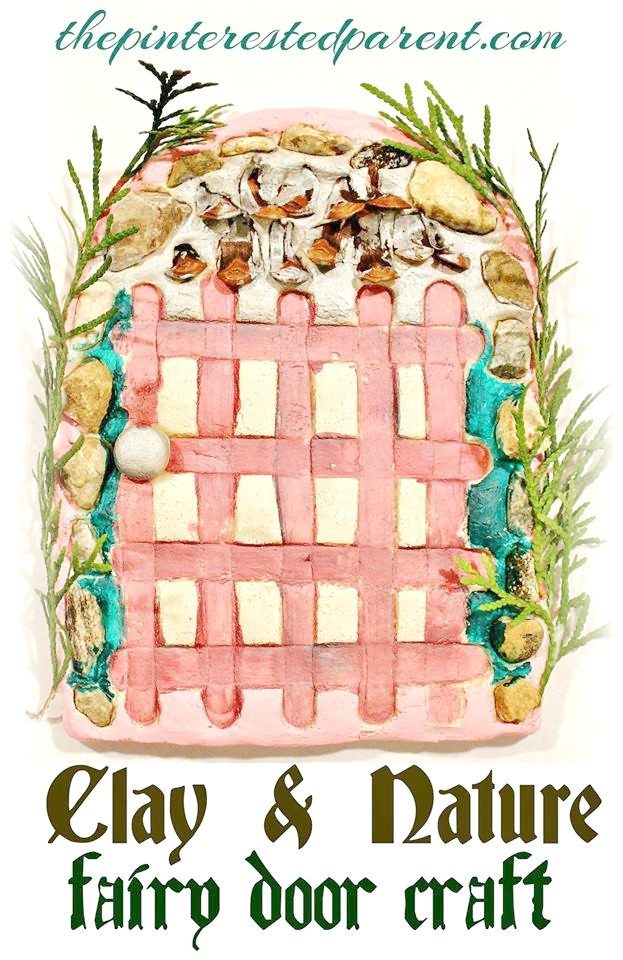
*This post contains affiliate links*
My daughter got an Irish Fairy Door for her birthday. We put it in her playroom, decorated the space around it & she fell in love with it. Since then, she loves all things fairy.
Salt Dough Mosaic Frames
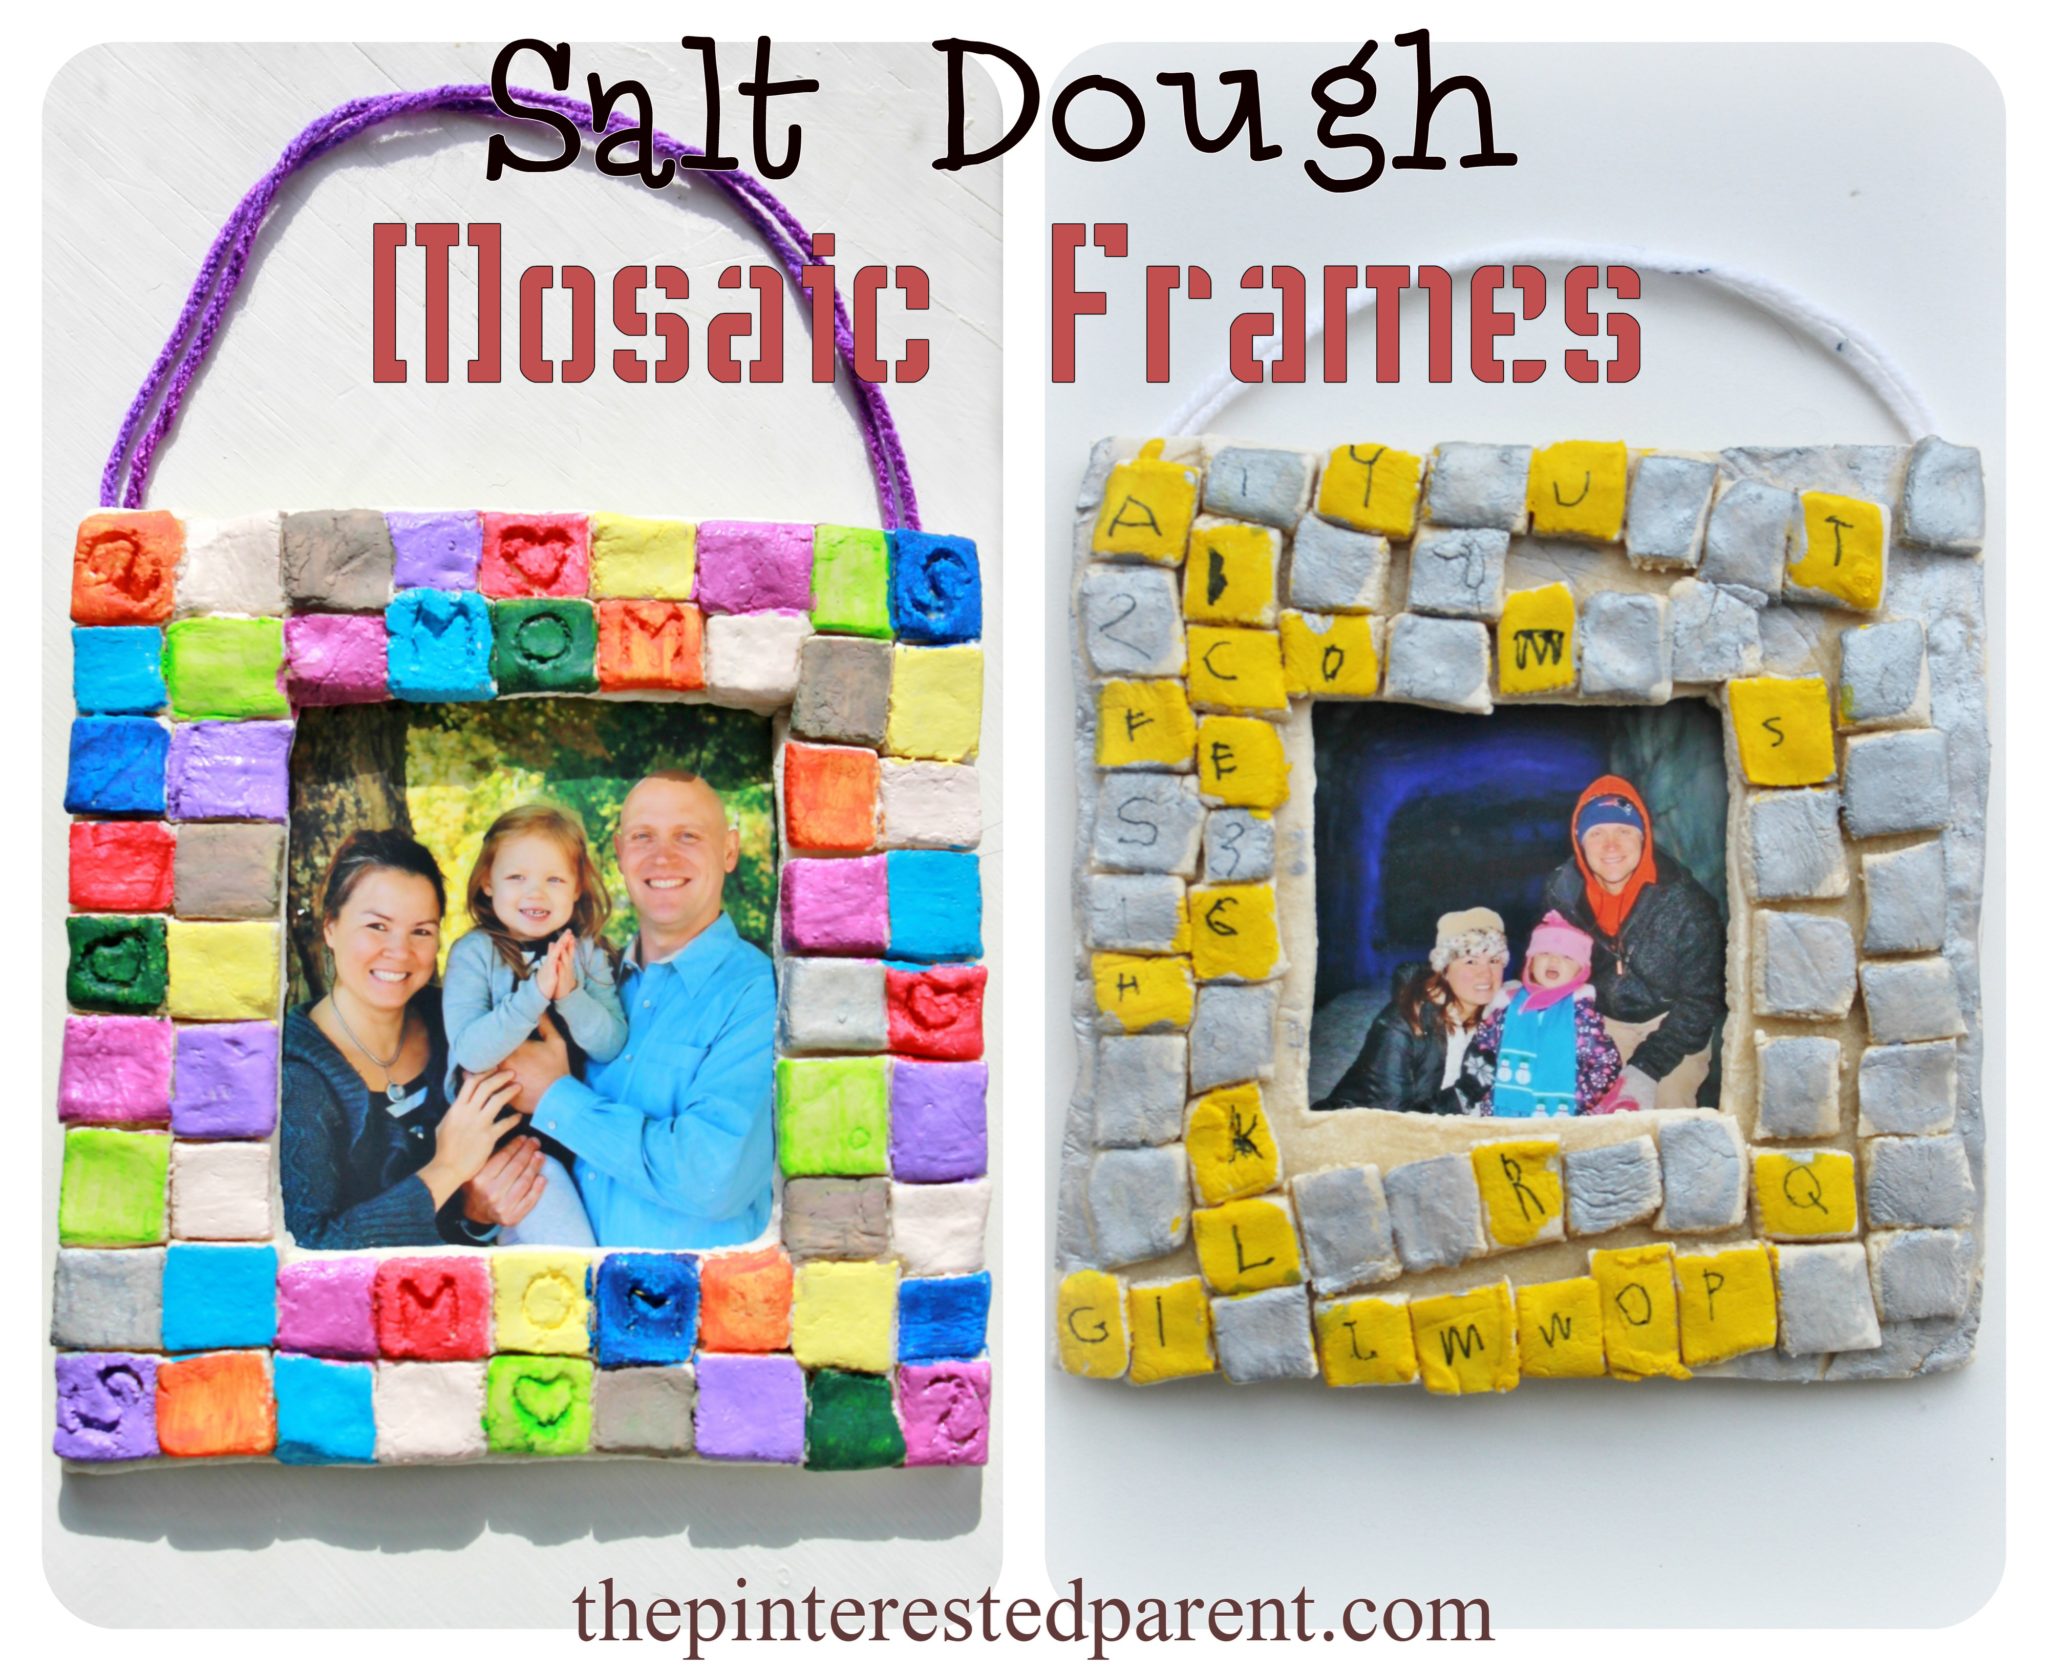
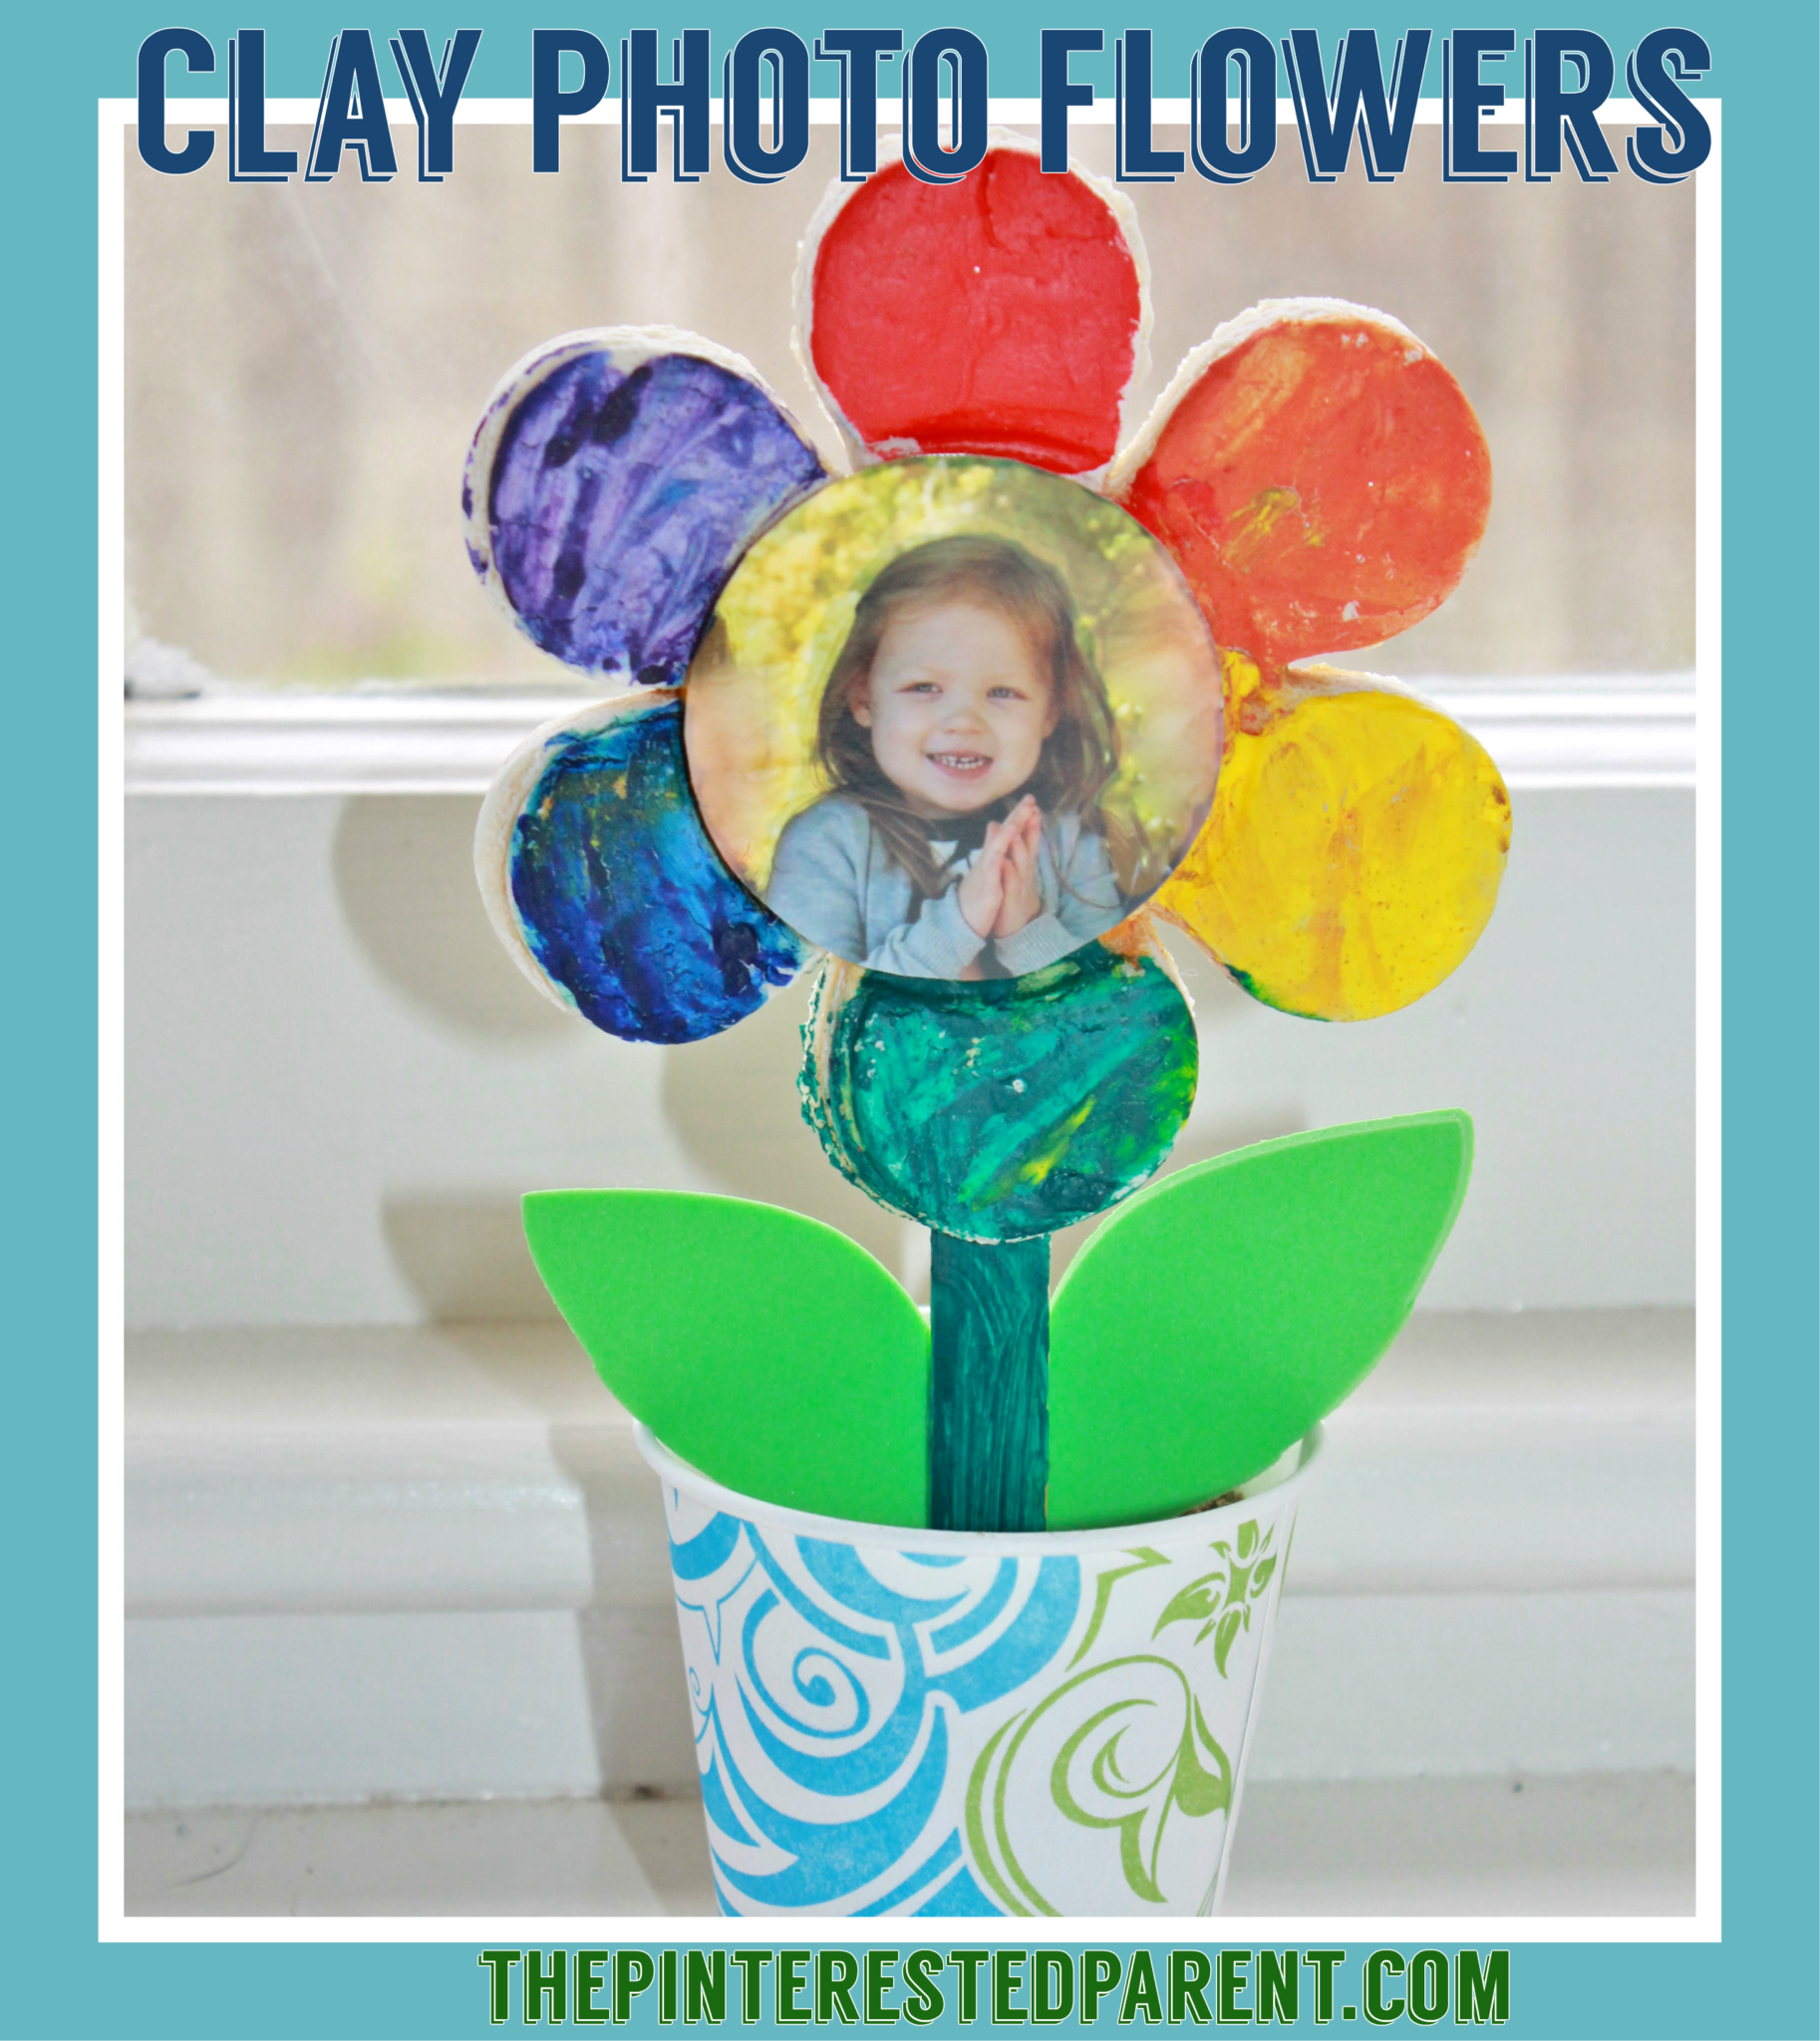
We love clay & play dough projects in our house. My daughter just can’t get enough of it. We make new dough every week, sometimes even a couple of times a week. We are just about settled into our new home, but are still missing pictures on our walls. I thought it would be fun for us to make some homemade frames together.
We started with a simple clay recipe.
2 1/2 cup of flour
1 1/4 cup of water
1 cup of salt
1 Tbsp of oil
1 Tbsp of cornstarch
Mix all the ingredients together & then knead with your hands. My daughter always loves this part. You may need to add less or more water.
Roll out your clay.
Cut a few long strips out of your dough & then cut into small squares.
Cut out a shape for your frame & then cut out the inside window. Use a photo as a template to know how big to cut your window.
Lightly wet the top of your frame. Press the squares on top until the frame is covered. Press the squares in enough so that they stick. For my frame, I etched designs in with a toothpick. Since Mother’s Day is nearing, I thought that a Mother’s Day themed frame would be a good choice. Mai chose to draw in her designs after.
Preheat your oven to 250 degrees. Bake for 1 hour & then flip your frame & bake for another hour. Depending on the thickness of your frame, you might need more or less bake time. When hardened, remove from the oven & let cool.
Paint your squares with acrylics or glaze.
After the paint dried, Mai used a marker to draw in her designs. She wanted to write letters & numbers on hers.
Glue yarn or a ribbon to the back to hang & glue a picture to the back. (We used crazy glue. Let adults apply crazy glue.)
My daughter was so proud of her finished project. She asked that both be hung in her room.
Thank you as always for stopping by. Please follow us on Facebook as well.
Clay Fingerprint Keepsake Ornaments
These clay fingerprint ornaments are perfect for any occasion. They make a great keepsake gift for grandparents and mom and dad.
*This post contains affiliate links* Some photos have been updated since original post.
My daughter has inherited a lot of hand-me-down books. We have so many that we don’t even know what we own. For a very long time, my daughter has only read a few of these books. Many just sat there collecting dust, but recently she has been diving into them all. We came across a few art books the other day. We found a few great “how to draw” tutorials and also came across a cute book filled with fingerprint crafts.
Kandinsky Inspired Clay Circles
I look forward to the weekends. After working all week, I enjoy every second of time with my family. One of our favorite things to do on the weekends is to go to the library. We have discovered some of our favorite books from trips to the library. One of our favorites was a children’s book about Wassily Kandinsky.
*This post contains affiliate links*
The Noisy Paint Box is a beautiful book about the young Kandinsky and how he could hear the colors that inspired his art. It is also a great tale of how he overcame those that did not understand and support his abstract form of art.
I showed my daughter some of his artwork on the computer and we discussed what abstract art was. His noisy paint box may have inspired him, but he inspired us. We were going to make our own Kandinsky like project with clay and paint.
We started with a simple clay recipe.
1 cup of flour
1 cup of salt
1/2 cup of warm water
We mixed all the ingredients together, first with a spoon and then kneaded it with our hands until it was smooth and ready to mold. My daughter has become a pro at making clay and play dough.
We rolled it into a ball and then used a rolling pin to roll out our dough. I used a bowl to make a circle.
We used a variety of different sized circle cookie cutters and glasses, anything that we could press softly into our dough to make different sized circles. Do not press all the way through. Press just hard enough to make an indent. If your child does press all the way through, you can gently press around the sides of the shape to keep it embedded in your circle.
My daughter wanted to hang them with ribbon, so we poked a hole at the top with a straw.
We both prepared our clay and then baked them on a cookie sheet at 250, flipping them a few times to harden both sides. (Adults should operate the oven and handle the hot clay.) How long you bake them for will depend on the thickness. Mine baked in about an hour while my daughter’s took about 3 before hardening. We let them harden and cool overnight.
It took us a couple days to get back to them, but when we did it was wonderful. As we painted, we spoke more about the book. My daughter excitedly mixed different colors on her palette to form new colors. “Silly Wassily”, she quoted the book as she painted her circles in different colors. We had a lovely talk about art and colors. When she was done painting, she was so excited to hang her project up that she asked if we could dry it with a hair dryer. Luckily, the acrylic dried in just a few short minutes and we were able to string up our creations with the ribbon of her choosing.
She was so very proud of her finished project and could not wait to show it off to her daddy.
Thank you as always for stopping by. Please follow us on Facebook as well.