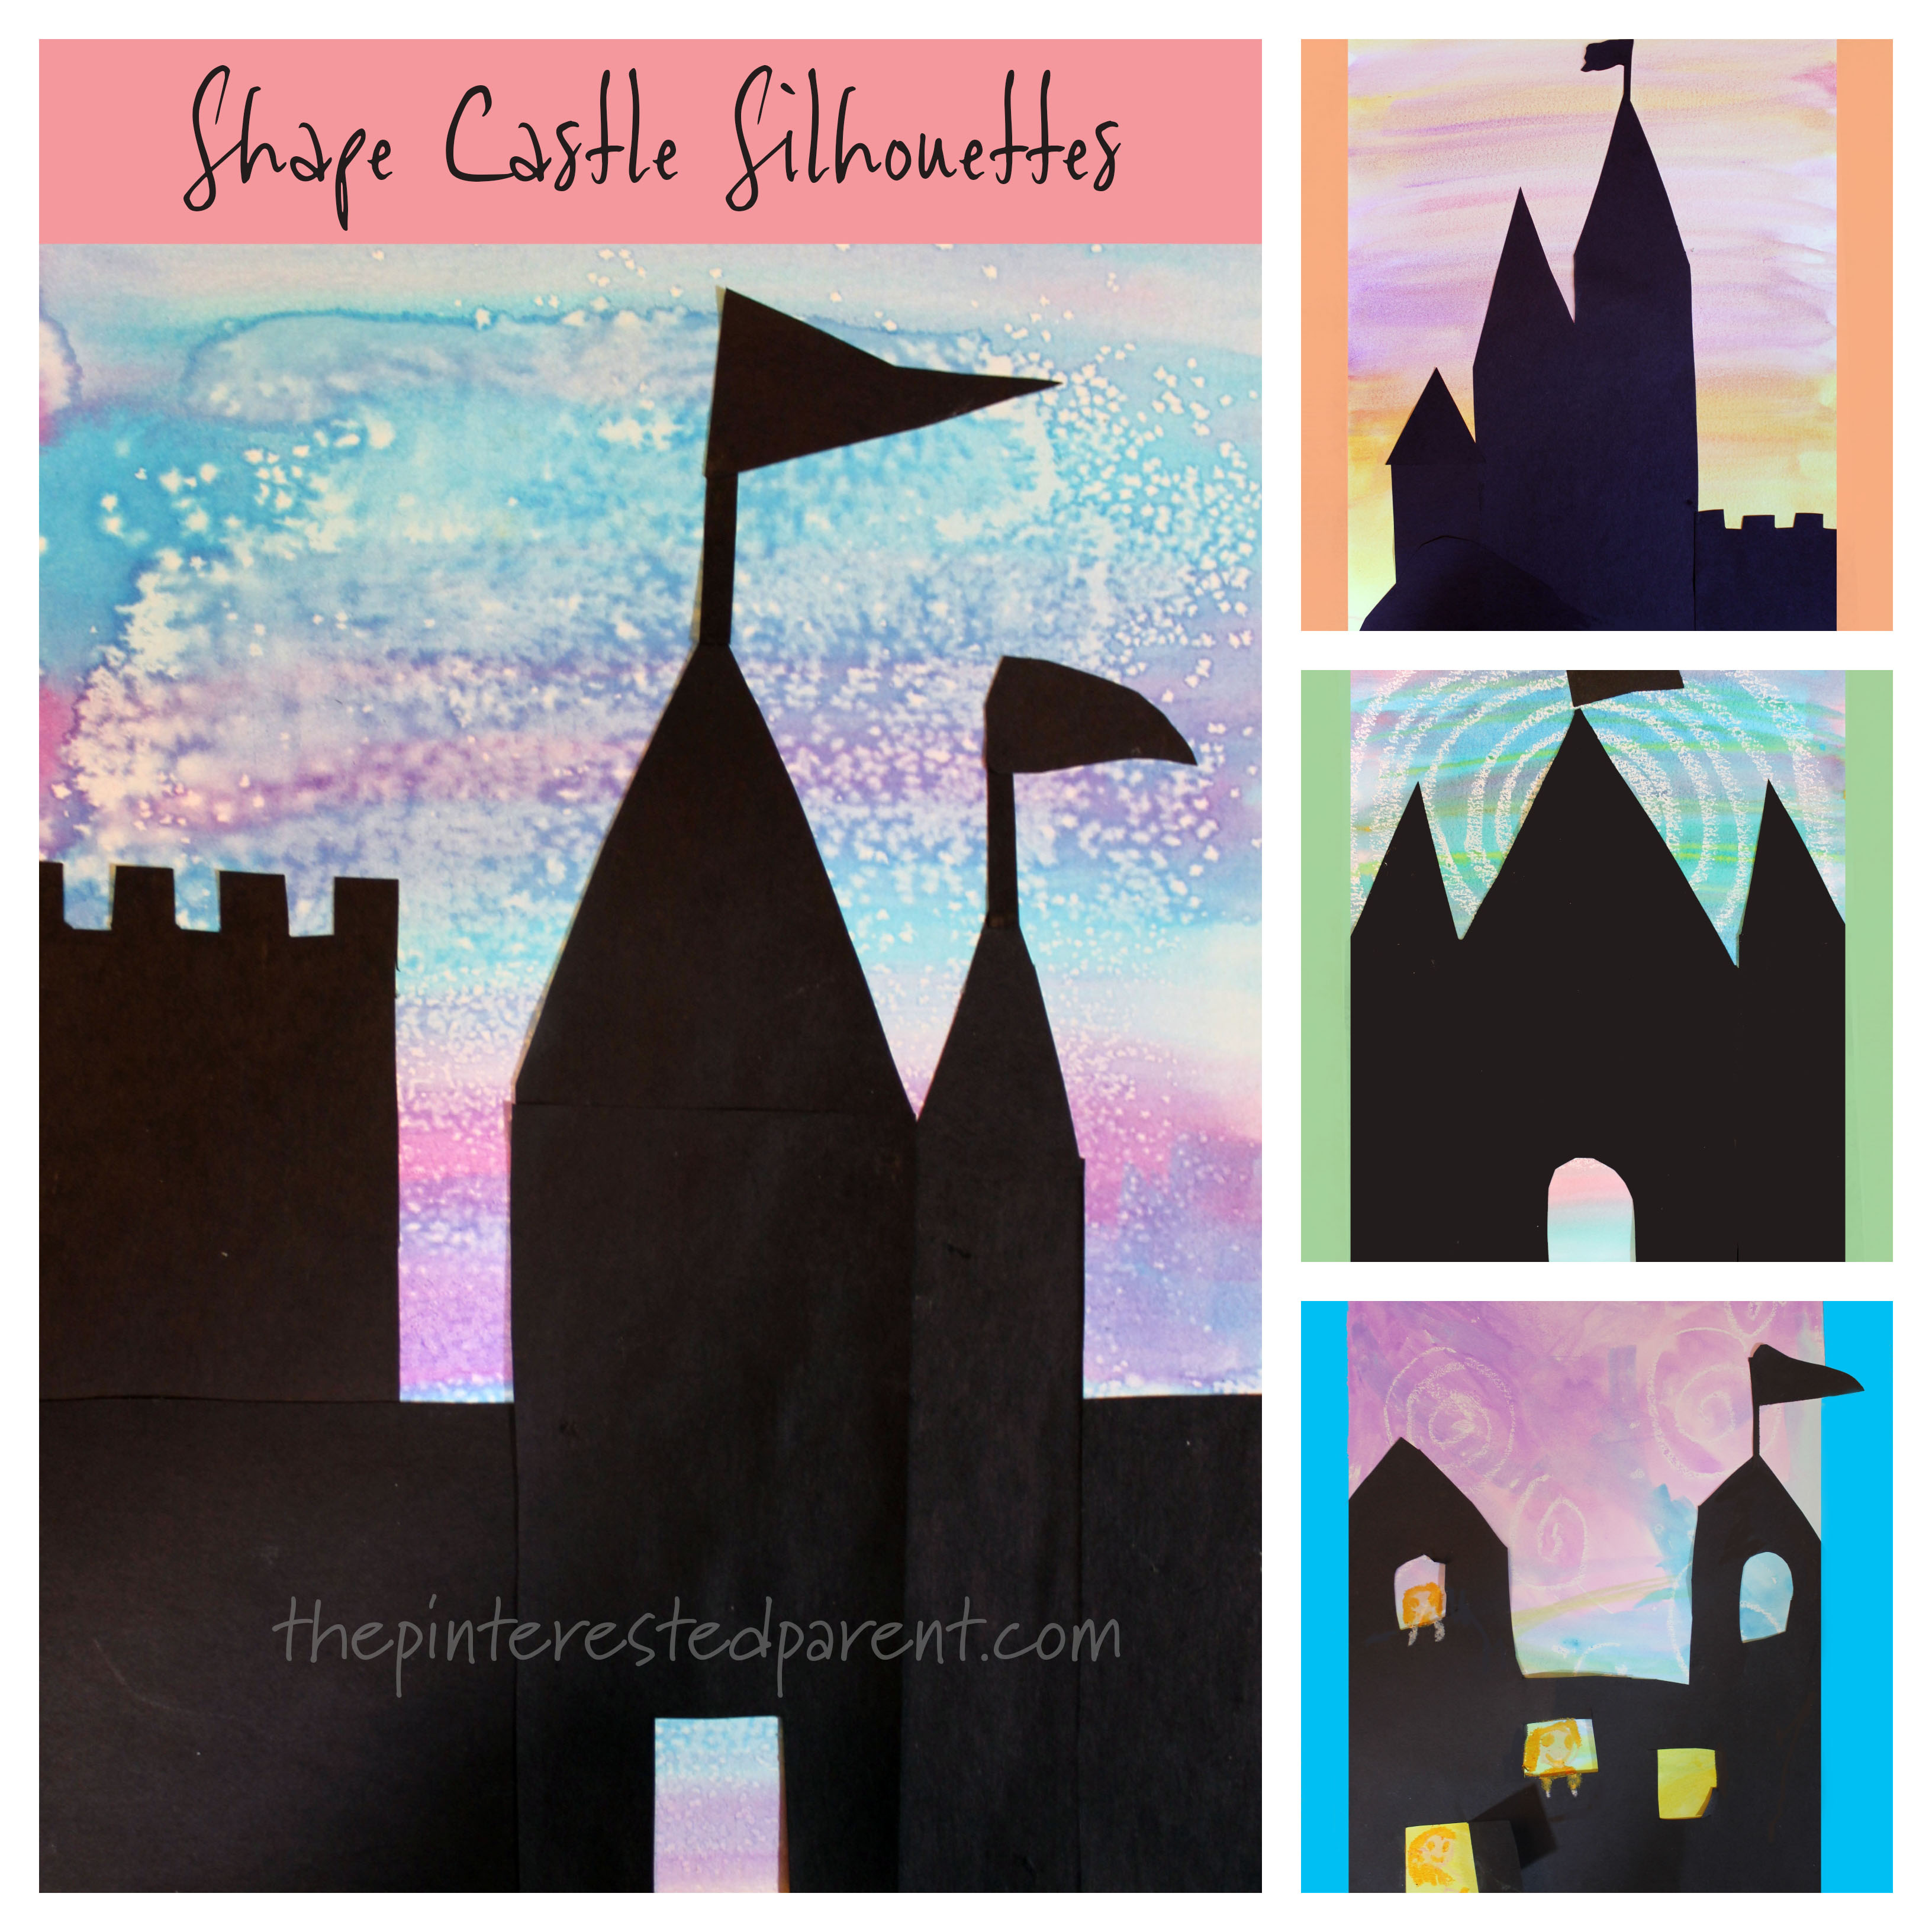
It is Harry Potter mania in my house. My daughter and I just finished book one, The Sorcerer’s Stone and are now moving on to The Chamber of Secrets. She is in love with all things Harry Potter and so am I. This past week the focus has been on Hogwarts Castle. I love castles and with all of the Harry Potter talk in the house I felt inspired to paint a little bit of Hogwarts. This kicked off our castle projects. We have been practicing drawing and painting castles and made these fun castle silhouettes with watercolors and construction paper.
Tag
salt
Salt Painted Easter Eggs
Have you ever tried salt painting? It is a fun and fascinating process and working with the glue is wonderful for honing those fine motor skills. That and the kids love shaking the salt. These salt painted Easter eggs are so much fun to make, you will want to make them again and again.
Watercolor and Salt Paintings
I love the reaction that occurs when you combine salt and watercolors. Salt paintings are a fun process that your kids will love.
Try sprinkling salt on a freshly painted watercolor picture and see what happens. It is lovely. Another cool process is painting on the salt with watercolors. This is a messy process, but a fun one that will certainly delight your kids. A word of warning, this technique is more about the process and the fun than the final product. There are changes that occur to the paintings upon drying. We have included some notes and suggestions about the salt paintings at the bottom of the post.
Twinkle, Twinkle, Little Sea Star
Twinkle, Twinkle, Little Sea Star. How beautiful and glittery you are.
There is nothing quite as wonderful as watching your children create. It is a fascinating and beautiful thing. My little girl and I spend a lot of time creating together, but my favorite projects are the ones that she comes up with on her own. This lovely sea star was one of her ideas and she was so eager to share it with me.
Stick and Stone Winter Crafts
The winter is officially here and we enjoyed a couple of snowy days this week to welcome the start of winter. We played outside in the snow all day yesterday and took in all of the beauty of the season. Watching the snowfall and looking at the snow-covered trees was enough to inspire some winter crafting.
We love working with clay and nature items. We have a collection of sticks and stones set aside for occasions just like this.

Newspaper and Watercolor Snowflake Art
*This post contains affiliate links*
The other day, I showed my little girl how to cut snowflakes. In the beginning, she had a bit of a hard time snipping through the folded paper, so we switched over to newspaper for our tutorial. We cut a bunch of them in different sizes. You can find directions on how to cut a snowflake here.
Watercolor & Salt Rainy Day Painting
My daughter loves pretend play. We play cupcake shop, hospital & sometimes we are animals, but my personal favorite is playing school. I love playing teacher & student with her. We do a series of activities complete with snack time, a brief recess & mini lessons. Incidentally, she listens to teacher mommy much better than regular mommy.
Salt Dough Mosaic Frames
We love clay & play dough projects in our house. My daughter just can’t get enough of it. We make new dough every week, sometimes even a couple of times a week. We are just about settled into our new home, but are still missing pictures on our walls. I thought it would be fun for us to make some homemade frames together.
We started with a simple clay recipe.
2 1/2 cup of flour
1 1/4 cup of water
1 cup of salt
1 Tbsp of oil
1 Tbsp of cornstarch
Mix all the ingredients together & then knead with your hands. My daughter always loves this part. You may need to add less or more water.
Roll out your clay.
Cut a few long strips out of your dough & then cut into small squares.
Cut out a shape for your frame & then cut out the inside window. Use a photo as a template to know how big to cut your window.
Lightly wet the top of your frame. Press the squares on top until the frame is covered. Press the squares in enough so that they stick. For my frame, I etched designs in with a toothpick. Since Mother’s Day is nearing, I thought that a Mother’s Day themed frame would be a good choice. Mai chose to draw in her designs after.
Preheat your oven to 250 degrees. Bake for 1 hour & then flip your frame & bake for another hour. Depending on the thickness of your frame, you might need more or less bake time. When hardened, remove from the oven & let cool.
Paint your squares with acrylics or glaze.
After the paint dried, Mai used a marker to draw in her designs. She wanted to write letters & numbers on hers.
Glue yarn or a ribbon to the back to hang & glue a picture to the back. (We used crazy glue. Let adults apply crazy glue.)
My daughter was so proud of her finished project. She asked that both be hung in her room.
Thank you as always for stopping by. Please follow us on Facebook as well.
Clay Fingerprint Keepsake Ornaments
These clay fingerprint ornaments are perfect for any occasion. They make a great keepsake gift for grandparents and mom and dad.
*This post contains affiliate links* Some photos have been updated since original post.
My daughter has inherited a lot of hand-me-down books. We have so many that we don’t even know what we own. For a very long time, my daughter has only read a few of these books. Many just sat there collecting dust, but recently she has been diving into them all. We came across a few art books the other day. We found a few great “how to draw” tutorials and also came across a cute book filled with fingerprint crafts.
Toddler Science Made Easy
I must have lived a very sheltered childhood because there are so many things that I never did as a child. Having a child of my own, I have been introduced to so many things that I missed out on when I was young. It is as if I am reliving my own childhood vicariously through her. My husband on the other hand has the inside scoop on all sorts of fun stuff that I never heard of, mostly in the form of science experiments. He introduced me to baking soda volcanoes last year & then the other day when I came home from grocery shopping he was working with Mai on another one.
I walked in the door to see my husband & daughter playing with a Cartesian Diver. I am sure many of you have heard of this, but this is one I missed as a child. I must have dozed off during science class that day. It was such a simple concept and I was as fascinated by it as my daughter was.
Cartesian Diver
All you need is a clean soda bottle, water, & a ketchup packet (or in our case a duck sauce packet) Do a float test first on the packet to make sure that it floats.
Fold the packet in half the long way to insert it into the bottle.
Fill the bottle all the way to the top with water & put the cap back on.
Squeeze the sides of the bottle. The little ones will need two hands. Squeeze the bottle & watch the packet sink.
Let go of the bottle & let it float back up.
Mai had so much fun that it inspired a few more experiments.
Salt & Ice Experiment
All you need for this experiment is some ice, salt & food coloring.
On a baking tray, lay out some ice. You can choose to use a large sheet or cubes.
Sprinkle salt on the cubes. The salt will cause the ice to beginning melting where sprinkled.
Squirt different colored food coloring onto the ice & watch as it seeps into the ice and follows the melted tracks. It makes a lovely effect.
We also had some fun experimenting with oil & water this week. For more on our oil & water experiments please check out our latest article in SEEK MAGAZINE.
Thank you as always for stopping by. Please follow us on Facebook as well.