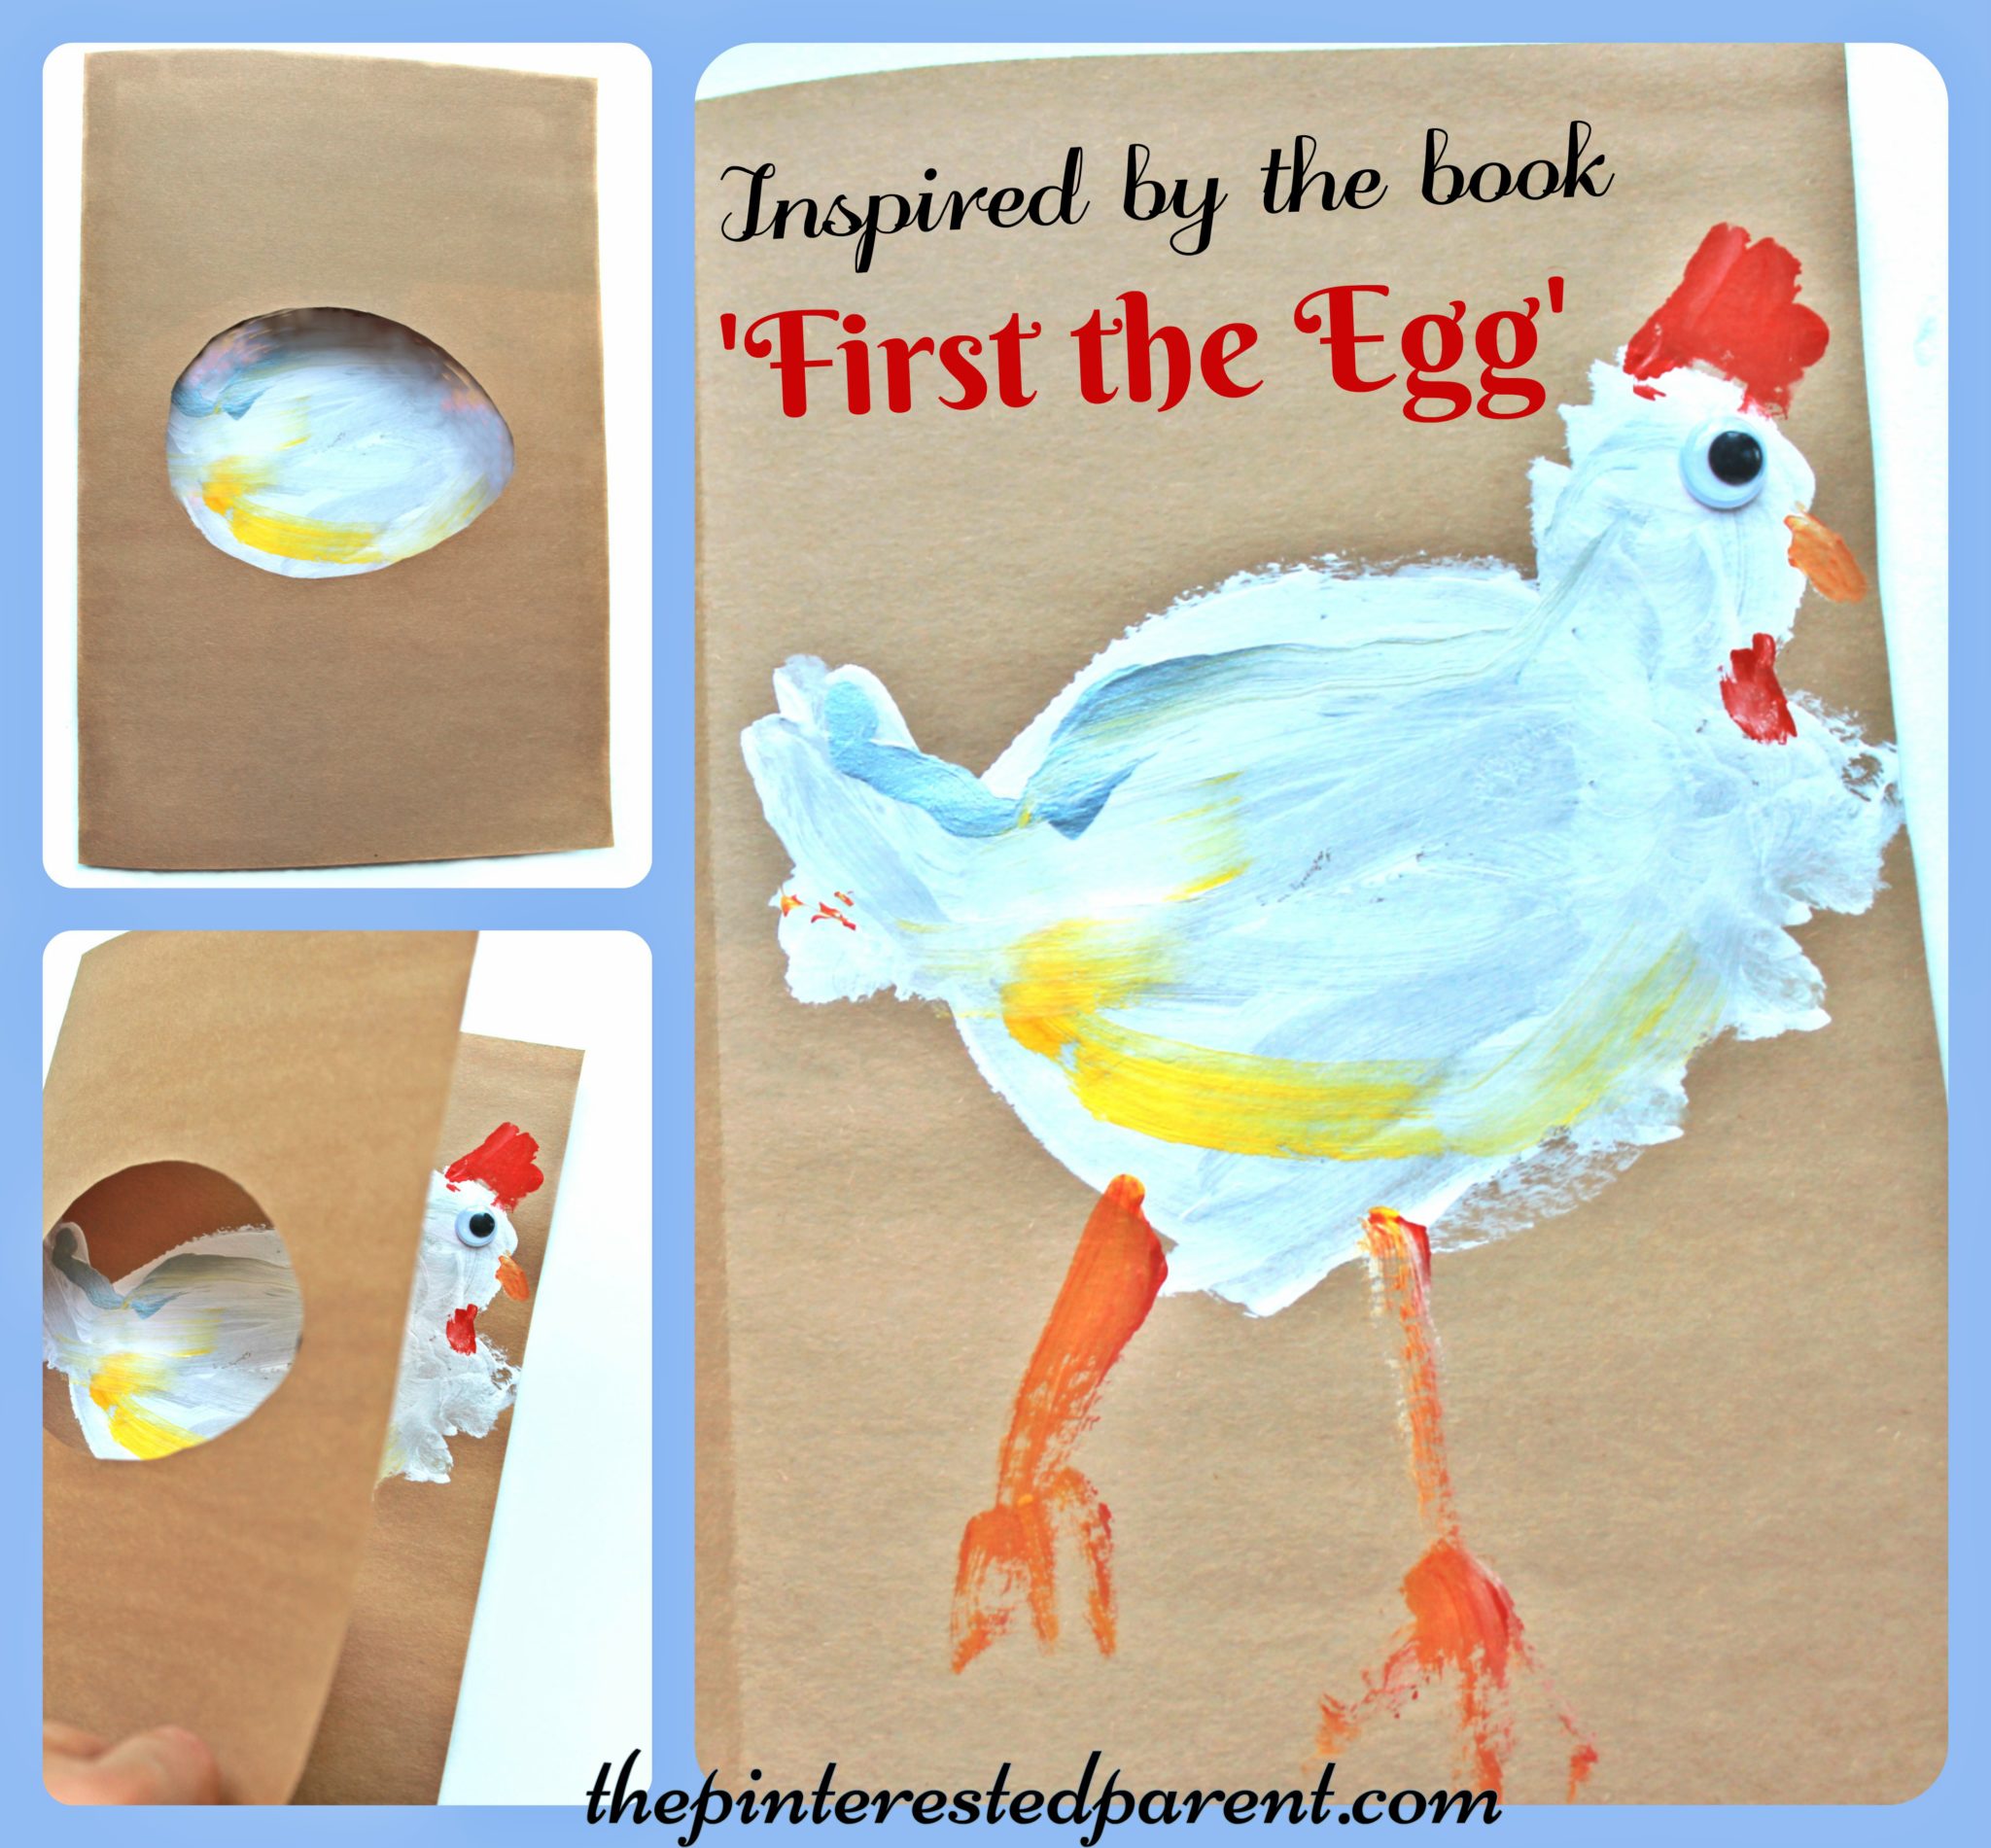
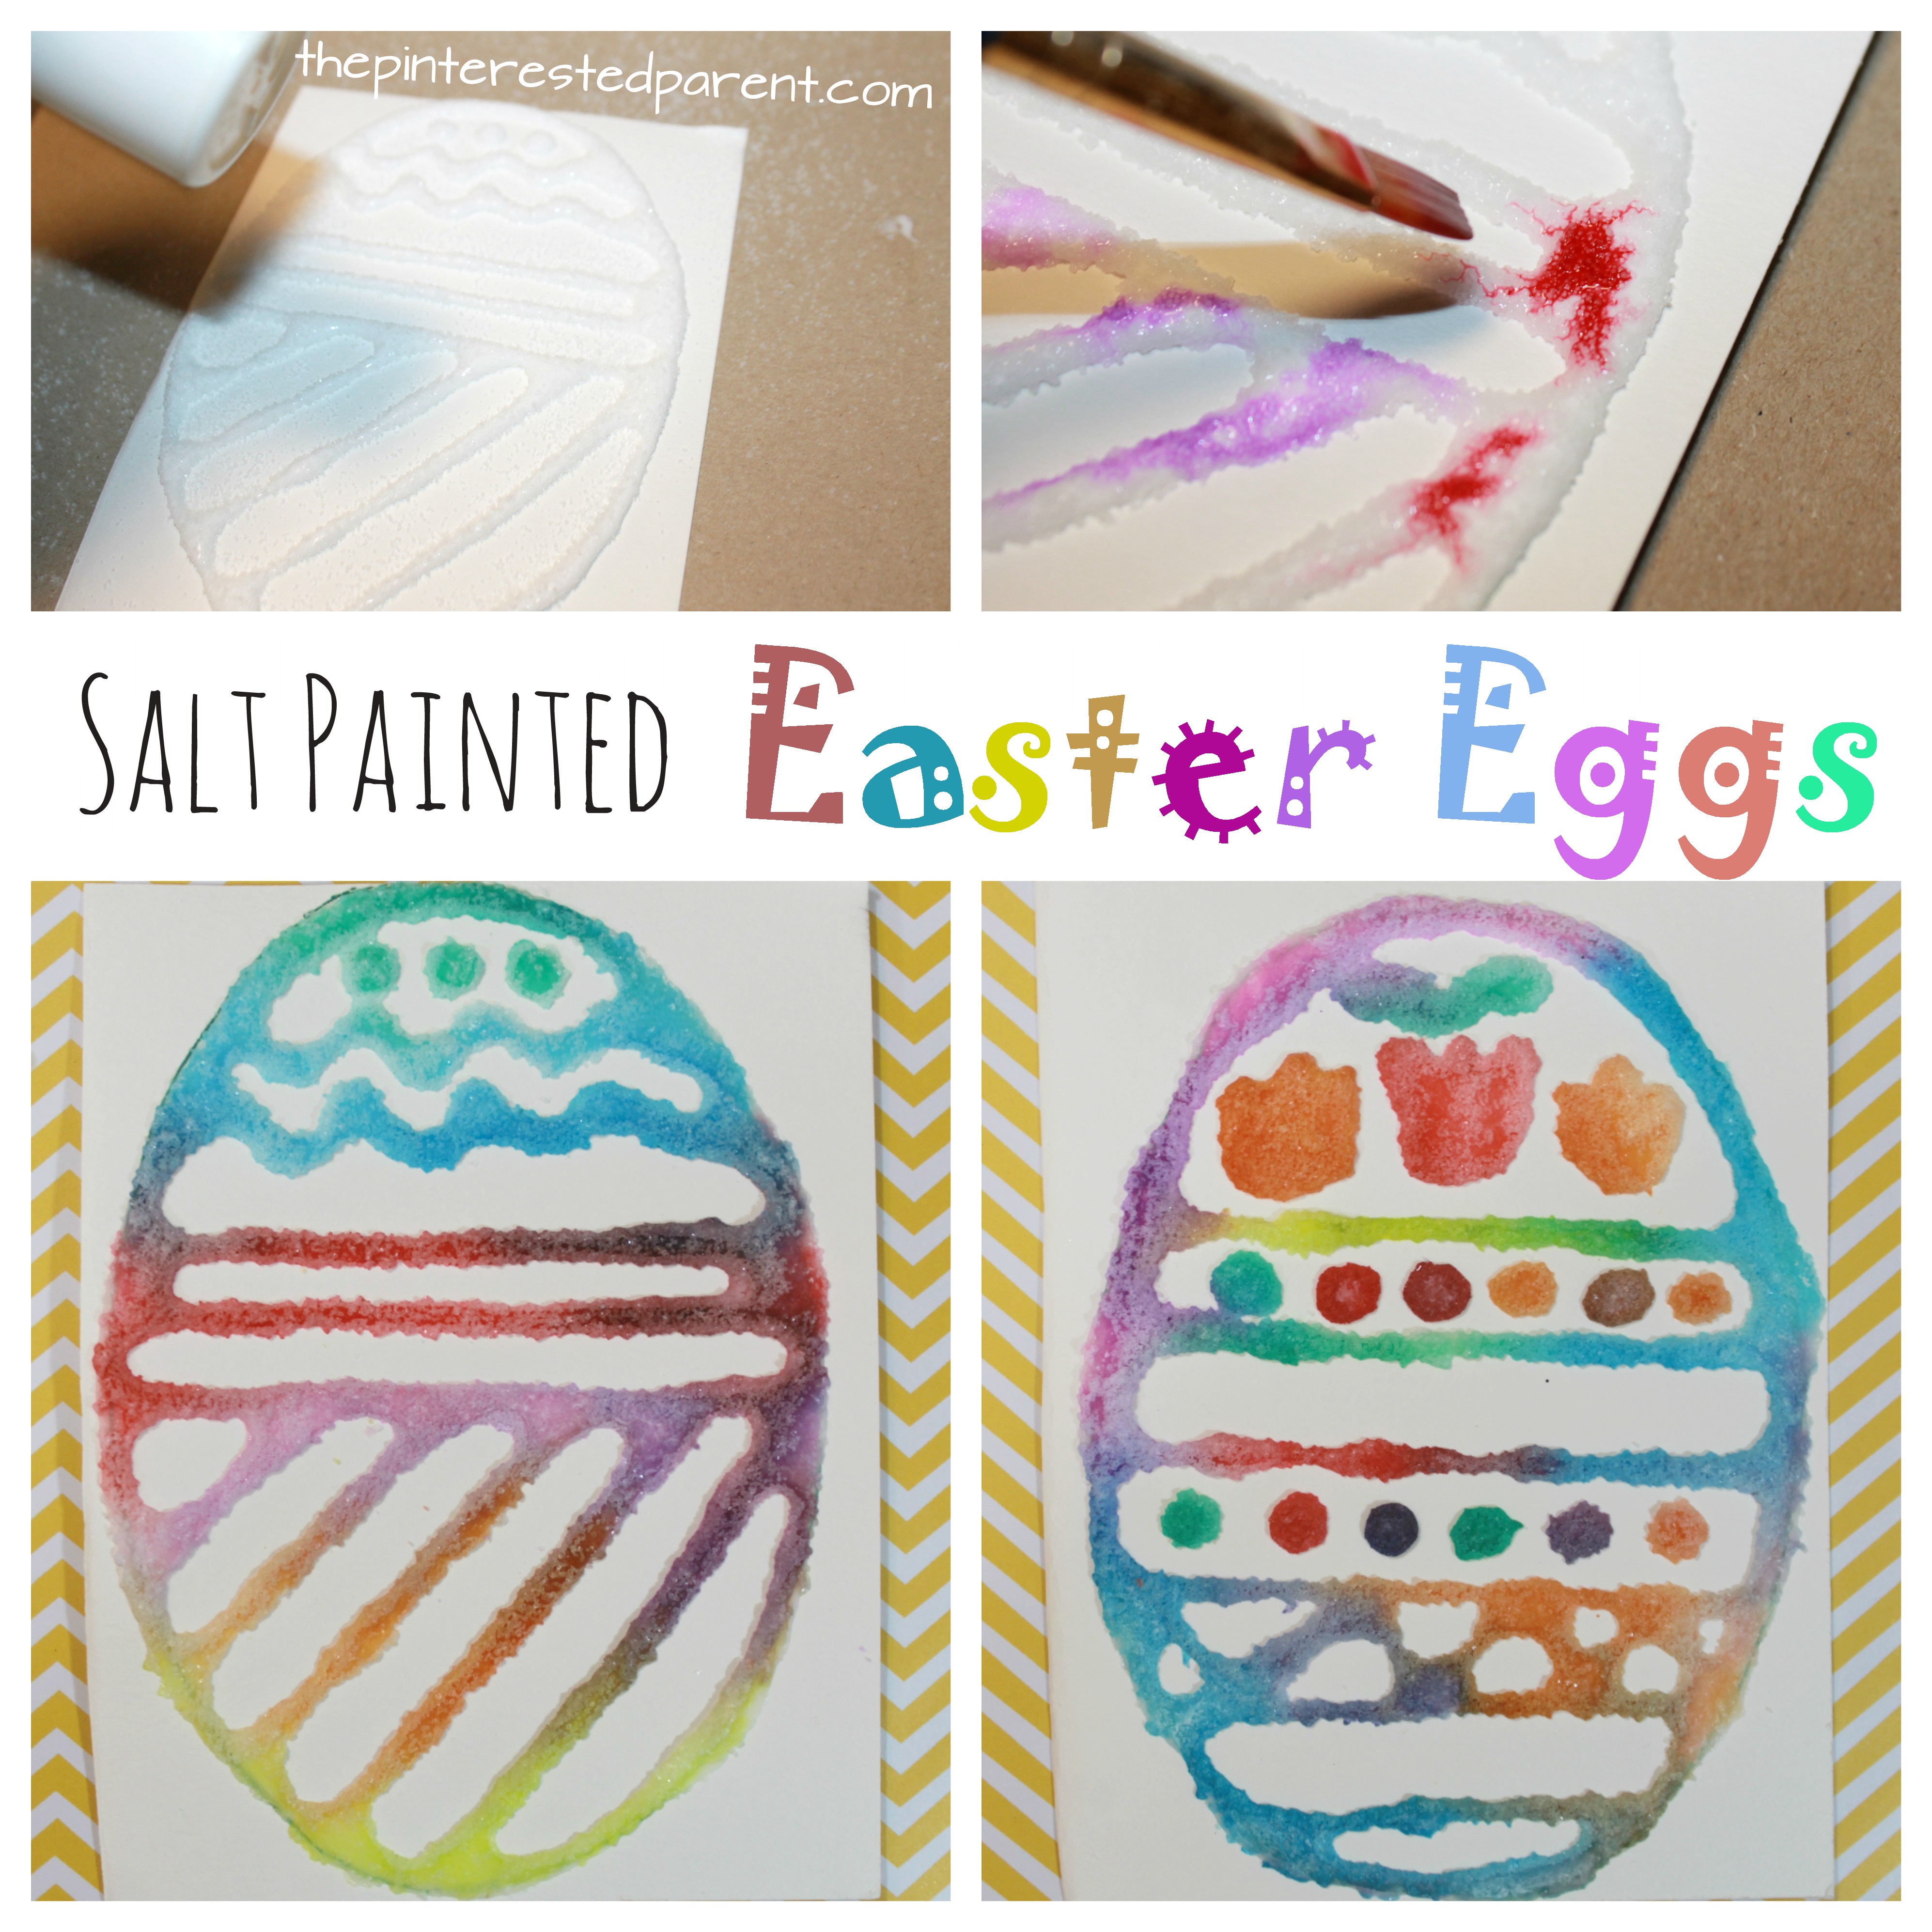
Have you ever tried salt painting? It is a fun and fascinating process and working with the glue is wonderful for honing those fine motor skills. That and the kids love shaking the salt. These salt painted Easter eggs are so much fun to make, you will want to make them again and again.
Tag
egg
Chicken & The Egg Craft
If you tune in with us regularly, you probably already know that my daughter loves to read. She has many favorites that we read all the time, but we try to introduce new books as much as possible. We visit the library every two weeks & pick out our new reads & look for potential new favorites.
*This post contains affiliate links*
Our latest trip to the library was a success. Our newest discoveries were ‘Water is Water’, ‘Thumb Love’ & ‘First the Egg’.
‘First the Egg’ is a charming book with beautiful and simple illustrations. It shows the development from egg to chicken, tadpole to frog, caterpillar to butterfly & more. It uses cut-outs to form the initial form & then reveals the transformation when you turn the page. We enjoyed this one so much that it inspired an art project based on its lovely cut-out concept.
Fold a piece of tan construction paper in half like a book. Sketch out an egg shape on the top page & cut it out.
Lightly trace around your cut-out onto the bottom page. Open the page up & paint a picture of a chicken. Make sure to cover all of the light outline. My daughter kept the book open in front of her & did a great job painting. My daughter blended the blues & yellows into the chicken just like in the book.
Set the painting aside to let it dry & then glue one googly eye onto your chicken.
When you close the page, it will show the egg on the front.
When opening the page, the egg is revealed to have the chicken underneath.
This was a fun project & it sparked my daughter to want to create similar crafts using the same cut-out technique. If you haven’t already, I recommend checking out this delightful book.
Thank you as always for stopping by. Please follow us on Facebook as well.
Barbecue Ham Fried Rice
Being Vietnamese, I grew up eating rice. I ate a lot of rice. As an adult not much has changed. It is one of my favorite side dishes to a meal, but rice doesn’t only have to be a side dish. Sometimes it can be the main course.
Ingredients:
Day old rice – 2 cups measured before cooking.
2 ham steaks, cubed
1/2 cup of chopped onion
1/2 cup of thinly chopped or shredded carrot
1/2 cup of chopped baby corn
1 can of chopped water chestnuts
1 cup of frozen peas
2 eggs
2 tbsp of olive oil
Sauce
1/4 cup of raspberry jam
1/4 cup of bbq sauce
1/2 tsp of minced garlic
2 tbsp of seasoned soy sauce ( Green mountain or Maggi are my favorites,) They have a completely different taste than Kikkoman or La Choy.
Pepper to taste 1 tbsp of water
Combine all ingredients in a bowl. Stir well.
Directions:
Cook 2 cups of white rice. Refrigerate overnight. This is important. Fresh rice will make for mushy fried rice.
Cut the skin of the outside of the ham steaks & cube into 1/4 inch chunks. Chop and set aside all vegetables except the peas.
Scramble the eggs with a splash of water. Water makes for fluffier eggs. Spray a large frying pan or electric skillet with cooking spray. Turn the stove or skillet to medium- low heat. Add the egg. When the bottom of the egg firms, flip it quickly. Let cook briefly. You want them just firm and fluffy. Transfer to a bowl and set side.
Turn up the heat to medium – high heat. Add a tbsp of olive oil. Add the ham & stir, cooking until the edges brown slightly. Add all the vegetables. Stir until the peas have thawed and onions have tendered. Pour the sauce mixture over the vegetables. Stir until evenly coated. Pour vegetables into a bowl and set aside.
Add another tbsp of oil & add to the pan or skillet. Add the rice. The rice will be hard and need to be broken apart as you stir. Spread out in a flat layer & and fry until the edges brown slightly. Pour the vegetable and sauce mixture over the top and stir until the rice, vegetables and sauce are evenly distributed. Remove from the heat & toss in the egg. Serve hot.
I love to eat with chopsticks when I can.
Mai wanted to learn too.
This was a huge hit. My husband ate 3 full plates worth. That is all the applause I need.
Related Topics:
http://aimslicious.wordpress.com/2014/04/27/chicken-biryani/ http://angeladelight.wordpress.com/2014/04/27/risotto-broccoli-gruyere/
Pasta La Carbonara
Yesterday was an emotional day for me. Not only was it the anniversary of my mother’s passing, but I received a phone call at work from my brother-in-law letting me know that my husband had been in a car accident while on duty. Luckily, my husband left the accident with only a few aches and pains and a dented cruiser. I was very happy to have my injured hubby home in one piece. It was definitely an occasion for comfort food & comfort for my husband start with bacon.
Pasta La Carbonara
While this is a fairly simple recipe to make, timing is very important in preparing this dish. The egg is added to the dish at the very end & is cooked by the heat of the pasta. It is very important that the past is hot, so the bacon must be ready before or at the same time as the pasta. Also, be sure to have your egg mixture ready before you finish your pasta.
Ingredients:
1/2 package of extra thick cut bacon (chopped into 1 1/2 – 2 inch pieces)
1 lb of pasta
3 eggs (room temperature)
1 cup of parmesan
1/2 tbsp of minced garlic
1 tbsp of olive oil
1/2 tbsp of garlic salt
Pepper to taste
Directions:
In a large skillet add olive oil & bacon. Cook over medium heat. Cook the bacon halfway through & add the minced garlic. Cook until just under crispy. Drain excess grease, leaving a little in the skillet to toss the pasta in & flavor. Cover & set aside until the pasta is ready. Make sure that the bacon is finished before the pasta. You need the pasta to be hot.
In a mixing bowl beat the egg. Add the parmesan, garlic salt & pepper. *Prepare this before the pasta is finished cooking. It must be added to the pasta while still hot as the heat of the pasta is what cooks the egg.*
While the bacon is cooking, cook the pasta. Drain the pasta & immediately add to the skillet & toss with the bacon. Remove from the heat and add the egg mixture and toss together. The egg will cook as you toss it & form a creamy sauce. Enjoy!
My husband may have been in pain, but he had a happy belly & even had room for seconds.
Related Topics:
http://inmamastephskitchen.com/2014/03/18/dinner-in-10-one-pan-spicy-tomato-pasta/
http://cookingandmyfamily.wordpress.com/2014/03/18/ragu-and-pasta/
http://yourperfectburn.wordpress.com/2014/03/18/shrimp-curry-with-cream-sauce/