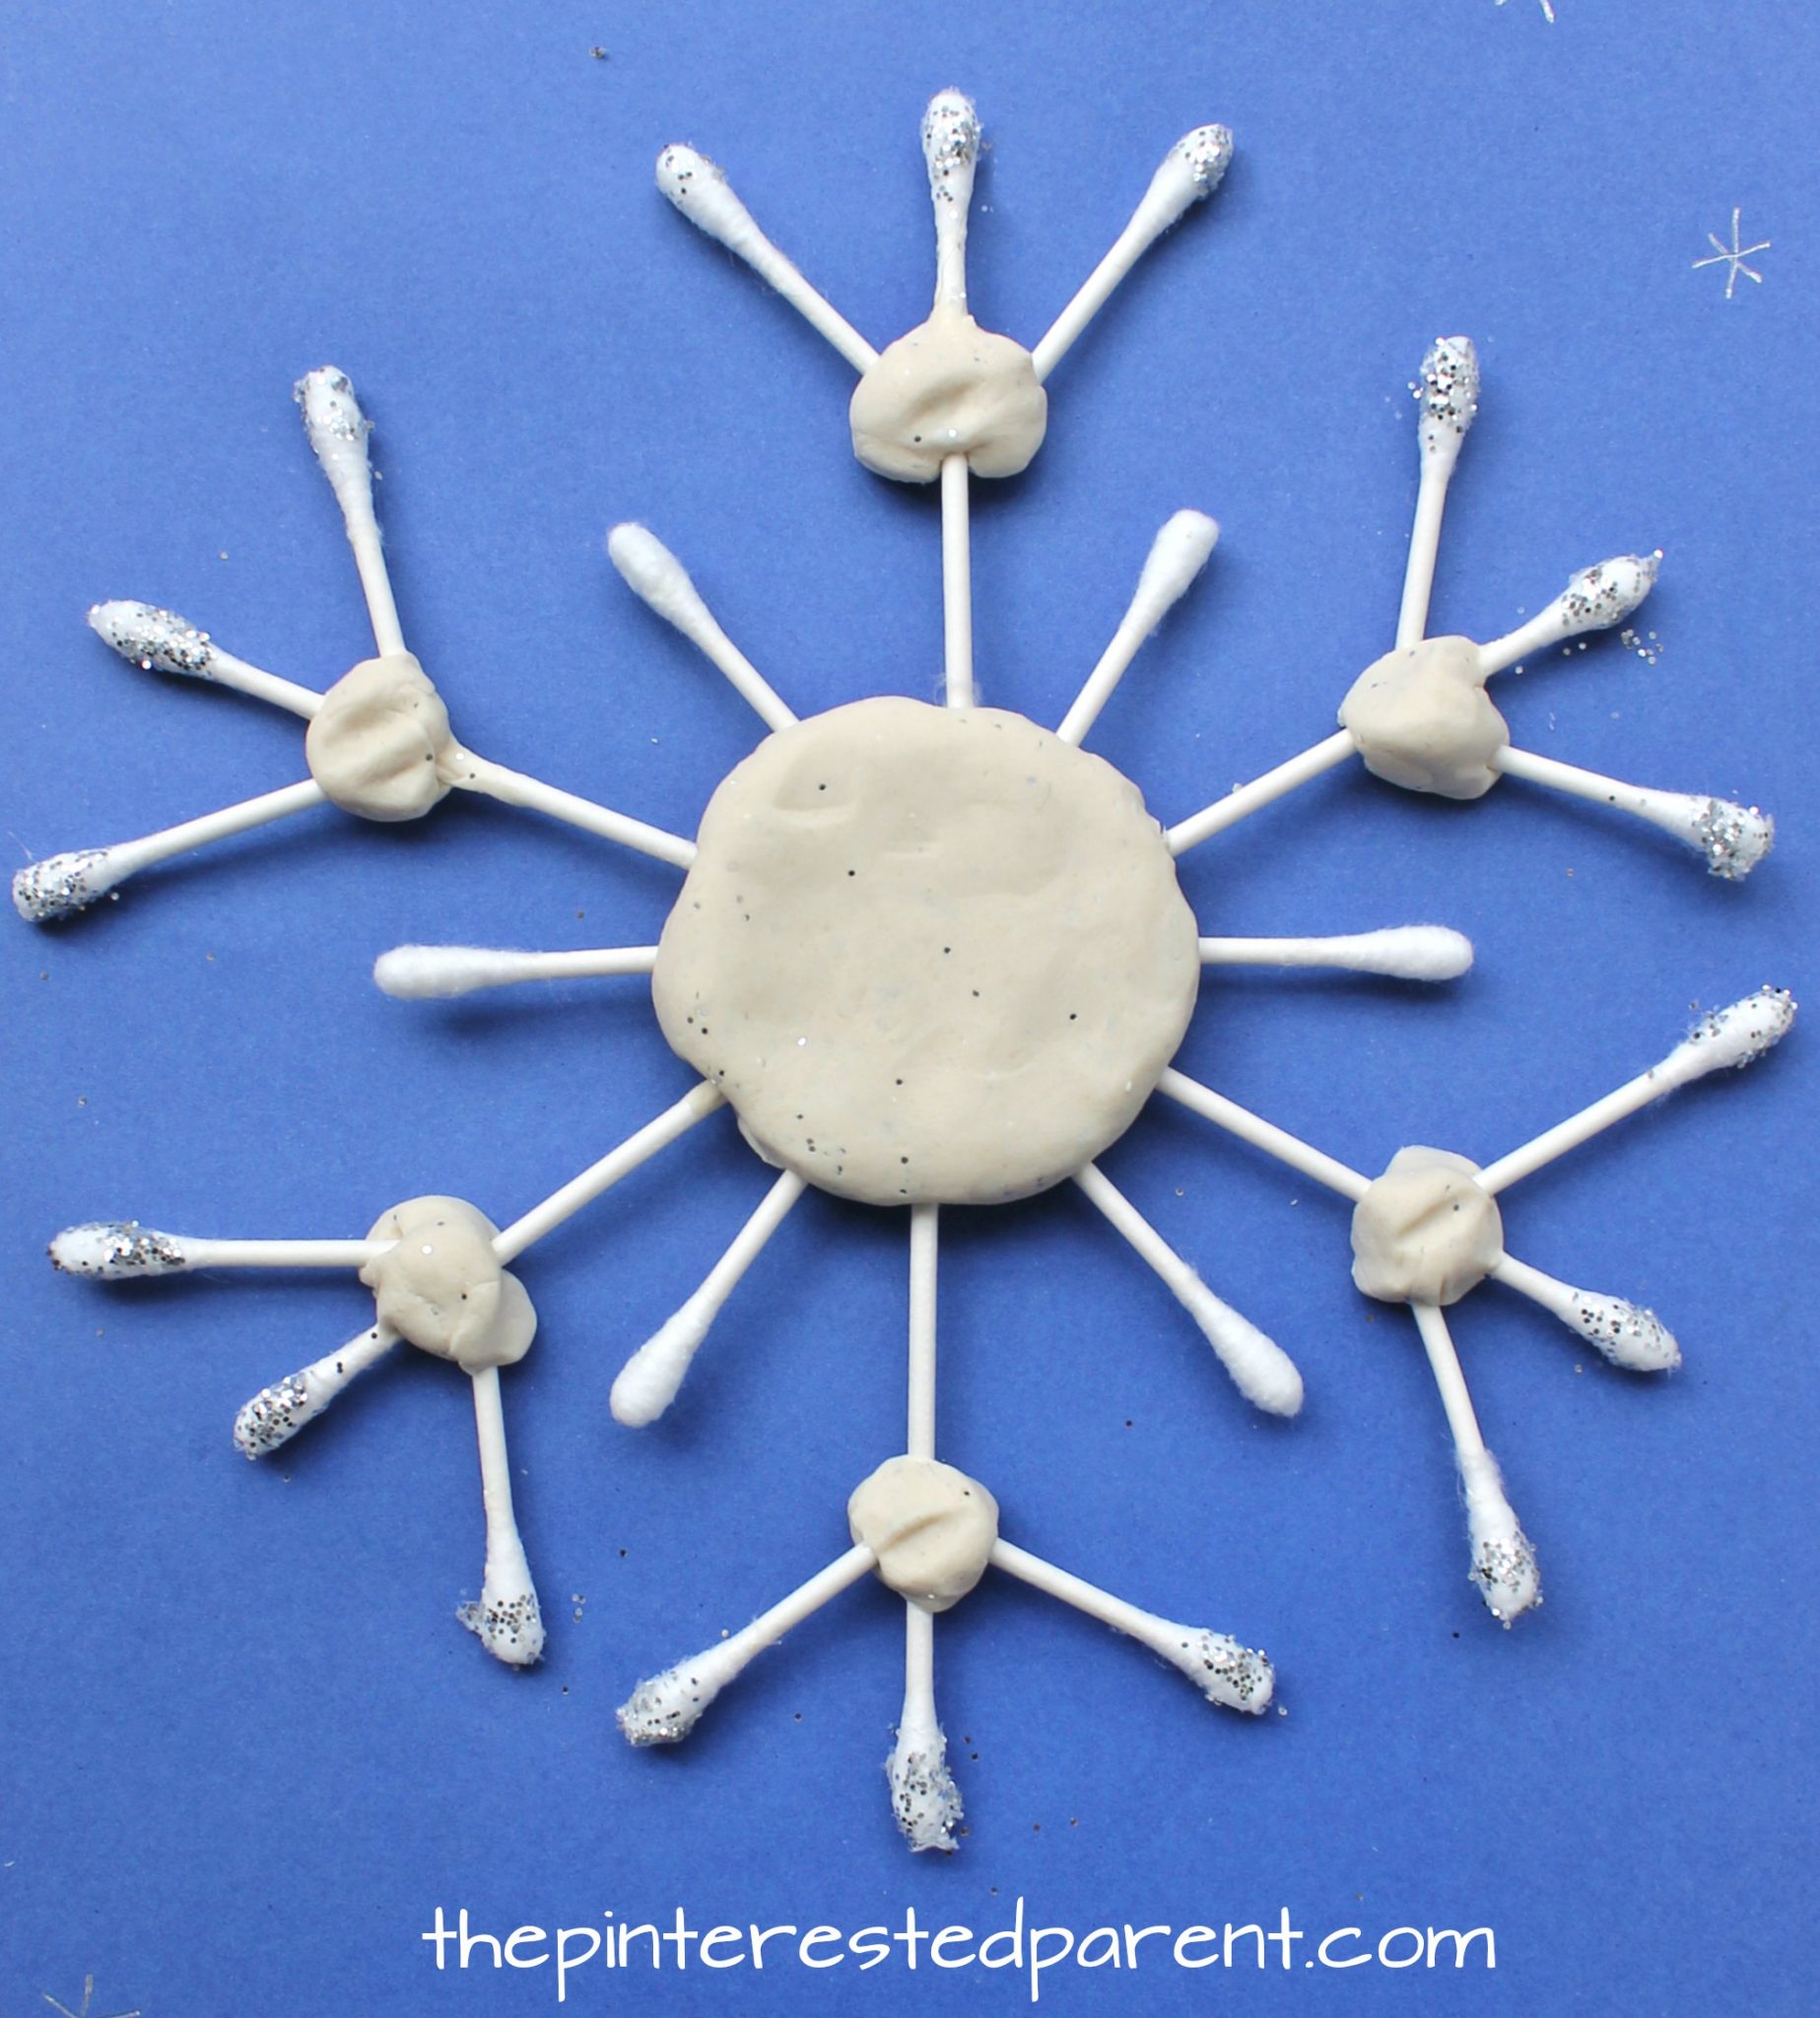
We just got our first frost of the season this weekend. This was a gentle reminder that winter will be here before we know it, like it or not. As much as I am not a fan of the cold, I am a fan of winter crafts and nothing says winter like snowflakes. I love snowflakes. They are so pretty and easy to make and they are a great way to teach patterns and symmetry. These Q-tip snowflakes are also fantastic for working on those fine motor skills.
Tag
play dough
Q-Tip Daisy Craft
These Q-tip daisies are an adorable craft and are great for fine motor skills.
Cotton swabs are not just for your ears. We use them in art projects often. They are great to paint with. They are fun to craft with as well. We used bare Q-tips to make these simple daisies for the spring, but you could also dip the Q-tips in paint and create other colorful flower creations.
Holiday Gift Ideas For Young Builders
Engineering activities are wonderful for improving your children’s fine motor skills, problem solving abilities and their imaginations.
*This post contains affiliate links. I received product in exchange for this post. All thoughts and opinions are my own.*
My daughter loves to build. She can and will construct out of anything. We build with recyclables.
We build with nature.
Pasta and Play Dough Robots
I am a big fan of using dry pasta for crafting. Painted pasta makes for great projects. Here are a few of our favorites.
Still Life Challenge
It is fascinating to watch my daughter while she creates. I love how she see things and it amazes me the details that she picks up at only 4 years old. She loves to prop things up on our coffee table and recreate them. Sometimes she draws them or sometimes she cuts out construction paper and assembles the pieces to form her project.
Last week, I did a little experiment. I put a still life on our dining room table and set out a bunch of supplies. I laid out paints, construction paper, scissors, glue, pencils, markers and clay.
I started to paint the fruit and asked her if she wanted to join me.
She sat down and declined the paint, but went straight for the construction paper. She cut out the shapes of the different fruits and their stems. She drew some of the fruits first and some she simply cut out.
She glued all of her pieces to another piece of paper to form her still life.
When she finished gluing, she used a marker to add a little life to her still. She gave all of the fruits faces and personalities and even made a cowgirl orange, complete with a lasso.
The next day, I invited my daughter to come and look at the still life of fruit. She sat on my lap and I asked her what she saw. She named off all the fruits on the cutting board. I asked her what color the pear was and she responded that it was green. I asked her if green was the only color that she saw and she looked closer and told me that she saw brown. When I asked her where she saw the brown, she started with the stem and then went into further detail about the speckles of brown around the pear, explaining that the speckles weren’t everywhere and showing me where they were more saturated. She went on to the next piece of fruit, which was the orange. She asked me about the little dimples all over the skin. She studied each piece of fruit and made wonderful observations about every piece.
She looked over the supplies on our table and reached for the clay. We used polymer clay, but play dough would be fine as well. She carefully sculpted each piece and laid out her fruit sculptures on a cutting board from her play kitchen.
I watched her intently as she used a straw from her juice to carve lines into her pumpkin.
When she sculpted her orange, she remembered her earlier observations and used a pencil to poke little dimples into it. She worked through each piece of fruit and even sculpted the red apple, which was no longer on our still because she ate it after making her construction paper project.
I was blown away by her clay sculpted still life. It came out so beautifully.
She loved it too. When she was finished, she grabbed a bowl out of play kitchen and cut up her fruit and made a fruit salad for the both of us to “eat”.
Thank you as always for stopping by. Please follow us on Facebook as well.
Pizza Making Play Dough Activity
My daughter is obsessed with Play-doh. She just loves it. She loves mixing the colors together, sculpting with it & she even loves those Play-Doh videos all over Youtube. *This post contains affiliate links*
Last year we even made her a Play-doh themed birthday party. Last night while playing with a new variety pack, she asked me for a paper plate. I grabbed her one & asked her what she was planning on making. She said she wanted to make a pizza. “Can you help me, mama?”
Of course! This sounded like a fun project.
Start by pressing a light tan color into the center of the plate & then using a rolling pin to spread the dough out.
Next , pinch the edges of your rolled out dough to make the crust.
Smooth on your sauce with your fingers, utensils or use the rolling pin.
Tear off small pieces of white dough & drop onto your pizza. Add pepperoni or any other toppings. As you can see by my silly girl’s face, she had a ton of fun making her pizza. Here she is rolling out broccoli for her pizza.
My daughter had a brilliant idea. The play dough pizzas were the perfect recipe for a fun evening together.
Thank you as always for reading. Please visit us on our Facebook page as well.
Printable Face Play Dough Mats
I have a play dough obsessed child. She loves all things play dough. Last year her birthday party was even, you guessed it, play dough themed. We have tried many different play dough activities, but we have not really ever worked with play dough mats. Since my daughter loves making people, I thought that face mats would be a great idea for her. Get your free printables at the end of the post.
We started with a lot of dough. We rolled out the colors that we wanted. It made it easier to work with.
I helped her get started with the face and showed her how to spread the play dough out.
She spread out her dough & formed little eyes & a mouth for her little girl. She used a plastic knife to cut away any excess. She wanted to give her a shirt too. She made sure that the shirt had a flower on it too. She did a great job.
Later that evening, she used wanted to draw on one too. She made a rainbow girl with rainbow hair. She was very proud.
Use laminate sheets over the printables to make them reusable. Laminate will make for easy clean up with the play dough. You could also use dry erase markers on it, to color & draw on it over and over again.
Download your free printables here.
Thank you as always for stopping by. Please follow us on Facebook as well.
Paper Plate Play Dough Nature Island
This is a wonderful activity for toddlers and preschoolers. Gather items from nature and form these beautiful nature items with play dough and paper plates.
My daughter and I do arts and crafts project just about every day. Many times, I take inspiration for our projects by things that happen over the course of our day. Sometimes, I just get a random idea and many times my daughter calls the shots. I had an idea last night to make nature fossils out of play dough, assorted leaves, flowers and small pebbles. We made homemade play dough. We added some cinnamon to change the color and add a lovely smell. We rolled out the dough & cut a circle out of the dough to imprint onto.
It’s A Play Dough World
I am currently living in a Play-Doh world. My living room is filled with containers & baggies filled with dough. Most containers are filled with multi-colored globs of dough that have been blended and smashed together. There are cutting tools, stamps & dough presses covering our tables & floors. It is easy to say that my daughter is obsessed with Play-Doh. Her birthday this year was even Play-Doh themed.
There is a kid’s television show that we will watch together called ‘Art & Music’. It is a lovely show that shows different mediums of art put to music. On every episode there is a segment called Clay World. They create amazing scenes & people right before your eyes. This is my daughter’s favorite part of the show. She oohs & aahs over their creations & tries to recreate them. I speak about inspiration often & it seems that even the youngest of artists get inspired.
Last night she asked me if we could make a Play-Doh village together. How could I say no to that?
We started with a pond laid out on a piece of poster board.
Mai helped me form rocks to place around the pond.
We rolled out a strip of mismatched green & sliced out grass blades.
I worked the grass around the pond and rocks.
I formed a walkway.
Mai wanted to make ducks for the pond. She formed one with a cookie cutter. She got upset once she realized that it could not stand up in the pond.
I showed her how to make a little duck that could float in the pond. She was a quick learn & made several little ducks to put in the pond.
We added a walkway to our pond & then pressed green dough around to form more grass.
Mai helped me press & work some brown dough around the side to form dirt.
We added an additional path to the side & a stream.
Mai made us a banana boat to put in our stream. That’s me in the orange. Mai is driving the boat of course & daddy & her cousin Sebby are in tow. I love that little girl’s imagination. Before she went to bed last night, she asked to add a zoo to our park. “Tomorrow baby girl.” I really am living in a Play-doh world.
Thank you as always for stopping by. Please follow us on Facebook as well.
Play-Doh Birthday
*This post contains affiliate links*
Picking a theme for Mai’s 3rd birthday was an easy decision. You have all heard me talk about our daughter’s love for Play-Doh. It only made sense to celebrate her special day with her favorite activity.