Tag

turkey

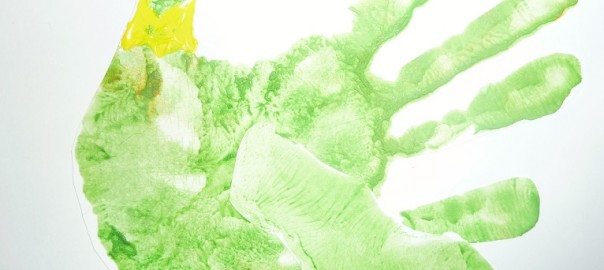
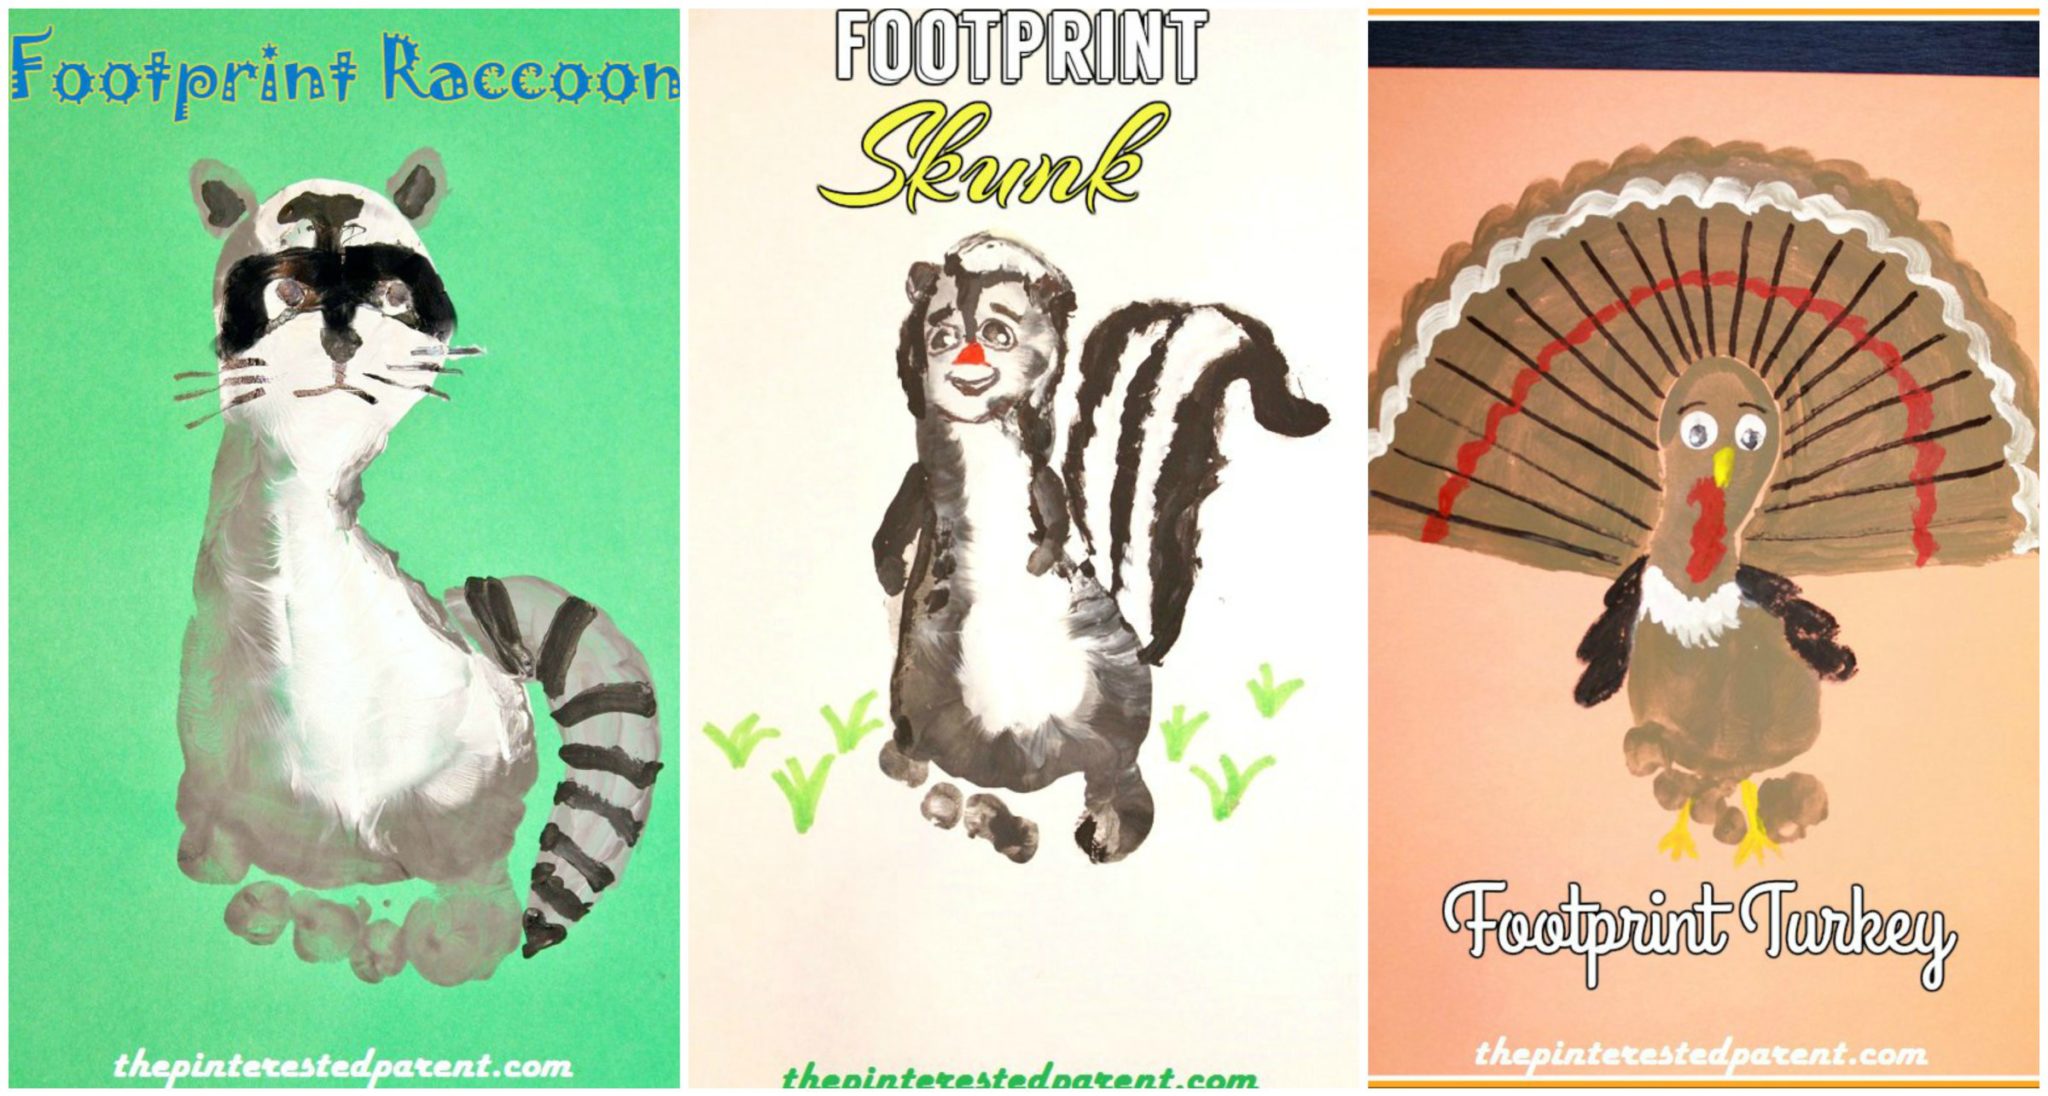
Footprint Crafts R, S, & T

Footprint Animal Crafts A - Z featuring R,S & T

We are getting into the home stretch with our footprint animal crafts from A-Z. Yesterday we were able to make crafts for the letters R, S, & T. As always we start with a painted foot.

R Is For Raccoon

Mai insisted that she could paint her own feet last night. So we let her paint her own feet first.

IMG_7178

For the raccoon, paint white down the center of the foot & paint the outside in gray. Press onto a piece of paper.

IMG_7179

Paint in the ears & tail in gray.

IMG_7182

Paint in the raccoon mask & add black stripes to the tail & the center for the ears.

IMG_7184

Paint in or use a magic marker to add the eyeballs, mouth & whiskers.

Footprint Raccoon Craft - Footprint animal crafts from A - Z R is for Raccoon

S Is For Skunk

Paint the foot much in the same manner as above, only use black instead of gray.

IMG_7180

Paint in the tail, ears & top tuft of hair.

IMG_7183

Finish off your craft by painting or drawing in the face with markers. Add small arms to complete your skunk.

Footprint Skunk Craft - Footprint Animal Crafts from A - Z S is for skunk

T Is For Turkey

Our daughter did actually paint her foot for this craft with very minimal help.

IMG_7181

Dot on the whites of the eyes, beak, hind feathers & the wattle.

IMG_7185

Paint in the feather details & paint in wings & feet to complete.

Footprint Turkey Craft - Footprint Animal Craft A - Z T is for turkey

Thank you as always for stopping by. Please follow us on Facebook as well


Tissue Layering & Paper Plate Crafts

TissuePaperplate.jpg

There are many reasons that I love craft projects with my toddler. One of the big ones is that it keeps her mind & hands occupied. I do many crafts side by side with her, but sometimes it is great to have her work independently while I cook supper or get chores done. Arts & crafts are a far better alternative to sitting in front of the television. This is why I love tissue paper crafting. It can keep her content for long periods of time.

Tearing the tissue into pieces is fun for her destructive little hands. Layering the tissue in different colors & patterns is a great creative outlet for my little artist.

What you will need:

Different colored sheets of tissue paper

Paper plates

Vinegar

Elmer’s glue

Paint brush

Mix 3 parts vinegar with 1 part glue & stir. The vinegar will cause the colors to bleed together & the glue will adhere the tissue to the plate.

Cut or rip the tissue paper into several pieces & colors. Layer the tissue pieces & paint on the vinegar/glue mixture. Do a few pieces at a time. Let dry & then trim the excess that hangs over the edges.

IMG_5809 IMG_5812 IMG_5813 IMG_5814 Tissuepapercollage.jpg

Mai said that she wanted to make a fish. We picked two colors & layered the bottom of a paper plate. Let it dry & trim around the edges. Cut out a triangle for the mouth & set the triangle aside. Cut out a triangle using a piece of construction paper. Glue the triangle mouth cutout to the inside of the construction paper cutout & glue to the opposite end of the fish’s mouth. Glue a small black circle inside of a larger black circle & glue above the mouth to make an eye.

PaperPlateFish.jpg

Mai wanted to make more animals. She asked for us to make animals that live on a farm. Since Thanksgiving is coming, I suggested a turkey.

IMG_5820
Layer & brush one color of tissue to the center of a paper plate.
IMG_5821
Form another layer around the yellow in orange & then add another layer in red. Let dry. Cut the excess paper around the edges.
IMG_5822
Cut out a shape for the turkey body & glue to the bottom center. Cut a piece for the turkey waddle & glue into place.
IMG_5823
Add a beak & some googly eyes. Finish off your turkey by adding pipe cleaner legs & feet to the bottom.

PaperPlateTurkey.jpg

Pine Cone & Play-Doh Turkey Crafts

ThanksgivingCraft.jpg

One of my favorite parts of my daughter’s days at daycare are receiving her daily reports & seeing all of the craft projects that she brings home. I love seeing her beautiful crafts, even the ones that she does with someone else.

This week she brought home a lovely fall one.  It was branches bound together & decorated with Play-Doh. Miss Laura said that Mai worked on it for 2 hours.

IMG_5740

This weekend there was a sale on Play-Doh at the supermarket, so I stocked up. Mai was so excited when I came home with a box filled with 24 different shades of it. She dove right in & started creating.

IMG_5735

She is becoming quite the little artist. Her imagination is developing so quickly. I watched her as she kneaded & forms different shapes & put them together. She explained to me as she molded her creation what she was making.  “Look mama, a frog! He has a blue fly on his tongue.” I have to admit, I was very proud.

IMG_20141025_101954346

She did not stop there. “Look Mama, I made Dukey’s poop.” Oh dear! It does look like Dukey’s poop.

IMG_20141025_111042731

Since we already were in such a crafty mood & had a table full of Play-Doh, I thought we could make something together.

Thanksgiving Turkey Craft

This just require pine cones & Play-doh. I used craft pine cones only because they were handy. You can use ones from your yard as well.

Form & mold the turkey’s head to the fat part of the pine cone. Show your child how to do it & let them do it to their own.
(If your pine cone is wobbly, place a chunk of Play-doh underneath to keep sturdy.)

IMG_5706

IMG_5702

Form long oval shaped pieces to use as the turkey feathers.

IMG_5707

Insert towards the back between the pine cone scales.

IMG_5712

IMG_5709

Again, show your little one how to do it.

IMG_5715

IMG_5714

Add the beak. Older children may be able to do this step, but the smaller hands might need the help. Mai asked mama to make her turkey face.

IMG_5710

Add the eyes next.

IMG_5711

Add the turkey’s waddle & you are done.

PineconePlayDohTurkey.jpg

Daddy’s Slow Cooker Turkey Soup

0651

I am going to gush for just a moment about my husband. I like to poke fun of him a lot in my posts. He is a really good sport about it. I tease about him being a “Yes daddy”, which he is, but he is the best “Yes daddy” out there. The truth is my husband is amazing. I often don’t give him enough credit for all that he does for the family. Lord knows, I am not always a picnic to be around, but he is consistently loving & supportive and I adore him for it.

Let me let you in on a little secret, I am not the greatest home maker. After the birth of our daughter, my housekeeping skills have become virtually non-existent. Thankfully, my husband helps with the household duties. He does the laundry & I hate doing it. I clean the bathrooms and floors & he rarely picks up a broom. We have a great balance for keeping our happy, messy home.

We also share in cooking duties. This weekend daddy did all the cooking. He made two of his specialties. He made his family recipe for venison mostaccioli, which unfortunately I can’t share & he made his famous crock pot turkey soup.

I am not much of a soup fan. It has never been a meal that excited me or filled me up, but my hubby’s soup is hearty & delicious and I love it. It is also a healthy and low fat meal option for those watching their diets.

Slow Cooker Turkey Soup

Ingredients:

Leftover turkey carcass (12-14 lbs starting weight)

3 whole celery stalks

3 whole & peeled carrots

2 whole medium onions (peeled)

2 bay leaves

1 tsp dried minced garlic

1/2 tsp coarse ground black pepper

1/4 tsp celery salt

1 tbsp chicken bouillon powder

1 tbsp salt

1 15 oz can of Veg-all (mixed vegetable blend)

1 14.5 oz can of chicken broth

1 2.25 oz pack of dry noodle soup mix (Lipton or store brand)

1/2 cup of pearled barley

Place all ingredients except last 4 to the bottom of a 6.5 quart slow cooker, with the carcass being added last. Fill the slow cooker with water. Cook on low for 6-7 hours. After 6-7 hours, strain the loose meat, whole vegetables & bones. Pick out the bones carefully, return the meat. Chop up the cooked carrots & celery stalks and add to slow cooker. Add the remainder of the ingredients & cook on low for 1 more hour.

0031 0041

0131

0121

0561

0581

0571

0621

0656

The soup was delicious as always. Our picky girl even enjoyed two bowls. Thanks daddy.

Up Next: Don’t Forget Your Furry Babies

Related Topics:

http://mobitesfood.com/2013/12/09/thai-vegetarian-minestrone-a-soup-for-all-seasons/

http://theculinarycapers.com/2013/12/07/best-tomato-soup-i-ever-ate-how-to-make-awesome-grilled-cheese/

http://whatsintheoven.wordpress.com/2013/12/07/bacon-cheeseburger-soup/

http://meggsalad.com/2013/12/07/creamy-butternut-cauliflower-soup-with-chicken-and-kale/

Mommy & Me Thanksgiving Crafts

hand & foot print turkey craft for kids - Thankgiving

I think every parent wants & hopes that their children will show interest in things that they are passionate about. Of course they will discover their own talents and passions, but to be able to have something to share and to connect to them with would be amazing. For my husband, who is a marathon runner, he has aspirations of Mai running races with him someday. He also loves to golf. He bought Mai her first toy golf set when she was just starting to walk.

Excuse me, playing through.

Since the day my daughter was born, I have been excited for the day that we would be able to do arts & craft projects together. I think I bought her, her first box of crayons before she could even hold one. I started her on finger paints before she turned one. I have been so hopeful that she would love art as much as I do. She likes to color and use her finger paints and she loves it when mommy draws pictures for her. She will often give me special requests by handing me her crayon and shouting “horse” or making an elephant sound. God, is she cute.

With the holidays coming, I have been daydreaming of decorating sugar cookies and making gingerbread houses but since Thanksgiving is only a couple of weeks away, I thought we could do a Thanksgiving Day craft favorite. Who hasn’t made the classic hand turkey as a child? I think most of us, probably have. I wanted to make a special turkey that joined our two hands together. Unfortunately, it is hard to explain to a nearly 2 year old toddler, that she can’t wiggle her hand around in the paint to make a mommy/daughter hand turkey.

049

050

052

 Instead, Mai finger painted with her Cool Whip paints and had fun on her own, but did let mommy take a footprint.

054

I took her foot print and added it to my hand. The foot would be the wing to my  hand’s turkey’s body.056

I added the feet & wattle using paint & here is mommy & Mai’s hand & foot turkey.

0601

Here is another cute and easy idea.

What you will need…

Styrofoam flower cone

Pipe cleaners in assorted colors

Googly eyes

Glue

Take the styrofoam cone and  cut it to your desired height.  I carved around the top also to give the appearance of a head.

063

Bend the pipe cleaners in half to use as the feathers.

067

Poke & insert folded pipe cleaners into the back of the styrofoam to form feathers.

070

Use an orange or yellow pipe cleaner & cut  into small pieces to use for the feet & beak. Knot a red pipe cleaner to use as the turkey wattle. Glue on the googly eyes and done.

Kids love pipe cleaners.

073

This is an easy project for kids of all ages.

Up next…Things That Make My Daughter Laugh