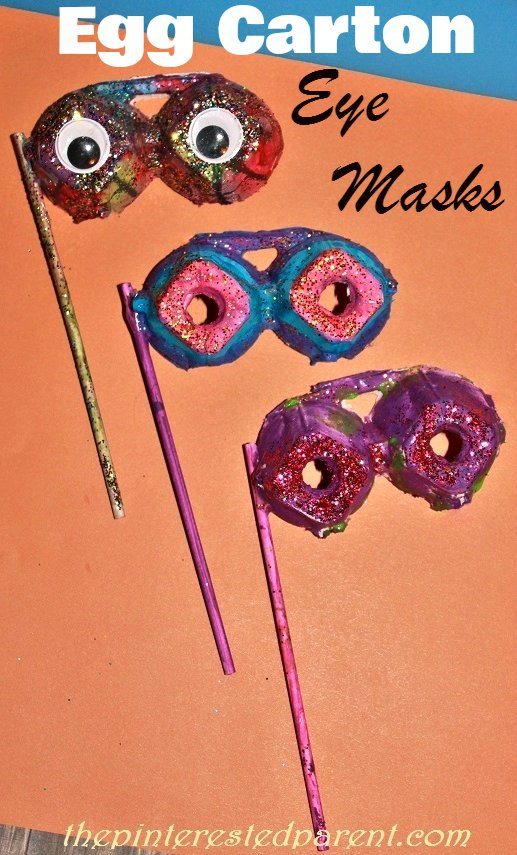
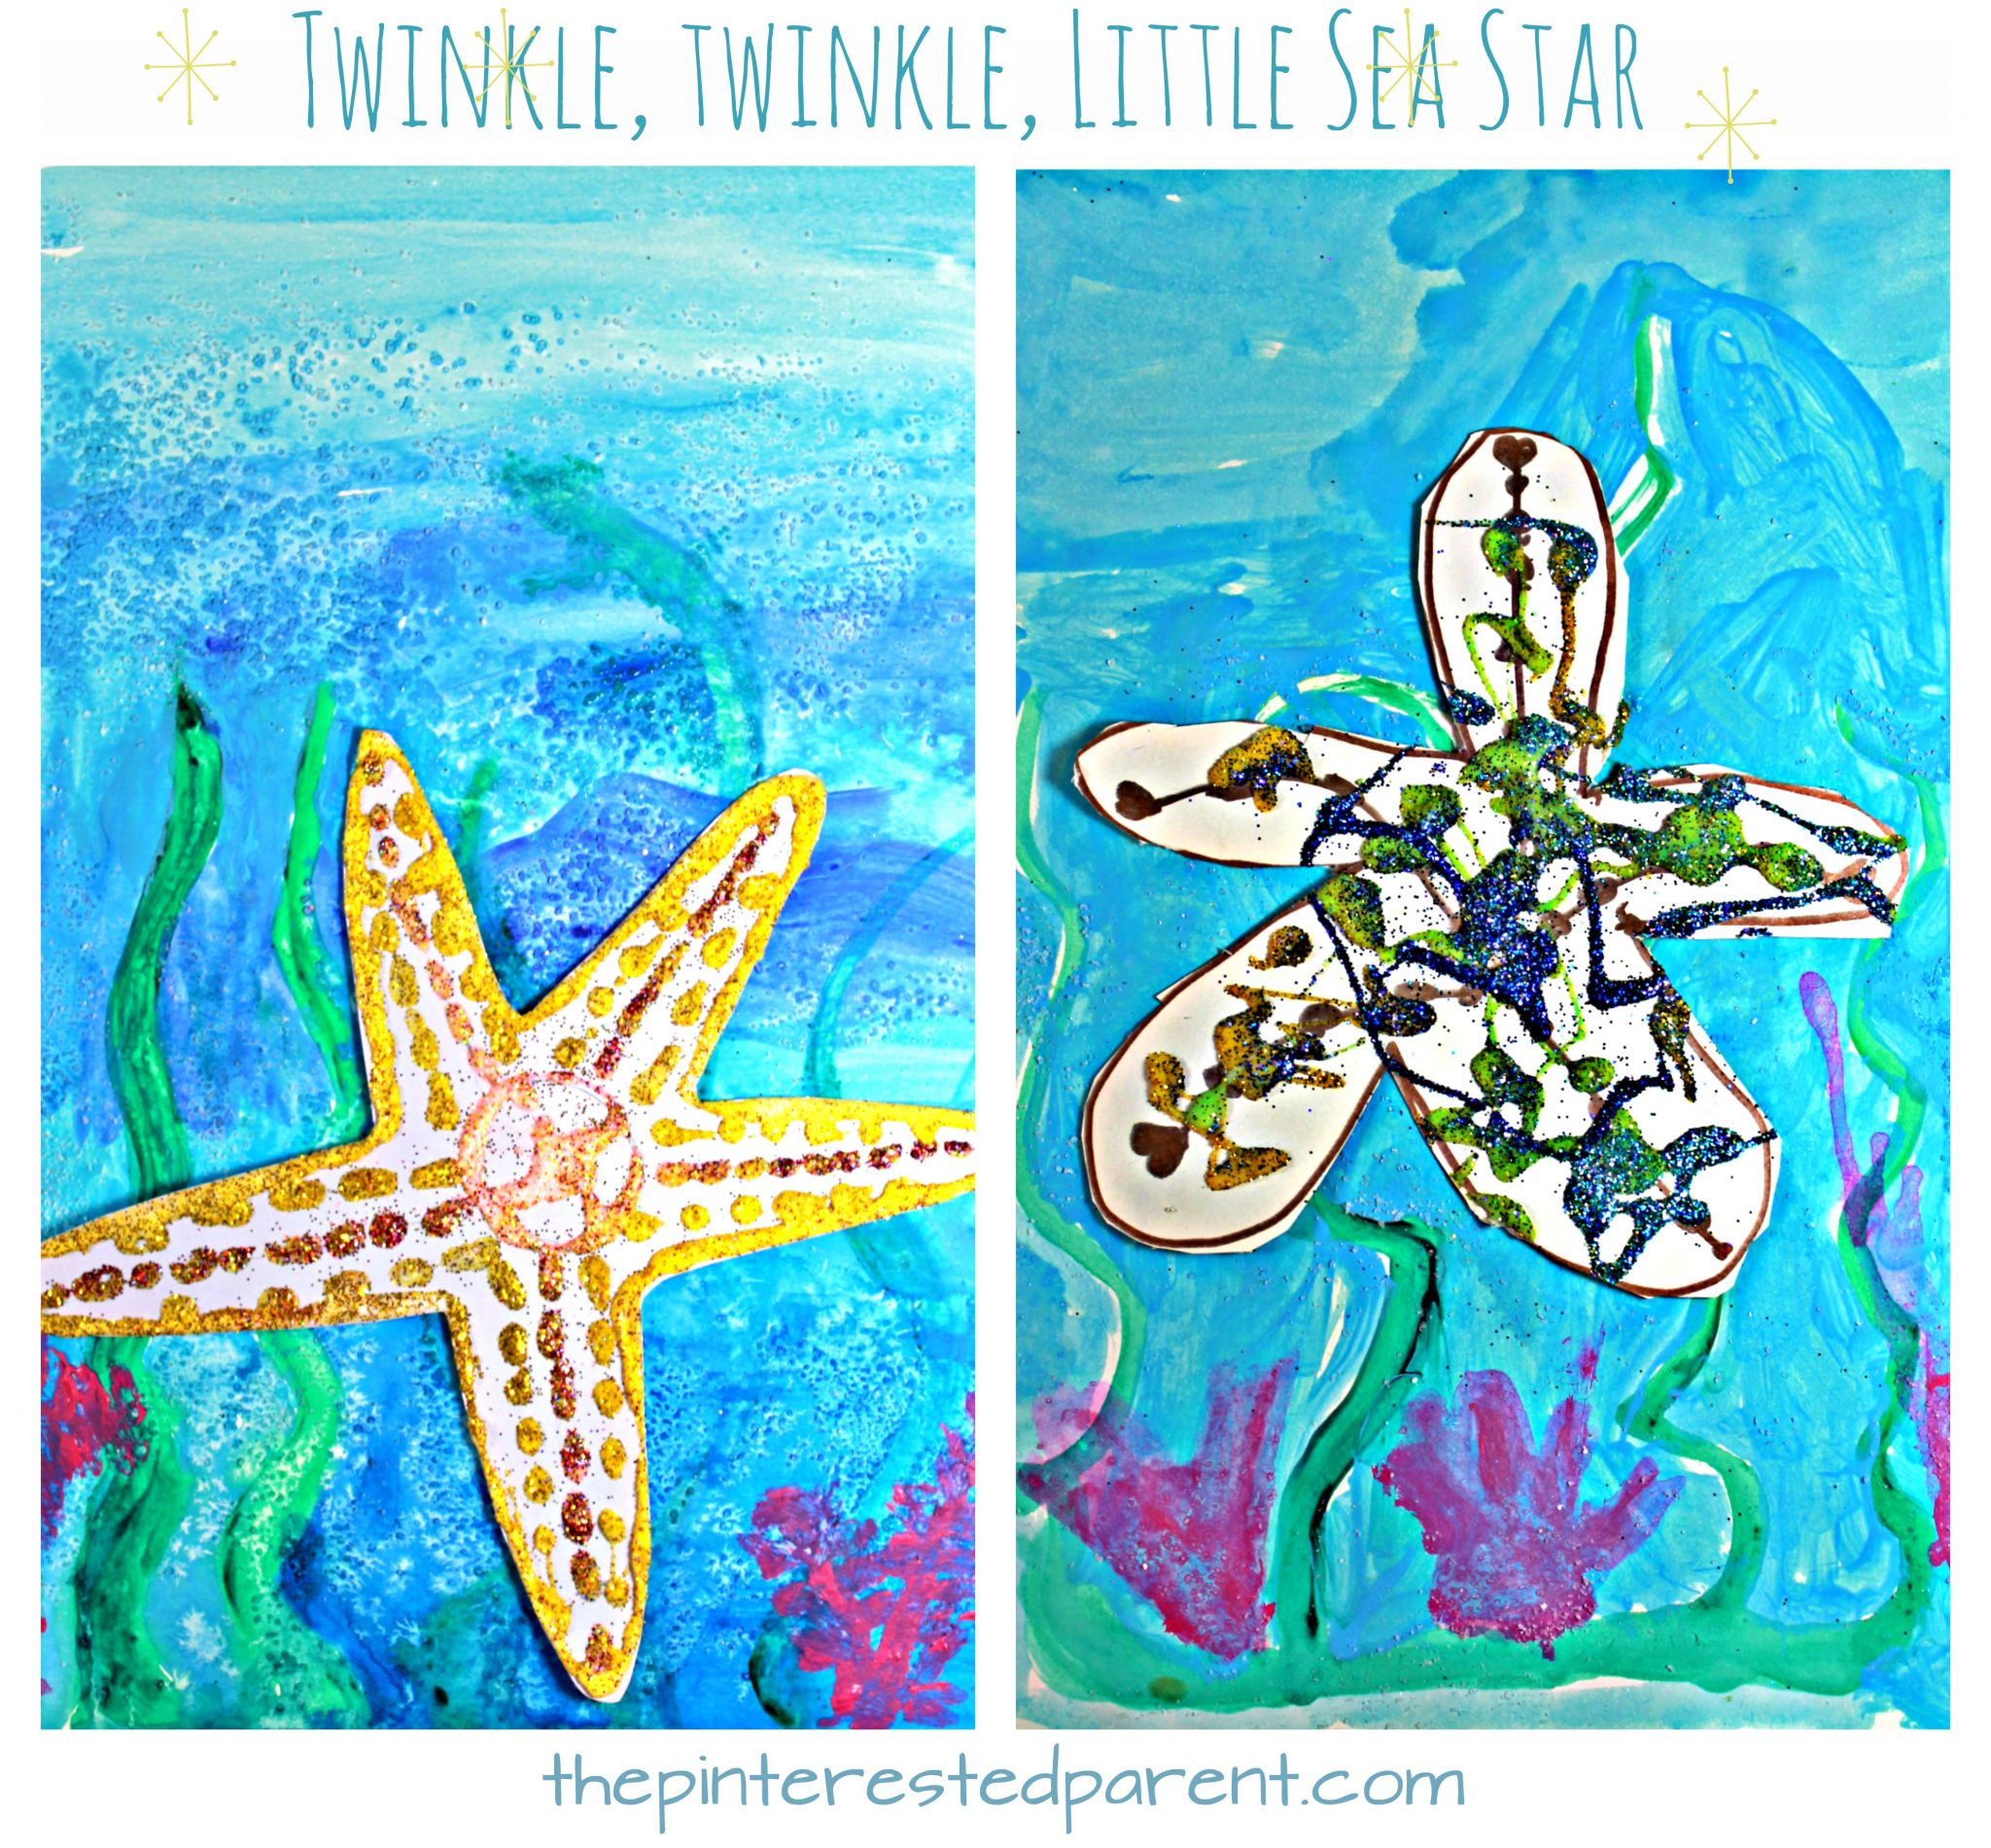
Twinkle, Twinkle, Little Sea Star. How beautiful and glittery you are.
There is nothing quite as wonderful as watching your children create. It is a fascinating and beautiful thing. My little girl and I spend a lot of time creating together, but my favorite projects are the ones that she comes up with on her own. This lovely sea star was one of her ideas and she was so eager to share it with me.
The winter is officially here and we enjoyed a couple of snowy days this week to welcome the start of winter. We played outside in the snow all day yesterday and took in all of the beauty of the season. Watching the snowfall and looking at the snow-covered trees was enough to inspire some winter crafting.
We love working with clay and nature items. We have a collection of sticks and stones set aside for occasions just like this.
I adore my daughter’s creativity. We have been doing arts and crafts together for a very long time & I have watched her creativity soar. This next craft was all a product of my little girl’s crafty little mind. I loved it so much that I had to share.
Last Christmas, we made Christmas ornament stamps out of potatoes. These were a big hit with my daughter. She loves stamping projects & we are a big fan of potato stamps. I have seen many people using toilet paper rolls as stamps by bending them into various shapes such as leaves, hearts & pumpkins and I thought what a wonderful idea.
We used our tubes to form two different shaped ornaments. I cut one tube and bent it to form the top of the ornament.
I used a glue gun to glue the tops in place like shown. Make sure the top piece is flush with the tube.
The ornaments are then ready to stamp with. I cut out a Christmas tree shape for Mai to stamp on, but she was not interested in the tree. She just wanted to stamp on a plain piece of paper.
Mai did not want to use the tree, but mommy did. I stamped the ornaments on the tree & let the paint dry.
I used paint & glitter to decorate the ornaments & my daughter chose to use scissors & cut hers out for a project of her own.
Thank you as always for stopping by. Please follow us on Facebook as well.
We have been packing up our house this month to prepare it for being put on the market. We only have a couple of weeks left to get our house ready, so we have to clear as much of the clutter as possible. I have had to pick & choose which craft materials I can store & which I can’t live without. Mai & I have a large collection of recyclables which include tissue boxes, paper towel rolls & more empty egg cartons than I know what to do with. Since I do not want to pack all of them, but cannot bring myself to throw them away, we decided to use some of them last night.
A while back, I bought a stack of burlap canvases. They having been sitting there collecting dust for several months now. Last night after dinner, I wanted to try one out. I painted a peacock, while Mai watched.
“What you making, Mama?”
“A peacock.”
“I want to make a peacock too!”
Egg Carton Peacock Craft
What you will need:
An egg carton
Acrylic paint
Glitter
Glue
Construction paper
Directions:
Cut the egg carton & separate each individual egg carton section. Paint the inside of the sections & around the outside sides in green. After painting each section, sprinkle glitter on the inside before the paint dries. Mai was so excited to add the glitter that she would not put it down even to paint the egg carton.
While Mai painted the cartons, I cut the body of the peacock out on construction paper. Add a beak & use paint to add details.
Glue the body down to a piece of construction paper & then glue the egg carton pieces in place.
Over the last couple of months my daughter has found a new obsession. Morning, noon & night you can find her at our coffee table buried up to her elbows in Play-Doh. She has become quite creative with her dough. There are so many possibilities. The fun is endless. Check out our list of fun Play-Doh activities this week at Seek Magazine.
The only problem with Play-Doh, is that we go through it so quickly. It is not always convenient or cost effective for me to run out to the store to buy more, so I often make it at home. I have tried many different recipes. I have made it cooked, uncooked, with hair conditioner, with Jello, but my favorite one is a recipe I found on Instructables.
There is a lot that you can do with a basic play dough recipe. You can add different colors, spices, scented oils and various textures. My daughter is in a sparkly phase. She likes to wear her sparkle tutu everyday & her sparkle shoes & she loves playing with glitter. We decided to mix our dough with glitter. Mai called it sparkletastic play dough.
It looked so pretty after we were through with it. It looked so festive. One of the activities that was on our play dough activities list was making Christmas ornaments. So that is just what we did.
Snowflake ornament
I rolled out a circle about 3″ around. I pressed a felt snowflake into my circle to make an imprint.
Use the back side of a spoon & press in all the way around to form a snowflake shape. Pull the felt piece out of the middle of the ornament.
Use a straw to poke a hole in your ornament where you would like your string to go. You may have to lift the ornament up so that the straw goes all the way through.
Let dry to harden. This might take a couple of days depending on the thickness of the ornament. Do not bake as the glitter will melt & cause the ornament to explode. Add a ribbon or string.
Family Hearts Ornament
Using a cookie cutters cut out three heart shaped ornaments. If you have 3 different sized heart cutters use the 3 different sizes. If you do not, use the same sized cutter & just spread out 2 of the hearts to form larger hearts so that you have three in increasing sizes.
Poke a hole into the smallest heart at the top center part of your heart. For the larger two hearts poke a hole in the top center & bottom center.
Let the hearts dry & harden for a day or two. Using a ribbon or string, string your 3 hearts together with the largest on top & the other 2 dangling beneath in descending order.
Using a marker or paint, write your names onto each heart.
You may also paint your ornaments after hardening. Mai is very excited to put up the tree in a couple of weeks & now we have some new lovely ornaments for our tree.
Last weekend was a big fun fall weekend for us. We did our hayride, went apple picking, went to the fair & picked pumpkins too.
This weekend, in the aftermath of a bad tummy virus, we put a hold on our plans to go to the corn maze & leaf peeping. All is well now, but I wanted Mai to continue to rest at home rather than running around. Last weekend we picked up a lot of pumpkins. I bought two full sized ones for carving, but Mai really wanted the little pumpkins because they were so cute.
The mini pumpkins were great because they were just the right size for my little pumpkin. She may still be too small to be wielding carving tools, but that doesn’t mean that she can’t have some fun. Pumpkins are not just for Jack-O-Lanterns anymore, after all.
Painting Pumpkins
We painted pumpkins mid-week. She is getting to be such a great little painter. She painted one pumpkin red with a green stem. “Look mama, it looks like an apple.” It really does.
Yesterday she asked to paint more pumpkins, so we did. Then we broke out the glue & the glitter for some extra fun. Seriously nothing lights my daughter’s face up faster than the prospect of pouring glue & glitter on something. This is a super easy, moderately messy, but very cute craft. Simply let your artist pour or paint on the glue & then shake on the glitters of your choice. Let dry & then shake off the excess glitter. Use paper or drop cloths to work on & to catch the glitter. When you are done, if you are stingy like me, you can pour the excess glitter back into its container for next time.
Glitter Pumpkins
Mai had so much fun making these. She even made one as a present for her Auntie Linda. “I make this one for Auntie Linda. She is so proud of me.” I bet Auntie is going to love it.
Mai’s are in front & mommy’s are in the back.
Our little pumpkin family.
As I have told you before, our daughter has a very strong sense of family. It is extremely cute how she refers to everything in terms of mama, dada & baby. When we were picking the pumpkins, she would tell me, “This is mama pumpkin, daddy pumpkin & the baby pumpkin.” And so they shall be.
Draw out you pumpkin family’s faces & then carefully carve out.
For daddy pumpkin, I fashioned him a Patriots hat out of foam.
For mommy pumpkin, I just hot glued some yarn to the top of the pumpkin. I did the same for the baby & then braided the hair into pigtails
I hot glued all 3 pumpkins together, putting the daddy on the bottom, mommy in the middle & baby on top. I used a pipe cleaner as a scarf for the mama.
It looks just like us doesn’t it? These were all so much fun, I think we will have to pick up more pumpkins next weekend.
Thank you as always for stopping by. Please follow us on Facebook.
This website uses cookies to improve your experience. These cookies feedback information to our analytics and advertisers. We track views of the site - which pages are visited, whether you are a regular or returning visitor to help generate a more personalised experience. You can switch cookies off or follow the READ MORE. AcceptRejectRead More
Privacy & Cookies Policy
Privacy Overview
This website uses cookies to improve your experience while you navigate through the website. Out of these, the cookies that are categorized as necessary are stored on your browser as they are essential for the working of basic functionalities of the website. We also use third-party cookies that help us analyze and understand how you use this website. These cookies will be stored in your browser only with your consent. You also have the option to opt-out of these cookies. But opting out of some of these cookies may affect your browsing experience.
Necessary cookies are absolutely essential for the website to function properly. This category only includes cookies that ensures basic functionalities and security features of the website. These cookies do not store any personal information.
Any cookies that may not be particularly necessary for the website to function and is used specifically to collect user personal data via analytics, ads, other embedded contents are termed as non-necessary cookies. It is mandatory to procure user consent prior to running these cookies on your website.