
yarn
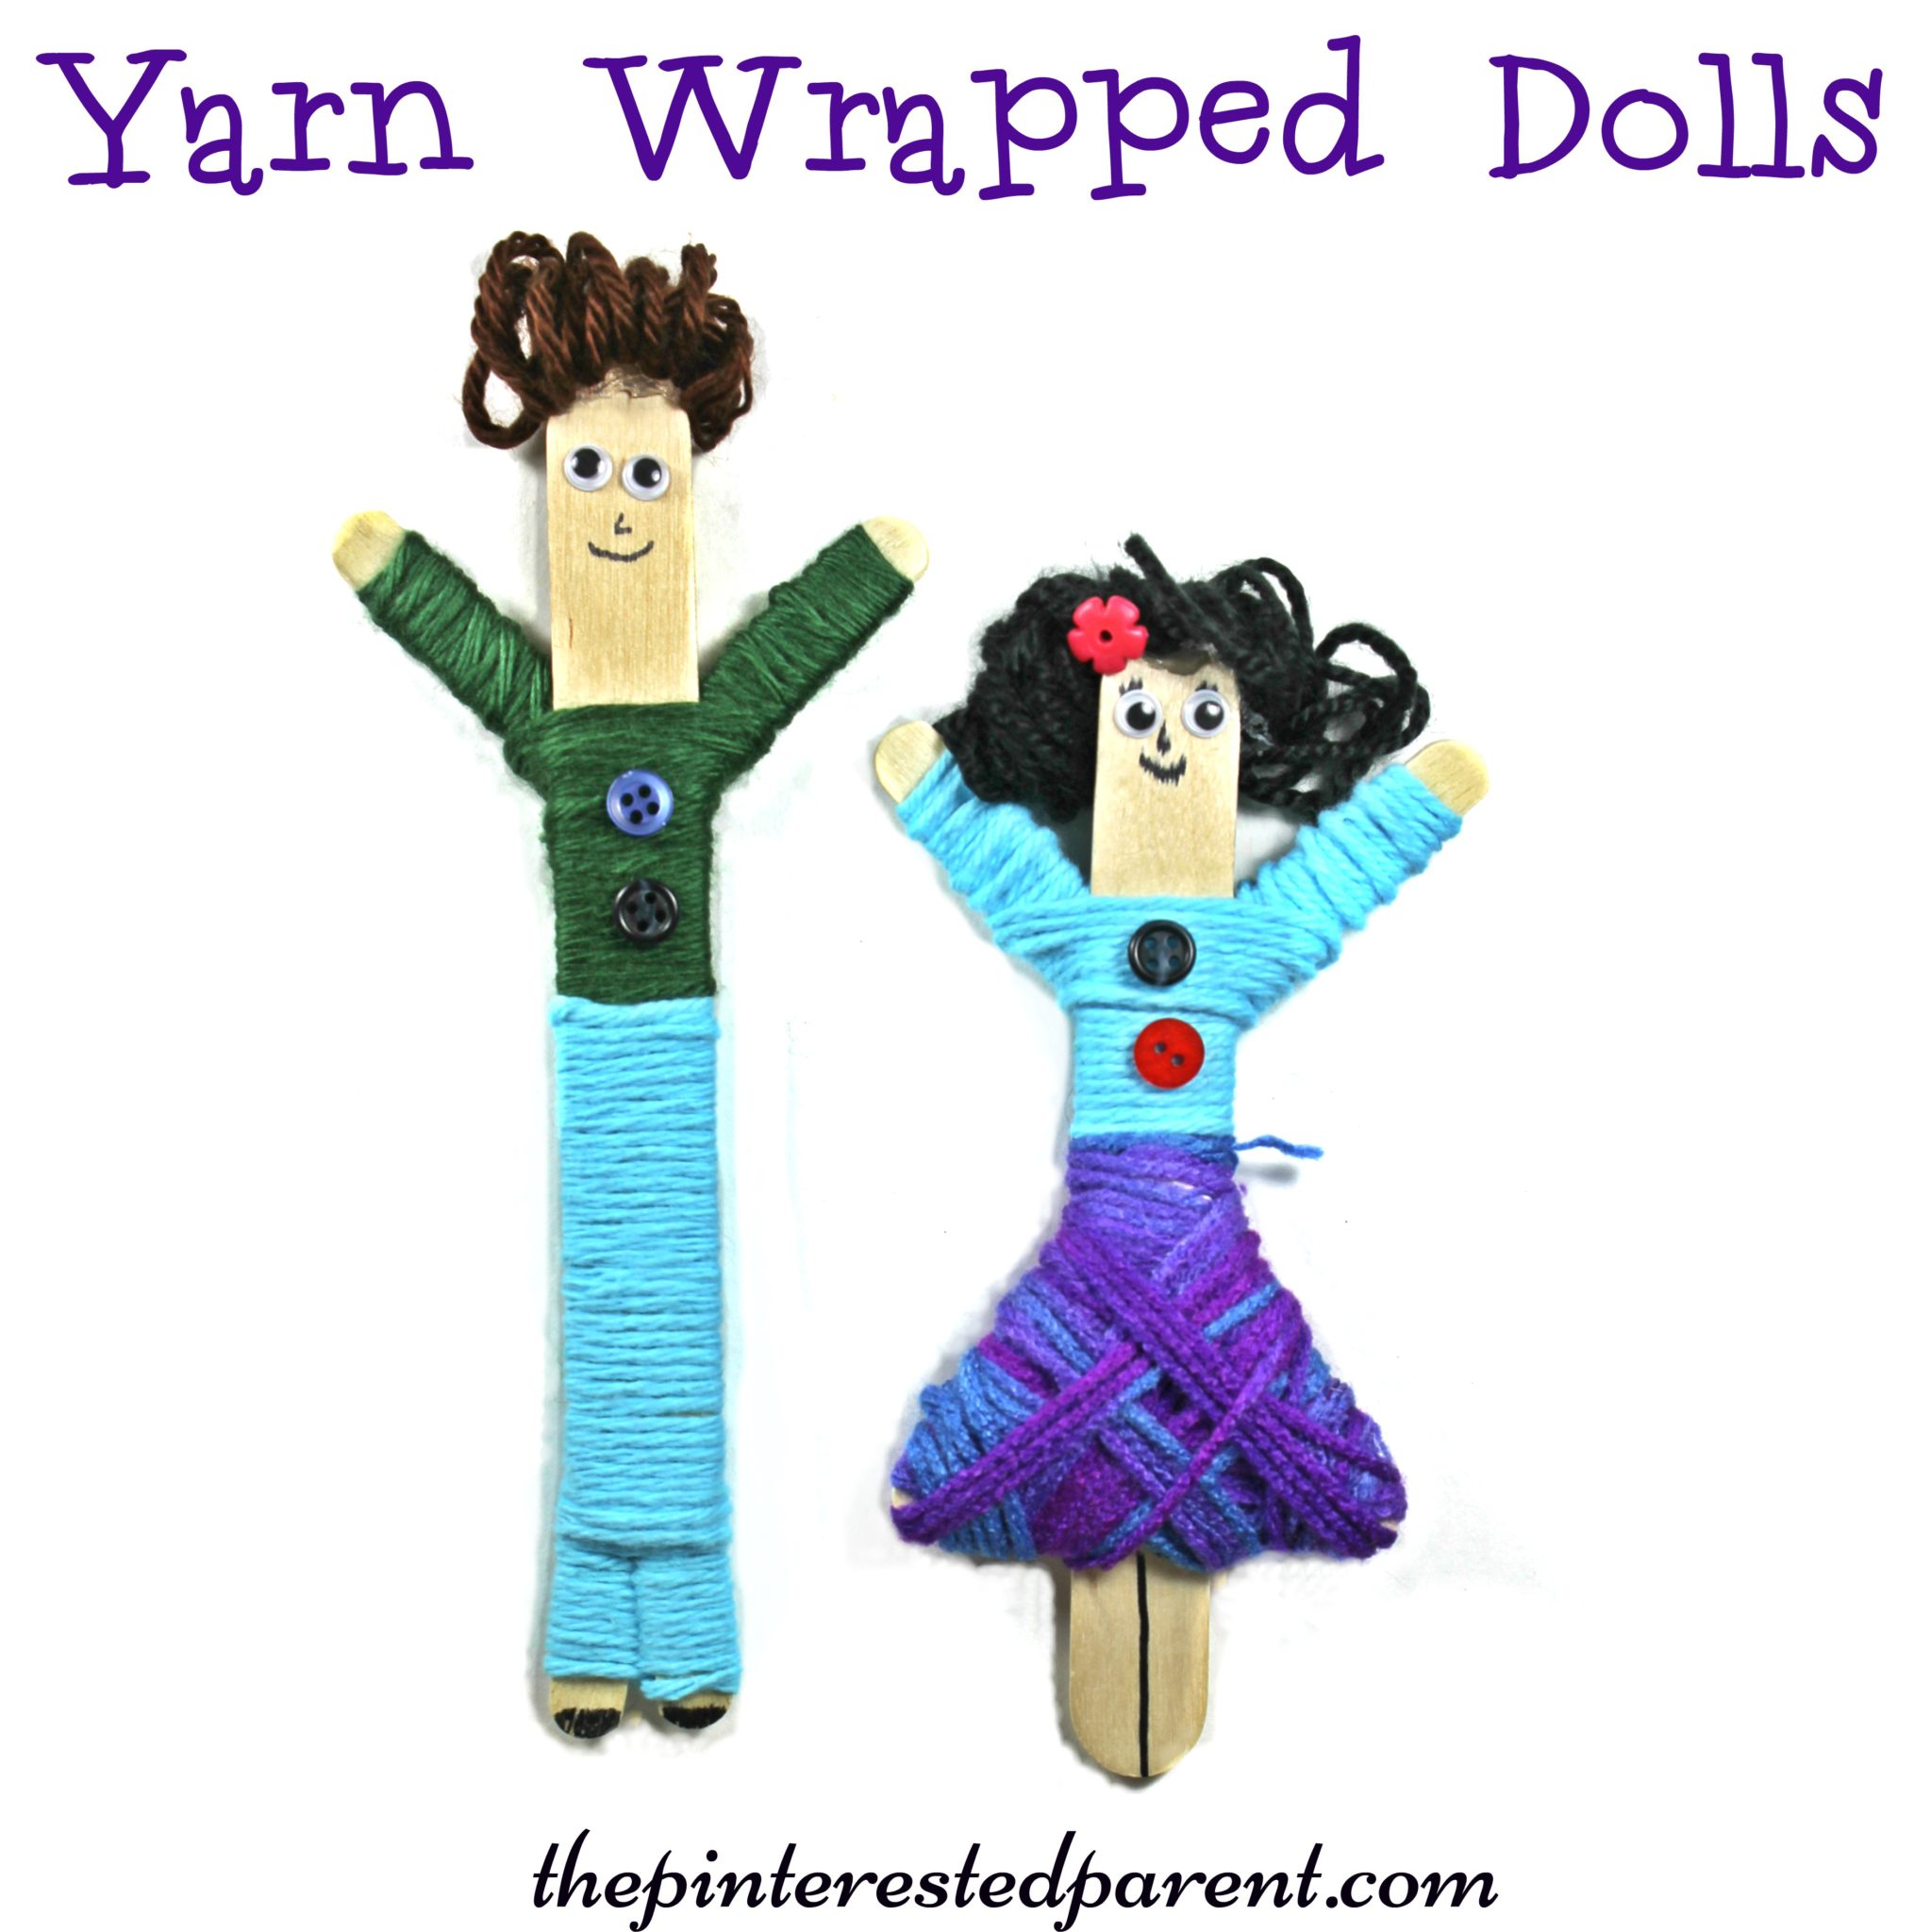
Yarn Wrapped Craft Stick Dolls
My 4 year old loves to play with yarn. Many of our favorite activities and crafts are wrapped or threaded with yarn. We made lovely yarn wrapped hearts earlier this year & my daughter loved it. She loves the yarn because she loves to unravel & cut it and I love it because it is great for her […]
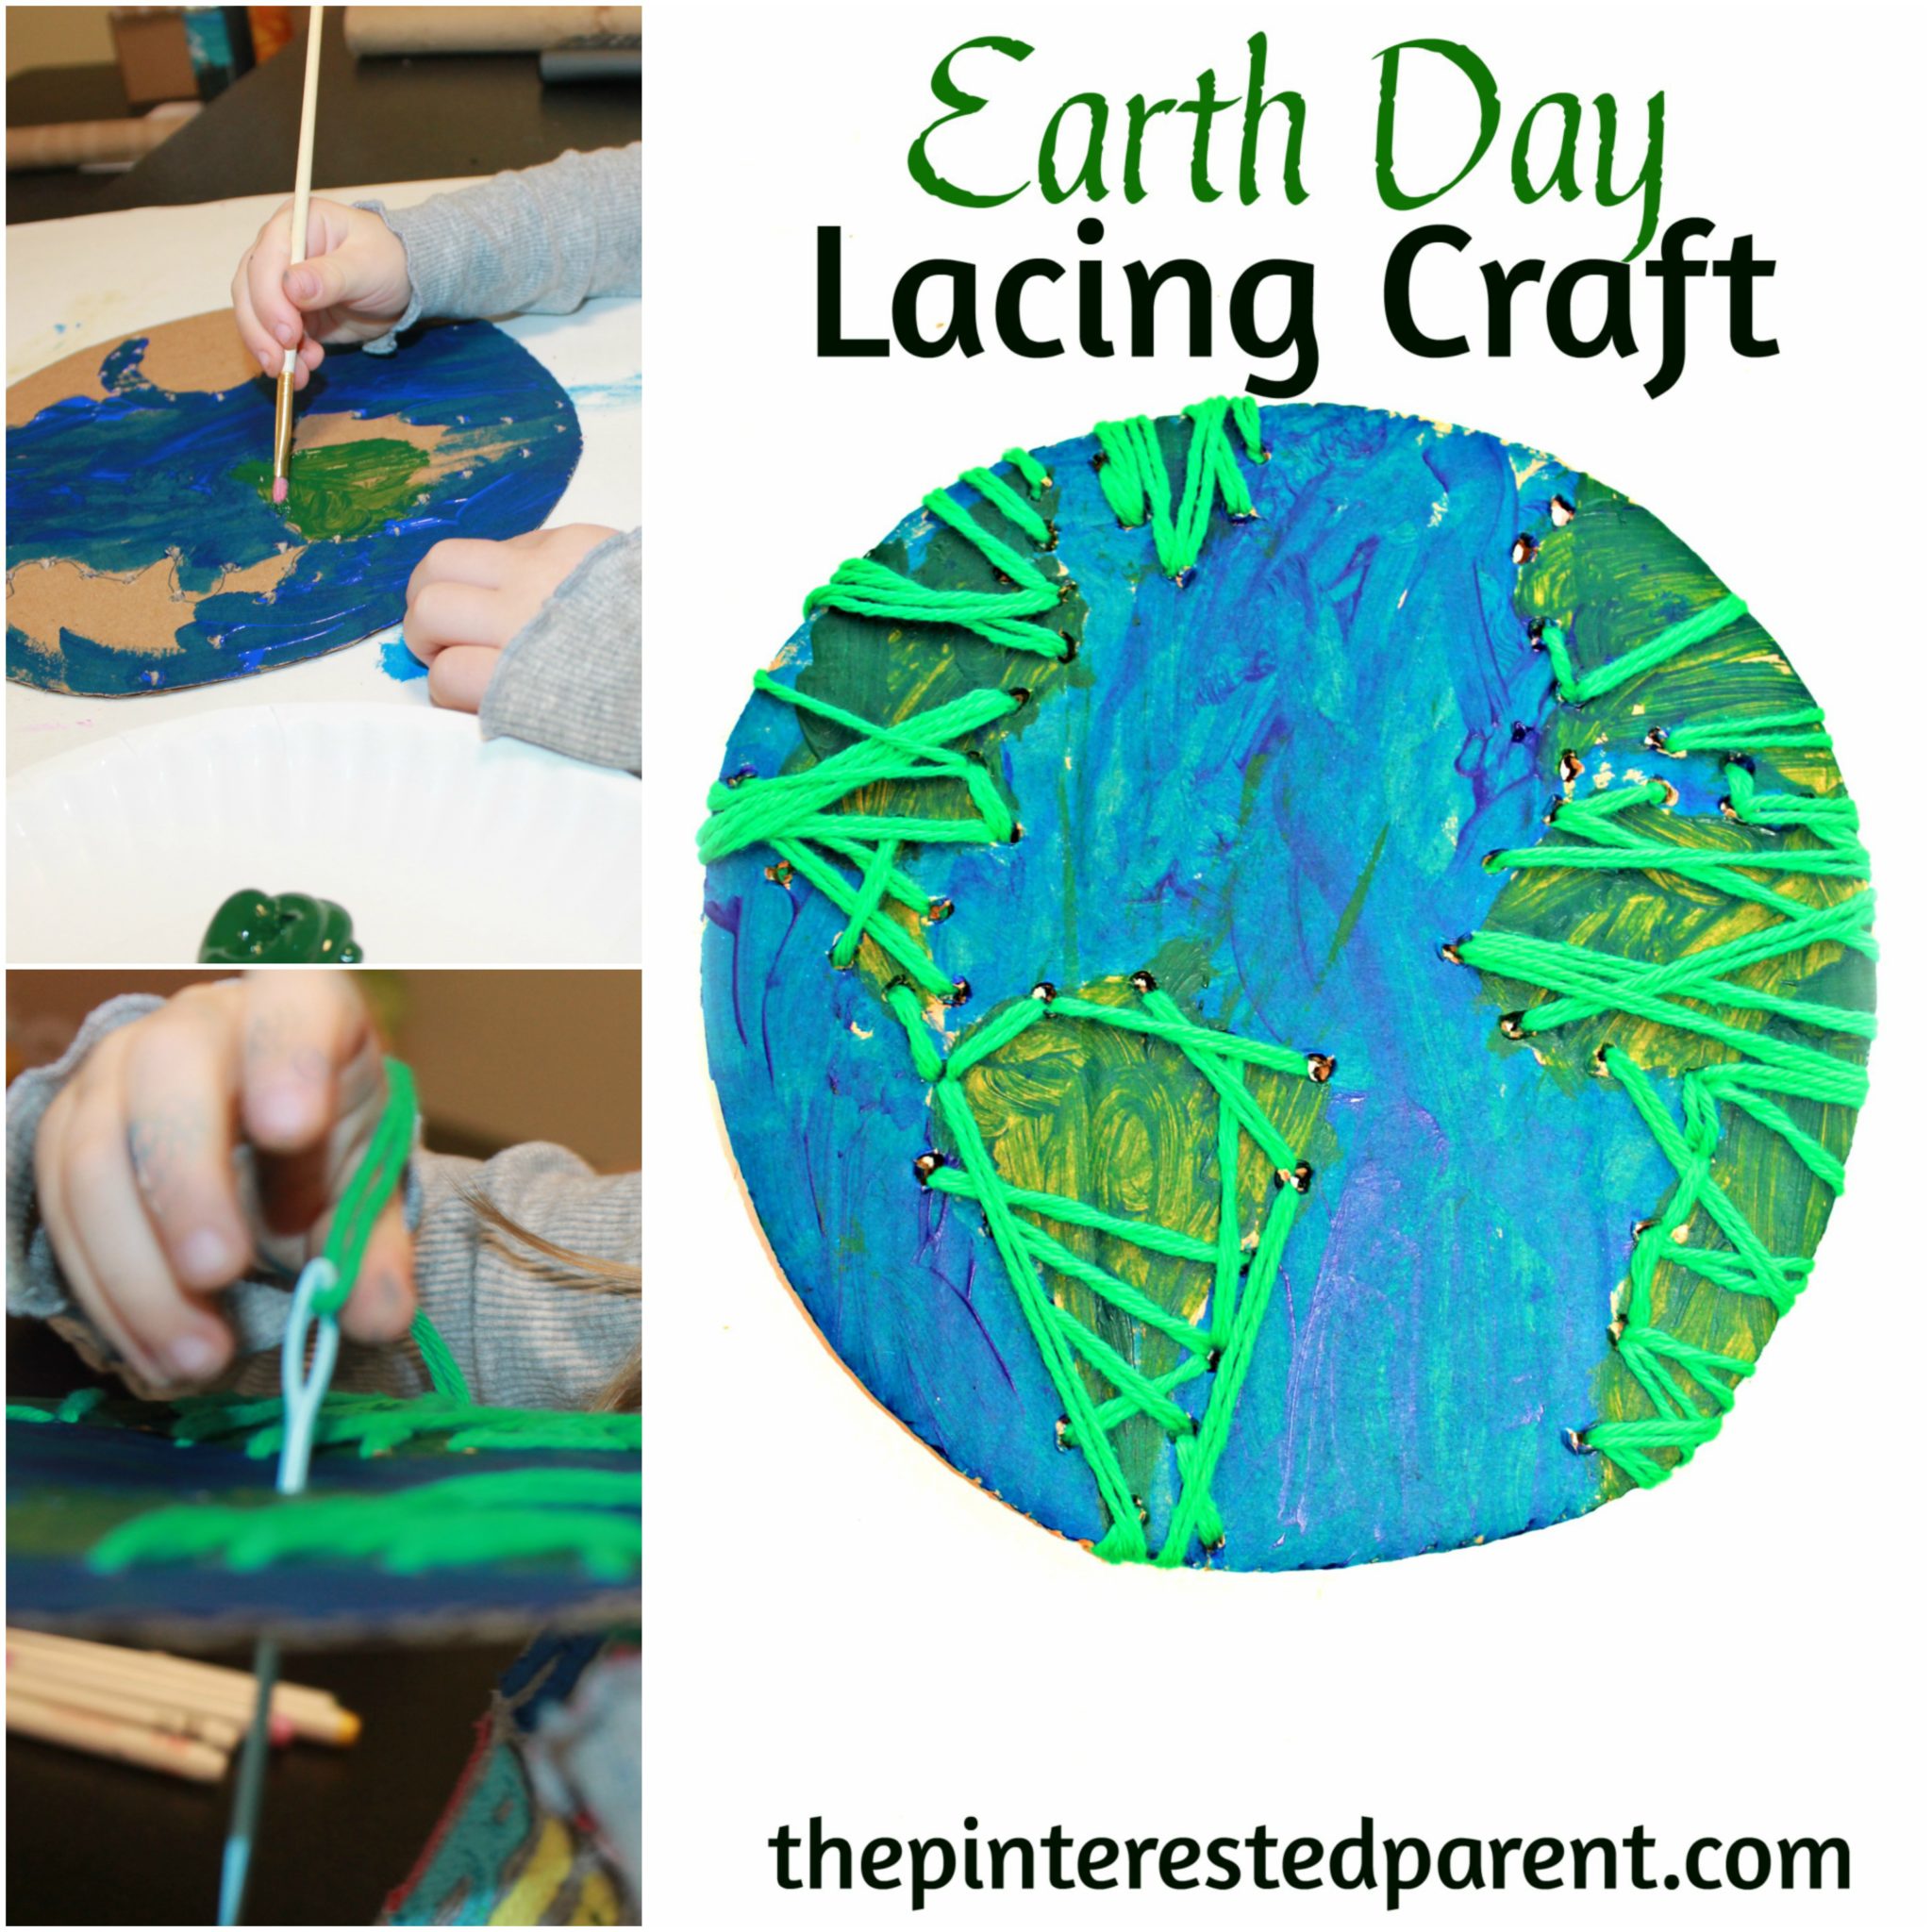
Earth Day Lacing Craft
Earth Day is April 22nd. It is never too soon to start teaching your children about the planet & how to protect it. We have taught our daughter to recycle & the importance of not wasting food, water or electricity. Even her favorite book “The Lorax” teaches her about what can happen if we don’t […]
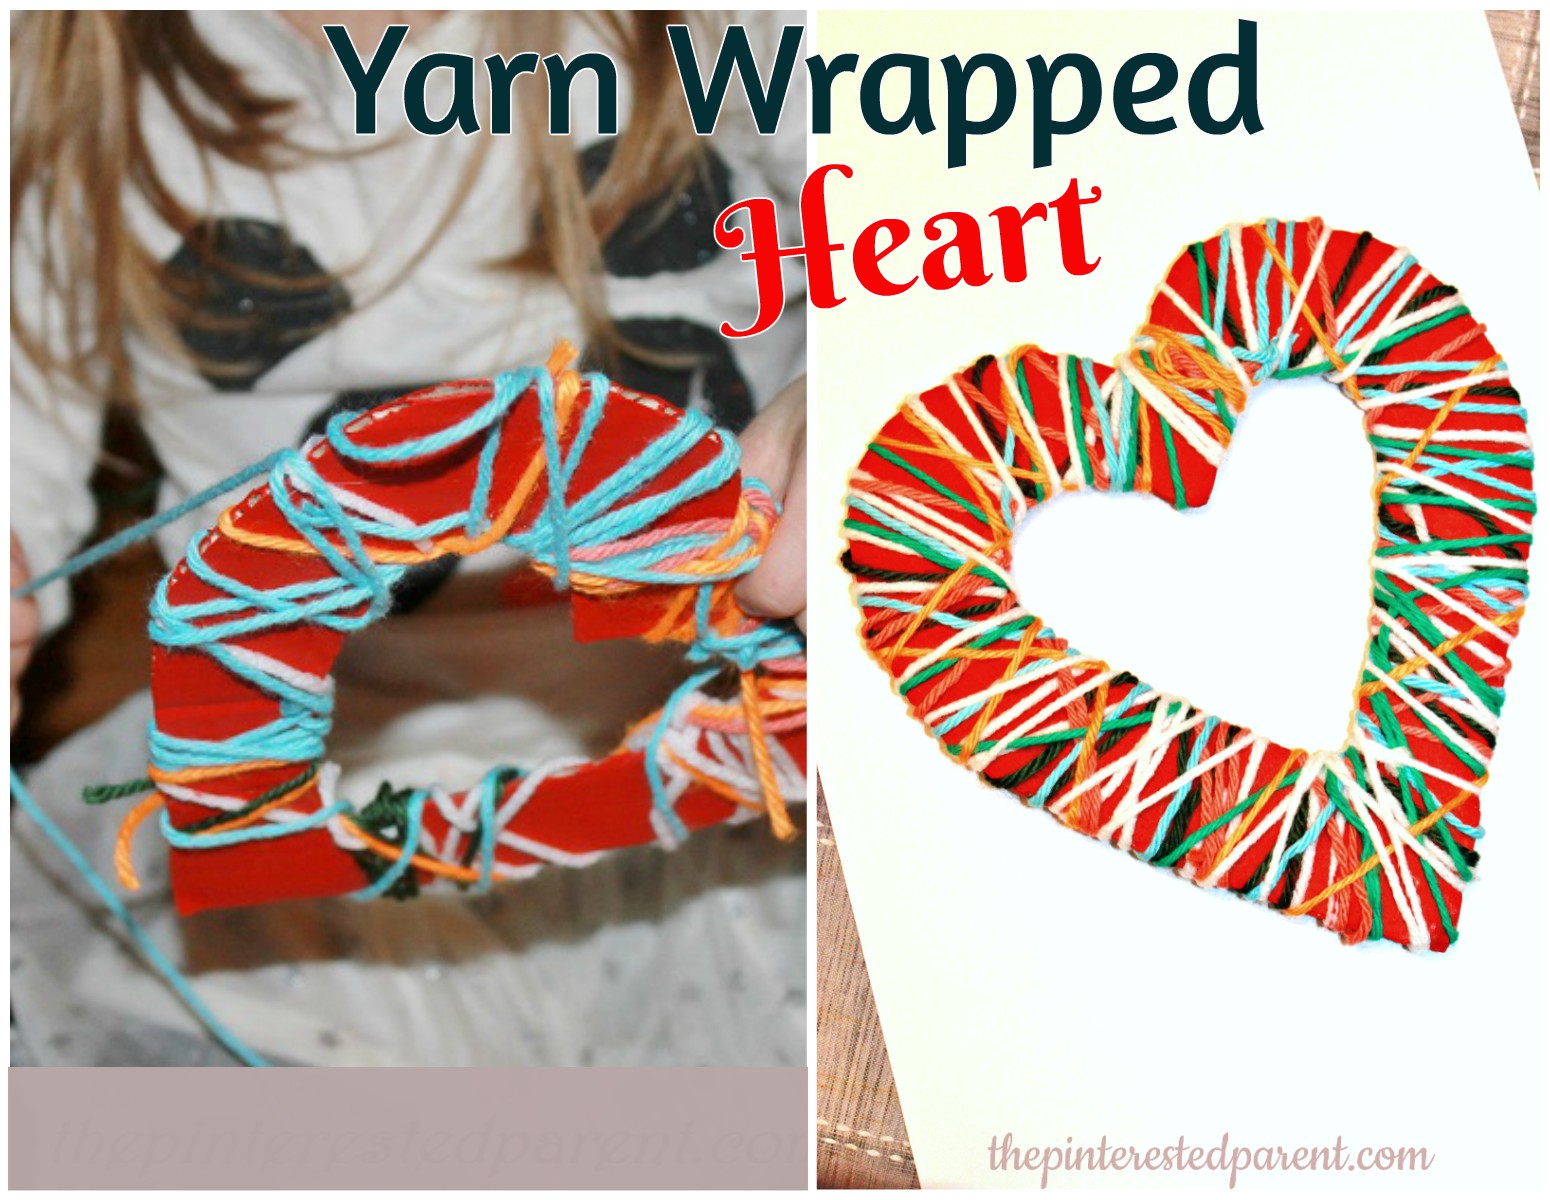
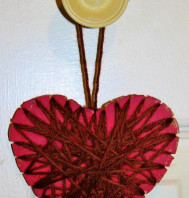
Yarn Wrapped Hearts
My daughter is slightly obsessed with yarn. We have a big bin filled with yarn & ribbon and she pulls it out all the time. She likes to cut it, tie it to things & make obstacle courses throughout the house with it.
Cardboard & Yarn Craft Ornament
Since Mai has started daycare our craft collection has doubled itself. We have a collection of home crafts & now the take home ones as well. Our kitchen island has a pile of them. This week, we hung up a few of our favorites to display them. This weekend we decided to make some crafts […]
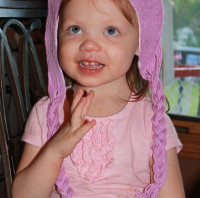
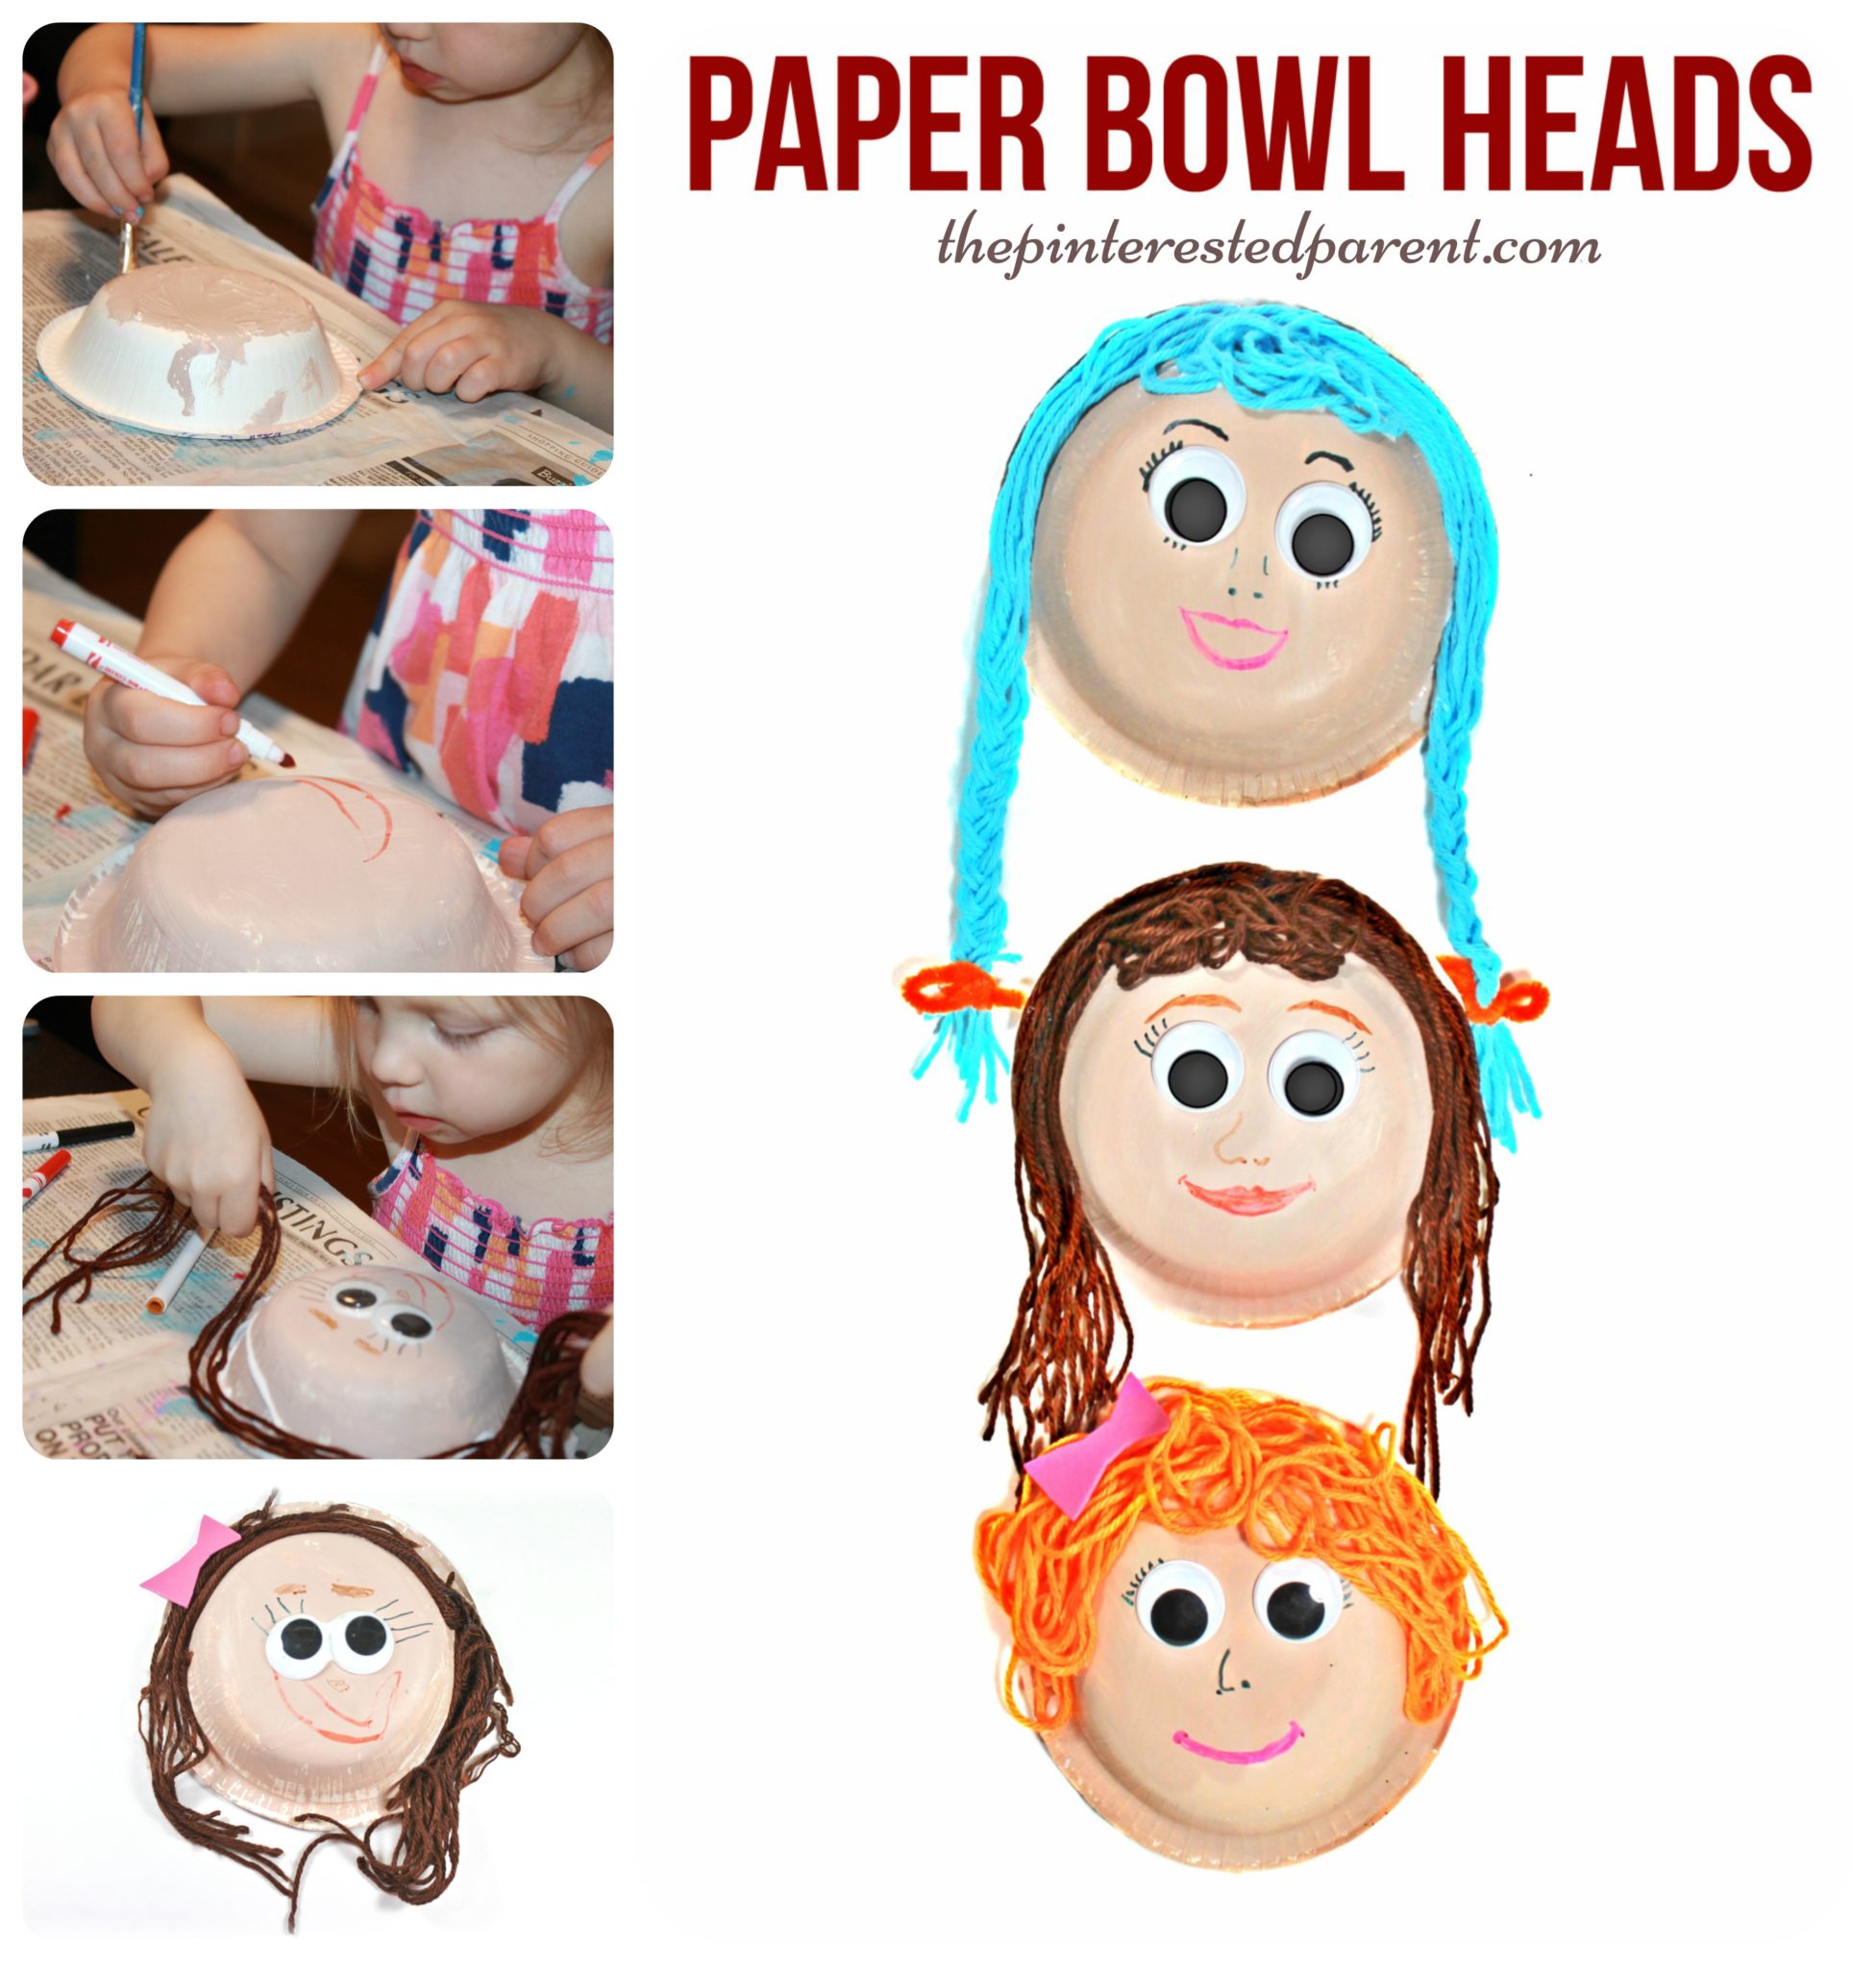
Paper Plate Wig Masks
My daughter loves to pretend play. She has a vivid imagination & it is fun watching her explore her world of make believe. She loves to play baker and bake us beautiful cakes. She will take the little cherries out of he Hi Ho Cherry-o game and decorate her stacking cups with them and make […]
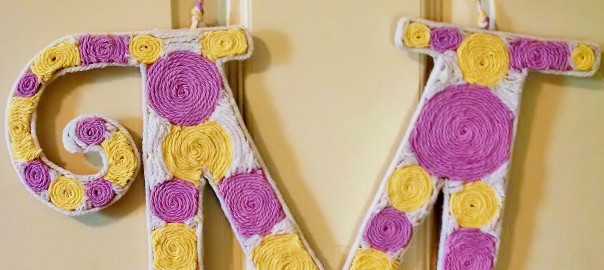
Yarn Embellished Initial Wall Hanging
My daughter as many of you may well know, is named after my mother. Mai is a less than common name, which is one of the things I love about it. She will always be unique. We have a lot of personalized & monagrammed things for her. I cannot see the letter M without thinking […]
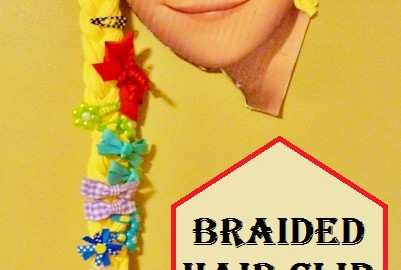
DIY Braided Hair Clip Holder
My little girl was born with very little hair. She, like her father had a receded hair line. (Sorry Honey!) There was no hair in the front, but there was quite a bit in the back. As time went on, the back of her hair continued to grow, yet the front stayed hairless. She started […]