Tag

fun

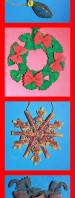
Christmas Pasta Crafts

pastachristmascrafts1

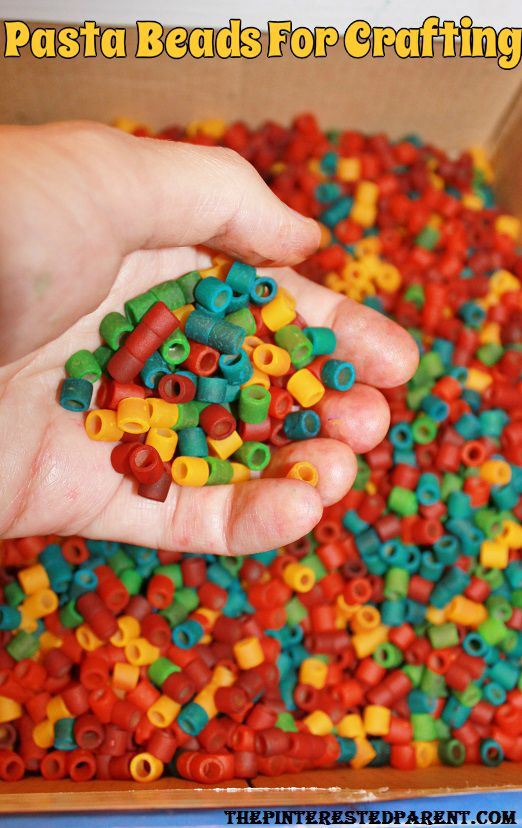
My love for pasta crafts needs no intro. If you follow me regularly, you already know about my many boxes of pasta set aside just for projects such as these. This weekend we spent 2 days making crafts out of a variety of pasta for the latest article that we were doing in this month’s SEEK. I have to admit, we got a bit carried away. I could not stop once we started.

For these crafts you will need assorted pasta, Elmer’s school glue or a glue gun (for adult use only), paint, glitter & some ribbon

Pasta wreath

Pasta needed:

Bow ties

Place your pasta on wax paper & glue bow ties in a circle as seen below. Let dry. Paint the wreath in green & paint 3 more bow ties in red. Let dry & then glue the red bows to the wreath. Attach a bow, string or pipe cleaner around the wreath to hang.

IMG_7293

IMG_7289

pastawreath

Pasta snowflake

Pastas needed:

Ziti

Wagon wheels

Bowties

Ditalini

Place your pasta on wax paper & glue as seen below. Let the glue dry. In a small container mix the school glue with a few drops of water to thin out the glue. Paint the entire assembled snowflake with the mixture & the sprinkle with glitter. Let the glue dry & flip over. Attach a ribbon with glue to form an ornament,

IMG_7283 IMG_7284 IMG_7285 IMG_7287 IMG_7390

IMG_7391 IMG_7395 IMG_7420

pastasnowflake

Pasta Ornaments

Pasta needed:

Large shells (stuffed shells pasta shells)

Wagon wheel pasta

Elbow macaroni

Glue a wagon wheel on top of the flattest end of a pasta shell. Glue an elbow to the top of the wagon wheel. It should form a half circle hole.

Paint your ornaments in colors of your choice. Let dry completely. Using glue draw an ornament design on your shell. Shake glitter over the top. Let dry & then shake off excess glitter. String a ribbon or string through the hole.

IMG_7426 IMG_7430 IMG_7431

pastornaments

Pasta Rudolph 

Pasta needed:

Large shell

bow ties

Elbow macaroni

Medium sized shells

Uncooked chick pea for the nose

Googly eyes

Paint both sized shells brown. Paint the bow ties and elbows in black. Attach the pasta as pictured. Add the googly eyes & a red painted chickpea for his nose.

IMG_7424

pastarudolph

Please stop in & visit us at Seek and check out our latest article. Fun With Pasta Crafts

IMG_7409

Pasta & Pipe Cleaner Crafts

IMG_4517

The other day my daughter was digging through a chest of drawers and came across a bamboo necklace that I bought when we were in the Bahamas. The necklace was just a simple beaded necklace on craft wire. My daughter was having a great time sliding the bamboo beads back & forth. She wanted to break it open and play with the beads, but I did not want to ruin my necklace. Instead we had another idea.

The beads on the necklace reminded me of Ditalini pasta. We had a couple of boxes of it to spare, so we decided to make bracelets with our Ditalini.

IMG_4479

First we dyed our pasta by tossing it a cup at a time into a plastic baggie with food coloring. Spread out the pasta on a paper towel & let it dry.

IMG_4480 IMG_4482


pasta beads and fine motor skills

(For a more rustic look, toss all your beads together while wet & try baking your beads for 30 minutes at 275-300 degrees. It will change the color & shape of the bead for a rougher look.)

Mai saw all the pasta laid out to dry and got excited. “Mama, we do project.” We do love our projects. Once the food coloring dried, my daughter was ready to dive in. We poured all the pasta beads into a shoe box & mixed them up. Mai had a little difficulty using string to make our bracelets, so we pipe cleaners instead. This worked much better. She was able to string them up with ease. This is a great activity for hand-eye coordination & Mai really enjoyed this.

IMG_4492 IMG_4493

Measure the pipe cleaner around the wrist to find the desired size for you bracelet. Snip the pipe cleaner about an inch longer than you need it.

IMG_4499

Twist the two ends together tightly & slide the bead around the newly joined section.

PastaBeadBracelet.jpg

IMG_4510

We made one more bead craft before our night was done. The colored pasta is not just for crafting, it also great for sensory boxes, color sorting and counting games.

pastaandpipecleaner

Baking Soda Volcanoes

BakingSodaVolcano.jpg

It has been a month now since Mai started daycare. As you all know, I was not exactly over the moon with the decision to put her in daycare, but now I couldn’t be happier. It is a pain waking up early to drop her off before work & I do still get that feeling of guilt at leaving her there, but I have seen such a wonderful change in her over these past few weeks. She comes home with great stories about her new friends & the fun things that they do together. It warms my heart to hear her talk about her day with such excitement.

The other day when my husband arrived to pick her up, they were outside making baking soda volcanoes. Hubby had a difficult time getting her to leave her fun activity. When they came home, they both wanted to share with me how much fun Mai & friends had playing with the volcanoes. My husband told me that it was just a simple activity using baking soda & vinegar. He said that he used to do this a lot as a child. Perhaps I lived a very sheltered childhood, but I had never heard of such a thing. I have seen many things on Pinterest for different science experiments that caused eruptions, but never actually looked at how they were made. Had I realized it was so simple I would have tried these ages ago. Thank you Miss Laura, you gave us a wonderful activity to try at home.

Baking Soda Volcanoes

What you will need:

Baking soda

Vinegar

Food coloring

Squeeze bottles

Small receptacle or cup- we used a mini flower pot & a Dixie cup

Plastic dish bin

Play Sand (optional)

Place your small receptacle in the center of the plastic dish bin. We used a mini flower pot & also a Dixie cup. Surround it with sand to give it a more volcanic look. Add baking soda to your center container. In a squeeze bottle or bottles, mix vinegar & food coloring. Squeeze the colored vinegar mixture over the baking soda & watch it erupt.

IMG_4373

IMG_4402 IMG_4404

IMG_4385 IMG_4396

IMG_4391 IMG_4409

IMG_4408 IMG_4418

If you can’t tell, our daughter loved this. We went through a whole bottle of vinegar & box of baking soda. When we were done, she said, “Mama, Dada go to store to buy more food coloring?”. I guess we have to hit the supermarket for more supplies.


Mining For Gemstones

miningforgems (1)

*This post contains affiliate links*

I can still remember the first time I made my daughter a sensory box. It was last year & it was just a large Rubbermaid storage bin filled with colored rice, rubber insects & some scoops & cups. Mai went crazy for it. I could not believe this simple idea could hold my daughter’s attention for so long. She played with it for hours. It was the first time since she was born that I was able to peacefully cook a full meal without her attached to my hip. I was even able to clean up after too. It was amazing.

038

As amazing as it was though it was also very messy. I accepted this as long as it kept Mai happily occupied. A year later I will still find a stray grain of colored rice every once in a while. We continued with the sensory play, making holiday themed boxes, fossil brushing & her favorite which is water play. All of these activities were fun & all of them were very messy.

With the warm weather here, I am delighted to be able to move the messy play outdoors for a change.

Mai recently became obsessed with these little crafting gems that I have. She carries them all around & like the rice, I find them everywhere. I had an idea to make a sensory treasure hunt for her using some of these gems that she is so fond of. We recently bought her a sand & water table and this fit in perfectly with our plan.

What you will need:

A sensory or water table, an old pool or a large storage bin. Any of these will work fine.

Play sand

Water

Colored crafting gems

A sand sieve, shovels or scoops

We have a sand/water table, so I used this for our activity, but it would just as easily work in a large Rubbermaid storage container or an old pool. Throw your gems into the bottom of your container, add sand & water. Let your child dig out the gems using scoops or shovels, a sand sieve or even just their hands.

IMG_2673

IMG_2671

IMG_2672

IMG_2677

IMG_2681

IMG_2691

IMG_2687

IMG_2684

IMG_2708

IMG_2690

As with all of the sensory play, this kept my munchkin amused for quite some time. I sat on the grass, enjoyed the sun and watched Mai digging out her gemstones. She would dig them out, put them aside & them throw them back in & start all over again. She asked for a towel to clean them off with & then put them in a container that night & set them next to her bed. Like I said, she really likes those gemstones.


Thank you as always for stopping by. Please follow us on Facebook as well.

Surviving My First 5K

4571612_race_0.9308576257227521.displayThe day finally came. It was only a matter of time that I would finally break down and run my first race. With a marathon runner for a husband it was inevitable. 311638_2198507855488_1079399790_nEven my daughter has already completed her first race. Should I be embarrassed that my two year old received her first race medal before me? IMG_19701 I started training a couple of months ago. I did not realize just how bad of shape I was in. My first couple of weeks started off great, but then work, baby & scheduling conflicts made it virtually impossible to get to the gym or run outside. I was very worried about how ill prepared I was. I became even more worried when I saw that the course was all uphill. Luckily, my first 5K was an obstacle course race. With 16 foamy & muddy obstacles there were many breaks in the uphill running (and by running, I mean mostly walking). The obstacles consisted of climbing walls, a giant foam slip & slide, mud crawls & a massive bouncy slide as the finale. Between all the huffs & puffs, some muddy water in the mouth & foam in the eyes, I had the time of my life. 4613116_race_0.31827722650558266.display 4612902_race_0.3917459688648467.display 4603715_race_0.9380796214813815.display 4577822_race_0.33772453226369137.display 4577694_race_0.42480102795743213.display I am disappointed in myself for not training harder for it, but I did accomplish what I set out to do, I finished my first race & had a great time doing it.  It was a nice break for us mommies. I am ready for round 2. Bring on the next race & this time I will train harder. 4589346_race_0.5318026521172017.display

Food For Eat & Food For Play

036For Mother’s Day last week a work colleague gave all of us mommies a giant chocolate bar. I love chocolate of course, but am not a fan of plain chocolate. I  wanted to make some sweet treats with the chocolate, but wasn’t sure what to do. I often refer to myself as a junk cook because I love to just grab random leftover junk & throw it together just to get rid of it. Last night was a good night for that & my daughter loves cooking with mama. The measurements are random because they are leftover ingredients, but my junk bars came out pretty good. My husband says they taste like a Twix bar.

Ingredients:

1 7oz chocolate bar

12 marshmallows

1 /8 cup of margarine

1 1/2 cups of graham crackers (chopped)

1 cup of chocolate cheerios

Directions: Melt the margarine over low heat. Add marshmallow & stir until melted. Add the chocolate bar. Remove from heat & mix until marshmallow & chocolate are melted. Quickly add the graham cracker & cheerios. Press into a pan. I used an 8X6X2 pan. Refrigerate & then cut into squares.

We went through many Cheerios. Mai was having so much fun with them, we used up most of the box.

013 004 041

009 019 023 026

cheeriosandgraham.jpg

Luckily for Mai, an accident the next day kept her in the food fun.

While I was work today, I received a text message from my husband. The text went a little something like this..”Do you know why there was a box of spaghetti open on both ends?”

Do you know why there was a box of spaghetti open on both ends?

Oops! I knew already that this was my fault. Sorry honey. But as the saying goes “When life hands you lemons, make lemonade.” So that is what we did. Daddy gave her a bowl and a handful of the spilled pasta. Mai was happy playing with the spaghetti while I was at work. When I came home I saw the big bowl of the uncooked pasta & remember something that I had seen before. I had a styrofoam cone laying around & stuck the dry spaghetti into it. We took some of our stale Cheerios from last nights food fun & our little tot had another activity to keep her busy. This is such a wonderful way to teach hand-eye coordination & as you can see my daughter loved it.

004 033  

020  038

008

So what else can we do with all that floor pasta?

How about spaghetti art?

Spaghettiart.jpg

002

Who knew Cheerios & spaghetti could be so much fun?

Who Needs Toys – Playtime Made Easy

047You always hear people joke that you don’t need to buy young children expensive toys because all they end up wanting to play with is the box. This is no joke. There is no truer statement. Toddlers are easy; they can find the fun in anything. Their little spongy minds are absorbing and exploring everything. Things as simple as the box, are still new and fascinating territory for them. At 2 years old, my daughter is past the excitement of the box, but still has a taste for the simpler things in life.
We have more toys in this house than we know what to do with. Between the play kitchen, Little People Villages & Twisty Tracks, she should have enough to keep her occupied until she is in her teens, but as kids tend to do, she gets bored of these things very quickly. There are many things that you can do to occupy your child’s day without the use of fancy toys.

Here are some simple and fun things for your child to do.

Water play

It doesn’t get much simpler than this. This is one of my favorite activities to give my daughter while I am cooking or doing dishes. Lay out a towel & fill a large container half way with water and add some measuring cups & spoons. Here my daughter told me she is making coffee.

047 049

Chick Peas, Beans & Rice

Similar to above, I have a container of chickpeas & colored rice set aside just for play. It is amazing how long my daughter will play with them. She will count them out & transfer them from cup to cup.

004

Couch Cushion Fun

My daughter has a lot of energy. She loves to jump & is always throwing herself on the ground for some odd reason. Take your couch cushions off the couch & place them on the floor & let your child roll around on the pile of pillows.

Stringing Pasta

Pasta necklaces are an old classic. This requires a little bit of hand – eye coordination. Mai strung up the 3 shown below & told me that it was the mama pasta, daddy pasta & baby pasta.

043 046

Read, read & read some more

We spend about a half hour before bed reading books every night, but books are not just for bedtime. We often read to our daughter while she is eating to keep her firmly planted in her chair during her meal. Many times even if my daughter insists that she does not want a story, if I just start reading she will eventually jump up on my lap.

IMG_20140305_204516429

Bubble Wrap

We order from Amazon a lot, I mean a lot. Bubble wrap comes with most of these packages. I think that bubble wrap is fun for small children and adults alike. Who doesn’t love popping that stuff?

Blanket forts

Being that mommy is always cold, even in the summer, we have blankets all over the house. Mai loves it when we make forts over the couch. “Mommy, play in the fort toooooooo?” Definitely! Here she is reading with a flashlight under her fort.

IMG_20140131_183348702

Song & Dance

My daughter loves music. She has been dancing as long as she has been walking. She also loves to sing songs with mommy & daddy. Don’t underestimate the power of music.

522469_10200213001120988_222369628_n

Red Light, Green Light & other games

My daughter loves running around our house in circles. I had to teach her Red light, Green light just to catch my breath in between chases. Pheeew! Also try Simon Says or Hide and Seek.

Get outside

If your toddler is like mine, then he or she loves to run free. Take them outside, weather permitting & let them run & jump and play. Here is Mai walking the track at the Relay for Life in memory of her grandmother & namesake.

IMG_20130621_181223_864

Color & Draw

I have an unlimited supply of poster board in our home. My daughter loves to doodle & color. She also loves when we draw for her too. She & I will lie on the floor and she will ask me to draw pictures of caterpillars & horses. She has a vivid imagination. She creates different scenarios for these pictures. Here Mai asked Mama to draw a mama & dada spider. She said that they were both sick & needed medicine.

IMG_20140307_185652426

Stacking boxes

I love stacking boxes & have quite a few sets strewn all over the house. My daughter shares my love for them. She likes piling them up & placing them inside of one another.

Styrofoam & Yarn

Seriously! Yarn sticks to styrofoam. If you are like me & have styrofoam cones laying around this is a great busy activity.

IMG_5129

What easy & simple activities do you have for you & your toddler. I would love to hear.

Dinosaur & Fossil Finding Sensory Box

FossilFind.jpg

My daughter likes dinosaurs. She really likes them. I think this is largely because of the book ‘How do dinosaurs say goodnight?’. I am not sure, but regardless, she loves those crazy creatures. A few weeks back I took her to a dinosaur exhibit.


1797515_10202291345918309_910362254_n


She of course loved it. There was a wide range of dinosaur related displays, rides & activities. One of the kid’s activities there was a sandbox with fossilized rock at the bottom. It had paint brushes to brush off the sand to uncover the fossils. Mai really enjoyed this. I thought this would be an easy enough activity to make a home. It took a few weeks, but today we finally tackled this sensory box & the results were great.


What you will need:


A large Rubbermaid container

Hardening modeling Clay – I made my own off of this recipe from Wiki- http://www.wikihow.com/Make-Modeling-Clay-at-Home

Play Sand

Paint Brushes

Corn Starch

Dinosaur figurines

An old sheet or a drop cloth


Instructions:

Get your molding clay ready. Knead & roll out to the desired shapes.


012

023


Using your dinosaurs make imprints into the clay with their feet & their bodies.


024


Let your clay harden according to it’s recipe directions or package directions.


027


Once your imprinted clay is hardened & cooled, place at the bottom of your Rubbermaid container.


031


Pour play sand on top of your clay imprints. I mixed the sand with cornstarch to lighten the texture of the sand.


033


Add your dinosaurs and paint brushes. Lay down an old sheet or drop cloth to collect any sand that may escape.


IMG_20140301_184223773


Dinosaurs!


054


Brush the sand & reveal your fossils.


046


My adorable daughter is showing me the mama dinosaur holding her baby dinosaur. So cute!


055


This is fun!


IMG_20140301_190034420


Mai loved this activity. We played with it after supper & up until bath time. She was so deep into her new role as archaeologist that mommy was able to bake, do the dishes & pick up all of her toys. It was a good night. Mai even helped mommy sweep up after.


057

IMG_20140302_104811348

Related topics:

http://expatfamilyq8.com/2014/02/26/cocoa-cloud-dough/

http://expatfamilyq8.com/2014/02/22/coloured-corn-sensory-box/

http://teachingtwos.com/2014/02/13/february-sensory-box/

http://lifelessonplans.org/farm-sensory-bin/

FossilFind.jpg


Thank you as always for stopping by. Please follow us on Facebook as well.

Phonics Muffins – Phonics Lessons With Muffin Tins & ABC Magnets

Phonics muffins

Toddlers are incredible. The amount of information that they take in, learn and retain on a daily basis is astounding. I am fascinated by my daughter & also often surprised by her as well. From the time she was an infant, we surrounded her with the alphabet.  I sang the Abc’s to her when she would cry, which was all the time. We also had a few visual aids…

Mai’s Nanna made this beautiful ABC quilt for her. It hangs on the fence in her playroom.

079
081

  With all of the alphabet jammed down her throat, it was no wonder that she learned her Abcs early. She has been sounding out her letters for some time now. She will play with her refrigerator magnets often while I am cooking. “B! Bbb bbb boy” You are right baby, B is for boy. She is growing up so fast that I can hardly believe it. With Mai sounding out her letters so much, I came up with a game that could hopefully challenge her phonics learning and entertain her.

This was a cheap and easy to make activity for my toddler. Just line muffin tins with pictures of different animals & objects and let her match up the alphabet magnet to the coordinating word. For example, matching the A to apple or B to banana.

What you will need:

2 muffins tins

Printouts of clip art objects to cover every letter of the alphabet (There are only 24 spots in the tins but you can switch out the other 2)

Alphabet magnets

Using the muffin tin as a stencil, outline the clipart & cut to fit inside of the tin.

IMG_20140225_192449798

Gather your magnets.

074

Watch your little one with pride as they pick up the letters and place them on the correct pictures. “M! Mmmm mm m monkey.”

089

087

076

I was overcome with pride watching my daughter do this activity. I have to admit that my eyes watered a little as she completed the tins. I could tell she was proud too. Next step…reading.

Related Topics:

http://littlehousecharming.com/2014/02/26/6-toys-approved-by-my-toddler-and-me/

http://raisingkidswithlove.wordpress.com/2014/02/26/tools-of-the-trade-for-literacy/

Asian Drumsticks & Family Selfies

IMG_20140221_184643198

When you have a toddler, there are good days & there are bad. Some days, you want to just rip your hair straight from your skull and others like today make you grateful beyond belief.

Our daughter is such a love bug & loves when mommy and daddy are both home together. They don’t happen often, so when they do she takes advantage of it. I was equally as happy to have us all together this evening. Since we were all home for a family dinner tonight, I made one our favorite meals, Asian style drumsticks over rice.

Asian Style Drumsticks

Ingredients:

12 drumsticks

1/4 cup of orange juice

1/4 cup of soy sauce (Golden Mountain or Maggi are recommended)

1 tsp honey

1/2 tsp crushed garlic

1/4 tsp powdered ginger

1/4 tsp cayenne powder

Flour for dusting

Pepper to taste

Directions:

Preheat oven to 450. In a bowl mix orange juice, soy sauce, garlic, ginger, cayenne & honey. Stir well. Dust the chicken with flour lightly & place in a baking dish. Pour marinade over the chicken, turning and coating each piece well. Add pepper to taste. Place them on a foil lined baking sheet. Spoon the marinade over the top of each drumstick. Bake for about 45-50 minutes, flip & move the chicken around in it’s sauce occasionally.

IMG_20140221_184643198 (1)

009
I like chicken, Mama.

After dinner, Mai wanted the whole family to retire to the couch & sit under the blankets. We were snuggled up so sweetly that I wanted to take a family photo to capture it. I set the camera on the coffee table on self timer & took a photo. What developed from there was a fun filled selfie evening that had all of us smiling. Even Dukey got in on the action & fun.

01201401910170200251

Related Topics:

http://joshuathomasbrown.wordpress.com/2014/02/22/boneless-chicken-thighs-with-a-sweet-spicy-twist/

http://dinnerforbrian.wordpress.com/2014/02/21/mango-chicken/

http://simplyfantasticbooks.com/2014/02/21/a-quick-meal-thai-chicken/