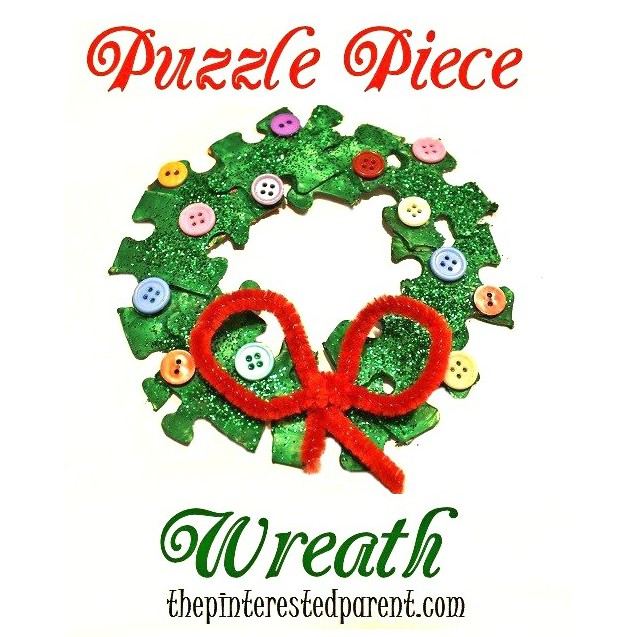
My sweet child has really been getting into the holiday season. I can tell this is going to be a fun year for our little munchkin.
Tag
toddler
Shape & Texture Mountain Landscape
As many of you know we moved last week. The new owners close on the house today, so yesterday we went to clean out our few remaining things & walk around our old home one last time to say goodbye. It was an emotional final walk through the empty house that we called home for so many years, but it is exciting anticipating the completion of our new home.
Charlie Brown Inspired Footprint Crafts
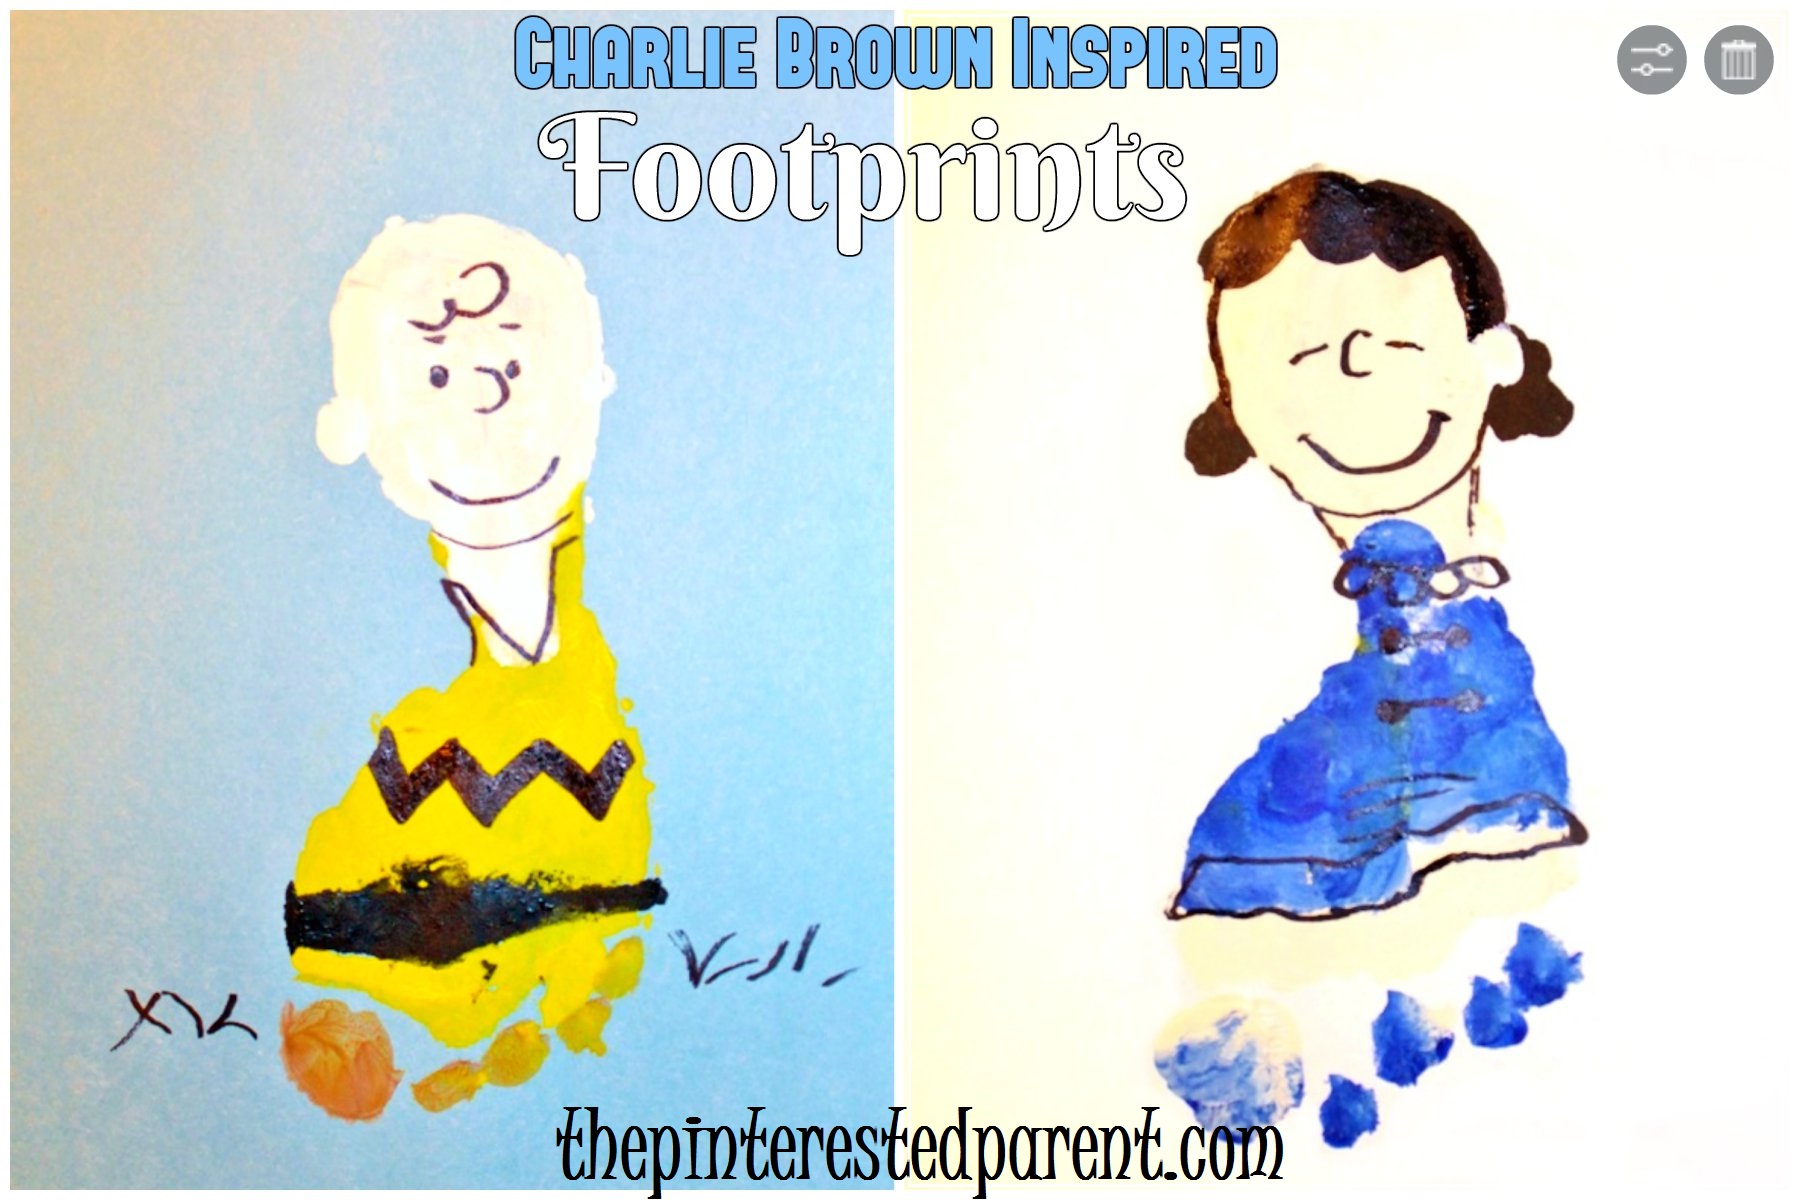
I have had Charlie Brown on the mind a lot these past few weeks. Charlie & the rest of the Peanuts Gang have a new movie coming out next month. It’s The Great Pumpkin, Charlie Brown was on last night & my husband & I just had our Halloween costumes delivered. That is right, this year my hubby & I are dressing up like Charlie Brown & Lucy. We had wanted Mai to be Snoopy with us, but she was very insistent that this year she was going to be a witch princess.
I love Chuck & the gang & as I told you just a couple of days ago when I made the Dr. Seuss inspired footprint crafts, I seem to be seeing everything as feet these days. I decided to sneak in one more footprint craft for the week.
Charlie Brown & Lucy inspired footprints
For Charlie, paint your child’s heel in pale peach. Paint their toes in brown & the rest of the foot in yellow with one black stripe running across the foot near the toes. Press it onto a piece of paper & let the paint dry. Dot on an ear with the peach color. Use a black Sharpie or marker to draw in the face & the zig zag of Charlie’s shirt.
For Lucy, paint the heel in light peach again. Paint another strip of the pale peach across the portion of the foot right under the toes & then paint the rest in blue. Press onto a piece of paper & let the paint dry. Add a dab of peach for the ear. Use a black Sharpie or marker to draw in the face, hair & details of the dress to finish her off.
Stay tuned for pictures of me & my husband as Charlie Brown & Lucy after Halloween.
Thank you as always for stopping by. Please follow us on Facebook as well.
Paper Plate Shape Monster Masks
‘What Pet Should I Get’ Inspired Footprint Crafts
*This post contains affiliate links*
My daughter loves books. She can not read yet, but she does know most of her books by heart. She can just as easily recite them to me, as have me read them to her. She has quite a long list of favorites & many of those favorites are Dr. Seuss books. When I heard that they discovered & released a new Dr. Seuss book I was so excited. I ordered one right away.
The day that I received it, I waited until my daughter’s bedtime before reading it. It did not disappoint. Mai adored it just as she did with the books before it. That evening she made me read it 3 times.
We had been doing a lot of footprint crafts lately. We made animals from A – Z, some Halloween inspired feet & we experimented with famous works of art. We have made so many that I have started seeing feet everywhere. As I was reading Jay & Kay’s adventures in the pet store to my daughter for the 100th time the other night, I actually started seeing some of the creatures as footprint art in my head. I might have a problem.
I think you already know where I am going with this. Here are a few footprint crafts inspired by the book.
Seuss Inspired Cat
I painted my daughter’s foot in yellow & pressed it onto a piece of paper. I used the same paint to paint in a tail & ears & the added a red bow around its neck. I dabbed on two spots of white for the eyes & then let everything dry. I used a Sharpie to draw in the lines for the details.
Seuss Inspired Dog
These are all pretty similarly made. The same as above, I painted my daughter’s foot in brown & pressed it onto a piece of paper. I painted in a tail & his snout. I dabbed on one eye & painted in a collar. I let it dry and then drew in the finishing details.
Seuss Inspired Bird
I painted my daughter’s heel in yellow and the rest of her foot in green & then pressed it onto a piece of paper. I painted in a beak with the yellow & head feathers in green. I let it dry & drew in the rest of the details.
From what I understand there are plans to release more books from this collection of works that they have found. I cannot wait.
Thank you as always for stopping by. Please follow us on Facebook as well.
Button Cornucopia Thanksgiving Craft
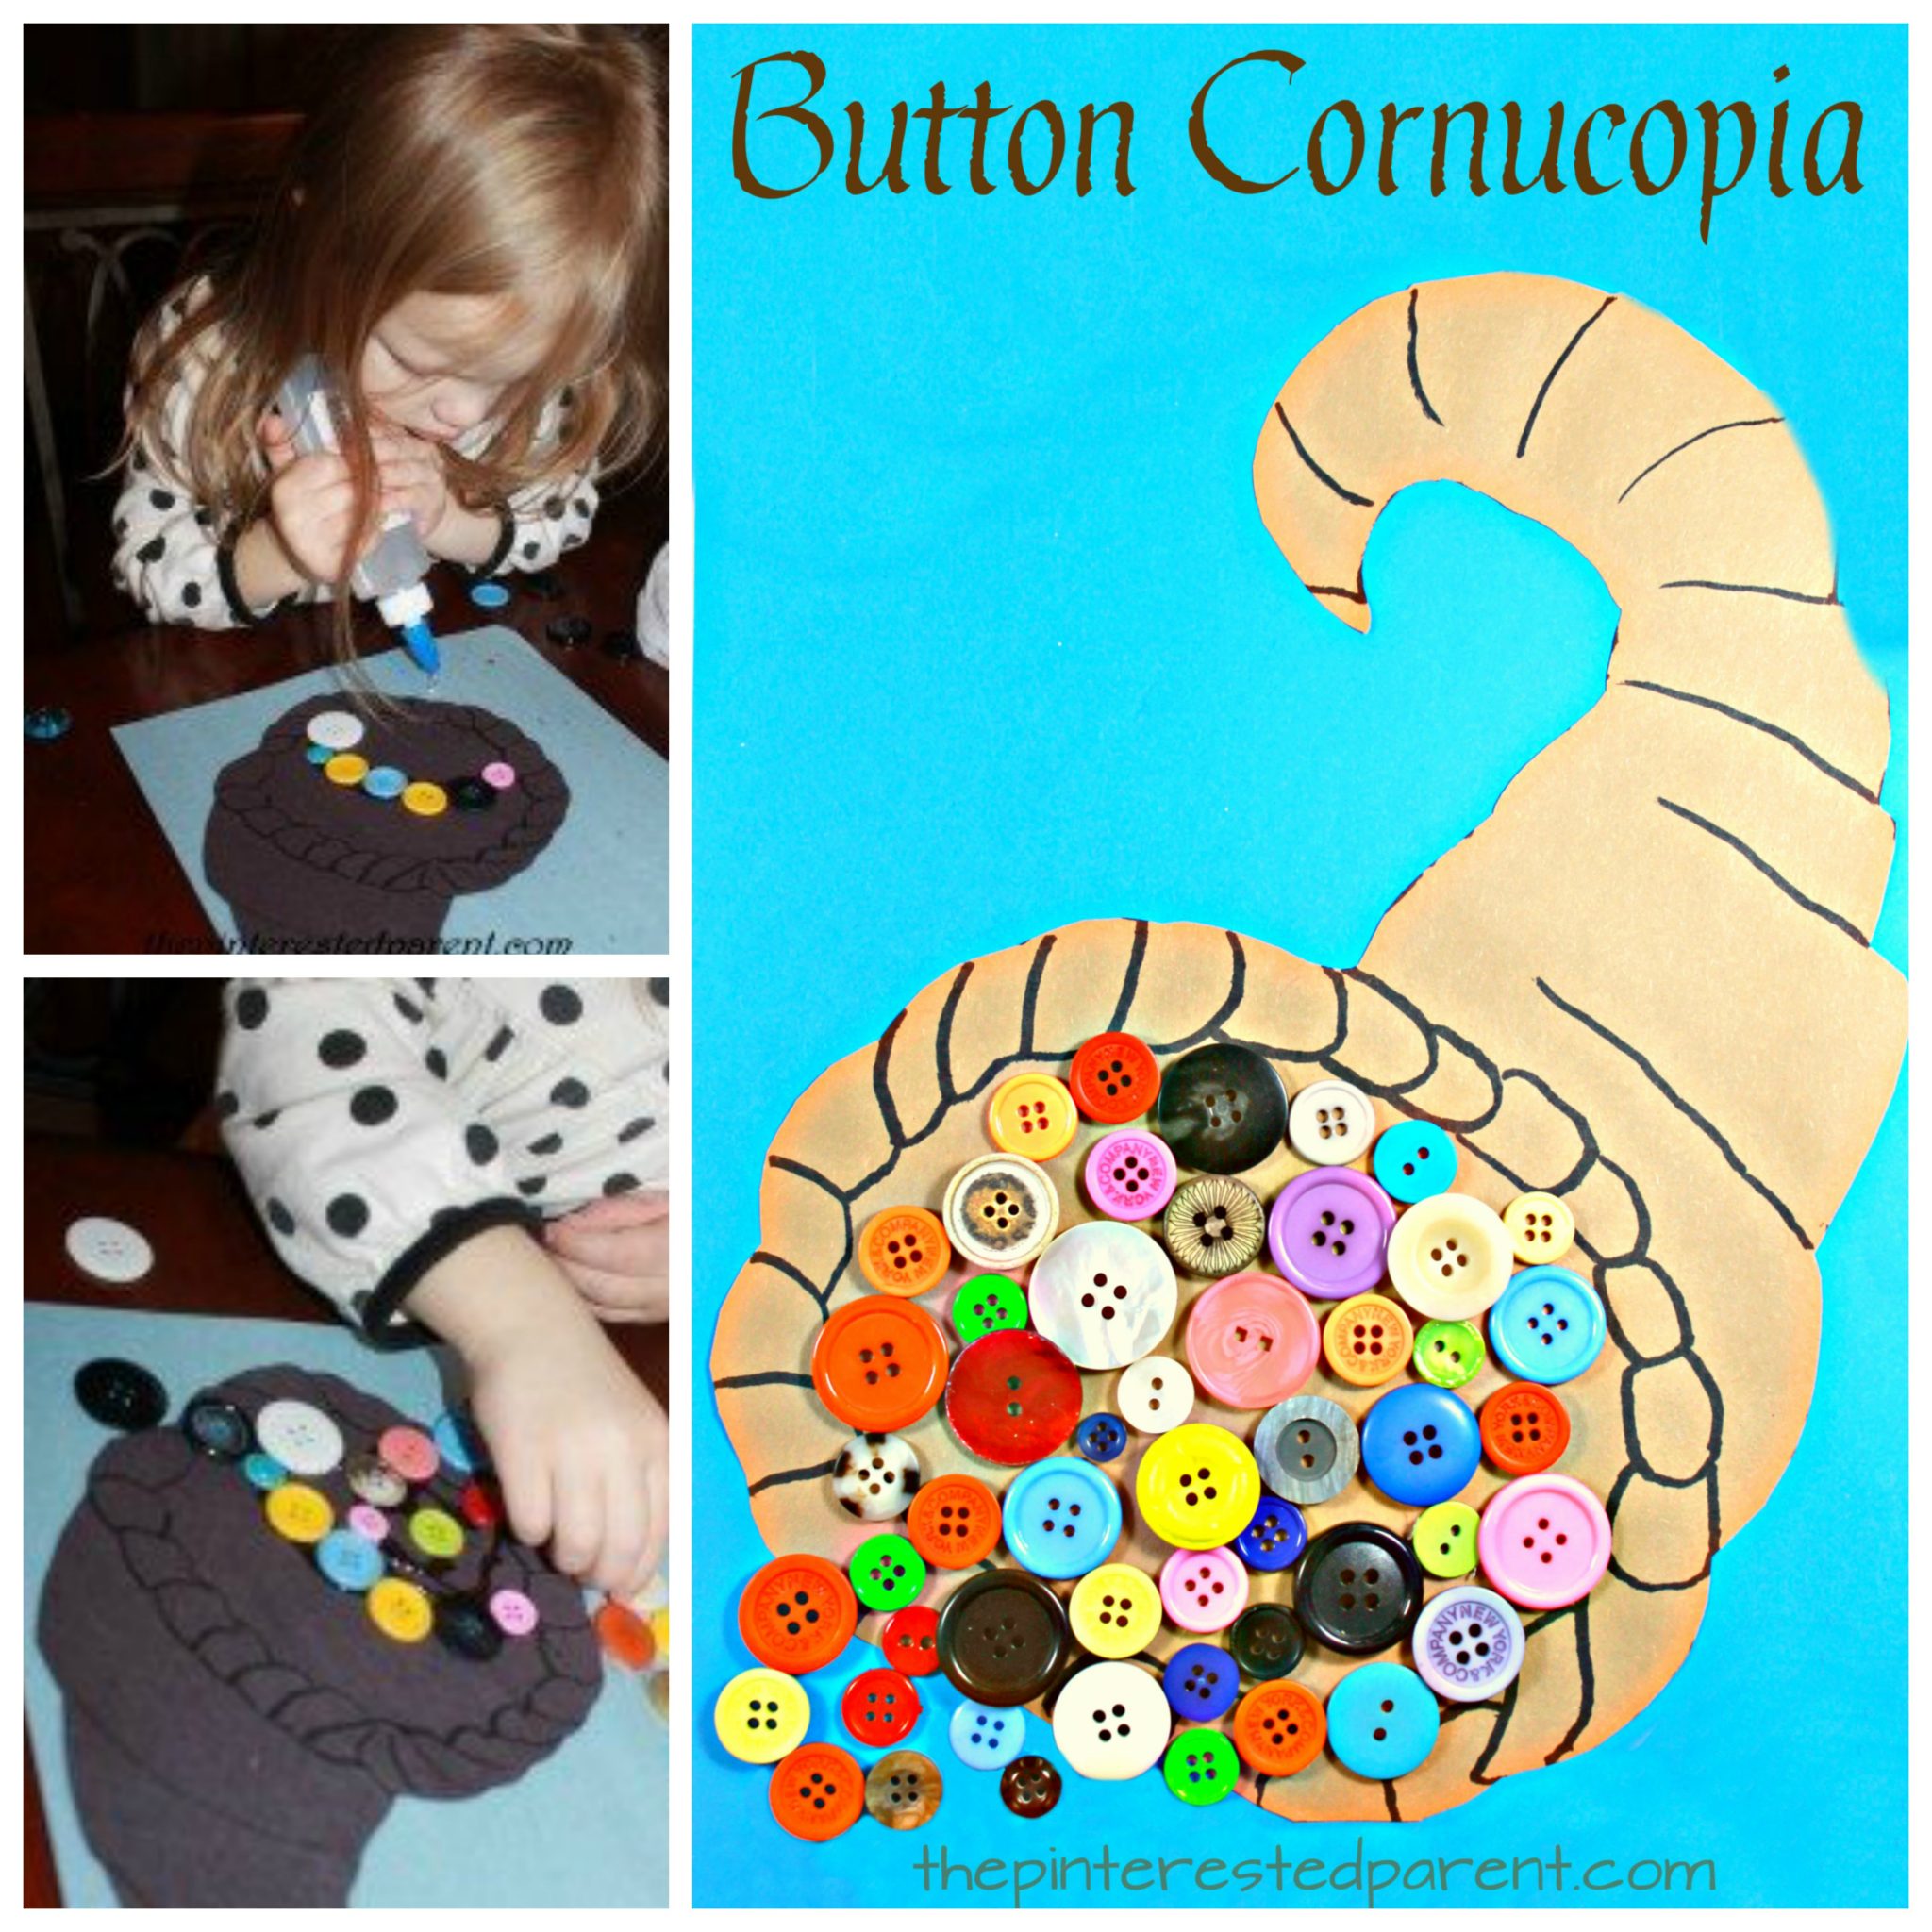
Buttons, buttons, buttons…my daughter is just crazy for buttons. Whether it is using them in sensory play, selling them in her pretend button store or doing crafts with them she loves them.
Half Drawing Art Activities
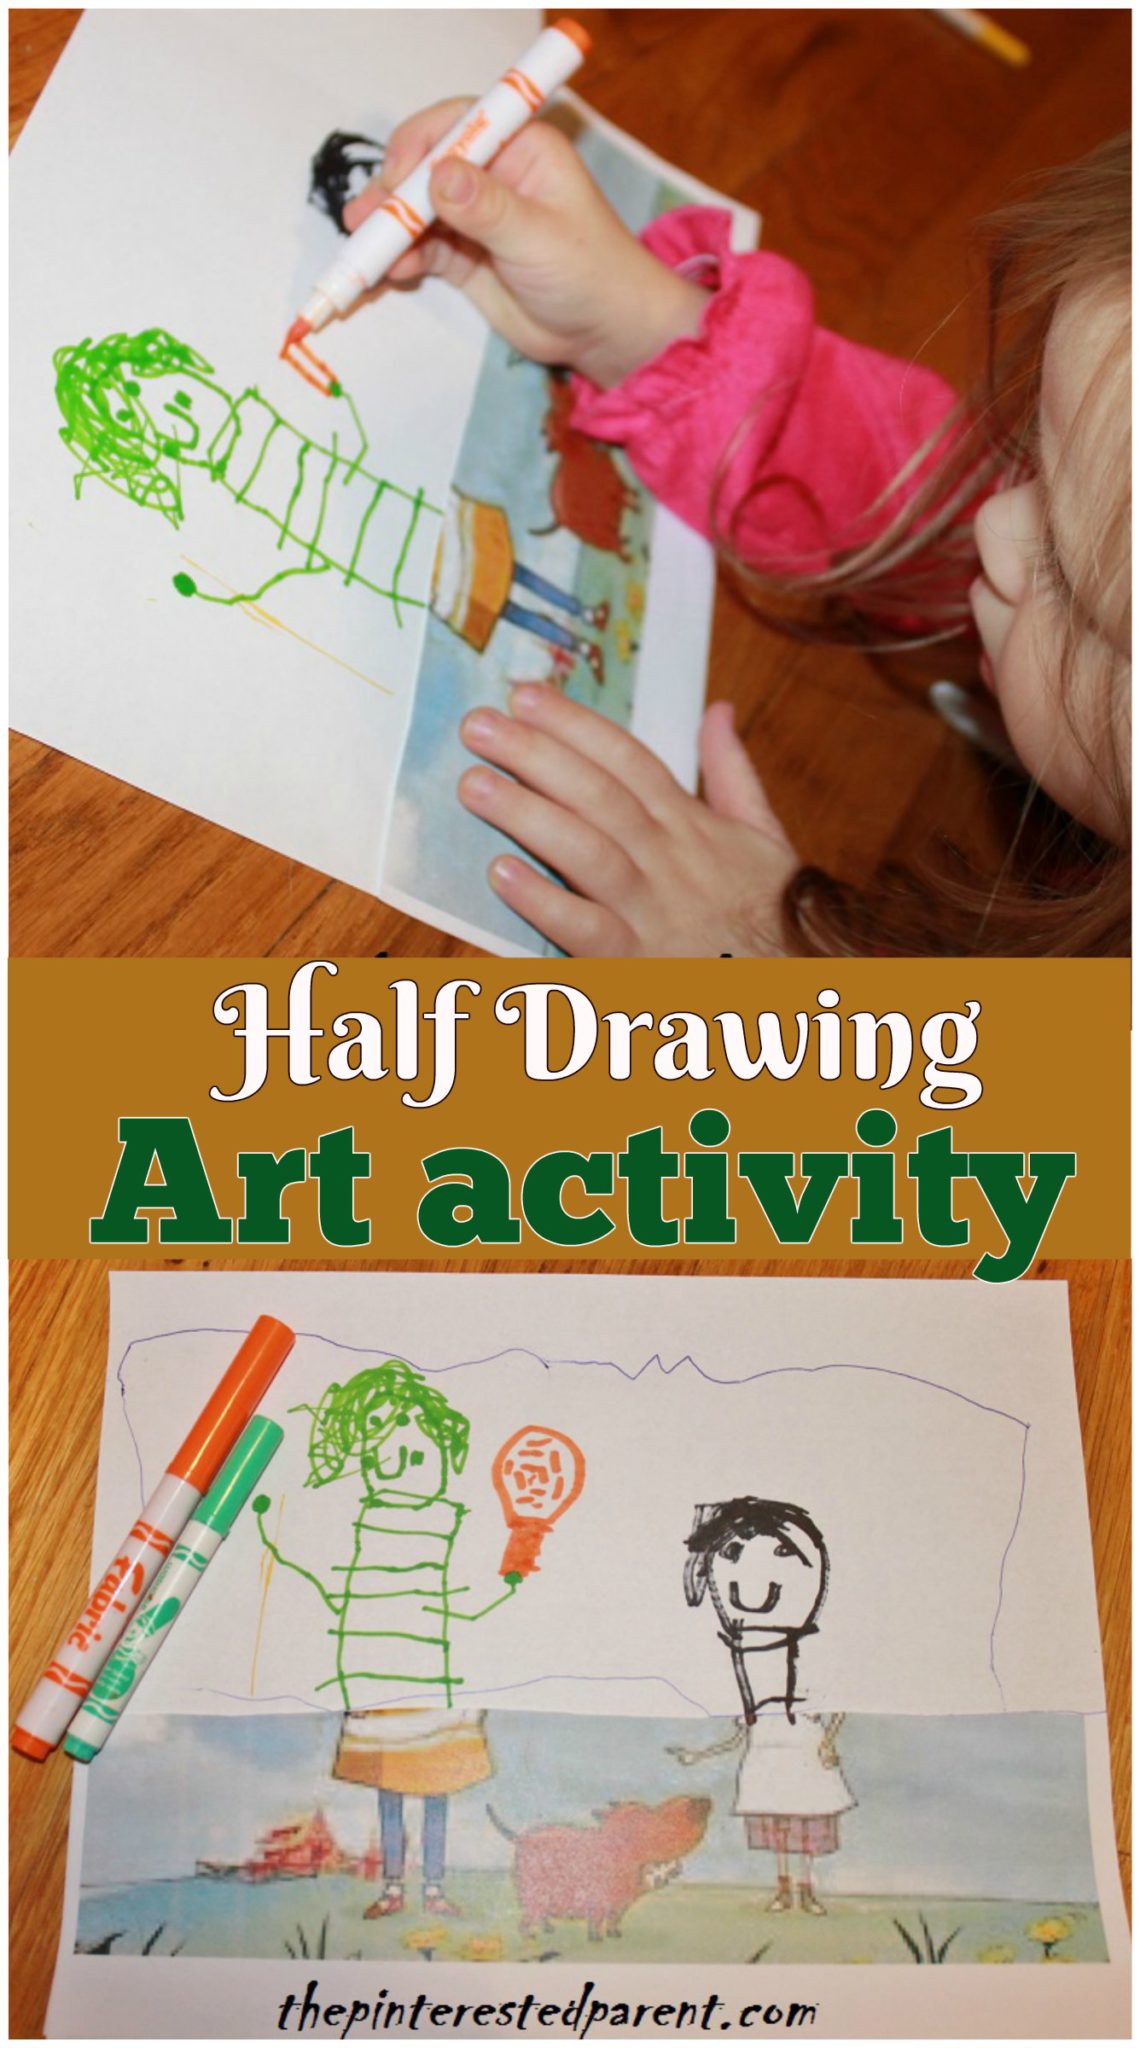
One of my daughter’s favorite shows is Stella & Sam. It is one of mommy’s favorite cartoons as well. If you have not seen it, it is an adorable cartoon about a little girl, her little brother & two great big imaginations. Mai asked me if I would draw a picture of them for her a couple of days ago. I began to draw & when I was about halfway through with my Stella, my daughter asked if she could finish it. I gave her my drawing and watched as she drew in the hair and the stripes on the shirt.
As she was drawing, it reminded me of an art project that I used to do as a child. We used to take pages out of magazines or books & rip them in half and finish the other half. This is not a new idea, but it was always one of my favorites as a kid.
We printed a few different pictures last night. One of them, of course, was Stella & Sam. We also printed a Jack-o-lantern, a witch & an apple tree.
I cut each of the pictures in two & glued each end to a piece of construction paper.
It was no surprise that Mai reached for Stella & Sam.
She made Stella with green hair an ice cream cone. It came out adorable.
We both worked on one end of the Jack-O-lantern.
It was just as much fun as I remembered & it was certainly fun watching my girl finishing the drawings.
Thank you as always for stopping by. Please follow us on Facebook as well.
Inuit & Igloo Crafts
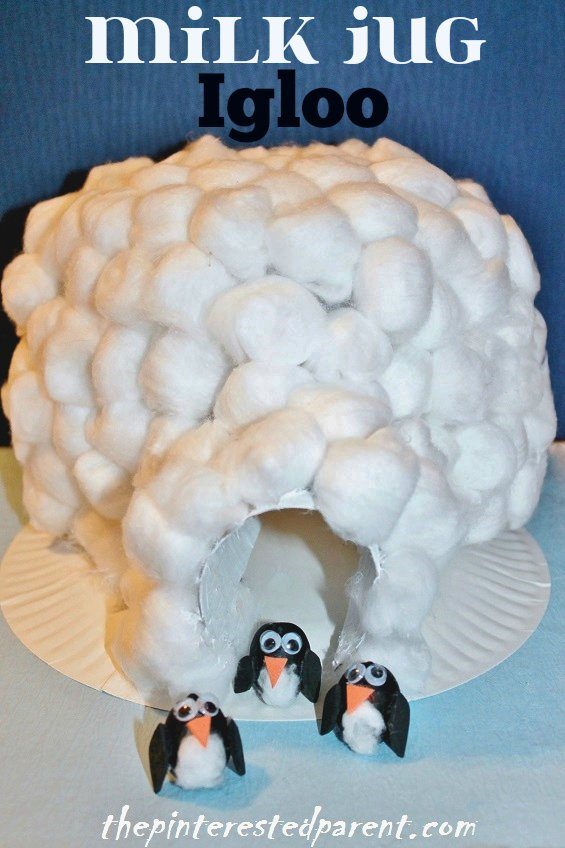
I can remember when I was a little girl, I could not wait until it would snow. I wasn’t much interested in building snowmen, but I loved having a good snowball fight & I loved to build snow forts, huts and igloos. The snow is hopefully still a little ways away, but I was thinking of my igloo adventures the other day. I had an idea for an igloo craft using an old milk jug.
Paper Plate Hair Cutting Activity
*Contains affiliate links for convenience*
I cut my daughter’s hair. If you have ever tried to cut a 3 year old’s hair, you should know that it is not an easy feat. I had to pretend that we were playing hairdresser in order to get her to stay still. While I was cutting, she kept asking if she could have the scissors and cut her own hair. When I was done, she asked if she could be the hairdresser now & cut mine. I had to say no to both, but it did give me an idea.
We have been working on using safety scissors lately. She likes to practice cutting & is still trying to find her comfort level in holding them. I thought that we could make a hair cutting activity for her.
All you will need is:
A paper plate
Glue
Googly eyes
Safety scissors – My daughter actually wanted to use scrapbook scissors for this activity. (Use caution & supervise your children when working with scissors.)
Directions:
Cut strips of paper in the color of your choice to form the hair. We made our hair wavy, so we cut wavy strips.
Glue a piece of construction paper of the same color around the back of the paper plate & trim any excess that hangs over the plate. Glue a flesh-toned piece of paper to the front & trim the excess as well. Add ears. Glue the strips of paper to the back to form the hair in the back.
Glue googly eyes onto the front & draw in the nose and mouth. Glue on a couple of strands of hair to the front & add long bangs for them to trim as well.
I gave Mai a few different pairs of scrapbook scissors & let her cut away. She is still trying to figure out the best way to hold her scissors, so I demonstrated on a separate piece of paper.
She had a lot of fun with this one & even told me that she has the most fun doing projects with me. Awwww. She is getting better each time with her scissors. Practice does make perfect after all.
Thank you as always for stopping by. Please follow us on Facebook as well.
Tissue Box Tow Mater Craft
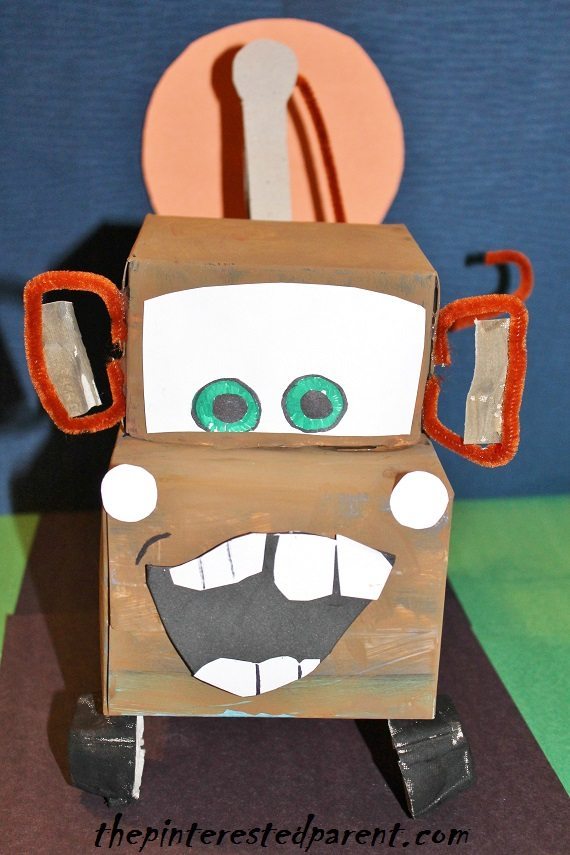
*This contains affiliate links for convenience.*
My daughter love cars. She loves cars, trucks, trains & planes. It is probably no surprise then, that she also loves movies like Planes and Cars. One of the most memorable characters from Cars is Tow Mater. In my daughter’s eyes all pick-up trucks are him.
We go through a lot of tissues in our house. My husband keeps a box in every room. We ran out of a couple of boxes of tissues last week & my daughter told her father that he needed to save them for me. “Mama, will probably want them for a craft.” I love that kid. She knows me so well. She was right. They were perfect for our Tow Mater craft.
What you will need:
A rectangular tissue box
A cube tissue box
Acrylic paint (brown & orange)
Egg carton
Pipe cleaner
Magic markers
Hot glue gun (Please use caution when operating the glue gun. Adult operation is recommended.
Directions:
Cut the cube tissue box, leaving about 1/3 of the box.
Cut half of the top of the rectangular box off. Glue the cube to the top of the rectangular box as shown.
Swirl the brown & orange paint. Do not blend completely. Paint both boxes. With the paint. The best part is that the paint does not need to be perfect because Tow Mater is rusty.
Cut a crooked mouth & teeth out of construction paper. Cut the front window out of construction paper & draw in the eyes.
Glue the window & mouth in place and cut out two headlights.
Paint 4 egg carton pieces black and let them dry.
Glue the egg carton pieces on for wheels.
Cut a brown piece of pipe cleaner in half & fold as shown.
Glue the pipe cleaners to the side of the top tier. Cut two rectangles out of egg carton & glue the rectangles in the pipe cleaners to for the rear view windows.
Cut two pieces out of the egg carton cover for the tow.
Glue them to the open pick-up portion of the truck as shown.
Glue a pipe cleaner off the end of the tow to finish it off.
My daughter was so happy with the finished truck. Tow Mater has had a busy couple of days towing all of my daughter’s toys.
Thank you as always for stopping by. Please follow us on Facebook as well.