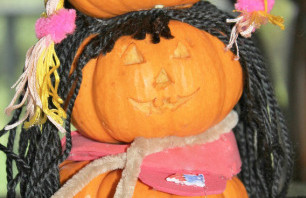
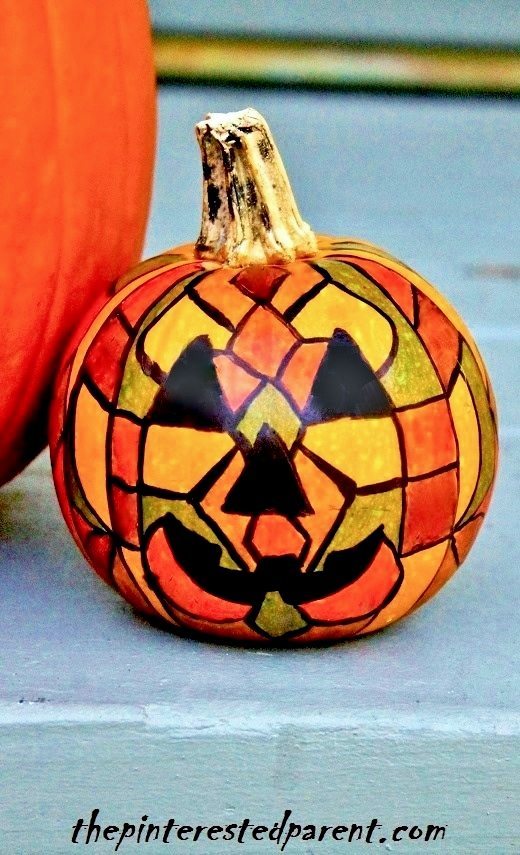
We were given a few small pumpkins yesterday. Last night, after a rather long & exhausting day, my family all fell asleep early. I was a little bored & was antsy to do something with my hands. I grabbed one of the mini pumpkins, some Sharpies & regular markers and decided I was going to make a stained glass Jack-o-lantern.
I sat on my chair & a half and watched ‘Identity Thief’ with the pumpkin & and markers on my lap.
I drew on the Jack-o-lantern’s face.
I drew random shapes around the Jack-o-lantern’s face.
I used my daughters markers to color in the shapes. Different colored Sharpies would work best, but we didn’t have any so we just used Crayola markers.
This didn’t take me very long to make & I thought that it came out pretty cute. This is what a bored mama does on a Saturday night.
Thank you as always for stopping by. Please follow us on Facebook as well.
I just re-shared it on Instagram last week. One of my Instagram friends recommended that I make a Q-tip skeleton. This sounded like a great idea, so I took her up on her suggestion. We made our skeleton using Q-tips & old mismatched puzzle pieces.
Puzzle Piece & Q-tip Skeleton
What you will need:
Puzzle pieces
Q-tips
Black & white paint
Black marker
Pipe cleaner
Glue gun (Use caution when using hot glue. Recommended for adult use only.)
Directions:
Pick out the puzzle pieces that you would like to use for your craft. We used 7.
Paint the pieces black & let dry.
Paint a skull & neck with white paint & let dry.
Glue a Q-tip to the neck & then vertically across two more puzzle pieces like shown. Break a Q-tip in half & glue on either end of the first Q-tip for shoulders.
Glue on the arm & leg bones as shown. Draw a face on your skull. Glue a pipe cleaner to the back to hang.
Thank you as always for stopping by. Please follow us on Facebook as well.
I love doing crafts with my daughter. It is always fun to see what she can do. One of my favorite crafts to do with her is shape crafts. I love to watch what she will construct and listen to her tell the stories about what she just made. Last night we took some of those shapes & used them to form haunted houses. Here’s how…
Cut out a bunch of shapes as shown. You will need two shapes for your house base & tower, two triangles for your roofs & two rectangles for chimneys. Cut small squares & rectangles out of yellow paper for the windows.
Glue your house base in place.
Glue on your roof. Draw a cross in the middle of your yellow squares to form the windows & then glue them in place as well.
Glue your tower next to your house & add the chimneys.
Cut out a circle to form a moon & glue it in place. Add googly eyes to finish off your haunted houses.
These houses came out so cute that it inspired one more haunted house craft.
Footprint Haunted House
Paint your child’s foot in all black. Stamp it onto a piece of paper & let it dry.
Paint a door & windows in with yellow.
Use white paint to add details to your house.
Paint in a roof or draw one in with marker.
Paint or draw in bats, a tree & extra details to finish off your haunted little foot.
Thank you as always for stopping by. Please follow us onFacebookas well.
I have been thinking about Halloween a lot this week. I realized that I had a little planning to do after my daughter informed me that she would like to be a princess witch this year. September is more than halfway through and Halloween is sneaking up on us quickly. With Halloween on the brain, it inspired us to make a few paper plate crafts. I love silhouettes. There us something so beautiful and haunting about them, which makes them perfect for Halloween. These Halloween silhouettes are an easy craft for all ages.
*The Pinterested Parent is a participant in the Amazon Services LLC Associates Program, an affiliate advertising program designed to provide a means for sites to earn advertising fees by advertising and linking to Amazon.com. In addition, text and image links in this post may be affiliate/referral links, which means we may be compensated if you make a purchase after clicking through these particular links* See full disclosure policy.
As much as fall is my favorite season, Halloween is my favorite holiday. Halloween is next week & we are looking forward to taking Mai trick or treating. I wanted to let her choose her own costume this year. I asked her several times & her answer has always been the same. “I want to be a Jack-o-lantern, mama.” Our daughter loves pumpkins & Jack-o-lanterns, so next week our daughter will proudly strut the streets as the cutest Jack-o-lantern ever to say “Trick or Treat”.
Until then, we can have a little fun making our Halloween crafts in anticipation.
Pasta Jack-O-Lanterns
You will need:
Jumbo shells (as used for stuffed shells)
Farfalle
Ziti You will need 1 piece of each of these pastas for each Jack-o-lantern
Orange & green paint
Black Sharpie
Glue gun
Directions:
Paint the jumbo shells orange & the Farfalle & ziti green.
Let the pieces dry.
Glue the ziti piece into the shell as shown.
Glue the Farfalle piece over the ziti.
With a black sharpie, draw on your Jack-o-lantern face.
Last weekend was a big fun fall weekend for us. We did our hayride, went apple picking, went to the fair & picked pumpkins too.
This weekend, in the aftermath of a bad tummy virus, we put a hold on our plans to go to the corn maze & leaf peeping. All is well now, but I wanted Mai to continue to rest at home rather than running around. Last weekend we picked up a lot of pumpkins. I bought two full sized ones for carving, but Mai really wanted the little pumpkins because they were so cute.
The mini pumpkins were great because they were just the right size for my little pumpkin. She may still be too small to be wielding carving tools, but that doesn’t mean that she can’t have some fun. Pumpkins are not just for Jack-O-Lanterns anymore, after all.
Painting Pumpkins
We painted pumpkins mid-week. She is getting to be such a great little painter. She painted one pumpkin red with a green stem. “Look mama, it looks like an apple.” It really does.
Yesterday she asked to paint more pumpkins, so we did. Then we broke out the glue & the glitter for some extra fun. Seriously nothing lights my daughter’s face up faster than the prospect of pouring glue & glitter on something. This is a super easy, moderately messy, but very cute craft. Simply let your artist pour or paint on the glue & then shake on the glitters of your choice. Let dry & then shake off the excess glitter. Use paper or drop cloths to work on & to catch the glitter. When you are done, if you are stingy like me, you can pour the excess glitter back into its container for next time.
Glitter Pumpkins
Mai had so much fun making these. She even made one as a present for her Auntie Linda. “I make this one for Auntie Linda. She is so proud of me.” I bet Auntie is going to love it.
Mai’s are in front & mommy’s are in the back.
Our little pumpkin family.
As I have told you before, our daughter has a very strong sense of family. It is extremely cute how she refers to everything in terms of mama, dada & baby. When we were picking the pumpkins, she would tell me, “This is mama pumpkin, daddy pumpkin & the baby pumpkin.” And so they shall be.
Draw out you pumpkin family’s faces & then carefully carve out.
For daddy pumpkin, I fashioned him a Patriots hat out of foam.
For mommy pumpkin, I just hot glued some yarn to the top of the pumpkin. I did the same for the baby & then braided the hair into pigtailsI hot glued all 3 pumpkins together, putting the daddy on the bottom, mommy in the middle & baby on top. I used a pipe cleaner as a scarf for the mama.
It looks just like us doesn’t it? These were all so much fun, I think we will have to pick up more pumpkins next weekend.
Thank you as always for stopping by. Please follow us on Facebook.
This website uses cookies to improve your experience. These cookies feedback information to our analytics and advertisers. We track views of the site - which pages are visited, whether you are a regular or returning visitor to help generate a more personalised experience. You can switch cookies off or follow the READ MORE. AcceptRejectRead More
Privacy & Cookies Policy
Privacy Overview
This website uses cookies to improve your experience while you navigate through the website. Out of these, the cookies that are categorized as necessary are stored on your browser as they are essential for the working of basic functionalities of the website. We also use third-party cookies that help us analyze and understand how you use this website. These cookies will be stored in your browser only with your consent. You also have the option to opt-out of these cookies. But opting out of some of these cookies may affect your browsing experience.
Necessary cookies are absolutely essential for the website to function properly. This category only includes cookies that ensures basic functionalities and security features of the website. These cookies do not store any personal information.
Any cookies that may not be particularly necessary for the website to function and is used specifically to collect user personal data via analytics, ads, other embedded contents are termed as non-necessary cookies. It is mandatory to procure user consent prior to running these cookies on your website.