Tag

bunny

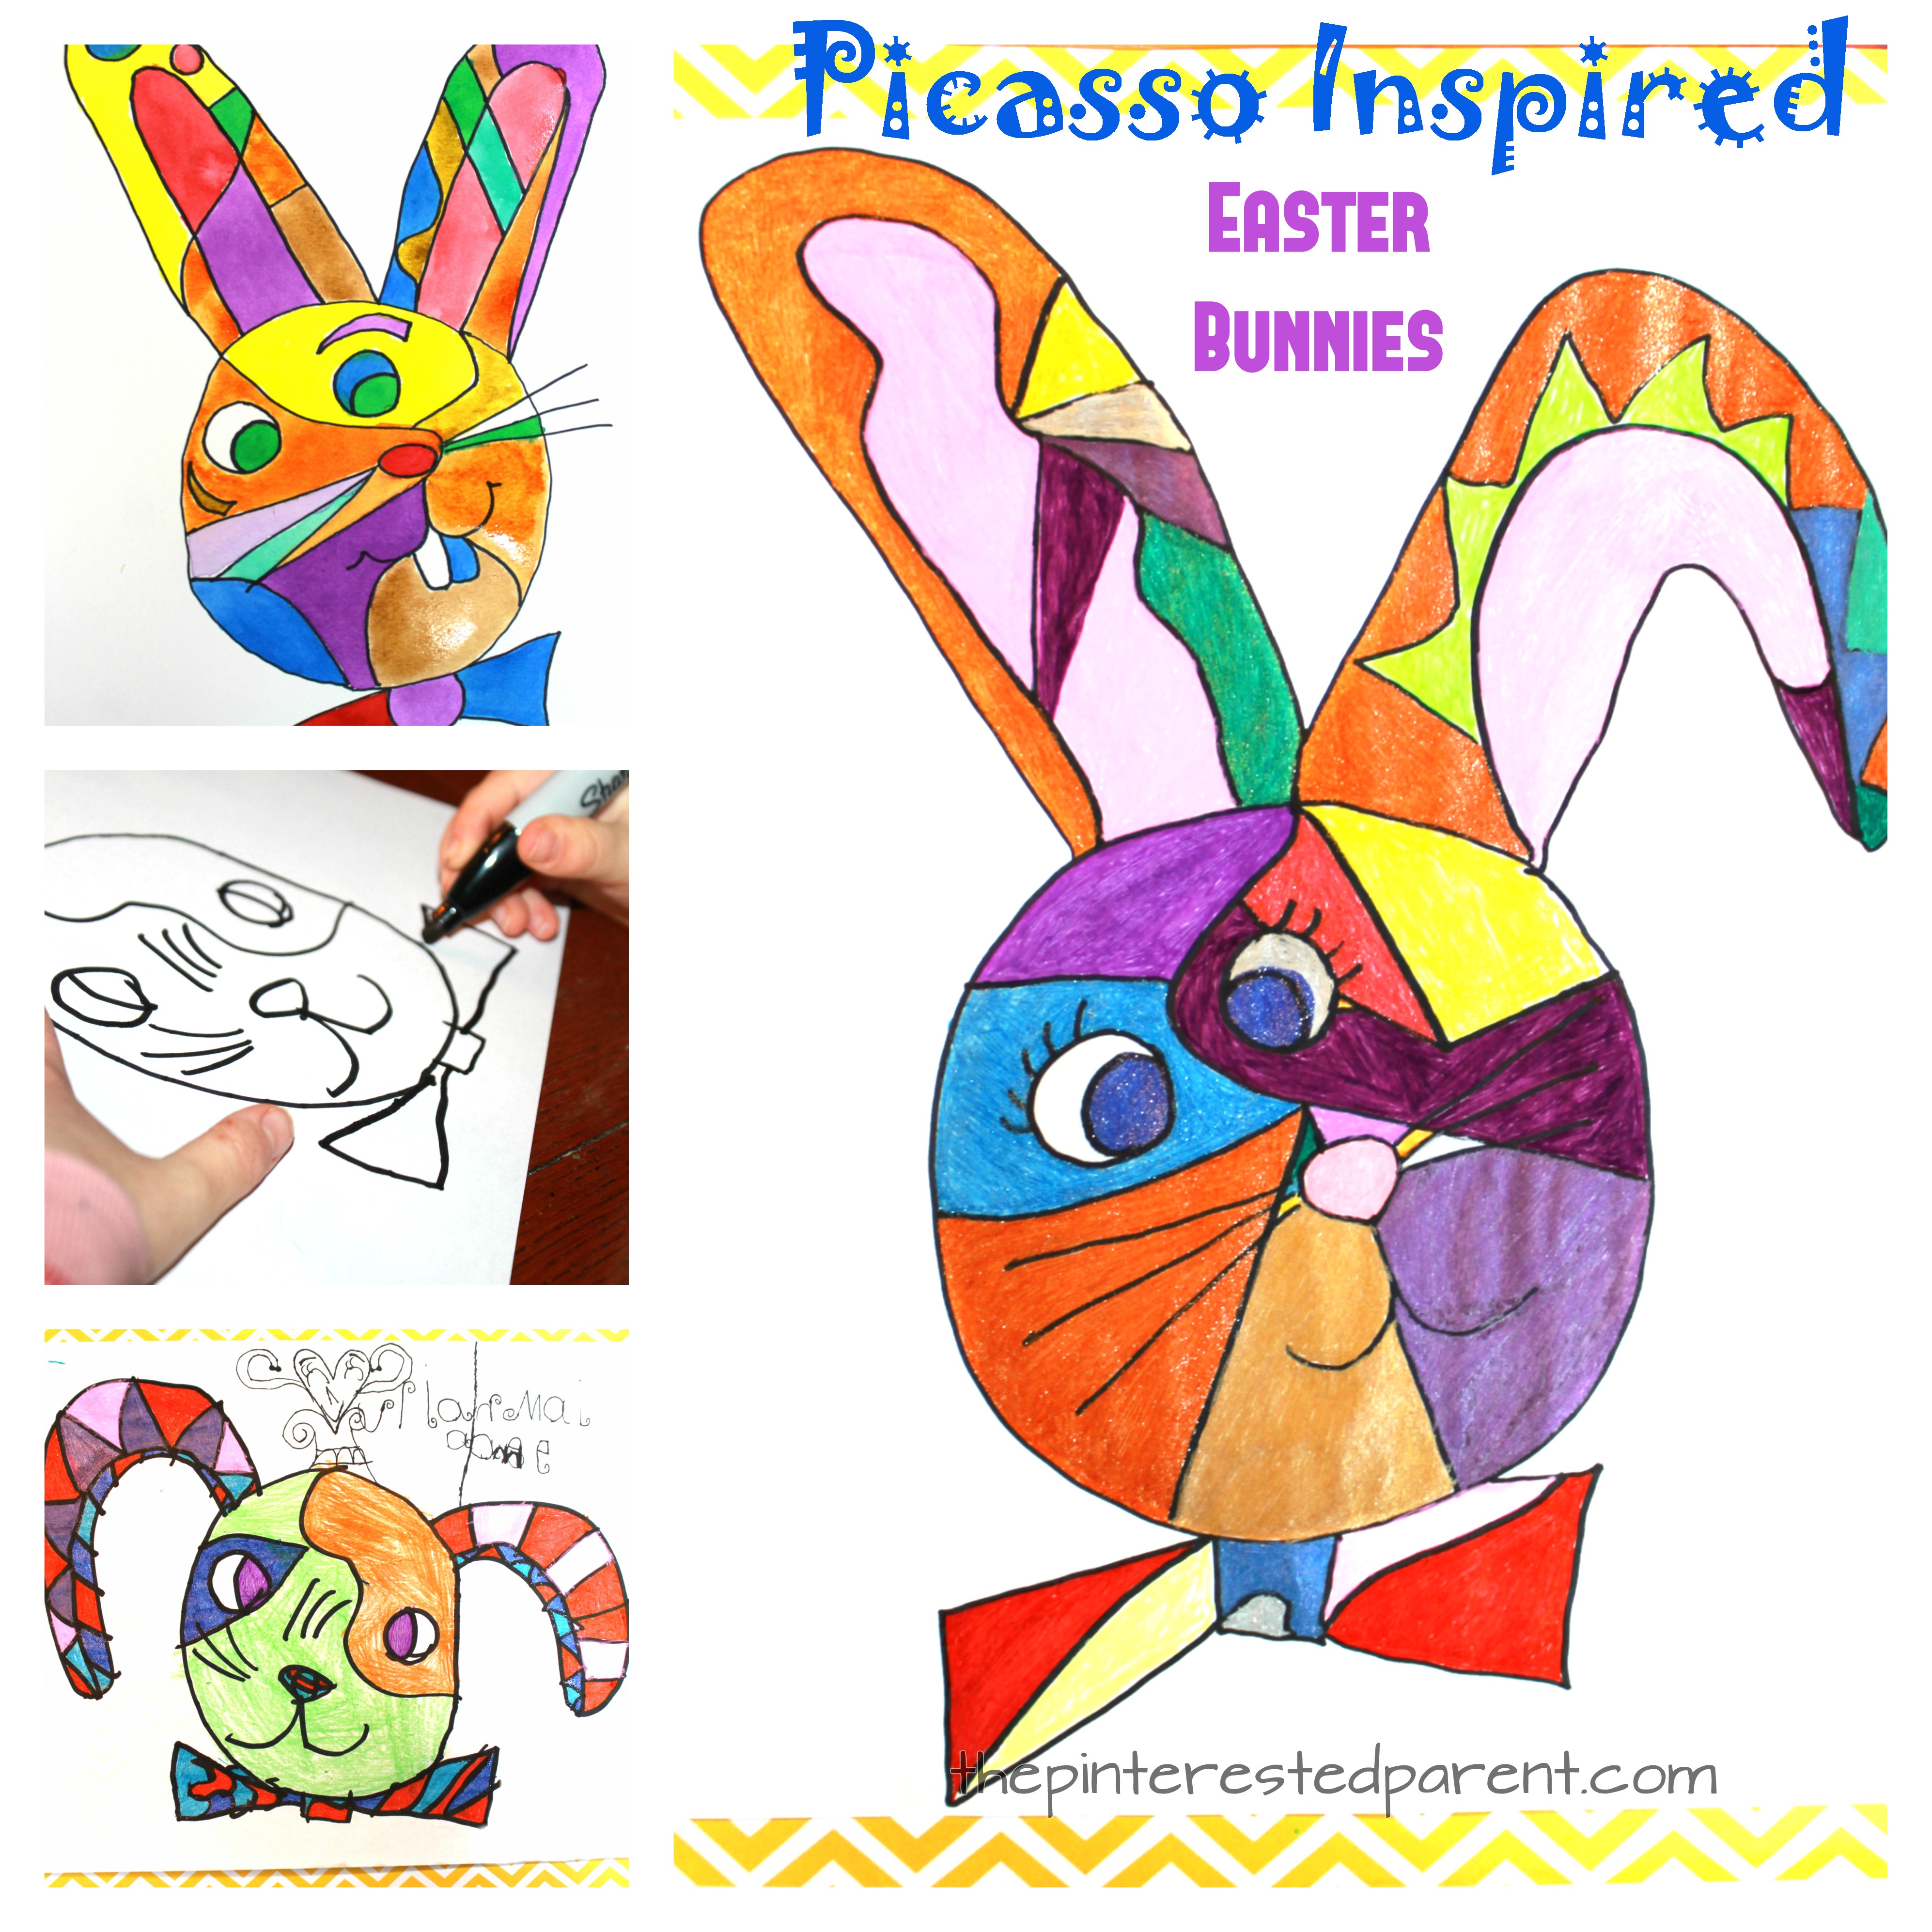
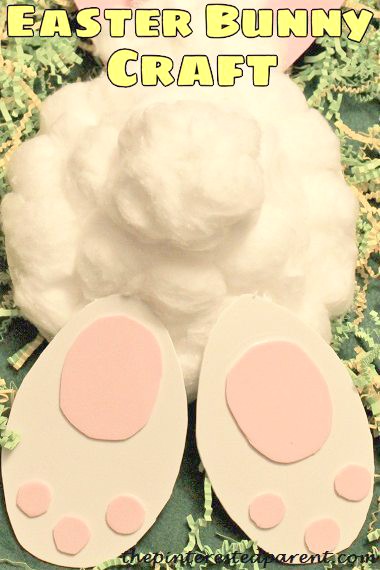
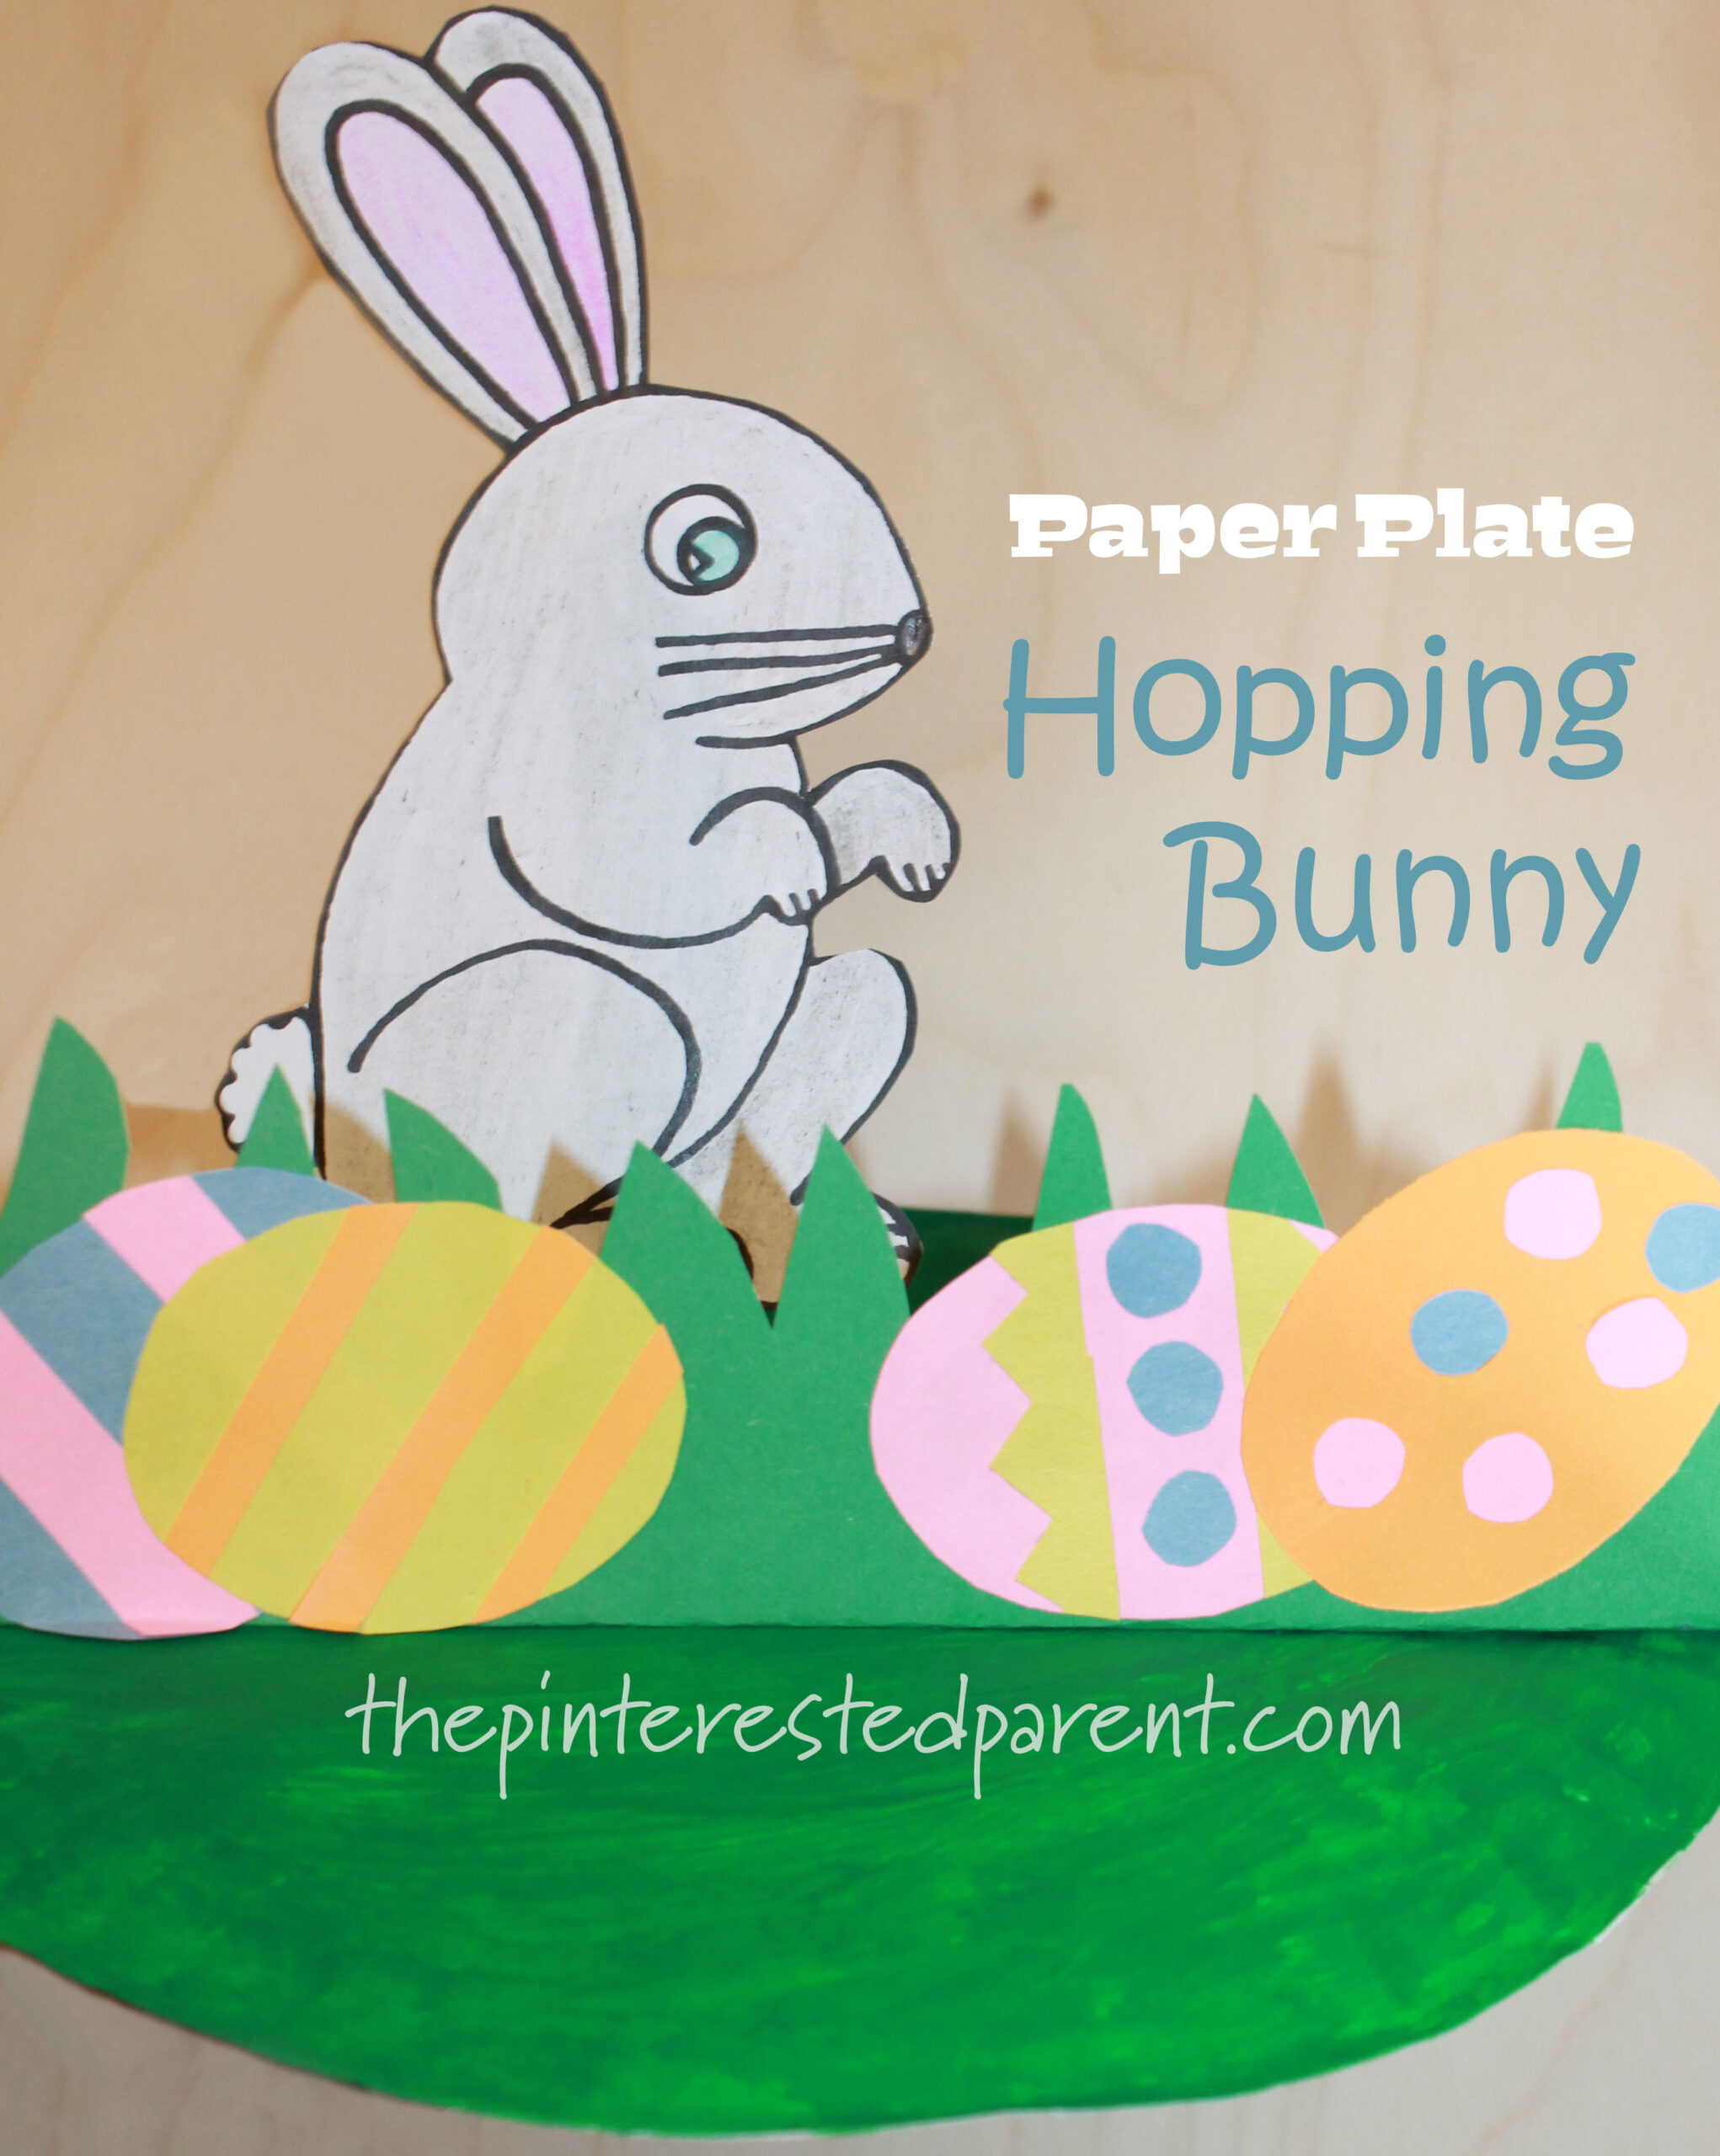
Paper Plate Hopping Bunny

We had so much fun with our last interactive bee craft, that we wanted to keep the interactive crafts going. This paper plate hopping bunny craft is perfect for Easter or just for the spring. Draw your own bunny or use one of our free printable bunnies. One was created by me and the other by my 8 year old daughter, who was so excited about this craft that she wanted to make her own.

Continue Reading…

Leaf Bunny Nature Craft

This adorable leaf bunny nature craft is perfect for the springtime and Easter.

We have a rhododendron bush in our front yard. I love the leaves from that bush and pick them off often to use for arts and crafts projects with my daughter. The last time we worked with them, my brother-in-law stopped over and suggested that we could make Easter bunnies with them because the leaves looked like bunny ears. Brilliant! Now why didn’t I think of that? Either way, I used his great idea and made this adorable leaf bunny.

Leaf Easter Bunny Craft. Easy spring nature arts & crafts for kids

Continue Reading…

White Chocolate & Peanut Butter Pretzel Bunnies

Easter is quickly approaching and with the holiday comes all of its delicious sweet treats.  White chocolate & peanut butter pretzel stick Easter bunnies recipe. These bunny treats were a huge hit & my kid loved to decorate them.

*This post contains affiliate links*

Last year I had experimented with pretzel bunnies. They were a big hit with my family, so I wanted to try them again with a little help from my favorite little helper. We had recently purchased a set of food markers & we both could not wait to use them.

White chocolate & peanut butter pretzel stick Easter bunnies recipe. These bunny treats were a huge hit & my kid loved to decorate them.

What you will need:

White chocolate melts

Pretzel sticks

Peanut butter

Confectioners sugar

Butter

Vanilla

Food markers

Directions:

Melt 3 Tbsp of butter. Mix it with 1/2 cup of creamy peanut butter, 1 cup of confectioners sugar & 1 tsp of vanilla. Mix it well. Scoop a heaping tsp of peanut butter mixture and roll into a ball. Place on a sheet of wax paper & use a spoon to flatten into a disc. Put them into the freezer for about a half hour or until they are slightly hardened.

IMG_5459 IMG_5460 IMG_5461 IMG_5462

Melt the chocolate according to package directions.

IMG_5453

Lay out another sheet of wax paper. Dip the pretzel sticks, two at a time into the melted chocolate. Let the excess chocolate drip off & place them on the wax paper in a V shape.

IMG_5463

Remove the peanut butter discs from the freezer a few at a time. Dip them one at a time making sure to cover the top, bottoms & sides & place over the pretzel, just covering about 1/4 of the bottom. Use a rubber spatula to fill in any empty space. Let the chocolate cool & harden.

IMG_5476

Then comes the fun part. Use your food markers to draw in the bunny faces. My daughter couldn’t wait to draw on her bunnies.

IMG_5472

Here was her favorite bunny that she made, complete with hair bow & scarf.

IMG_5474 IMG_5475

They were a huge hit again with my family and my friends at work.

Thank you as always for stopping by. Please follow us on Facebook as well.

Bunny Tail Craft

Paper plate or paper bowl cotton tail Easter bunny craft for kids. Arts and crafts


My daughter loves crafts that allow her to play with glue. We have bottles of glue in our house & she just loves getting her paws on them whenever she gets a chance. Tonight I thought we could make little bunny bottoms. It would give her a chance to use some glue & play with fluffy cotton, which I thought she would love.

What you will need:

Paper bowl

Cotton balls

Glue

Construction paper


Directions:

Glue cotton balls all around the bowl.

IMG_9845

After you have covered the bowl, add extra cotton to the middle to form the bunny tail.

IMG_9846

Cut out two ovals for the foot paws.

IMG_9847

Cut out a pink oval & 3 circles for each foot & then glue them into place to form the bunny paws.

IMG_9848

Cut out ears & glue them under the bowl in place.

IMG_9856

Glue the feet into place & let dry.

Easter bunny tail craft with paper bowl or plate & cotton balls

To be honest, Mai did not take to this craft. When I told her that we were making bunny bums, she laughed. She grabbed her bowl & grabbed her glue. She added one cotton ball to the middle of the bowl & said “I done, mama.” That looks great too, baby.

IMG_9865

Thank you as always for stopping by. Please follow us on Facebook as well.

Pasta Shell Easter Bunny Craft

Pasta Easter bunny craft.jpg


The best thing about doing arts & crafts with my daughter is the time that we get to spend together. My daughter says to me all the time. “Mama, I have fun with you. I like making projects with you.” This melts my heart. I love doing crafts with her as well. She is becoming so creative & is learning so much from our craft time together. When I told her today that we were going to make bunnies out of pasta shells, she cheered loudly & pulled her safety stool right up to our work space. So began this evening’s craft.

Pasta Shell Easter Bunny Craft


What you will need:

Jumbo pasta shells (3 for each bunny made)

Spaghetti (just one strand)

Paint

Hot glue


Directions:

Paint the inside of the shells in pink. These shells will be the ears.

IMG_9808

IMG_9815

Paint the outside of the shell in the color that you choose for your bunny’s ears. I chose gray, Mai wanted purple ears.

IMG_9810

Paint a shell for the head.

IMG_9812  IMG_9817

IMG_9806

Paint a strand of spaghetti in black. Let it all dry.

IMG_9820

Paint a nose in the middle of the face.

IMG_9822

Add in the eyes & mouth.

IMG_9824

Break the spaghetti into small pieces for the whiskers & glue on to the face.

IMG_9825

Glue the ears into place from the back using a hot glue gun. Use a generous amount of glue to secure.  (Sorry kids, hot glue is only for us grown-ups)

IMG_9826


IMG_9842

Pastashellcraft.jpg

Thank you as always for stopping by. Please follow us on Facebook as well.


Footprint Easter Bunny Craft

Foot print Easter Bunny craft I just never get sick of my daughter’s cute little piggies. There is just something so cute about baby feet. With time racing by, she is quickly becoming less of a baby & more of a little girl. Mommy needs to preserve all these baby moments while I can. With Easter nearing, I thought it time for our first Easter craft.

What you will need:

Poster board

Plain white paper

Paint

Paint brush

Markers

Cotton Balls

Glue

Paper plate

Directions:

Spread paint on a paper plate.

015

Dip your child’s feet in the paint.

019

Press the paint covered foot on a piece of paper. Repeat with the other foot & let dry. Cut out the feet prints.

020

Sketch out your bunny around the baby’s feet, using the feet as bunny feet

110

Draw some egg shapes on a piece of paper & have your child paint on it.

037

Cut out the eggs & set aside.

109

Glue the eggs to the chest where the hands would be holding them.

111

Cut out two oval shapes as hands & glue them down over the eggs to make it appear as if they are holding them. Draw lines on the paws.

IMG_20140309_094254882

Paint/color your bunny’s ears, eyes, nose & tummy. Outline the mouth & whiskers.

114

115

Squeeze glue on to the parts that you want fluffy, like the bunny ears.

117

Spread cotton balls out across the glue.

118

My daughter loves gluing. This is a part that you can do together.

125

IMG_20140309_093916566

We chose to cut our bunny shape out & hang it on the refrigerator with magnets.

IMG_20140309_095538214

We also made a smaller one with floppy ears. This looks a little more like a floppy earred dog than a bunny, but I still think it came out pretty cute.

033

My daughter got a real kick out of making the paint foot prints. We made several set of foot prints because she thought it was so funny. We hung our craft on the refrigerator. Before bed this evening Mai ran up to it & said “Goodnight Bunny”. She is so cute.