Category

Kid’s activities

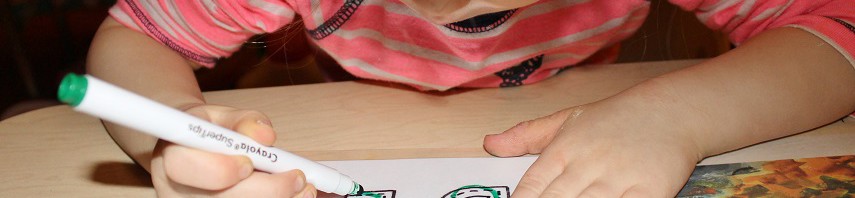
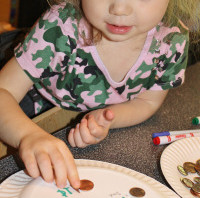
Toddler Science Made Easy

Saltnice.jpg

I must have lived a very sheltered childhood because there are so many things that I never did as a child. Having a child of my own, I have been introduced to so many things that I missed out on when I was young. It is as if I am reliving my own childhood vicariously through her. My husband on the other hand has the inside scoop on all sorts of fun stuff that I never heard of, mostly in the form of science experiments. He introduced me to baking soda volcanoes last year & then the other day when I came home from grocery shopping he was working with Mai on another one.

I walked in the door to see my husband & daughter playing with a Cartesian Diver. I am sure many of you have heard of this, but this is one I missed as a child. I must have dozed off during science class that day. It was such a simple concept and I was as fascinated by it as my daughter was.

Cartesian Diver

All you need is a clean soda bottle, water, & a ketchup packet (or in our case a duck sauce packet) Do a float test first on the packet to make sure that it floats.

Fold the packet in half the long way to insert it into the bottle.

Fill the bottle all the way to the top with water & put the cap back on.

Squeeze the sides of the bottle. The little ones will need two hands. Squeeze the bottle & watch the packet sink.

CartesianDiver.jpg

P1180938

Let go of the bottle & let it float back up.

P1180939

Mai had so much fun that it inspired a few more experiments.

Salt & Ice Experiment

All you need for this experiment is some ice, salt & food coloring.

On a baking tray, lay out some ice. You can choose to use a large sheet or cubes.

Sprinkle salt on the cubes. The salt will cause the ice to beginning melting where sprinkled.

P1180959

Squirt different colored food coloring onto the ice & watch as it seeps into the ice and follows the melted tracks. It makes a lovely effect.

P1180962

We also had some fun experimenting with oil & water this week. For more on our oil & water experiments please check out our latest article in SEEK MAGAZINE.

OilWater.jpg

Thank you as always for stopping by. Please follow us on Facebook as well.

7 Fun Cleaning Day Activities For Kids

7FunCleaning.jpgWhen you have a toddler, cleaning your home is not always the easiest thing to do. Having an only child, I am in charge of my daughter’s entertainment, so when I am busy, she wants my attention. Today our house needed a good cleaning, but Mai wanted to play.

On Cleaning Day, there is a lot of potential for fun. Here are some fun activities for your kiddos while you clean.

1. Cushion Mountain-  Is it time to clean your sofa cushion covers? While they are in the washer, pile up your cushions in a safe, clear area & let them have some fun.

P1180867 P1180863

2. Let Them Help Out- We may not like our chores, but give a kid a broom and they are tickled pink. There are many chores your child can help you with, sweeping, dishes or wiping down tables.

3. Loose Parts Play- Cleaning out a junk drawer or throwing out other odds & ends around the house? Give them to your child to play with, provided that they are clean & safe. Playing with loose parts is a fabulous way for a child to work their imaginations.

P1180894

4. Sheet Forts- Are you stripping your bed to make way for clean sheets? Use your dirty sheets to make a monster sheet fort.

5. Laundry Basket Or Hamper Fun- Laundry day is always fun for our daughter. Kids love to jump into an empty laundry basket. Our daughter has a pink collapsible hamper. When it is empty she likes to pretend that she is Sheriff Callie & ride it like a horse. “Giddy up, Sparky!”

232323232-fp83232-uqcshlukaxroqdfv-36-nu=335---53-;;7-WSNRCG=3--988-8-2336nu0mrj

6. Obstacle Course- If you clean the house anything like me, you tear it apart & trash it before you put it back together. With all the moved tables & chairs, cushions & laundry baskets lying around, it is a great opportunity to build an obstacle course. Climb over the ottoman, jump over a broom, crawl under the play table and climb your cushion mountain to victory.

7. Imaginary Beach- Before you throw those sheets and blankets in the washing machine, lay them down on the floor for some imagination play. We placed a blanket down for our water & a sheet for our sand. We broke out a few shovels & beach toys and our daughter’s mind did the rest. Lunchtime? Let them have a beach picnic.

P1180887P1180882P1180888

You don’t need to wait for cleaning day to enjoy these activities. These are fun on any day.  I have to admit that I stopped cleaning to join in on some of the fun too. Before we put our couches back together, we let our princess do one more thing. The princess did not feel the pea on her royal bed, but then again I had just swept the floor. Happy cleaning.

P1180892

Thank you as always for stopping by. Please follow us on Facebook as well.

Valentine’s Day Rubs

GlueRubs.jpg

For Christmas this year, one of my dear friends bought my daughter Fashion Plates. When Mai unwrapped her gift, it was Mommy’s face that lit up not hers. I loved Fashion Plates as a girl. I felt like a young girl again. As I sat on the floor rubbing a crayon against the plates, I thought to myself this is probably something that we can do at home with our own designs.

Valentine’s Day Rubs

What you will need:

A few squares of cardboard

A hot glue gun

Crayons

Paper

Directions:

I cut a few squares out of a cardboard box.  Be sure the squares are clean & even. With a glue gun draw a design. (For adult use only) Keep your designs simple & try to apply the glue as evenly and level as possible for the best effect.

P1180544

For our Valentine’s themed designs, we went with a heart, an arrow & the word love. The glue should dry in a couple of minutes.

P1180545

Once dry, place the squares under a piece of paper. Using the side of a crayon, rub back & forth & watch the design transfer onto the paper.

CrayonRubs.jpg

Unfortunately for me, not all of my ideas are winners with my daughter. Like the Fashion Plates, this was more entertaining for mommy than her. She made one arrow & then moved on to drawing a picture of a monster family.

P1180554

It was not a total waste for Mai though. We discovered that the rubs also make a lovely paint stamper.

P1180555

Thank you as always for stopping by. Please follow us on Facebook as well.

Foam Tub Clings

If you have a toddler or a small child, you know the importance of routines. We have had the same bedtime routine with our daughter for the majority of her young life. Somewhere around 7:30 she brushes her teeth, takes a bath & gets in her jammies. We read some books, rock & then tuck her in for bed. As she has gotten older she has made some subtle adjustments to her routine.

easy to make foam tub clings for kids - did you know that foam clings when it is wet? Great for a creative and fun activity for toddlers and preschoolers during bath time.

*This post contains affiliate links*

In lieu of books, she now prefers to be read Highlights magazines, lots of them. At the end of every magazine there are usually games, activities & recipes for the kids to do. In a recent edition, I came across a great idea.

Highlights High Five Magazine - Great for toddlers and preschoolers

Did you know that foam will stick to the side of a tub when it is wet? I did not either. We work with foam sheets for crafting all the time, so I had plenty of it to experiment with. I cut out different colored shapes & showed my daughter how to dip it in the water & stick it to the side of the tub. She let her imagination go from there. She sent me out of the bathroom a few times to cut more foam. She had special requests for certain shapes so that she could finish her masterpieces.


asd

Mai made a sideways & colorful snowman, a man in a hat & scarf and just a square.

img_20150123_222340022_hdr

Here she created a princess castle & a Minnie Mouse.

img_20150123_222350229_hdr

She had so much fun with the shapes that I could not get her out of the tub. I had a pruny footed toddler at bedtime, but she sure did have fun.

An Old ELf, A New Elf & A Crafty Elf

Paper plate Elf Mask for kids - Christmas craft

For somebody that was as eager for the holiday season to begin as I was, I was a little behind in putting up our Christmas decorations.  It had been a busy few weeks, but we finally found an evening to put up our Christmas tree.

The first year that my husband & I started dating we purchased our first Christmas tree as a couple. We put it up in my apartment. We spiked some eggnog, put in the movie Elf and decorated the tree together. Eight Christmases later & we are still doing the same thing. Now we just have an extra set of hands & there is one smaller glass of eggnog minus the rum added into the mix.

30355_476778535707723_1084537005_n

We let Mai do most of the decorating this year with a few boosts from mommy & daddy. She did a lovely job.

IMG_7873 IMG_7929

We also added a new elf tradition to our holidays. Last year my sister bought Mai an Elf on the shelf for Christmas. Tonight I read her the elf’s story. She listened, intrigued by his tale, nodding in between sentences as to say that she understood. She named her Elf “Koontz”. She whispered to him that she would like a train set. Forgive me if the next few weeks are filled with pictures of our sneaky little visitor.

IMG_7932

In the midst of all of our new & old traditions, Mai asked me if we could make a project. She loves working on projects. Since we were surrounding ourselves with elves, I figured why not one more.

Paper Plate Elf Mask

What you will need:

Paper Plate

Paint

Foam sheets or construction paper

Cotton balls

Glue

Pipe cleaners

Pencil

Directions:

Draw eyes on the back of your paper plate & cut them out.

IMG_7859

Paint your plate in flesh tone. Let dry.

IMG_7861

Paint on two pink circles for cheeks.

IMG_7862

Paint a mouth and nose.

IMG_7911

Cut out shapes for the hat, ears and collar. You may use construction paper. I always opt for foam sheets though as they do not rip or wrinkle. Glue into place.

IMG_7912

Bend 4 pipe cleaners into curls as shown.

IMG_7913

Glue the curls to the edge of the hat. Draw on eyelashes & eyebrows with a marker or paint.

IMG_7914

Glue two pipe cleaners to the back of the mask. Use the pipe cleaners to secure the mask to your head.

IMG_7915

Glue cotton balls to the rim of the hat & to the end of it to form the fur.

Paper Plate Christmas ELf Mask for kids


30 Holiday Season Activities For Your Family

IMG_7615The first snow fall of the season inspired a fun snow-filled weekend. We had a fun family day yesterday complete with more snow angels & snowmen. Even though the temperatures have dropped there are still a lot of fun things that we can enjoy with the family through the winter & holiday season. Whether it means bundling up & hitting the outdoors or keeping warm & cozy in the house there is a long list of things that you can do together with your children.

Outdoor Play

1. Build a snowman– Building snowmen has been a winter favorite long before Frozen ever came out. Do you want to build a snowman? You bet I do.

2. Go sledding

3. Make snow castles

4. Have a snowball fight – It turns out that my daughter loves snowball fights. I threw one at daddy & that was enough to have her sold. She laughed & jumped in excitement at each ball thrown.

img_7625

5. Paint the snow- Put food coloring & water in a squirt or spray bottle & have a little bit of artistic fun in the snow.

6. Make snow angels

7. Build a snow fort

8. Use beach toys in the snow- Keep those sand pails & shovels out for the winter. They are wonderful for snowy days.

9. Go for a hike

10. Ice skating

11. Have a snowy photo shoot– A camera with a timer & a tripod are my family’s best friend. Most of our family photos are shot this way. Don’t forget to capture each of these moments while you can.

img_7594

In Home Activities

1. Drink cocoa around the fireplace-  What is better than snuggling up with your family around a warm fire on a cold day?

2. Write a Christmas list to Santa

3. Watch Christmas movies

4. Bake holiday cookies– I adore baking with my daughter. She is baking up pure joy.

img_7215

5. Decorate the Christmas tree

6. Elf on the shelf- – That sneaky little elf is back. You better watch out. He tells Santa all.

7. Bake a gingerbread house

8. Make homemade Christmas cards

9. Make winter & holiday crafts– I will be honest, this is one of my favorite parts of the holidays. I love holiday crafting with my daughter. Here was our latest over the weekend… Mini muffin liners strung up around a pipe cleaner & topped off with a pipe cleaner bow.

cupcakelinerwreath

10. Read Christmas stories

Family Outings

1. Go Christmas light peeping– I love the twinkling lights during the holidays. They are beautiful. There is always that street that is filled with the best Christmas lights in town.

2. Pick out a real Christmas tree

3. See a Christmas show

4. Go on a sleigh ride– There are places that do this. If you are lucky enough to find one, grab your family a blanket and some cocoa and go.

5. Go caroling

6. Visit a winter/Christmas bazaar

7. Visit Santa– My daughter is still pretty skeptical about the big guy in person, but she stepped up & asked for that train set that she wanted.

img_65141

8. Donate toys or gifts – Teach your children that it is better to give than receive. Help those less fortunate than you.

9. Go Christmas shopping

I hope everyone embraces all that the holiday season brings this year.

IMG_75681


Learning To Write The Alphabet With Tracing

We have had a rough couple of nights at the old homestead. My daughter had been sick with a bad cold, fever & vomiting. Yesterday my husband & I stayed home from work with her. She was in good spirits and seemed to be on the mend. She was very excited to have us both home. IMG_7061

*This post contains affiliate links*

We did a lot of snuggling and drew some pictures & colored. The other day Mai wrote the letter “T”. It was her first written letter. She was so proud & so were we. She held up her piece of paper & showed my husband & me. She beamed. Today in the midst of some of her drawings she made some more Ts. She has mastered the letter T now, but what about her other letters. T doesn’t want to stand alone. He wants his friends.

IMG_20141120_210415638_HDR

Lately she has been talking a lot about school. She throws on her backpack & tells me she is going to school on the school bus. She will kiss me goodbye & drive away on her little pink buggy. It is adorable.

IMG_7064

Today, we took her role play a little further & had a mock classroom. She took the bus into school, walked into class & removed her backpack just in time for roll call.  Today’s lesson…learning to trace our letters.

Laminated Tracing Cards

These were quick & easy to make. You can print out ABCs from your computer or write them out yourself. I did 3 letters per row. I added dash marks to the inside of the letters to give her a guide to trace.

IMG_7043

Cut out a rectangle around each row of letters to form a card. Place each card into a laminating pouch or sheet & trim if needed. The laminating pouches come in different sizes. We used 3 1/2 X 5 1/2. We used a laminating machine, but you can find self-adhering laminating sheets or pouches at an office supply store.

This will create 9 cards total.

IMG_7044 IMG_7048

Class is now in session. I quickly showed Mai how to trace inside of the letters.

IMG_7082

She jumped right into to each card and showed me what she could do. “Look Mama teacher. I traced it.”

IMG_7088IMG_7089IMG_7090

She very carefully traced within each letter.

IMG_7094

She was upset when she had realized that she used the brown marker instead of the pink. I showed her that she could just wipe the card clean with a tissue. She was happy to clean off the card & mark it again in the pink.

IMG_7093

We had a great lesson today. She even taught her baby how to trace her letters.

IMG_7096

I made a great discovery tonight as well. I found out that when I am mama teacher, she listens and follows directions much better. Our next lesson was cleaning up the classroom. All of her Legos & Play-doh cookie cutters were put back in their boxes without debate this evening. It was fabulous. Mama teacher will have to work on a potty training lesson next.

tracing.jpg

Pasta Mosaic Craft & Activity

pastamosaic

This weekend it was my husband’s birthday. For his birthday, we had a nice family breakfast and spent some quality time together, but daddy really wanted to watch football today. Since he so willingly gives up football every Sunday for Paw Patrol & Doc McStuffins, Mai & I were determined to let him watch his team play today. We needed an activity to keep our little one occupied for a long period of time.

As you all probably already know, I am a huge fan of pasta crafts. We have more boxes of pasta for crafting than we do for eating in our house. One of my favorite pastas to use is Ditalini. When dyed, it looks like beads. We made pasta jewelry a while back and colored much more of the small pastas than we needed. We had a ton leftover to use. We just needed a project that we could use them on.

Luckily we had the perfect activity in mind that both kept her busy for a shockingly long long time & used up all of our little Ditalini.

Spread out Play-Doh in the center of a paper plate.

IMG_6171

IMG_6172

Color pasta by shaking pasta in a plastic Ziploc bag with food coloring & let dry.

IMG_6173

Have them press the pasta pieces into the Play-Doh one by one.

IMG_6180

IMG_6183

IMG_6192

You can also use another pasta to outline a shape and work around it.

IMG_6195

This was a fun activity and craft for us. I was impressed with how thorough and thoughtful Mai was when placing each piece as if she already had a plan for each piece.

IMG_6196

Hey, why does yours look better than mommy’s?

IMG_6199

Teaching The Value Of Money

IMG_5417They say “Money can’t buy you happiness.” This may be true, but it sure can buy you a lot of things that make you happy. People love money. Even at an early age the love of money begins. My daughter may not comprehend the value of money, but she sure does know that she likes it. Whenever there is spare change lying around, her face lights up & she hoards it for her piggy bank.

Mai is in her “I want that” phase. We can barely leave the house without it. At the grocery store I hear it echoing down every aisle. “I want the Goldfish crackers.” “I want the funny juice box.” Alright, but you’re buying today. It is funny, she never does.

Children’s brands are clever. They advertise everywhere. Luckily, we do not watch much television that contains commercials, but those marketers find a way to sneak in a ad anywhere. While reading to Mai ‘If You Give A Mouse A Cookie’, she noticed the back book jacket with the author’s other books on it.

“Mama, I want the pig with the pancake.”

“I’m sorry honey. We don’t have that book.”

“Mama, you go to the store & get the pig with the pancake?”

Siiiiiiiigh! Thank goodness for the library.

I can remember at a young age my mother telling me “Money doesn’t grow on trees.” My smart ass remark back was always “Yes it does. Money is made out of paper & paper grows on trees.” Oh how, I wish I could go back in time & smack the crap out of myself.

We want Mai to grow up understanding the value of money and how to spend responsibly, but for now we will just start with her being able to differentiate between those coins that she loves to hoard. Here is an easy coin sorting activity.

What you will need:

2 paper plates

A couple of markers

Glue

Scissors

Assorted change

Directions: Money is dirty, so be sure to clean your change first. On one plate, slice 4 slits on the back just long enough to fit each coin. Use a marker & write the value of each coin to the side of the slit. On the other side of the slit, attach the coin with glue or with tape. Write the coin name underneath. Place the other plate down normally. Staple or glue the paper plate with the coins to the other one so that the coins are on top. It will form a little container to insert & catch the coins in.

IMG_5412 IMG_5410 IMG_5413 IMG_5414 IMG_5420 CoinSorting.jpg

“Mama, now we put them in the piggy bank?” The kid is no dummy.

Thank you as always for stopping by. If you like us here, please follow us on Facebook.

Felt Birthday Cake For Toddler Play

IMG_50731

Our daughter is a fan of the television. I am not a fan of her watching television, but still we do let her watch videos & toddler appropriate programming in moderation. She does not like it when we shut off the TV. She is a smart cookie though & knows how to work her family.
Daddy: “Mai, we have to shut of the TV.”

Mai: “How bout, we watch Patriots.”

She knows her daddy’s weakness.

She also knows her nana’s. “Nana, do you want to watch Cooking Channel?

Mai enjoys watching cooking with her nana. She also loves helping in the kitchen and pretend cooking in her play kitchen.

IMG_3987

Her favorite pretend food to make is cake. She makes cakes out of Play-doh. She stacks her stacking cups to make tiered cakes & then decorates them with the cherries from her Hi Ho Cherrio game. There is a learning exercise on ABC Mouse that allows you to decorate cakes & she adores this. She will draw with her imaginary icing & place flowers & fruit all over her virtual cake.

To help inspire our future little cake boss to continue to make tasty treats, we came up with this felt birthday cake for her to decorate.

What you will need:

A medium sized plain cardboard hat box

Assorted colors of felt sheets

Yarn

Craft pom poms

Elmer’s glue

Glue Gun

Scissors

Pen

Directions:

Start with a medium sized plain hat box. You can purchase on of these at a craft store for only a couple of dollars.
Start with a medium sized plain hat box. You can purchase one of these at a craft store for only a couple of dollars.
Remove the top & trace out the outline of the top on a felt color of your choosing & then cut it out.
Measure out and mark the felt to cover the side of your box top as well.
Using Elmer's glue, glue down the top & sides. The Elmer's glue will allow the felt to dry flat & smooth.
Using Elmer’s glue, glue down the top & sides. The Elmer’s glue will allow the felt to dry flat & smooth.
To make my icing edge, I braided 3 long strands of yarn & used the hot glue gun to glue down along the edge of the box top.
Cut and glue felt to cover the bottom half of the hat box as well. Allow to dry before proceeding.
Cut out colored felt strips about a 1/2 inch thick. Cut using a waving pattern on one side.
Roll the strip to form your cake flowers.
Glue the flowers in place using a glue gun.
To form a strawberry, cut out two heart shapes. Dot the heart shapes with a green marker to add seeds.
Place a craft pom pom in the center of one of the heart shapes. Add hot glue from the glue gun around the edges & place the other heart over it, dotted side facing out. Press the edge together all the way around . Cut  out a small star shape in green & glue over the top center of the strawberry.
Place a craft pom pom in the center of one of the heart shapes. Add hot glue from the glue gun around the edges & place the other heart over it, dotted side facing out. Press the edge together all the way around. Cut out a small star shape in green & glue over the top center of the strawberry.
To make a cherry, I just used a red pom pom & added a green felt piece for the stem.

Cut out letters & numbers. Make as many different fruits & flowers as you like. Let your little baker go to work decorating their cake.

IMG_5074

IMG_5067 IMG_5066 IMG_5084

Store cake pieces inside the box.

IMG_5081

feltbirthdaycake