Tag

pretend

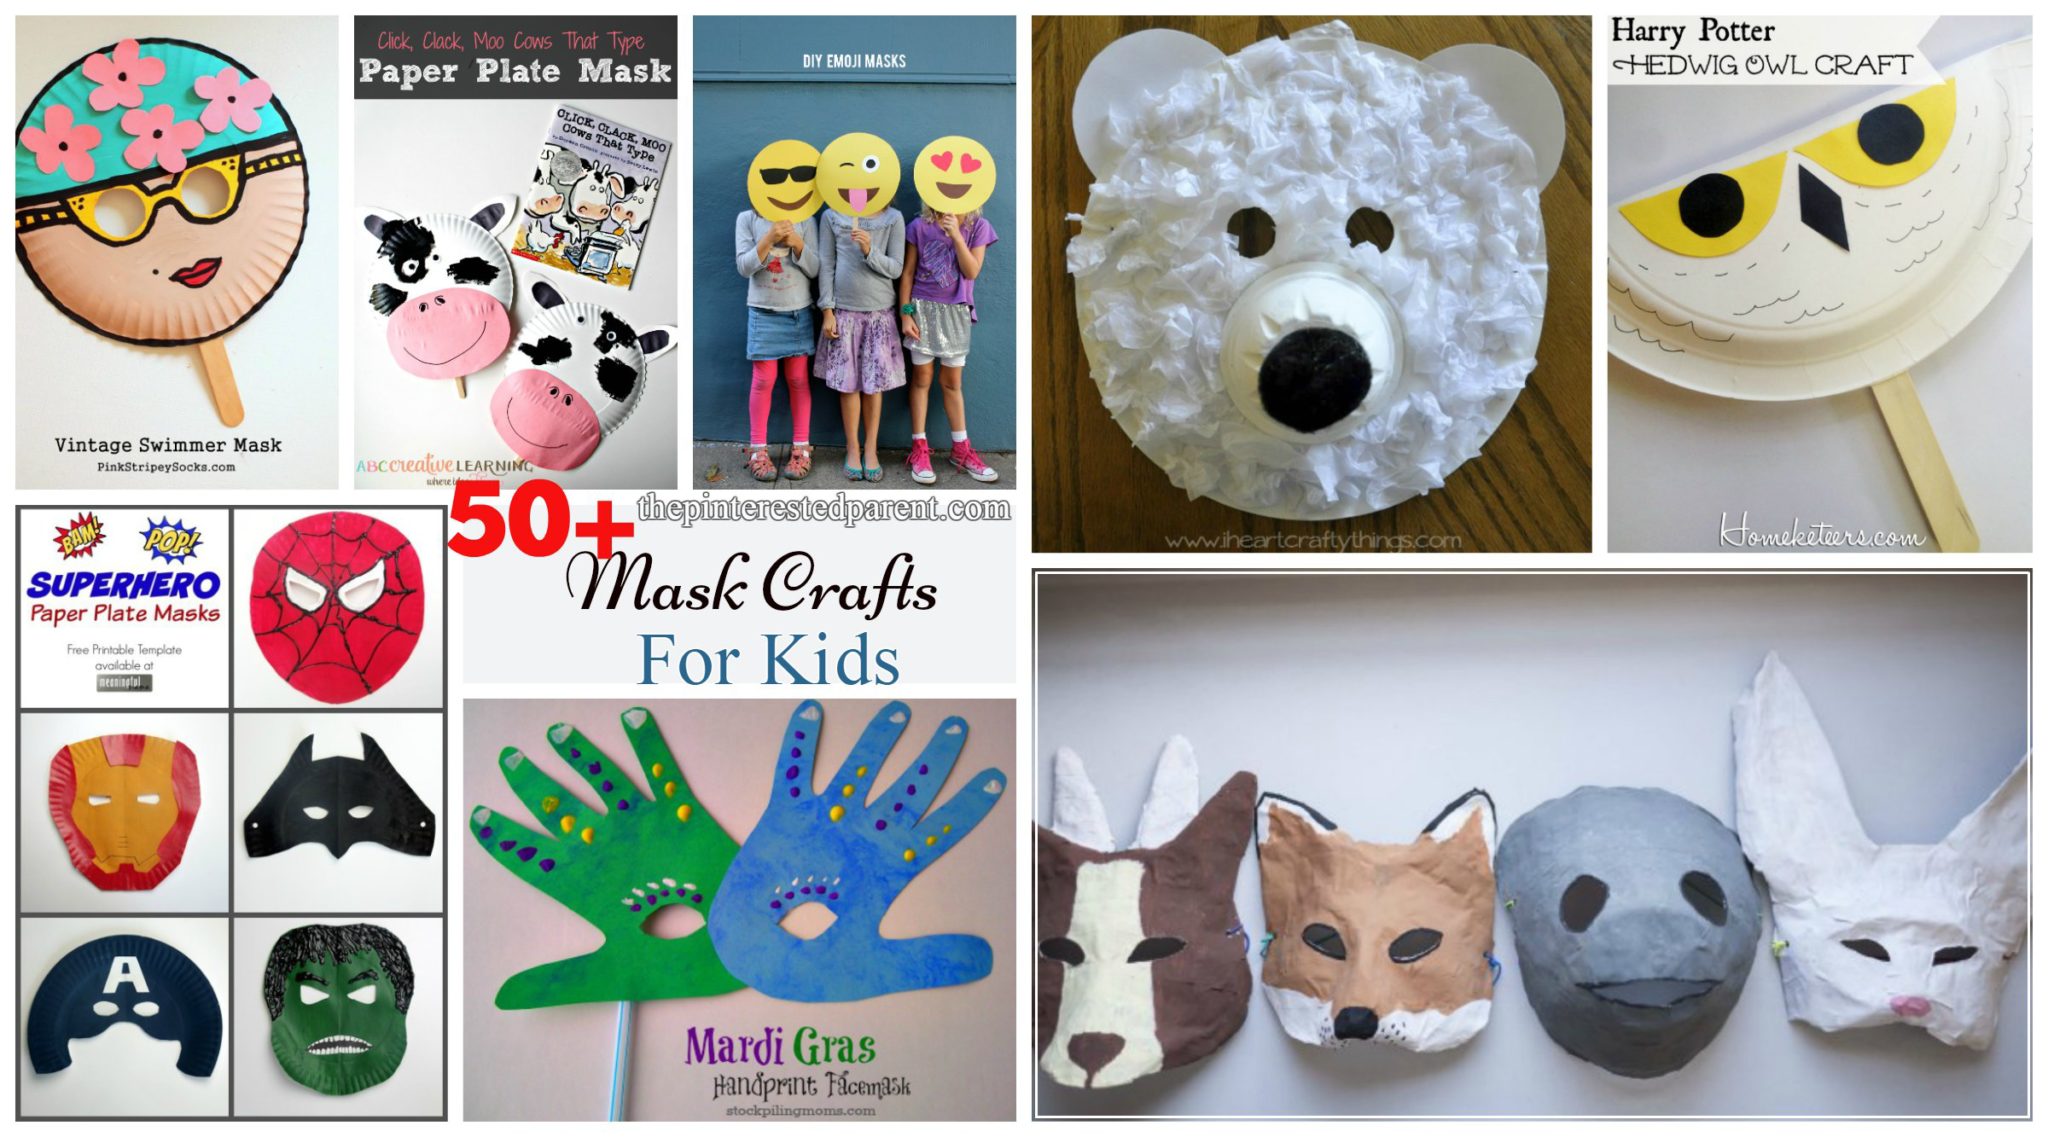
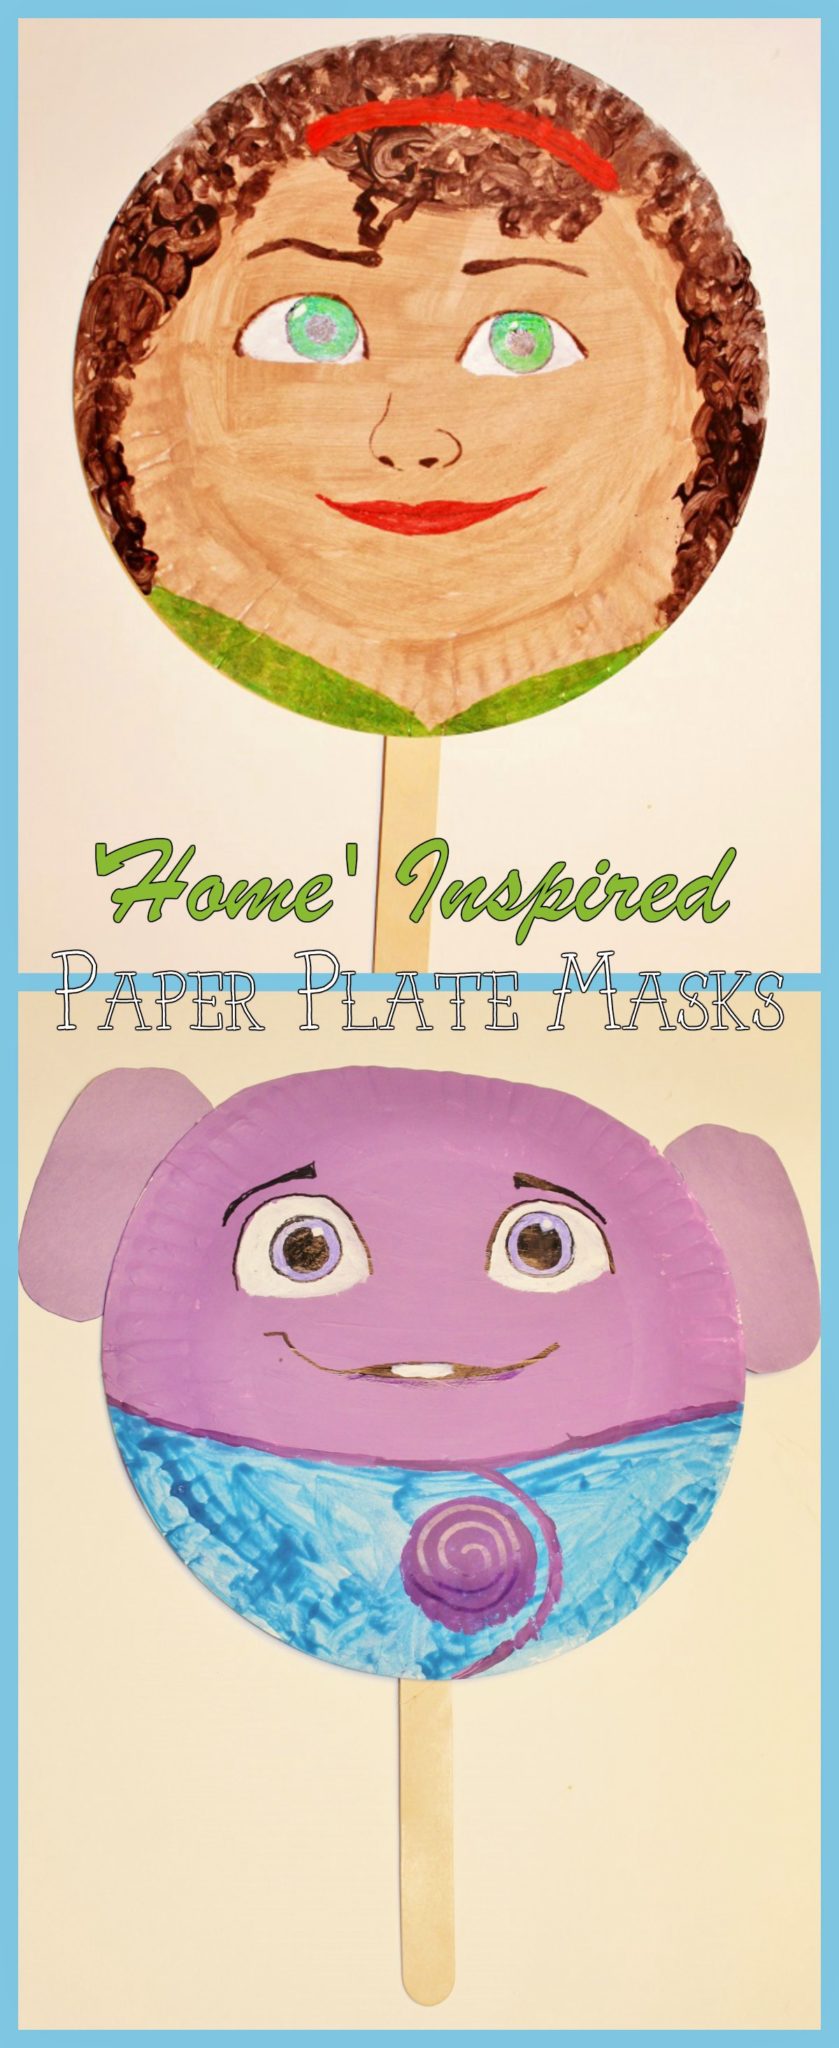
Shopkins Inspired Paper Plate Mask

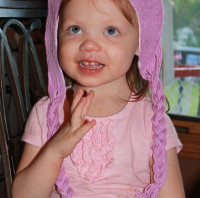
My daughter loves the Shopkins. We have a bunch of those little Shopkins baskets and characters all around our house. My daughter loves all of those little characters.

Paper plate mask inspired by Shopkins Green Apple Blossom - kid's character crafts and activities for pretend play

*This post contains affiliate links*

What she also loves are masks, more specifically paper plate masks. I have made her many over the past couple of years & we still have every one. Our latest is inspired by the green apple from Shopkins.

We have a ton of pre-painted paper plates left over from a mask making activity that we had at a kid’s craft party, so I just grabbed one of those.

IMG_8737

I drew a simple flower on white foam using a green outline with magic marker & drew a simple stem on brown foam.

IMG_8738

I cut out the flower & the stem & glued them to the top of the plate.

IMG_8741

I cut a worm out of pink foam and leaves out of green. I drew in details to both and added googly eyes to the worm.

IMG_8742 IMG_8744

I glued extra-large googly eyes to the plate & drew in the rest of the face using Sharpies.

IMG_8745

I added the little feet in at the bottom to finish it off.

Paper plate mask inspired by Shopkins Green Apple Blossom - kid's character crafts and activities for pretend play

My little girl loved her new mask.

Paper plate mask inspired by Shopkins Green Apple Blossom - kid's character crafts and activities for pretend play

Thank you as always for stopping by. Please follow us on Facebook as well.

Egg Carton Crown

We use recycled items in our crafts all the time. It is very difficult for me to throw anything out. This has crossed over to my 4 year old & my husband as well. My daughter will save bottle caps & other random things & tell me “This will be good for a craft” & my husband won’t throw anything away without asking me if I can use it first.

Egg carton crown craft - use recyclabes to make this dress up crown or tiara for pretend play for the kids

*This post contains affiliate links for convenience*

Our craft room has bins of recyclables, but most prevalent in our collection is egg cartons. We have piles of them. It was time to put some of them to some good use. Here is a great craft that parents can do for their little kings & queens.

Egg Carton Crown

What you will need:

Egg cartons

Glue gun (Use caution when operating a glue gun. Low heat guns are recommended for children.)

Acrylic Paints

Buttons

Pom Poms

Directions:

Egg Cartons do come in a variety of different shapes. We used a family sized pack that looked like this inside.

IMG_8129

Cut through the egg carton the long way. You will want to cut through the centers of the 2 spiky portions running along the middle of the carton.

IMG_8130

Your cut piece should look like this.

IMG_8131

Cut through the middle of your cut section the long way until you have two halves.

IMG_8132

Use a glue gun to glue the two pieces together to form one long piece. You should be able to get the spikes to match up so that they blend when gluing them together. Depending on the size of your child’s head you may need to glue on a few extra spiked sections.

IMG_8133

When you reach the desired length, bend the long piece of egg carton to form a crown shape & then glue into place.

IMG_8135

Paint your crown in the color of your choice. My daughter wanted red for hers.

IMG_8136

Use buttons & pom poms for embellishments or add on whatever you like to create your crown.

IMG_8137IMG_8138

My daughter loved her crown. It fit her head perfectly. She had a crown fit for a queen.

Egg carton crown craft - use recyclabes to make this dress up crown or tiara for pretend play for the kids. Arts & Crafts

Thank you as always for reading. Please visit us on our Facebook page as well.

Egg Slime

Easter is only a week away. We have been shopping & preparing for the holiday. I have a ton of plastic Easter eggs lying around waiting to get filled. I should rephrase that, I had a ton of plastic Easter eggs. My daughter  has been slowly depleting my supply & using them in her play kitchen.Make egg slime for ooey gooey pretend & sensory play for the kids

*This post contains affiliate links for convenience*

 She pretends to crack them open & throws the empty egg shells in the trash. I had to give her a pretend trash because she was throwing them away for real. She take pretend play very seriously. She has been having a lot of fun mixing up her air eggs, but since she likes the realistic, I thought we could add a little something extra to her pretend egg scrambles. Here is what we did.

Make egg slime for ooey gooey pretend & sensory play for the kids . Play Food with slime

We made up a quick batch of slime.

Ingredients:

2.5 oz of clear school glue

2.5 oz of white school glue

1/2 cup of liquid starch

Water

For Later:

Yellow Play-doh

Extra-large plastic eggs

Directions: Pour all of the glue into a bowl. You can use all clear or all white glue, but to achieve the look I was going for I used a mixture of half & half.

IMG_6114

Add the liquid starch in very small increments at a time. Stir it well as you go. It will thicken quickly. Be careful not to add the starch too quickly.

IMG_6115

When it gets to thick to stir, you can use your hands to knead it. I used just shy of the 1/2 of liquid starch & then added spoonfuls of water at a time until I achieved the consistency I was looking for. My daughter helped.

IMG_6123

Use the Play-doh to form little yellow balls for the yoke. Flatten them out a little with your hand.

IMG_6111

Grab a handful of your slime & add a yolk to the top for a realistic looking sunny side-up egg.

IMG_6116

Or you can put the slime & yolk into an extra-large plastic egg for a fun egg cracking experience.

IMG_6137

My daughter thought that this was hilarious. “Mama, it looks like real eggs.” It turns out that just like with regular eggs that she does not like the yolk, so she pulled those out & just played with the whites. Like I said, my daughter likes to keep things realistic.

Thank you as always for stopping by. Please follow us on Facebook as well.


DIY Cardboard Cash Register

Cardboard Cash Register for pretend play

We moved into a new house recently. We have been working on unpacking and setting up our home over the last couple of weeks.  It is hard to believe that we have so much stuff. The boxes seem endless. Mai has been enjoying playing inside of the empty boxes and we have been having fun repurposing our boxes into new fun creations.

My daughter loves to play store. She pretends that she is running her own Stop & Shop all the time. She often uses her calculator as a cash register, but I thought we could make her another one using one of our old boxes.

We used a medium-sized box.

Open both ends of the box.

IMG_3194

Cut the seams on one of the boxes sides. This will be the front of your register.

IMG_3195

Cut an arc shape on one side of the box  & then use the leftover cardboard as a template to cut the other side. This should remove the left & right top flaps of the box as well.

IMG_3196

Cut a slot out of the front of the register to add a drawer. Glue the bottom of the box back together. Bring the front part of the box up and curve it to the arc. Glue it into place.

IMG_3197

Trim the sides & fold the top front flap in half & then fold it down so that it is flat across the top. Fold the back flap in half & fold over so that the first fold is flat & that the second fold aligns with the top of the register.

(Note: I forgot to take a picture of this until after painting)

IMG_3222

Use the leftover piece cut from the arc to form a drawer by creasing the edges about an inch in on all four sides. Fold up the creases and glue the seams into place.

IMG_3199

Use the other leftover piece of cardboard to cut a rectangular piece that will fit on the register as its face. Paint your register & rectangular piece in the colors of your choice & let dry.

IMG_3202

Cut the keys & a register screen out of construction paper & write in the numbers with magic marker. Glue all the pieces into place.

DIY Cardboard Cash Register for pretend play - made with 1 box

This took very little time to make & put a big smile on my daughter’s face. Mai’s bakery is now open for business.

This was a spur of the moment project, so I apologize for the lack of photos. Please let me know if you need further instruction.

Thank you as always for stopping by. Please follow us on Facebook as well.

Pipe Cleaner Tiaras

Pipe cleaner tiara for princess & pretend play

I have had a rough week. I have been sick this whole week. I left work early twice & yesterday stayed home all together. I lounged on the couch, slept a lot & binged watched Netflix, but then got very fidgety & bored. I had a big bag of shimmery white pipe cleaners that I had been wanting to make something out of, but I didn’t know what. I began playing with them & then knew what I wanted to make.

Pipe Cleaner Tiaras

So this is what happens when mommy stays home from work sick.

Grab two cleaners & twist them together. Do this again to another pair of cleaners.

IMG_1386

Take both twisted pairs & twist them together at the ends so that they formed a circle. Tuck in the sharp edges.

 IMG_1387IMG_1385

Make another twisted pair & formed it into a bow.

IMG_1388

With a single pipe cleaner, bind the bow to the circle by weaving it around the bow & the circle.

IMG_1389

Fold a pipe cleaner in half & then twist it. Roll the cleaner so that it forms a shape as shown below. Do this again with another cleaner.

IMG_1390

Use a pipe cleaner to bind each shape to the side of the bow & to the circle. Weave in and out. The better you bind it, the sturdier your crown.

IMG_1391

IMG_1392

Use another twisted pair. Fold it in half & then roll each end down & outward to form a shape like this.

IMG_1393

Bind it right above the center of the bow.

IMG_1394

Form a heart out of another twisted pair.

IMG_1395

Line up the point of the heart behind the center of the bow & bind in place with a single cleaner.

IMG_1396

Form two more curly shapes like shown & bind to each side of the heart and any other points that the shape meets. Weave in & out and always remember to tuck the sharp end in.

IMG_1390 IMG_1398 IMG_1399

IMG_1401

Add colored pom poms to your tiara with a glue gun to add color. (As always use caution when operating a hot glue gun. It is recommended for adult use only.) If you still have sharp edges from your pipe cleaners, try dabbing the edge with just a bit of hot glue to cover the end.

IMG_1419

I had so much fun with this one. I made a few more with different shapes & colors.

Pipe Cleaner Tiaras - For princess pretend play & dress up

Try your own designs. I surprised Mai when she came home from pre-school. She liked this one the best.


IMG_1531
Her animals really liked them too.

IMG_1449

Thank you as always for stopping by. Please follow us on Facebook as well.

Pipe Cleaner Tiaras

Button Soup Counting Activity

IMG_8388

*This post contains affiliate links for convenience*

We have a lot of buttons in our house, a lot of buttons. They are great for fun & colorful crafts. My daughter loves to craft with them & she loves to play with them too. She likes to separate them into color piles & use them in games of make believe. One of her favorite things to do is to make pretend soup. This gave me an idea. We could turn our game of pretend into a fun counting activity.

We made a recipe which incorporated counting, measuring, separating colors & following directions.

Here is a printable version of our Button Soup Recipe.

Soup

We set up a large empty bowl & another filled with water. I told her to measure & add 4 cups of water to her empty bowl. She carefully measured out her scoops & added them to her bowl.

IMG_8351

We read off the numbers & colors of each ingredient. She dug through her pile of buttons & counted and pulled out each color.

IMG_8355

IMG_8364

IMG_8360

She mixed up her soup enthusiastically & in the end added the whole bag of buttons after finishing the recipe.

IMG_8384

IMG_8378 - Copy

This was a fun activity. You can change the recipe to add different ingredients & more measurements for a lesson in measurements as well.

Thank you as always for stopping by. Please follow us on Facebook as well.

Button Soup Counting, Colors, Measuring & Play For Toddlers with a free printable

‘Home’ Inspired Paper Plate Masks

Home Inspired Paper Plate Masks

*Contains affiliate links*

Last weekend we took a mini vacation to the beach with some family friends. We had a great time & made some wonderful family memories.

11940699_10206323312554955_4423009267890951082_n

The drive to the beach was long though & the drive home seemed even longer. Mai’s uncle downloaded her a movie on the Ipad before we left for our trip. It was for just in case she started getting punchy during the drive. She did great the first hour, but then started to get antsy. We started the movie for her. It was Dreamworks ‘Home’.

As we drove, all I could hear were squeals & laughter coming from the backseat. She loved the movie & quickly started to imitate the characters.

My daughter loves to pretend play. To encourage her pretend play, we often make paper plate masks. Last night, she very enthusiastically helped make ‘Home’ – inspired masks. Here is how.

What you will need:

A paper plate for each mask

Paint in purple, blue, white, light brown, dark brown, red & green

Craft sticks

Purple foam or construction paper

Glue gun (for adult use – use caution)

Black sharpie

Directions:

Draw a slightly curved lined about 1/3 of the way up from the bottom of a paper plate.

IMG_7037

Paint on the top of the line in purple. I helped my daughter by painting a strip of purple for her along the drawn line. I let her paint the rest.

IMG_7041

Paint under the purple in blue.

IMG_7043

Outline between the blue & purple with a darker purple & then draw a curve to form Oh’s uniform. Paint a purple circle in the middle of the curve as show, Paint in the white’s of the eyes & use a Sharpie to draw in the mouth & eyebrows. The face does not have to be perfect. Your child will know who it is supposed to be.

IMG_7047

Cut long ovals out of purple foam & glue them to the side of the head.

IMG_7048

Glue two craft sticks together & then glue them both to the back of the mask.

IMG_7049

Paint in the eyeballs to finish off your mask.

Paper Plate Mask - Inspired by Oh from the movie home

To make a Tip – inspired mask:

Paint the plate in light brown.

IMG_7042

Paint in the hair using a swirling pattern to form curls. The headband is optional.

IMG_7044

Draw in the face. Markers work best on smaller details.

IMG_7046

Paint in Tip’s green eyes & her sweatshirt. Add the craft sticks for the mask handle.

IMG_7056

Mai could barely wait until these were finished. She stood next to me anxiously waiting for the masks to be ready.

She loved them of course.

IMG_7068 IMG_7066

Thank you as always for stopping by. Please follow us on Facebook as well.


Felt Birthday Cake For Toddler Play

IMG_50731

Our daughter is a fan of the television. I am not a fan of her watching television, but still we do let her watch videos & toddler appropriate programming in moderation. She does not like it when we shut off the TV. She is a smart cookie though & knows how to work her family.
Daddy: “Mai, we have to shut of the TV.”

Mai: “How bout, we watch Patriots.”

She knows her daddy’s weakness.

She also knows her nana’s. “Nana, do you want to watch Cooking Channel?

Mai enjoys watching cooking with her nana. She also loves helping in the kitchen and pretend cooking in her play kitchen.

IMG_3987

Her favorite pretend food to make is cake. She makes cakes out of Play-doh. She stacks her stacking cups to make tiered cakes & then decorates them with the cherries from her Hi Ho Cherrio game. There is a learning exercise on ABC Mouse that allows you to decorate cakes & she adores this. She will draw with her imaginary icing & place flowers & fruit all over her virtual cake.

To help inspire our future little cake boss to continue to make tasty treats, we came up with this felt birthday cake for her to decorate.

What you will need:

A medium sized plain cardboard hat box

Assorted colors of felt sheets

Yarn

Craft pom poms

Elmer’s glue

Glue Gun

Scissors

Pen

Directions:

Start with a medium sized plain hat box. You can purchase on of these at a craft store for only a couple of dollars.
Start with a medium sized plain hat box. You can purchase one of these at a craft store for only a couple of dollars.
Remove the top & trace out the outline of the top on a felt color of your choosing & then cut it out.
Measure out and mark the felt to cover the side of your box top as well.
Using Elmer's glue, glue down the top & sides. The Elmer's glue will allow the felt to dry flat & smooth.
Using Elmer’s glue, glue down the top & sides. The Elmer’s glue will allow the felt to dry flat & smooth.
To make my icing edge, I braided 3 long strands of yarn & used the hot glue gun to glue down along the edge of the box top.
Cut and glue felt to cover the bottom half of the hat box as well. Allow to dry before proceeding.
Cut out colored felt strips about a 1/2 inch thick. Cut using a waving pattern on one side.
Roll the strip to form your cake flowers.
Glue the flowers in place using a glue gun.
To form a strawberry, cut out two heart shapes. Dot the heart shapes with a green marker to add seeds.
Place a craft pom pom in the center of one of the heart shapes. Add hot glue from the glue gun around the edges & place the other heart over it, dotted side facing out. Press the edge together all the way around . Cut  out a small star shape in green & glue over the top center of the strawberry.
Place a craft pom pom in the center of one of the heart shapes. Add hot glue from the glue gun around the edges & place the other heart over it, dotted side facing out. Press the edge together all the way around. Cut out a small star shape in green & glue over the top center of the strawberry.
To make a cherry, I just used a red pom pom & added a green felt piece for the stem.

Cut out letters & numbers. Make as many different fruits & flowers as you like. Let your little baker go to work decorating their cake.

IMG_5074

IMG_5067 IMG_5066 IMG_5084

Store cake pieces inside the box.

IMG_5081

feltbirthdaycake


Paper Plate Wig Masks

IMG_34041My daughter loves to pretend play. She has a vivid imagination & it is fun watching her explore her world of make believe. She loves to play baker and bake us beautiful cakes. She will take the little cherries out of he Hi Ho Cherry-o game and decorate her stacking cups with them and make tiered cakes. Last week when I didn’t feel good she made me a bowl of chicken soup complete with ABC magnets & a plastic drumstick. Delicious!

One of her favorite cartoons is Sheriff Callie. She has a cowboy hat that she wears & a pink hamper that she calls Sparky her horse. Giddy Up Sparky.

IMG_2548

She loves wearing dresses & twirling around & saying “Look Mama, I look like a princess.” Yes you do.

With her growing interest with the world of dress up & make believe, I thought we could have a little dress up fun.

Paper Plate Wig Mask.

What you will need:

Paper plates

Yarn

Glue

Pipe cleaner or string

Scissors

Directions:

Cut a whole out of two paper plates following the line of the first inside circle in the plate.
Cut a hole out of two paper plates following the line of the first inside circle in the plate.
Glue the two paper plates together for a sturdier mask base.
Measure out how long you want your bangs to be & cut a piece of yarn at the desired length.
Measure out and cut several more pieces of this length.
Glue the bang pieces into place. Do not worry about them lining up perfectly, you can trim them later.
Trim along top and cut until flush along the curve of the plate.
After you have placed your bangs, add a strand of yarn on the out edge of the plate following the curve of the plate about a 1/4 of the way down & then let the yarn hang straight down & cut to desired length,
After you have placed your bangs, add a strand of yarn on the outer edge of the plate following the curve of the plate about a 1/4 of the way around & then let the yarn hang straight down & cut to desired length.
Add another piece of yarn  right up against the other following the same pattern. Do this until you have worked your way to the inner edge & then switch sides & repeat.
Add another piece of yarn right up against the other following the same pattern. Do this until you have worked your way to the inner edge & then switch sides & repeat.
Continue  until both sides are finished.
Continue until both sides are finished. Trim the uncovered portion of the plate.
Insert a pipe cleaner or string between the two plates or to the the back of the plates to create the backing to your mask.

IMG_3409 IMG_3407

And for the boys…

IMG_3416
Cut out a half circle within your paper plate.
Sketch out & cut a mustache shape.
Start with one side of your mustache, laying down strand by strand similar to above.
IMG_3421
Working from the top end of one side of your mustache work to the edge of the plate and follow downward along the curve of the circle until you meet the opposite side of the mustache.
My big kid enjoyed his mask too.

IMG_3424